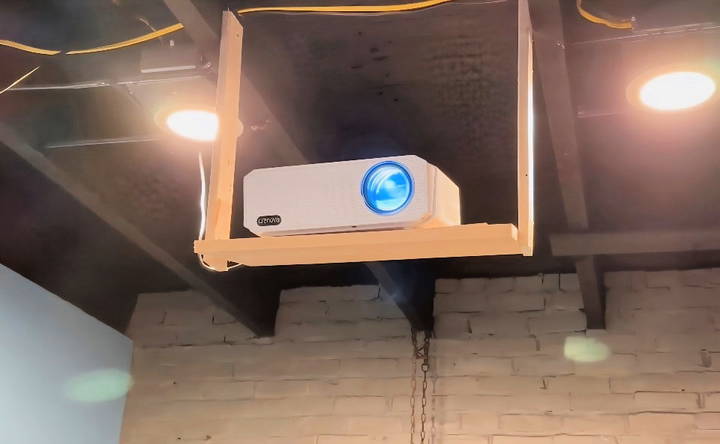
Making your own DIY projector mount is a great way to save money and customize your home theater setup. A DIY projector ceiling mount can be crafted using simple materials that you can find at your local hardware store. This guide will walk you through the process, ensuring that your projector is securely mounted and positioned for an optimal viewing experience.
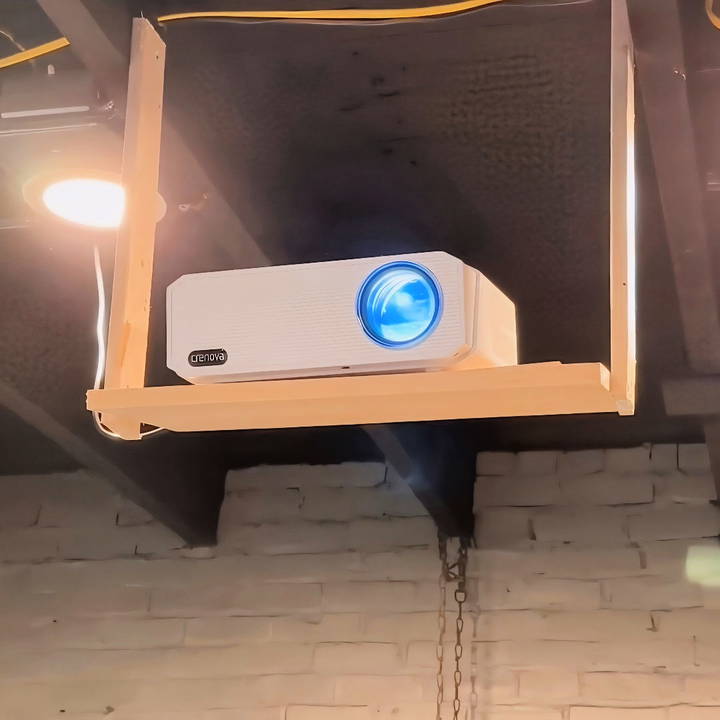
In addition to being cost-effective, a DIY projector mount allows you to tailor the setup to fit your space perfectly. You'll need basic tools and some patience, but the result will be a clean and professional-looking mount. Follow along to learn the essential steps and tips to make the process smooth and successful.
Ready to learn more about the necessary materials and steps to build your own DIY projector ceiling mount? Continue to the next section to get started!
Materials Needed
Before we dive in, I want to mention the essential materials you will need for this project. Each material plays a critical role in ensuring the sturdiness and accuracy of the mount.
- Two wooden boards (1x3): These will be used as the main support beams. Their dimensions allow for an ideal balance between sturdiness and ease of handling.
- One wooden board (1x8 or 1x10): This serves as the base on which the projector will actually sit.
- 3-inch screws: These will secure the support beams. While you don't specifically need 3-inch screws, they're reliable for ensuring everything stays in place.
- Level tool: For making sure everything is straight and even.
- Screwdriver or drill: For driving screws into the wood.
- Small shims: To fine-tune the alignment of the projector.
- Additional small screws: These will lock the final adjustments in place.
Step by Step Instructions
Learn how to build a DIY projector mount with easy, step-by-step instructions. Perfect for any home theater setup. Follow our guide to get started now!
Step 1: Preparation
First things first—gather all your materials and tools. It's always best to have everything within arm's reach before you start. Here's a brief overview of why each one is needed:
- Wooden boards: Provide the primary structural support.
- Screws: Secure the structure.
- Level tool: Ensures your projector will project straight.
- Drill: Makes it easier to drive the screws in.
- Shims: Fine-tune the final alignment.
Step 2: Cut and Position the Support Beams
Take your two wooden 1x3 boards. These will be your support beams. Measure your space and cut the boards accordingly.
- Measure the Space: Make sure the beams fit between your ceiling studs.
- Cut the Boards: Use a saw to cut your boards to the measured length.
Step 3: Attach the Support Beams
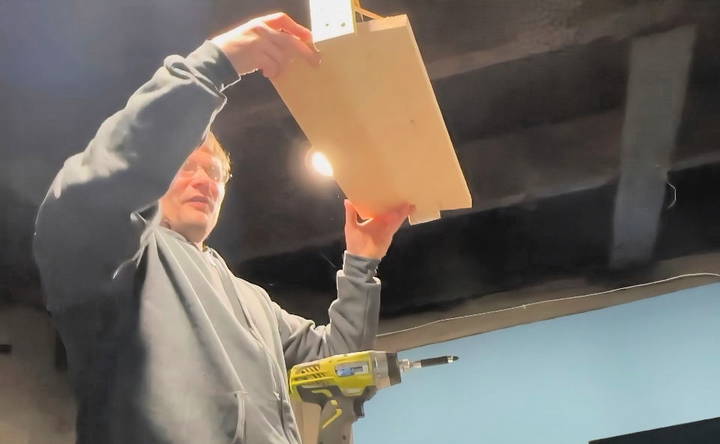
Now that you have your support beams, it's time to attach them to the ceiling.
- Mark the Screw Positions: This ensures that you'll hit the ceiling studs.
- Screw the Beams: Use your drill and 3-inch screws to attach the beams to the ceiling, making sure they're securely fastened.
Step 4: Build the Projector Platform
Next, prepare the 1x8 or 1x10 board which will hold the projector.
- Measure and Cut: Cut your 1x8 or 1x10 to fit snugly between the 1x3 beams. You want it to be just short enough to move slightly for adjustments.
- Initial Attachment: Drill a single 3-inch screw in the middle of this board as an initial hold, allowing it to pivot.
Step 5: Level the Platform
Now it's time to ensure your projector platform is level.
- Place the Level Tool: Use the level tool on top of the board to check its alignment.
- Make Adjustments: Rotate the platform slightly if it's not level. This single screw allows a bit of movement to get things just right.
Step 6: Fine-Tune and Secure
Here's where those small shims come into play for the final adjustments.
- Insert Shims: If needed, place shims under the edges of the platform to make micro-adjustments for a perfectly level surface.
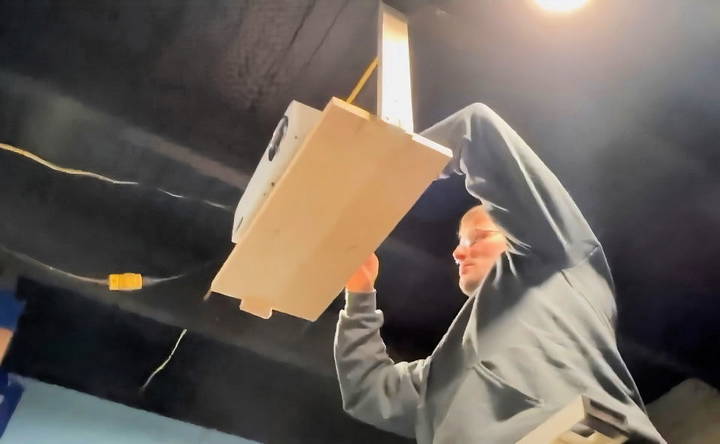
- Lock It In: Once everything is aligned, secure the platform with additional small screws on both sides. This will lock it in place and prevent any unwanted movement.
Step 7: Mount the Projector
With the platform securely in place, it's time to mount your projector.
- Position the Projector: Place your projector on the platform.
- Plug It In and Test: Turn on the projector and test the alignment on your screen or wall.
Step 8: Final Adjustments and Double-Check
Once the projector is on and displaying, make any necessary final adjustments. It's crucial to make sure everything is aligned perfectly.
- Check the Display: Look at how the image projects. Make sure it's not skewed.
- Secure Everything: Double-check all screws and ensure everything is tight and secure.
Tips and Tricks
- Smart Movement: The initial single screw allows for a bit of pivot, making leveling easier.
- Utilize Ceiling Studs: This will make sure your mount is solid and won't fall.
- Pre-drilling holes: This can make screwing easier and prevent the wood from splitting.
Customization Tips for Unique Spaces
Building a DIY projector mount for unique spaces can be a fun and rewarding project. Here's how to make sure your projector fits perfectly in any room, no matter its shape or size.
- Measure Twice, Mount Once: Before you start, measure your space carefully. Check the distance from the projector to the screen and ensure there's enough room for the mount. Remember, the key to a good projector setup is all in the positioning.
- Think Outside the Box: If your room has an unusual layout, get creative. Use adjustable mounts that can tilt or swivel to accommodate odd angles. For example, if you have a slanted ceiling, look for a mount with a pivoting arm.
- Keep It Steady: Stability is crucial. Make sure your mount is secured to a stud in the wall or a solid part of the ceiling. This will keep your projector safe and ensure a clear, stable image.
- Go Portable: For renters or temporary setups, consider a portable stand. These can be moved around easily and don't require drilling into walls or ceilings.
- Blend It In: Make your mount blend with your decor. Paint it the same color as your walls or ceiling, or use decorative covers to conceal it.
- Safety First: Always prioritize safety. If you're unsure about the installation, consult with a professional. It's better to be safe than sorry, especially when dealing with electrical equipment.
By following these tips, you'll have a projector mount that not only looks great but also enhances your viewing experience.
Troubleshooting Common Issues
When setting up a DIY projector mount, you might run into a few hiccups along the way. Here's a straightforward guide to solving some common problems:
Unstable Image
- Solution: Check that all mount connections are tight. A loose screw or bracket can cause the projector to wobble. Use a level tool to ensure everything is perfectly horizontal or vertical.
Projector Overheating
- Solution: Ensure there's enough airflow around the projector. Avoid enclosing it in a tight space. If possible, add a small fan to help circulate air.
Image Alignment Issues
- Solution: Adjust the projector's keystone correction settings. If your mount allows for it, fine-tune the angle and position until the image aligns with your screen.
The Mount Doesn't Fit the Projector
- Solution: Verify that the mount is compatible with your projector model. If not, you may need an adapter plate or a different mount design.
Vibrations from Surrounding Environment
- Solution: Add dampening materials like rubber washers between the mount and the contact surface to absorb vibrations.
Difficulty Accessing Ports
- Solution: Choose a mount design that allows easy access to your projector's ports. If cables are too short, consider getting longer ones or using cable extenders.
Screen Size: Too Small or Too Large
- Solution: Move the projector closer to or further from the screen to adjust the image size. Check the projector's manual for the recommended throw distance.
By tackling these issues with simple fixes, you'll ensure a smooth and enjoyable viewing experience.
FAQs About DIY Projector Mount
Find clear answers to the most common questions about DIY projector mount, including installation tips and material suggestions.
Yes, you can use alternative methods like adhesive hooks, tension rods, or ceiling clamps that don’t require drilling. However, ensure they can safely support the weight of your projector.
To ensure stability, make sure the mount is securely fastened to wall studs or ceiling joists. Use appropriate anchors if necessary, and double-check all connections. If you’re using a shelf, ensure it’s firmly anchored and the projector is balanced.
The best way to align your projector is to adjust the mount so the projector’s lens is centered and parallel to the screen. Use the projector’s keystone correction and zoom features to fine-tune the image alignment.
To hide cables, consider using cable management sleeves or raceways that you can paint to match your wall or ceiling. Another option is to run cables through the wall or ceiling if you’re comfortable with more advanced DIY work. Always ensure that electrical codes are followed for safety.
Yes, you can build a portable projector mount using a tripod or a rolling stand. For a tripod mount, you'll need a tripod with a camera screw that matches the projector's base. For a rolling stand, consider using a small table or cart with lockable wheels for easy movement and stability.
Conclusion
Building this DIY projector mount was a fulfilling and straightforward project that didn't break the bank. Utilizing basic materials and simple tools, you can achieve a highly customized yet sturdy mount for your projector. This DIY undertaking has enhanced our family viewing experience manifold.


