Making a DIY proofing box, also known as a fermentation chamber, is a fantastic way to manage precise temperatures for bread proofing or other fermentation projects. If you're a baker or a fermentation enthusiast, having a dedicated, temperature-controlled environment can significantly improve your results. Here, I'll guide you step-by-step to build a homemade proofing box that costs a fraction of the price of pre-built models. This setup is simple, requires only a few components, and can be assembled quickly.
Why Build a DIY Proofing Box?
A proofing box provides a controlled environment for bread dough to rise or for various fermentation processes (like culturing koji or making yogurt). Temperature stability is crucial for these processes, but store-bought proofing boxes can be expensive. With just a few materials, you can make your own proofing box for around $80-$95. Let's dive into what you'll need and the steps involved.
Materials Needed
Here are the essential items you'll need to construct your DIY proofing box:
- Styrofoam Cooler: A Styrofoam cooler serves as the box itself. Styrofoam is an excellent insulator, maintaining consistent temperature and humidity levels inside the box.
- Recommended size: 19 inches wide by 12 inches deep by 16 inches tall. This size can accommodate a standard half-sheet cooling rack, giving you plenty of space for various items.
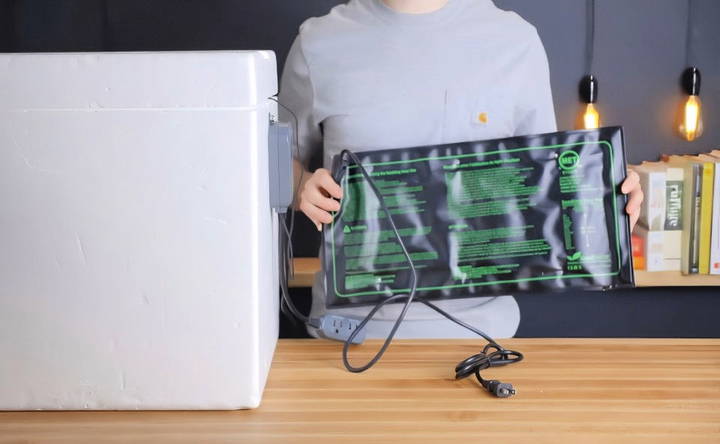
- Seedling Heating Mat: A seedling heating mat will act as the heat source. This mat can reach temperatures up to 110°F, which is more than sufficient for most proofing and fermentation needs.
- Opt for a mat that covers the base of the Styrofoam cooler. This ensures even heating and allows you to easily monitor temperature levels.
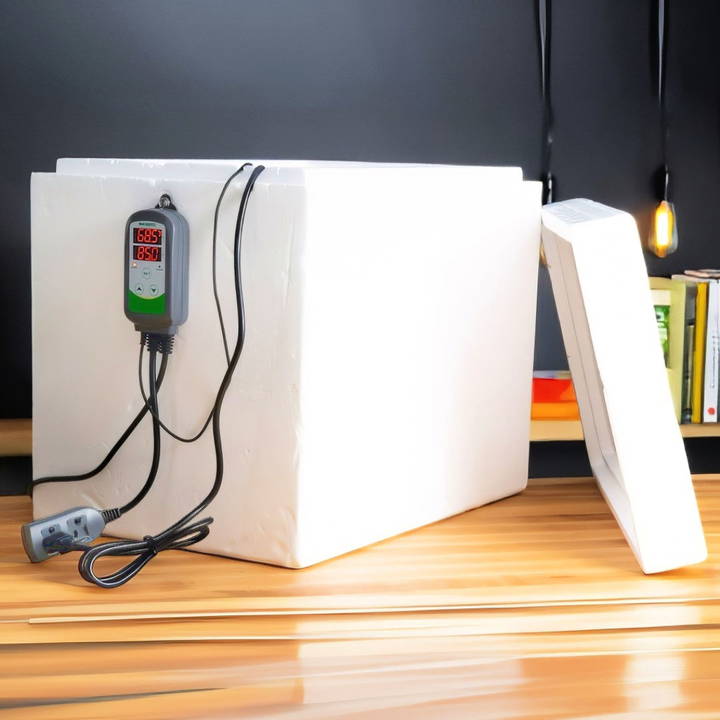
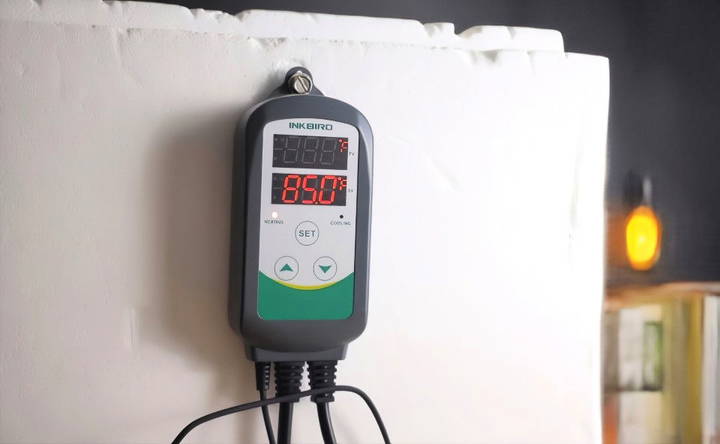
- Temperature Controller: A temperature controller is essential to maintain precise temperatures. It has a probe that monitors the temperature inside the box and automatically adjusts the heating mat to reach your desired temperature.
- Choose a controller with an easy-to-use interface and, if possible, one that is compatible with your heating mat for straightforward operation.
- Cooling Rack (optional but recommended): A half-sheet cooling rack can elevate your items above the heating mat, allowing for even heat distribution.
- This keeps containers off the direct heat, preventing the potential overheating of your ingredients.
Step by Step Instructions
Learn how to build a DIY proofing box with our step-by-step guide. Perfect your baking with easy instructions and optional humidity control.
Step 1: Prepare the Styrofoam Cooler
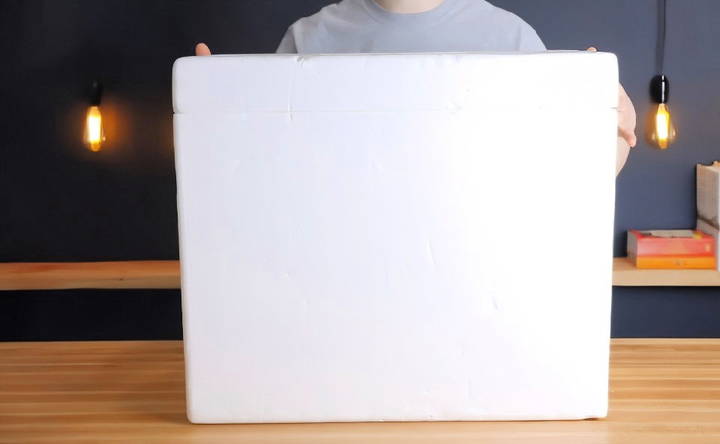
Start by setting up the Styrofoam cooler. This will act as the insulated body of your proofing box. Make sure the cooler you choose has a lid, as this will be essential for maintaining the temperature inside the box.
Step 2: Place the Seedling Heating Mat
Lay the heating mat flat at the bottom of the Styrofoam cooler. Ensure that it fits well without bunching or curling. Most seedling mats are flexible and should easily adapt to the base of the cooler. A heating mat that covers the base of the cooler will provide consistent heating, which is essential for reliable temperature control.
Step 3: Install the Temperature Controller
- Attach the Probe: Insert the temperature probe from the controller into the box. Position it so it can accurately read the internal temperature of the cooler. A mid-level position often works best, as it reflects the average temperature.
- Set Up the Controller: Connect the heating mat to the temperature controller on the designated port (typically labeled "heating"). Then, plug the temperature controller into a power outlet.
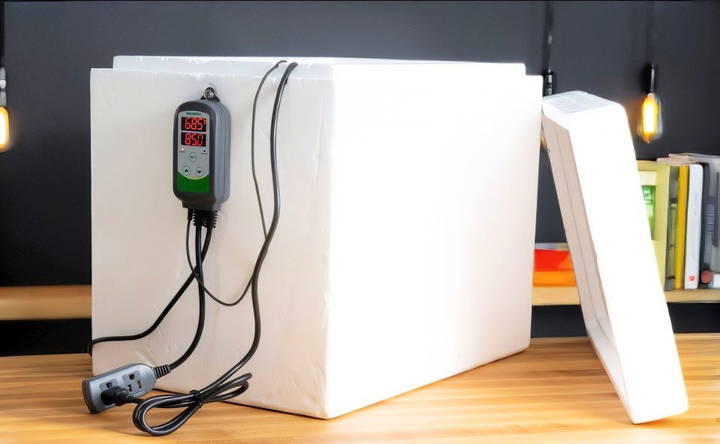
Some users mount the controller on the side of the cooler for convenience, but this is optional. The controller can remain outside the cooler if you prefer a simpler setup.
Step 4: Add the Cooling Rack
If you're using a cooling rack, place it over the heating mat. This rack serves as a barrier between your ingredients and the heating mat, ensuring that containers do not directly touch the heat source. This setup is especially useful for proofing bread dough or fermenting sensitive cultures.
Step 5: Set the Temperature
Now that everything is in place, set the desired temperature on the temperature controller. For bread proofing, 75-85°F is typically ideal, but other fermentation projects may require different temperatures:
- Bread Proofing: 75-85°F
- Yogurt Making: 110°F
- Koji Culturing: 80-90°F
With the controller active, it will automatically adjust the heating mat to reach and maintain the temperature you set.
Step 6: Close the Lid and Monitor
Once the temperature is set, close the cooler's lid to lock in the heat. The Styrofoam acts as an insulator, helping to maintain a stable temperature inside the box. Keep an eye on the temperature controller's display to ensure the internal temperature remains consistent.
Optional: Adding Humidity Control
Certain fermentation projects, like koji or cheese making, benefit from added humidity. If you're working with high-humidity recipes, you might consider adding a small humidifier and a humidity controller to your proofing box. Many temperature controllers also have humidity control options, allowing you to achieve a dual-function proofing box.
Benefits of a DIY Proofing Box
This DIY proofing box offers several advantages:
- Cost-Effective: Pre-built proofing boxes can cost over $170, while this DIY version can be made for around $80-$95, depending on the materials you choose.
- Customizable: You can adjust the heating mat's power, add a humidifier, or even upgrade to a larger cooler if needed.
- Compact and Portable: Styrofoam coolers are lightweight, making this setup easy to move and store when not in use.
- Energy Efficient: The insulated cooler reduces heat loss, which means the heating mat won't have to work as hard, saving energy and extending the mat's lifespan.
Maintenance and Tips for Long-Term Use
To keep your DIY proofing box in good working order, consider the following maintenance tips:
- Clean the Cooler Regularly: If any spills or condensation build-up occur, wipe down the interior with a damp cloth to prevent mold or mildew.
- Monitor the Temperature Controller: Check the temperature controller's settings regularly, as prolonged use can sometimes cause minor drift in settings.
- Replace Heating Mats as Needed: Heating mats may wear out over time. If you notice the mat isn't heating as effectively, consider replacing it.
- Check Humidity Levels (If Applicable): If you've added a humidifier, regularly monitor the humidity to ensure it aligns with your fermentation needs.
Alternative Configurations
You may not need every item listed, depending on the type of fermentation you're doing. For example:
- For Cooler Ambient Conditions: If you live in a warm climate and only need slight heating, a smaller heating mat or less powerful controller may suffice.
- If High Temperatures are Needed: For fermentations requiring higher temperatures, such as yogurt, opt for a more powerful heating mat.
Budget-Friendly Modifications
If budget constraints are a concern, there are a few ways to reduce the cost:
- Cheaper Temperature Controller: Some temperature controllers are more affordable and offer basic temperature regulation features. You might lose some precision, but for most DIY purposes, a basic model works well.
- Alternative Heating Mat Sizes: Smaller or less expensive mats can reduce initial costs. However, they may require additional heating time or closer temperature monitoring.
Conclusion:
Building a DIY proofing box is an affordable and efficient solution for anyone interested in bread-proofing or home fermentation. With just a few basic components, you can build a controlled environment that rivals commercial proofing boxes for a fraction of the cost. This setup not only provides stable temperatures but is also easy to maintain and customize according to your specific fermentation needs.
Whether you're new to fermentation or an experienced baker, a DIY proofing box can enhance your projects, delivering consistent, reliable results every time. Now you're ready to bring precision to your kitchen without the hefty price tag!
FAQs About DIY Proofing Box
Discover everything you need to know about DIY proofing boxes with this comprehensive FAQ guide to improve your home baking skills.
While a Styrofoam cooler is recommended due to its insulating properties, you could use a plastic or metal cooler as long as it’s well-insulated. However, other materials may not retain heat as effectively, making temperature consistency more challenging.
Yes, this setup can handle multiple fermentations as long as they require similar temperatures. Using a cooling rack to layer containers can maximize space within the cooler.
As long as you have a reliable temperature controller, it is generally safe to leave the box unattended for reasonable periods. However, always double-check that all connections are secure.
Yes! Adding a small humidifier and a humidity controller can allow you to manage humidity levels, beneficial for certain fermentation projects.
The temperature controller automatically turns the mat on and off to keep the box within about 1°F of your set temperature. If minor fluctuations persist, consider placing an additional thermometer inside to monitor temperature directly on your ingredients.
Yes, alternatives like insulated food delivery bags, clear plastic containers, or even a small fridge work well as long as they’re insulated. Some users even repurpose plastic coolers or foldable insulated bags for ease of storage.
The seedling mat typically reaches up to 110°F. If you need higher temperatures, consider using a reptile tank heating mat, which can often go slightly warmer.
Cooling can be achieved by using a small fan or adding frozen gel packs. For greater control, use a mini fridge with a dual heating/cooling controller.
Some users notice a slight plastic smell initially, but it usually fades. Placing food in sealed containers can prevent any potential odors from affecting the flavors.
Yes, adding a small humidifier with a humidity controller can regulate humidity inside the box. This is helpful for projects like koji fermentation or making delicate breads that require higher humidity.
Seedling heating mats are designed for continuous use, but it’s wise to check the manufacturer’s instructions regarding safety. To minimize risk, avoid covering cords and ensure proper ventilation.
If heating takes too long, pre-warm the cooler by briefly placing a hot water bottle inside, or use a larger or more powerful heating mat if compatible with your controller.
For best results, keep the box indoors during winter. The Styrofoam cooler provides insulation, making it effective even in colder settings. However, if temperatures are very low, consider adding a second layer of insulation.
Covering your dough loosely with plastic wrap or a damp towel can help retain moisture during proofing. This setup generally provides enough moisture for most recipes without additional humidifiers.
While possible, regular heating pads may have automatic shut-off features, which can disrupt proofing. Seedling mats are more reliable for continuous, low-level heating needed in proofing boxes.


