Starting a DIY putting green in my backyard was one of my best decisions. It wasn't just about improving my golf skills; it became a peaceful escape for me. Gathering the right materials took some time, but step by step, it all came together. The feeling of walking on my green, knowing I built it, is unmatched.
The process of building this green taught me patience and the importance of precision. I learned a lot about different grass types and how sunlight affects growth. Sharing this project with friends made the experience even richer. It's a project that keeps on giving, both as a hobby and a way to connect with others.
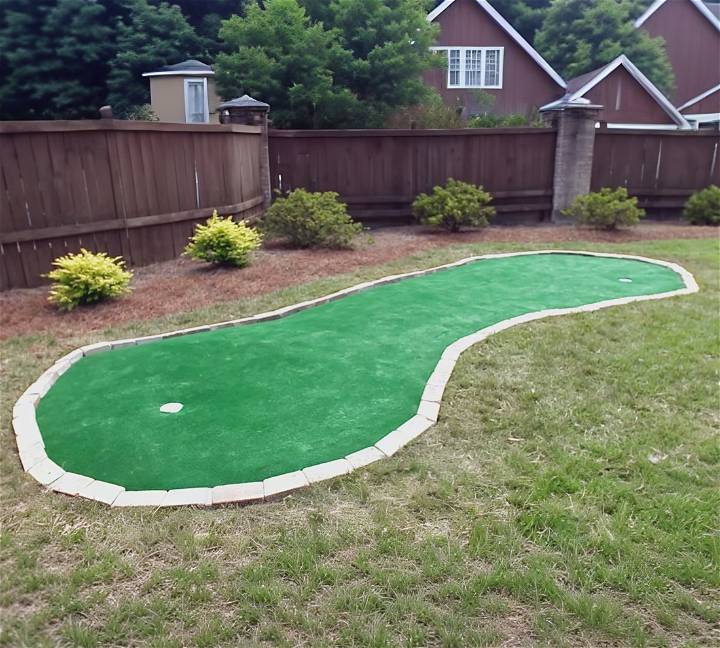
I'm here to help with this: making your own DIY putting green can be very rewarding. With some dedication, you can build a space to enjoy and be proud of.
Choosing the Right Location for Your DIY Putting Green
Choosing the right location for your DIY putting green is a crucial step in the process. Here are some factors to consider:
Sunlight and Shade
The amount of sunlight your chosen location receives can significantly impact the health of your putting green. Most types of grass used for putting greens require at least 4-6 hours of direct sunlight each day. However, too much sunlight can also be harmful, especially in hotter climates. Therefore, a location with a balance of sunlight and shade is ideal.
Wind Direction
Wind direction can affect the playability of your putting green. If your location is in a windy area, consider the prevailing wind direction when designing your putting green. This can add an extra challenge to your game.
Drainage
Good drainage is essential for maintaining a healthy putting green. Poor drainage can lead to waterlogged soil and damage the grass. When choosing your location, avoid areas where water tends to pool. If your preferred location has poor drainage, you may need to install a drainage system.
Space
Ensure you have enough space for your putting green. The size of your putting green will depend on your personal preference and the space available. A typical home putting green can range from 500 to 5,000 square feet.
View and Surroundings
Finally, consider the view and surroundings. Your putting green should be a place where you enjoy spending time. Choose a location with a pleasant view, and consider how the putting green will fit in with the rest of your landscape.
The location you choose can greatly influence the success of your DIY putting green project. Take the time to consider these factors and choose the best location for your needs.
Design Considerations for Your DIY Putting Green
When designing your DIY putting green, there are several factors to consider. Here are some key points to keep in mind:
Size and Shape
The size and shape of your putting green will largely depend on the space available and your personal preferences. A typical home putting green can range from 500 to 5,000 square feet. You might want a simple rectangular design, or you could opt for a more complex shape to add interest and challenge.
Number of Holes
Decide on the number of holes you want on your putting green. Most home greens have one to three holes, but this can vary depending on the size of your green and how you plan to use it.
Undulations
Consider adding undulations or slopes to your putting green. This can make your green more challenging and fun to play on. However, keep in mind that making undulations can be more complex and may require additional work and materials.
Surrounding Area
Think about the area surrounding your putting green. You might want to add a fringe of longer grass around the green, or perhaps some sand bunkers for an extra challenge. Also, consider how the putting green will fit in with the rest of your landscape.
Materials
The type of grass or turf you choose for your putting green can have a big impact on the look and feel of your green. Bentgrass is a popular choice for real grass greens, while synthetic turf can be a good option for low-maintenance greens.
Designing your putting green is a chance to get creative and make a green that suits your needs and preferences. Take your time with this step, as a well-designed green can provide you with years of enjoyment.
How to Make a Backyard Putting Green
Setting up a backyard putting green improves your golf game and lets you enjoy golf at home. This guide helps you build one step by step.
Step by Step Instructions
Learn how to easily build a backyard putting green with our step-by-step guide below:
Step 1: Choose the Location
The first step is deciding where in your backyard you want the putting green. You'll need a level spot with good drainage. Use a hose to help visualize and outline the shape. Consider the size of the synthetic turf roll when planning; they are commonly found in widths of 7.5, 12, or 15 feet.
Step 2: Outline and Prepare the Area
Once you've chosen the location, use spray paint to mark the outline of your green. Remove the grass within this outline using a sod cutter or a trimmer. Clean up any leftover grass clippings and debris. You'll then need to dig out 4 to 5 inches of dirt from the marked area to prepare for the crushed rock base.
Step 3: Install Base Layers
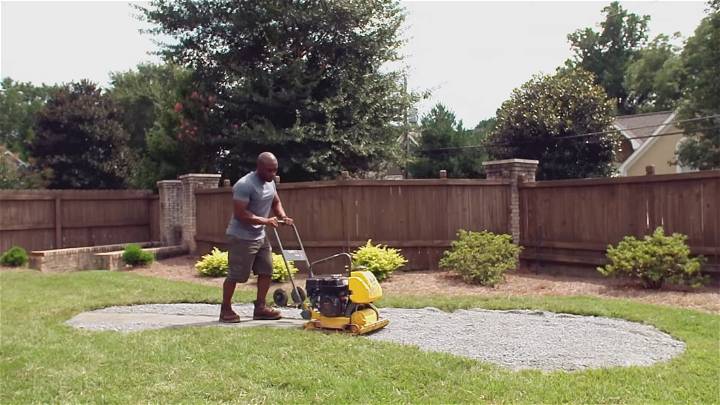
Spread a long-term weed killer to prevent future growth under the green and lay down landscape fabric. Fill the excavated area with layers of crushed stone and sand, spread them evenly and wet the area with a hose. Compact everything using a plate compactor or lawn roller to build a smooth and flat base.
Step 4: Set Up the Cups
Decide where to place the cups for the holes and mark these spots. Dig holes for the cups and small trenches for drainage, filling them with gravel and sand. Ensure to compact the areas around the holes while avoiding damage to the cups' edges - this ensures a smooth roll for the ball.
Step 5: Lay the Synthetic Turf
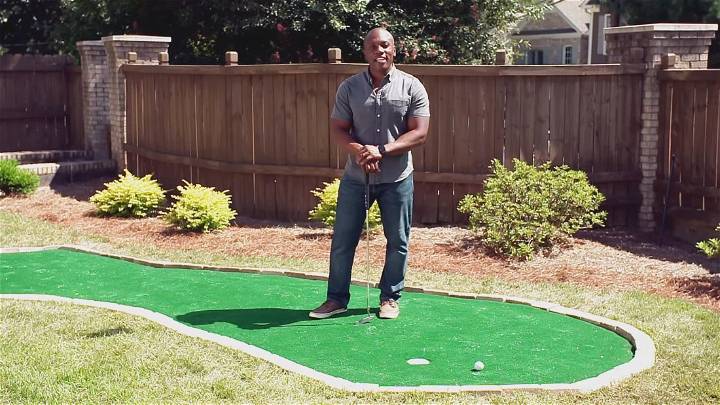
Roll out the synthetic turf over the prepared area, cutting it to fit your design. Use pegs or landscape staples to secure the turf. Locate the cups underneath the turf, cut an "X" over them, and trim away the excess to expose the holes.
Step 6: Install a Border
Make a border around your putting green to prevent golf balls from rolling away. You can use retaining walls, rock blocks, or other types of edging. Consider adding a chipping mat just off the green to prevent damage to the surrounding real grass.
Step 7: Maintenance
To ensure your putting green stays in top condition, regularly sweep and hose it down. This helps to remove debris and keep the surface smooth for play.
Tools and Materials Needed
At the end of this project, you should have a fully functional backyard putting green. The specific tools and materials required will be listed at the conclusion of the video tutorial linked below. They include items such as a sod cutter, landscape fabric, crushed stone, sand, synthetic turf, and golf cups, among others.
Video Tutorial
For a step-by-step video tutorial on making a backyard putting green, watch the helpful guide by The Home Depot here.
It pairs well with this written guide, offering comprehensive visual instructions to complement the techniques discussed, ensuring you can confidently tackle this project.
This detailed guide, together with the video tutorial, offers all you need to successfully build a putting green in your backyard. Enjoy enhancing your golf game in the convenience of your own home!
Landscaping Ideas for Your DIY Putting Green
Landscaping can significantly enhance the look and feel of your DIY putting green. Here are some ideas to consider:
Grass Fringe
Adding a fringe of longer grass around your putting green can build a realistic golf course feel. This fringe can also serve as a buffer zone, helping to prevent balls from rolling too far away.
Sand Bunkers
For an added challenge, consider incorporating sand bunkers into your design. Not only do they make the game more interesting, but they also add a visually appealing contrast to the green grass.
Garden Beds
Adding garden beds with flowers or shrubs around your putting green can enhance its aesthetic appeal. Choose plants that complement the overall design of your garden and are suitable for your climate.
Pathways
Consider adding pathways leading to and from your putting green. These can be made from a variety of materials, such as gravel, stepping stones, or wood chips, and can add a nice touch to your landscape design.
Lighting
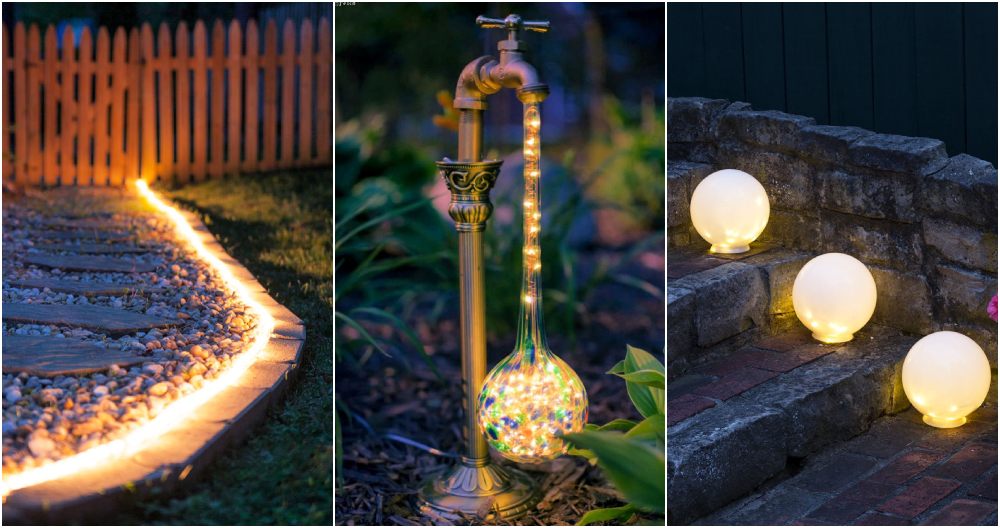
If you plan to use your putting green in the evening, adding outdoor lighting can be a great idea. This not only makes the green usable after sunset, but also adds a beautiful ambiance to your garden.
Feel free to get creative and design a landscape that suits your personal style and complements your putting green. After all, your putting green should be a place where you enjoy spending time.
Common Problems and Solutions for Your DIY Putting Green
Maintaining a DIY putting green can present some challenges. Here are some common problems and their solutions:
Problem: Poor Drainage
Poor drainage can lead to waterlogged soil and damage the grass. If you notice puddles forming on your green after rain, you may have a drainage issue.
Solution: Improve the drainage by adding a layer of gravel under the turf. If the problem persists, consider installing a drainage system.
Problem: Uneven Surface
An uneven surface can affect the roll of the ball and the overall playability of your green.
Solution: Regularly check the surface of your green for any bumps or depressions. You can level the surface by adding or removing sand underneath the turf.
Problem: Weed Growth
Weeds can invade your putting green and compete with the grass for nutrients.
Solution: Regularly inspect your green for weeds and remove them as soon as they appear. Consider using a weed control product if the problem persists.
Problem: Discoloration
Discoloration can be a sign of various issues, such as disease, pests, or nutrient deficiency.
Solution: Identify the cause of the discoloration and address it accordingly. This may involve applying a fungicide, pesticide, or fertilizer.
Regular maintenance is key to keeping your DIY putting green in good condition. If you encounter a problem you can't solve, don't hesitate to seek professional help.
Maintenance Tips for Your DIY Putting Green
Maintaining your DIY putting green is essential to keep it in top condition. Here are some tips to help you:
Regular Brushing
Regular brushing helps to keep the surface of your putting green smooth and even. It helps to prevent the build-up of debris and can also help to maintain the upright position of the grass blades, improving the roll of the ball.
Prompt Debris Removal
Leaves, twigs, and other debris can cause damage to your putting green if left unchecked. Make sure to remove any debris from your green promptly to prevent any potential damage.
Proper Watering
Watering your putting green is essential, especially if it's made of real grass. However, avoid overwatering as it can lead to problems such as disease and thatch build-up.
Regular Mowing
If your putting green is made of real grass, regular mowing is essential to keep it in top condition. The ideal height for a putting green is typically around 3/16 to 1/4 inch.
Aeration
Aeration can help to improve the health of your putting green by allowing water, air, and nutrients to reach the roots of the grass more easily. This can be done using a simple hand tool or a powered aerator.
Regular maintenance is crucial for your DIY putting green. Follow these tips to keep it in top shape for years.
FAQs About DIY Putting Greens
Here are some frequently asked questions about DIY putting greens:
1. What type of grass is best for a home putting green?
Bentgrass is often used for home putting greens due to its fine texture and tolerance for close mowing. However, it requires a lot of maintenance. Synthetic turf is another popular choice because it's durable and requires less upkeep.
2. How much does it cost to build a DIY putting green?
The cost can vary greatly depending on the size of the green, the type of grass or turf you choose, and whether you do the work yourself or hire professionals. It could range from a few hundred to several thousand dollars.
3. How much space do I need for a home putting green?
A home putting green can range from 500 to 5,000 square feet, depending on your available space and personal preference.
4. How often should I water my putting green?
If your putting green is made of real grass, it will need regular watering, especially in hot weather. However, avoid overwatering as it can lead to problems such as disease and thatch build-up.
5. How do I maintain my putting green?
Regular maintenance tasks include mowing (for real grass), brushing, removing debris, watering, and aerating. You may also need to apply fertilizers, fungicides, or pesticides as needed.
6. Can I add undulations to my putting green?
Yes, adding undulations or slopes can make your green more challenging and fun to play on. However, making undulations can be more complex and may require additional work and materials.
7. What should I do if weeds appear on my putting green?
Regularly inspect your green for weeds and remove them as soon as they appear. Consider using a weed control product if the problem persists.
8. Can I use my putting green in the winter?
If your putting green is made of synthetic turf, it can be used year-round. If it's made of real grass, it may go dormant in the winter but can still be used, provided the ground is not frozen.
9. How long does it take to build a DIY putting green?
The time it takes can vary depending on the size of the green and whether you do the work yourself or hire professionals. It could range from a few days to a few weeks.
10. Can I build a putting green in my backyard?
Yes, as long as you have enough space and the right conditions (good sunlight, proper drainage), you can build a putting green in your backyard.
Conclusion:
In conclusion, making your own DIY putting green can be a fun and rewarding project. With a little creativity and some elbow grease, you can enjoy practicing your golf skills right in your own backyard.


