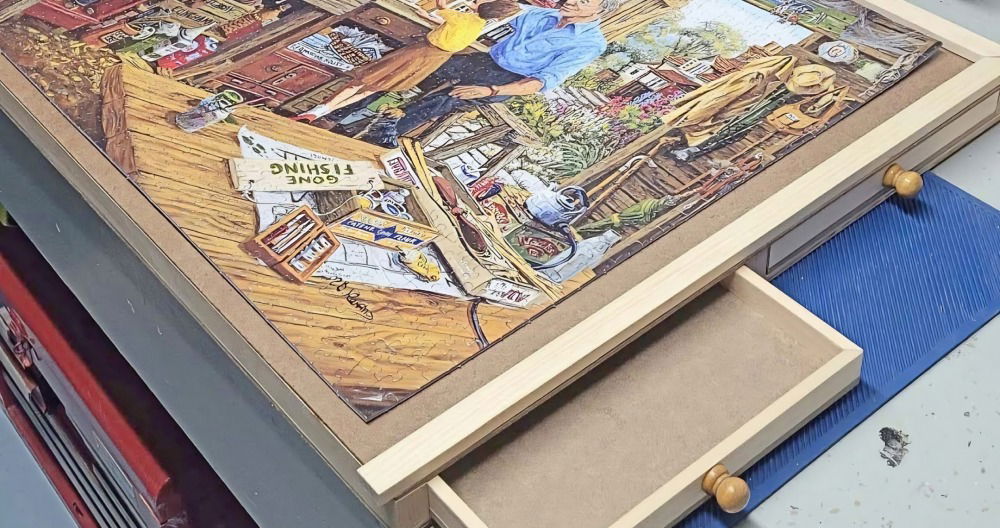
Building a DIY puzzle board was a project I took on one weekend because I love puzzles and needed a sturdy place to work on them. Initially, I wasn't sure if I could build it myself, but once I gathered some basic materials like wood, glue, and a few tools, I felt confident. This project was fun and quite easy to complete.
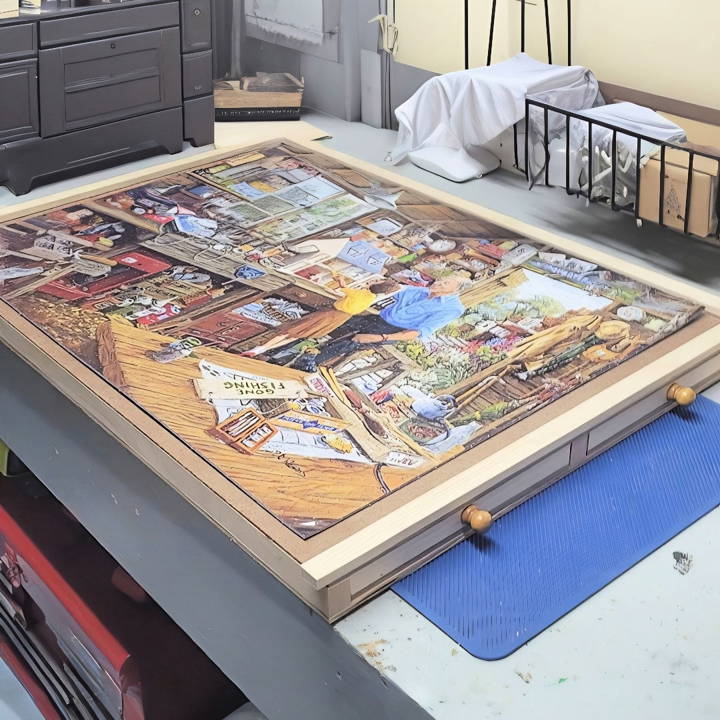
With clear, step-by-step instructions, I was able to assemble the various pieces. The end result was a functional and sturdy puzzle table that made working on puzzles so much easier. It's a great feeling to turn an idea into a reality.
Starting your own DIY puzzle board can be a fun and rewarding experience. This guide will definitely help you.
Necessary Materials and Their Purpose
Before diving into the nitty-gritty of construction, let's talk about the essential materials required for this project and the reasons behind their selection:
- Tempered MDF (Medium Density Fiberboard): I chose MDF for both the top and bottom pieces of the puzzle board due to its smooth surface, ideal for puzzle assembly, and its durability. Make sure to get a piece large enough to accommodate your puzzle size plus extra margin.
- Hobby board or Pine wood strips: These are used for constructing the drawer bodies and the trim around the border of the puzzle board. Pine provides a sturdy yet lightweight option for the drawers.
- Wood Glue & Brad Nails: Essential for assembling and securing the puzzle board and drawers, ensuring everything stays tightly together.
- Drawer Knobs: These are critical for adding functionality to the drawers, making them easy to open and close.
- Tools: A jigsaw, a nail gun (or hammer and nails), and a track saw (optional) are key tools that facilitate cutting and assembling the board.
Understanding the purpose behind each material and tool selection is crucial for a successful build, paving the way for a smooth and enjoyable crafting process.
Step by Step Instructions
Discover step-by-step instructions on how to make a DIY puzzle board. Perfect for enthusiasts. Easy, fun, and practical guide for DIY puzzle lovers.
Step 1: Cutting the Base and Top
First, measure and cut two pieces of MDF to your desired dimensions. I aimed for a finished size of 24 by 30 inches which dictated cutting the pieces slightly larger (28 by 34 inches) to allow for the addition of trim.
Step 2: Cutting Strips for Internal Structure and Trim
Next, I utilized hobby boards to cut strips that would serve as the sides of the drawers and the board's trim. The dimensions should match the height of your desired drawer plus a tad more for the trim to rest on.
Step 3: Assembling the Frame
To build a frame for the puzzle board that could accommodate drawers, I glued the strips around the edges of one MDF piece and secured them with brad nails. It's vital to ensure these strips are perfectly aligned and evenly spaced, as they'll dictate the drawer layout.
Step 4: Crafting the Drawers
Turning my focus to the drawers, I cut additional hobby board pieces to build small boxes that would fit snugly within the frame I had assembled. This involved detailed measurements to make sure each drawer would have enough space to slide in and out effortlessly.
Step 5: Finishing Touches
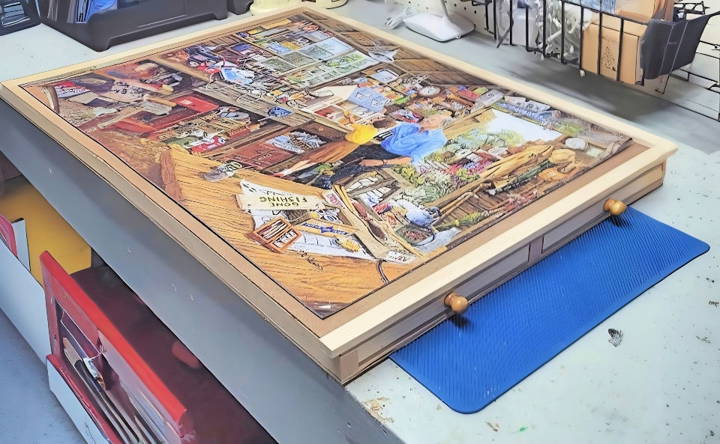
After assembling the drawers and attaching knobs, I focused on attaching the second MDF sheet to top off the puzzle board. This required a delicate balance to align correctly and to nail in place. The last step was adding trim around the edges for a clean, finished look, enhancing the aesthetic appeal of the board.
What I Learned
Reflecting on this project, the importance of precision in measurements and cuts cannot be overstated. Even slight inaccuracies can lead to drawers not fitting or the board wobbling, detracting from its functionality and overall appearance. Patience and meticulous attention to detail are your best allies.
This project highlighted adaptability's importance. Issues like warped wood or mismatched measurements became chances to think creatively and adjust.
Design Customization
Building a DIY puzzle board is not just about functionality; it's also an opportunity to express your creativity and make something unique that reflects your personality or the intended user. Here's how you can customize your puzzle board design:
- Choose Your Size and Shape: Start by deciding the dimensions of your puzzle board. It should be large enough to fit your largest puzzle but manageable to move around. Common shapes are rectangular and square, but don't be afraid to try circular or heart-shaped boards for a fun twist.
- Select a Theme: Personalize your board by picking a theme that resonates with you. It could be a favorite color scheme, patterns inspired by nature, or motifs related to a hobby or interest. This theme will guide your choices for the board's visual elements.
- Add a Personal Touch: Incorporate elements that are special to you. This could be a monogram, a favorite quote, or artwork. You can use stencils, decals, or hand-painting to add these personal touches to your board.
- Functional Aesthetics: Consider the practical aspects of your design. For example, if you often puzzle at night, add a border that glows in the dark. If you have limited space, build a foldable board or one that doubles as wall art.
- Finishing Touches: The finish on your puzzle board not only protects it but can also enhance its look. Choose from matte, glossy, or satin finishes, and consider environmentally-friendly varnishes or sealants.
- Safety First: Ensure that all materials and decorations used are non-toxic and safe for all ages, especially if children will be using the puzzle board.
Design with customization in mind to make a functional, personal puzzle board. The aim is to make solving puzzles enjoyable. Keep it simple, fun, and true to yourself!
Troubleshooting Common Issues
When crafting a DIY puzzle board, you might encounter a few hiccups along the way. Here's how to troubleshoot some common issues with simple, practical solutions:
- Warped Wood: If your board warps, lay it flat under heavy objects for a couple of days. For future projects, choose plywood or MDF, which are more resistant to warping.
- Sticky Surface: A sticky finish can be frustrating. To avoid this, apply a thin, even layer of sealant and allow it to dry completely before adding another coat. If it's already sticky, gently sand the surface and reapply the sealant.
- Paint Bleeds: Prevent paint from bleeding under tape by sealing the edges with a clear sealant before painting. If bleeding occurs, wait for the paint to dry, then use a fine-tip brush to touch up the edges.
- Difficulty in Piece Movement: If puzzle pieces don't slide easily, apply a wax finish or a specialized puzzle board lubricant to reduce friction.
- Scratches and Dents: Fill minor scratches with wood filler, sand smooth, and touch up with paint. For dents, use a damp cloth and an iron to steam the wood fibers back into place.
- Loose Decorations: If decorations come loose, reattach them with a stronger adhesive like wood glue or epoxy. Make sure the surface is clean and dry for the best bond.
- Fading Colors: To protect colors from fading, use UV-resistant varnish and avoid placing your puzzle board in direct sunlight for extended periods.
By addressing these common issues, you'll ensure your DIY puzzle board remains in great condition, providing endless hours of entertainment. Remember, the key is patience and attention to detail.
FAQs About DIY Puzzle Board
Get answers to common questions about DIY puzzle boards. Learn tips, materials needed, and step-by-step instructions to build your perfect puzzle board.
Attaching trim pieces to the sides of your puzzle board can add a raised edge. Cut the trim to the length of each side of your plywood, and for a seamless fit, saw 45-degree angles into the ends of the trim pieces before gluing them around the plywood edges.
Yes, you can build a portable cardboard puzzle board without the need for power tools. You'll need a large piece of cardboard, a utility knife for cutting, and optionally, duct tape or decorative washi tape to reinforce the edges and add a personal touch.
Absolutely! You can design your puzzle board with drawers or a storage compartment. This requires additional materials like drawer knobs, screws, and hinges. You can find detailed guides online that provide step-by-step instructions for making a puzzle board with storage.
To protect your wooden puzzle board, apply a coat of polyurethane or a similar sealant to guard against spills and wear. For cardboard puzzle boards, avoid exposure to moisture and store them flat to prevent warping. Regularly dust off your board to keep it clean and smooth for puzzle building.
To make your puzzle board portable, consider using lightweight materials like foam board or corkboard. You can also add handles to the sides of a wooden board for easy carrying. For a foldable design, hinge two boards together so they can be closed like a book, protecting your puzzle inside. Use Velcro straps to keep it securely closed during transport.
Final Thoughts
In conclusion, building your own DIY puzzle board can be a simple yet fulfilling project. Grab your tools and get started today. It's easier than you might think!


