If you're searching for an efficient, durable, and cost-effective solution to water your garden, a DIY pvc pipe sprinkler might be the answer. Using PVC pipes, you can easily build a sprinkler that will serve your irrigation needs for years to come. With this guide, you'll have all the instructions, materials, and advice needed to construct your own sprinkler. Based on a proven design that has irrigated an acre-long garden for over a decade, this sprinkler is easy to assemble, inexpensive, and effective.
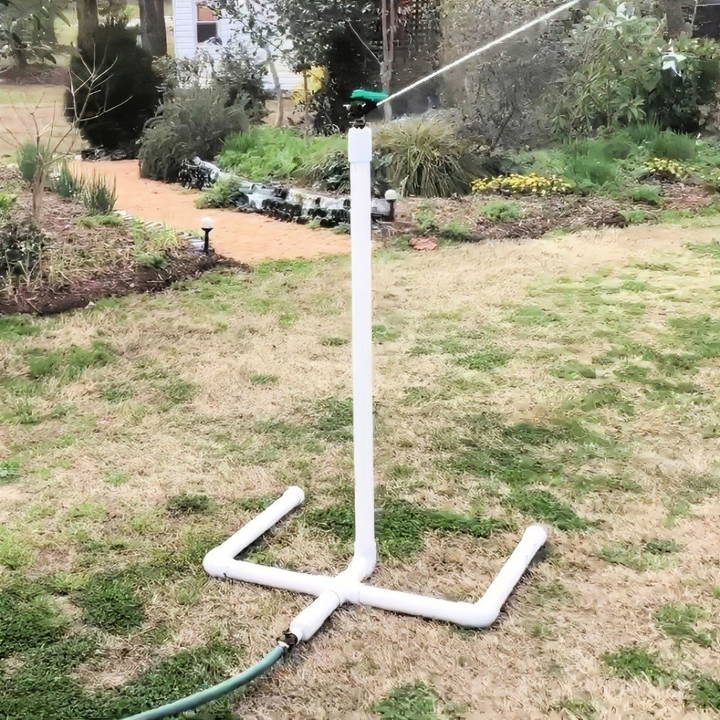
Why a PVC Sprinkler?
PVC sprinklers offer several advantages over metal or commercial sprinklers. Here's why:
- Durability: PVC is resistant to rust, unlike metal sprinklers, which can clog over time due to rust buildup.
- Cost-Effective: With only about $50 in materials, you can build a highly functional sprinkler that can last for years.
- Lightweight and Easy to Handle: Unlike heavier metal versions, the PVC sprinkler is easy to move around your garden without much effort.
- Customizable: You can modify the design to suit your garden's specific needs, making it an adaptable tool.
- Stability: When filled with water, the base of the sprinkler becomes weighted, preventing it from flipping over during use, even in windy conditions.
Materials Needed
Here's a comprehensive list of the materials you'll need to build your PVC sprinkler. You can easily find all of these components at a hardware store like Lowe's or Home Depot:
- PVC Pipes (1 ½ inch): These will form the body of the sprinkler. You'll need around 10 feet of PVC piping.
- PVC Fittings:
- 2 End Caps
- 3 90-Degree Elbows
- 1 Four-Way Connector
- 2 Couplings
- Saw (or Sawzall): A tool to cut the PVC pipes to the required lengths.
- Teflon Tape: Used to seal threaded joints.
- PVC Primer and Cement: These will bond the PVC pipes and fittings together.
- Pipe Vice or Cutting Tool: You can use a vice to hold the pipes while cutting or simply use the tailgate of a truck.
- Nozzles: For water output. You can get various nozzle types depending on the spray distance you need.
- Sandpaper: To smooth the edges of the cut PVC.
Tools Needed
- Sawzall or hacksaw (to cut the PVC pipe)
- Measuring tape (to ensure accurate measurements)
- Marker or pencil (for marking the cut lines)
- Channel locks (to tighten the nozzles and fittings)
Step by Step Instructions
Make your own DIY PVC sprinkler with easy step-by-step instructions. Perfect for garden enthusiasts seeking cost-effective watering solutions.
1. Measure and Cut the PVC Pipe
Start by measuring the PVC pipe lengths needed for your sprinkler. The primary structure involves a base with four legs and a vertical pipe that will connect to the hose.
- Step 1: Mark the sections of PVC pipe that need cutting. For example, you will need pieces that are 7 inches long for the base.
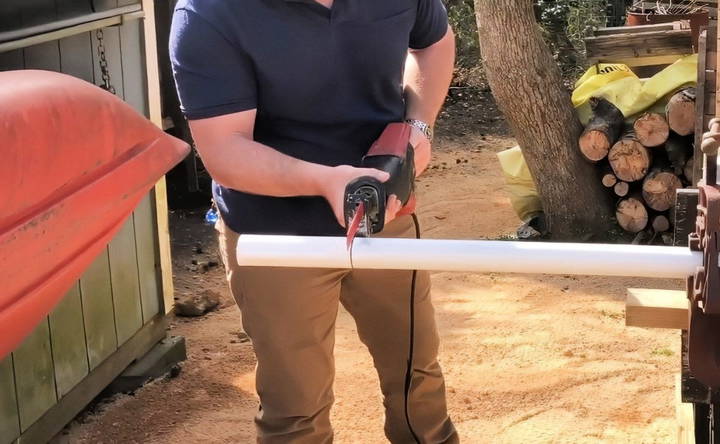
- Step 2: Cut the PVC with a saw or a Sawzall. Ensure the cuts are straight to prevent uneven connections later. You can use a piece of sandpaper or a pipe wrap around the pipe to guide your cut.
- Step 3: Sand the edges of the cut pipe to remove any burrs, making it easier to fit the pieces together.
2. Assemble the Base
The base is the foundation of your sprinkler and ensures its stability when filled with water.
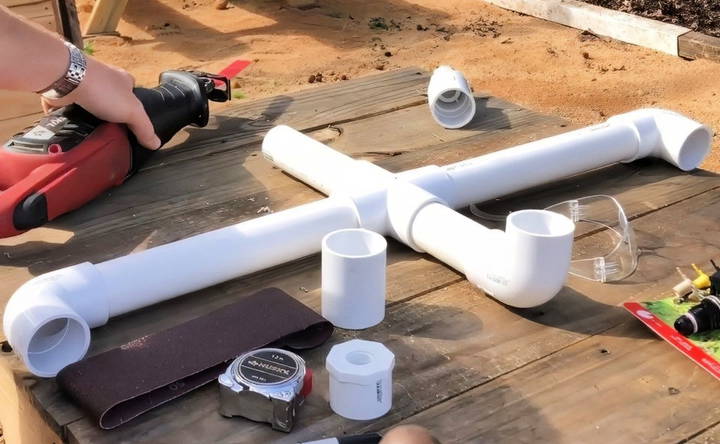
- Step 1: Take two of your PVC pipes and connect them using the four-way connector at the center. This forms the cross-section of the base.
- Step 2: Attach the 90-degree elbows to each end of the base's cross-section.
- Step 3: Insert the longer PVC pieces into the elbows to complete the base structure. These should be measured to your desired size depending on the stability you want.
This base structure will fill with water, which adds weight and ensures that the sprinkler remains stable even when operating at high pressure.
3. Attach the Vertical Pipe
Once your base is assembled, it's time to connect the vertical part of the sprinkler, which will hold the nozzle that distributes the water.
- Step 1: Insert a coupling into the four-way connector. This will serve as the joint between the base and the vertical pipe.
- Step 2: Attach a vertical pipe (about 2 feet long) to the coupling.
- Step 3: Use a 90-degree elbow at the top of this vertical pipe to build a spout where you will attach the hose.
4. Add the Sprinkler Head and Nozzle
The final step is to attach the sprinkler head and nozzle. You have several options for nozzles depending on the coverage area you need.
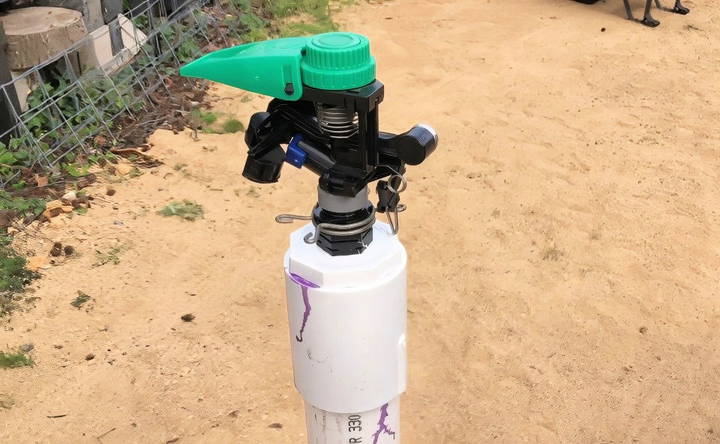
- Step 1: Wrap Teflon tape around the threads of your chosen nozzle. Make sure you wrap it in the direction that follows the threading, or it will bunch up when you screw it in.
- Step 2: Insert the nozzle into the PVC fitting at the top. Use channel locks to gently tighten it. Don't over-tighten, as this can damage the threads.
5. Sealing the Joints
Once everything is fitted, it's time to permanently bond the pipes together using PVC primer and cement. This will ensure there are no leaks and that the structure remains solid.
- Step 1: Apply PVC primer to both the outside of the pipe and the inside of the fittings.
- Step 2: Immediately follow up by applying the PVC cement. Once you push the pipes and fittings together, hold them for a few seconds to allow the glue to set.
Be cautious when using the PVC cement. It dries quickly and the parts become impossible to separate once bonded.
6. Test Your Sprinkler
Before using your sprinkler for regular garden irrigation, it's important to test it to ensure it's functioning as expected.
- Step 1: Attach a garden hose to the spout.
- Step 2: Turn on the water and watch as the base fills up, providing stability.
- Step 3: Adjust the nozzle direction and spray pattern. Depending on the nozzle you chose, you can rotate it to cover 360 degrees or a targeted area.
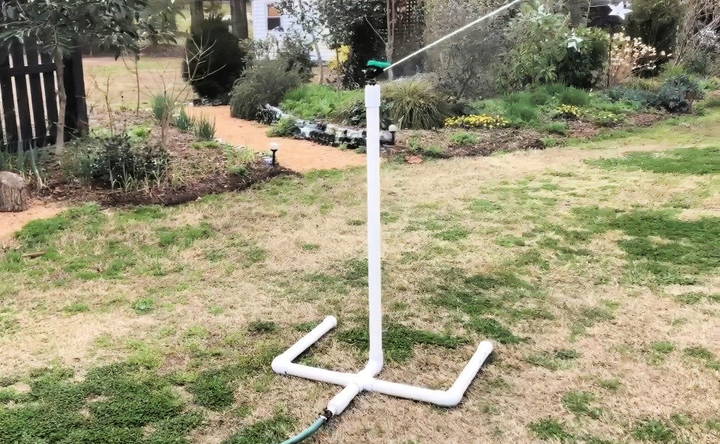
Watch out for leaks at the joints or the nozzle. If leaks occur, tighten the fittings or apply more Teflon tape as needed.
Tips for Optimal Use
- Drain Before Winter: One of the most common mistakes is leaving water inside the PVC pipes during freezing temperatures. Water expands when frozen, which can crack the PVC. Be sure to drain the sprinkler completely after each use in colder weather.
- Use a Pipe Wrap for Straight Cuts: If you're cutting the pipes by hand, using a pipe wrap can help you make straight, even cuts, improving the overall look and function of your sprinkler.
- Experiment with Nozzles: Depending on your garden's size and the water pressure, you may need to experiment with different types of nozzles to get the perfect water distribution.
Conclusion
Building a DIY PVC sprinkler is a practical and rewarding project that can save you money while providing efficient irrigation for your garden. By following these steps and using readily available materials, you can build a durable and reliable sprinkler that will serve you well for years to come. Not only is it easy to build, but it's also customizable, allowing you to adjust the design to fit your specific needs.
This PVC sprinkler design has been tested and proven to work in various gardening environments, providing excellent water coverage for large and small spaces alike. So why not give it a try? With minimal investment and effort, you can enjoy the benefits of a high-quality irrigation system built by your own hands.
Additional Resources
For more DIY projects and garden tips, check out local hardware stores, garden blogs, or YouTube channels that focus on gardening and irrigation solutions.
FAQs About DIY PVC Sprinkler
Discover answers to common questions about DIY pvc sprinkler systems—installation tips, benefits, and troubleshooting guidance.
Yes, the spray distance can be modified by selecting different nozzle types. The design allows for easy swapping of nozzles to control the water flow and coverage, giving you options based on the size of your garden and water pressure.
The PVC sprinkler's design is stable when filled with water. However, if you live in a particularly windy area, you can use landscape anchoring stakes to secure it further. This ensures it remains stable under varying conditions.
Drain the water from the sprinkler after each use in cold weather. You can add a female threaded coupling to the base, allowing you to easily unscrew and drain the pipes to avoid cracks due to freezing water expansion.
The PVC glue typically dries in a few minutes, but it's recommended to wait at least 24 hours for a complete bond before testing the sprinkler to ensure no leaks develop at the joints.
Some users recommend using 1 ¼ inch PVC pipes instead of 1 ½ inch to make cutting easier with a PVC cutter. You can also reduce the standpipe size to ¾ inch to make the design less top-heavy without affecting performance.
Yes, when the pipes are filled with water, the internal pressure can help increase the sprinkler’s reach, allowing it to cover a larger area of your garden.
Currently, no detailed diagrams are available, but you can build one based on the measurements provided in the guide. Users have suggested including measurements like pipe cuts (e.g., 2 x 21 in, 2 x 12 in) to make the process easier.
The entire project should cost around $50, which includes all necessary PVC pipes, fittings, nozzles, and glue. This is significantly cheaper than most commercial sprinklers that may not last as long.
Yes, this PVC sprinkler is versatile and can be used for a variety of surfaces, including clay tennis courts. Adjust the nozzle to control the water distribution depending on the surface's needs.
The modular nature of the PVC sprinkler makes it easy to replace parts or make modifications. You can customize it further by experimenting with different pipe sizes, lengths, and fittings to suit your specific irrigation needs.


