Making a DIY PVC trellis for your garden is a fantastic way to maximize your growing potential, support your plants, and extend your growing season. This guide will show you the steps to build a PVC pipe trellis that can be used as a shade tunnel or converted into a cold frame for continuous use throughout the year. Whether you're an experienced gardener or a beginner, this tutorial will give you all the information you need to build a durable, reusable PVC trellis.
Why Build a PVC Trellis?
PVC trellises are lightweight, affordable, and easy to assemble, making them an excellent choice for gardeners looking to maximize space and protect plants from harsh weather conditions. The design we'll discuss is versatile, allowing you to:
- Support Climbing Plants: Use the trellis for beans, peas, tomatoes, or cucumbers.
- Build a Shade Tunnel: Protect heat-sensitive crops by covering the structure with shade cloth during the hottest months.
- Build a Cold Frame: Extend your growing season by using plastic sheeting to shield your plants from frost and colder temperatures in the fall and winter.
This project provides all the benefits of a traditional garden structure without the high cost or complicated installation process.
Materials You Will Need
Before getting started, gather the following materials. Most of these can be found at your local hardware store or online, and they won't break the bank.
PVC Pipes
- Half-inch PVC Pipes: 10-foot lengths are ideal, but you can use 8-foot pipes for a smaller structure.
- PVC Connectors: T-joints and elbow connectors to secure the frame.
Rebar
- 18-24 inch Rebar Stakes: These will anchor the PVC pipes to the ground, providing stability.
Other Essential Supplies
- Hammer or Mallet: To drive the rebar into the ground.
- Zip Ties or String: To secure plants to the trellis or hold the plastic in place.
- Plastic Sheeting or Greenhouse Film: For cold frames, you'll need a durable plastic sheet.
- Shade Cloth: To cover the structure during hot weather.
- Wire or Tape: Optional for added reinforcement, especially if you experience heavy snowfall.
Step by Step Instructions
Learn how to build a DIY pvc trellis with step-by-step instructions. Discover seasonal modifications and maintenance tips for a perfect garden setup.
Step 1: Position and Prepare Your Rebar
Start by selecting the area in your garden where you want to build the trellis. This could be over a raised bed, along a row of climbing plants, or even in the middle of your garden where shade is needed.
- Mark the Positions: Plan where each rebar stake will go. A typical setup places the stakes about two feet apart along the length of your garden bed. The closer the stakes, the sturdier the structure.
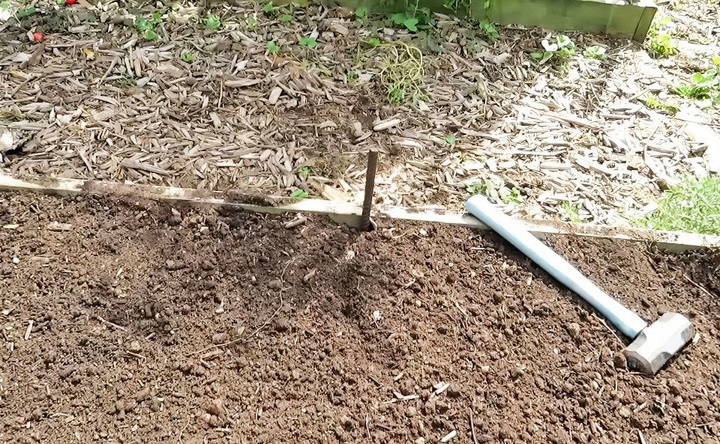
- Drive the Rebar Into the Ground: Using a hammer or mallet, pound each piece of rebar at least halfway into the ground. This will give your PVC pipes a stable foundation to sit on. Aim for each piece to be vertically straight and spaced evenly.
Step 2: Install the PVC Pipes
Next, it's time to insert the PVC pipes. These pipes will form the ribs of your trellis, tunnel, or cold frame.
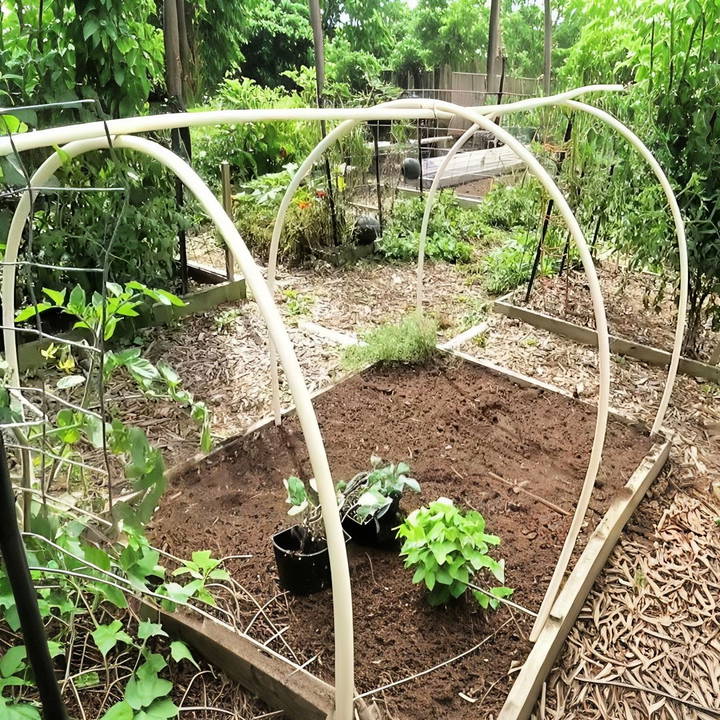
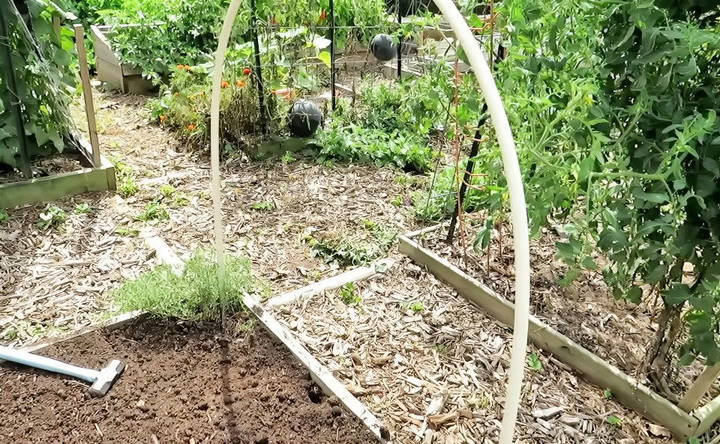
- Slip the PVC Pipes Over the Rebar: Take one end of a 10-foot PVC pipe and place it over the rebar on one side of your garden bed. Bend the pipe across the bed and slip the other end over the corresponding rebar on the opposite side. This forms an arch.
- Repeat for Additional Arches: Continue bending the PVC pipes over your rebar stakes, forming several arches. Place the pipes at consistent intervals (about 2-3 feet apart), depending on how large your structure is.
Step 3: Connect the PVC Pipes
To add stability to your structure, you'll need to connect the ribs.
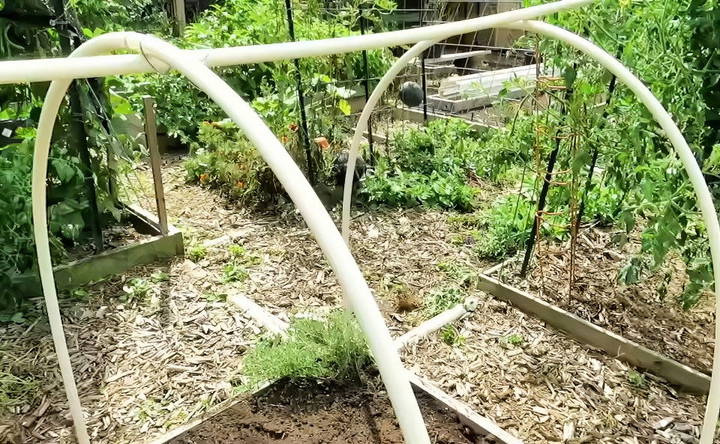
- Run a PVC Pipe Along the Top: Use T-joint connectors to attach a horizontal PVC pipe across the top of your arches, running from one end of the structure to the other. This top piece helps support the frame and keeps the ribs from moving in different directions.
- Secure with Zip Ties or Wire: Ensure that the top pipe is tightly secured to each arch using zip ties or wire. This will reinforce the overall structure and provide extra support.
Step 4: Add Trellis Supports
If you're planning to use this setup primarily as a trellis, now is the time to add string or netting to support your climbing plants.
- String the Trellis: Run string or twine across the arches horizontally, spacing them about 6-12 inches apart. This builds a grid for your plants to climb.
- Vertical Support: You can also run strings vertically from the top pipe to the bottom of the frame to provide additional climbing support for your plants.
Your trellis is now complete! At this point, you can leave the structure as is, but its versatility really comes into play when you transform it into a shade tunnel or cold frame.
Modifying Your Trellis for Different Seasons
The beauty of a PVC trellis is that you can modify it for different gardening needs throughout the year.
Shade Tunnel for Hot Summers
If you're growing cool-weather crops that struggle in the heat, like lettuce or spinach, adding a shade cloth to your PVC trellis will help protect them from excessive sun exposure.
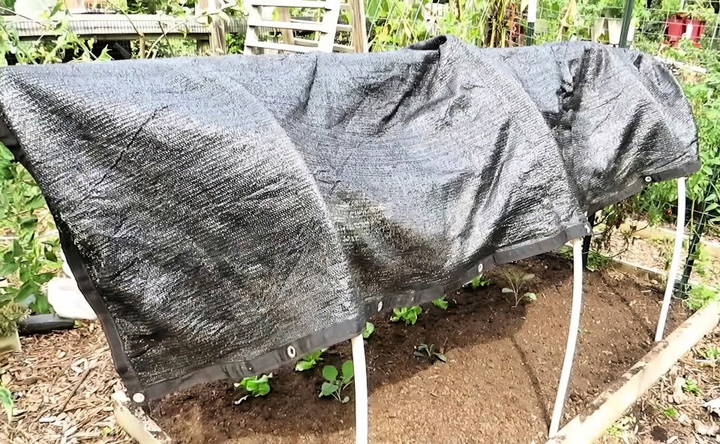
- Cover the Structure with Shade Cloth: Drape the shade cloth over the top of your arches, ensuring it extends down to cover both sides. Use zip ties, clips, or string to secure the cloth in place.
- Allow Ventilation: Leave the sides slightly open or roll up the cloth to allow air circulation and prevent your plants from overheating.
Cold Frame for Fall and Winter
As the weather cools, you can easily convert your PVC trellis into a cold frame to keep your plants growing longer.
- Cover with Plastic Sheeting: Drape heavy-duty plastic sheeting or greenhouse film over your PVC frame. Make sure to use a large enough sheet to cover the structure completely. Leave about 2 feet of excess plastic on each side so you can secure it tightly to the ground.
- Secure the Edges: Weigh down the edges of the plastic with bricks, stones, or wooden planks to prevent it from blowing away.
- Close the Ends: For extra protection, bunch the plastic at the ends of the tunnel and tie it off. This builds a seal, helping to trap heat inside.
The plastic sheeting will act as insulation, capturing warmth from the sun during the day and preventing frost from damaging your plants at night.
Conclusion
Building a DIY PVC trellis is an excellent investment for any gardener. Not only does it provide vertical growing space for climbing plants, but it can also be converted into a shade tunnel or cold frame, allowing you to extend your growing season throughout the year. With just a few affordable materials and some basic construction skills, you can build a versatile structure that serves multiple purposes in your garden.
By following the steps outlined in this guide, you'll have a durable and customizable PVC trellis that can support your plants and protect them from the elements. So, why wait? Start building your PVC trellis today and enjoy the benefits of a more productive and resilient garden.
FAQs About DIY PVC Trellis
Discover answers to common questions about DIY pvc trellis. Get tips, materials, and step-by-step guidance for your garden project.
For this project, half-inch PVC pipes are ideal because they are flexible and easy to work with. Use 10-foot pipes for a larger structure or 8-foot pipes for a lower tunnel, which helps retain heat better in colder months.
Use 18-24 inch rebar stakes hammered into the ground. The PVC pipes will slip over the rebar, making stable arches. Ensure the rebar is at least halfway into the ground for maximum stability.
Space the arches about 2 to 3 feet apart. Closer spacing provides more support, especially if you live in areas with heavy snow. Wider spacing is suitable for milder climates or lighter loads.
For cold weather, use plastic sheeting or greenhouse plastic to retain heat. For shade, use a breathable shade cloth. Both materials can be easily secured with zip ties, wire, or string.
Yes! Use it as a trellis in spring and summer, a shade tunnel for heat-sensitive plants in mid-summer, and as a cold frame with plastic sheeting in late fall and winter.
To support snow, use additional PVC crossbars or tie the arches together with wire for extra reinforcement. This prevents the plastic from sagging under the weight of snow.
Leave the ends of the plastic slightly open during the day to allow airflow and prevent overheating. You can also install simple flaps or doors for easy access.
Cool-weather crops like lettuce, kale, spinach, and radishes thrive under this structure in colder months. In the summer, use it for climbing plants like beans or cucumbers with the trellis setup.


