When I first set out to build a DIY ram pump, I didn't quite know what to expect. I had seen a few videos and read some articles, but there was nothing quite like getting my hands dirty and figuring it out step-by-step. In this guide, I'll share everything I learned from the materials needed, the building process, troubleshooting tips, and things I wish I had known from the start. Let's dive into the world of ram pumps, a simple yet powerful tool to move water uphill without electricity.
What Is a Ram Pump and Why Would You Want One?
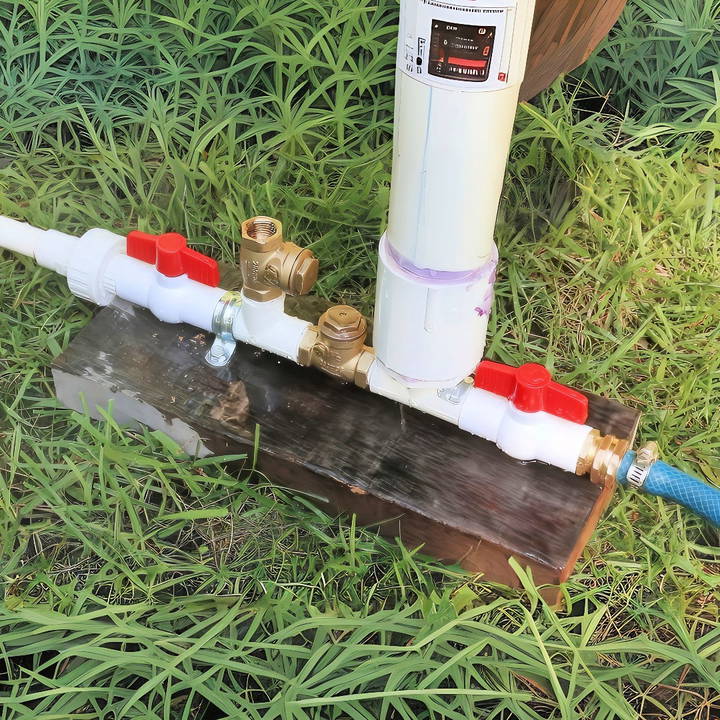
A ram pump is a type of water pump that harnesses the kinetic energy of flowing water to move it to a higher elevation. The beauty of this pump is that it doesn't require electricity or fuel, making it perfect for remote areas or off-grid applications. If you have access to a flowing stream or spring with a reasonable drop, a ram pump could be a game-changer for your garden, livestock, or even your home water supply.
I decided to build a ram pump to utilize a small creek on my property, which would allow me to move water uphill to a garden. This sustainable approach meant no more hauling water buckets or using electricity—just a clever use of physics.
Getting Started: Materials You'll Need
Before diving into the assembly, gathering all the required materials is essential. I discovered early on that preparation is key; nothing is more frustrating than having to pause halfway through because I forgot a crucial part.
The Essential Components
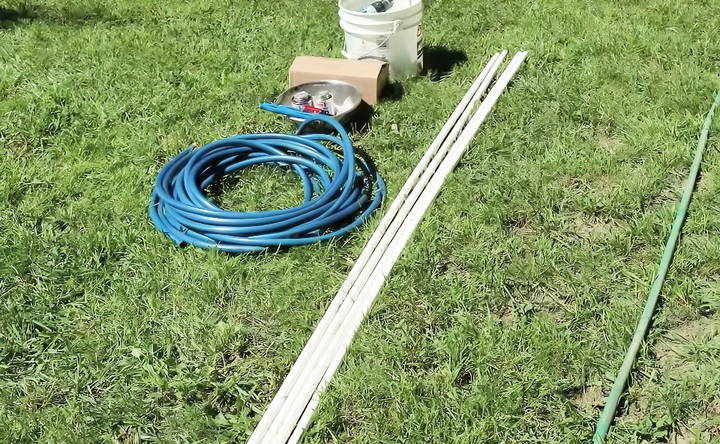
Here's a breakdown of the materials I used to build my ram pump, along with some personal tips on why each item is necessary:
- PVC Pipes and Fittings: These form the core structure of the pump. You'll need various lengths and diameters, depending on your setup. I recommend getting more than you think you'll need. Trust me; having extra on hand saves a lot of frustration.
- Swing Check Valves: These are the heart of the pump, controlling water flow and allowing the pump to function without any external power. Make sure they're durable—cheap valves can fail quickly.
- Pressure Tank or Air Chamber: This helps regulate water pressure and makes the pump more efficient. I used a small air bladder inside a PVC chamber, which worked surprisingly well.
- Teflon Tape and Plumber's Tape: These ensure a tight seal on all threaded connections to prevent leaks. Don't skimp on this—poor seals lead to significant performance issues.
- Drive Pipe and Delivery Pipe: The drive pipe brings water into the pump, and the delivery pipe sends it to the desired location. The length and diameter will depend on your setup. I used 30 feet of half-inch PVC for my drive pipe.
Step by Step Instructions
Learn how to build a DIY ram pump with step-by-step instructions. From preparing pipes to troubleshooting, master each phase and get your pump running efficiently.
1. Preparing the Pipes and Fittings
Start by prepping all the pipe nipples with Teflon tape. This step is crucial for ensuring leak-free connections. Here's a pro tip: when wrapping Teflon tape, hold the fitting so the threads face away from you and wrap the tape clockwise. This simple trick will make sure the tape doesn't unravel when you screw the fittings together.
I learned the hard way that failing to tape properly can cause minor leaks that snowball into major performance issues. Taking the time to do it right the first time saves you from having to disassemble and redo the work.
2. Assembling the Check Valves
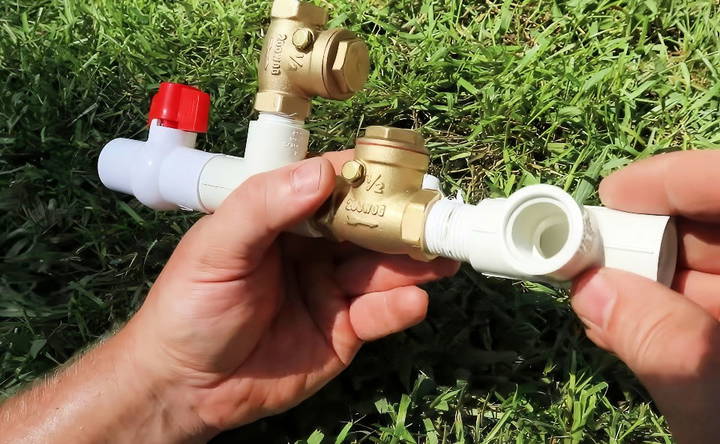
The check valves are the most critical components in the ram pump. These valves have a flapper inside that opens and closes with water flow, making the pressure needed to push water uphill.
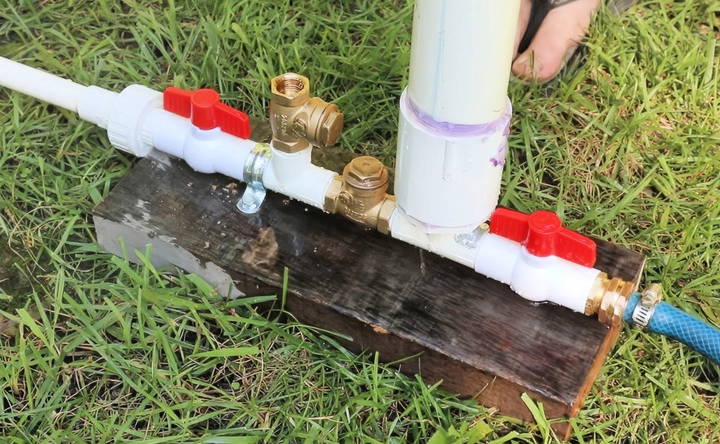
Attach the first swing check valve to the inlet pipe. Make sure the arrow on the valve (which indicates the direction of flow) points towards the delivery side. A simple mistake here can cause the whole system to fail. Tighten it by hand and then use a wrench for the last turn to ensure it's secure.
Repeat the process for the second check valve, but this time, ensure the arrow points away from the pump, allowing water to exit properly.
3. Building the Pressure Chamber
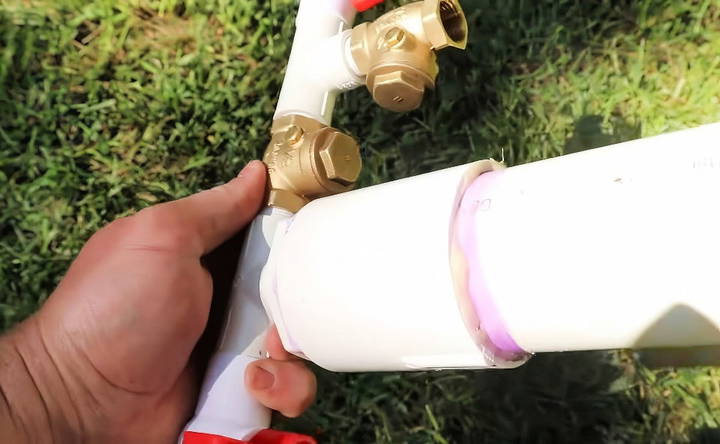
The pressure chamber or air tank is another critical component that helps stabilize the pressure within the pump, improving efficiency. I built mine using a PVC pipe with an air bladder inside.
First, I applied a PVC primer and cement to all the pieces that would be glued together. This ensures a strong, watertight bond. Then, I inserted the air bladder into the PVC pipe, keeping the valve stem accessible for inflation.
You don't need an air compressor for this step. I used a simple screwdriver to press down the tip of the Schrader valve, then inflated it manually. This method works surprisingly well, and you don't need to over-inflate it—just enough to give the chamber some bounce.
4. Connecting Everything Together
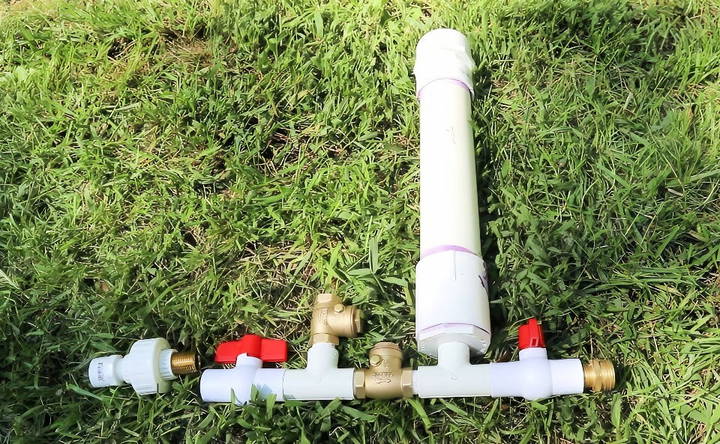
Now it's time to assemble all the pieces. Connect the pressure chamber to the main pump assembly by screwing it into place. Use a large set of channel locks to tighten it securely. Then, attach the outlet adapter (for a garden hose) to the outlet side of the pump.
This is also a good time to consider adding a union joint to the inlet side, as I did. A union joint makes it easy to disconnect the pump for maintenance or modifications without having to cut the pipe.
5. Setting Up the Supply Bucket and Drive Pipe
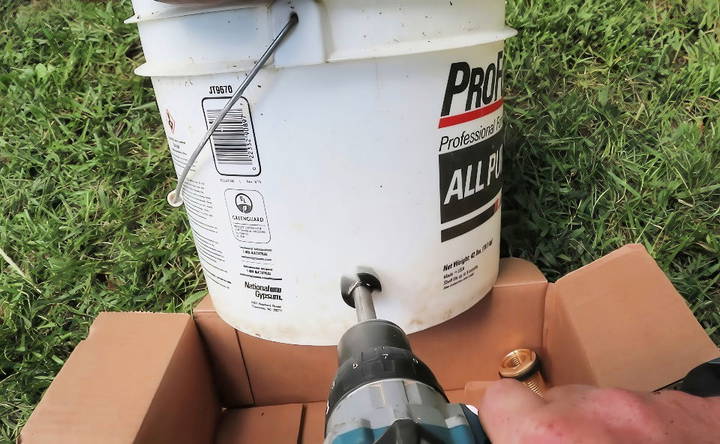
To supply the pump with water, you'll need a supply bucket with a bulkhead fitting installed. I drilled a hole near the bottom of the bucket and installed the fitting, ensuring it was watertight.
Next, connect the drive pipe to the supply bucket. The drive pipe should slope downhill towards the pump. In my setup, I used 30 feet of half-inch PVC drive pipe, ensuring a drop of about five feet over that distance to generate enough pressure.
6. Starting Up the Pump
The moment of truth! Start by filling the drive pipe with water and letting any trapped air escape. Once the air is out, open the valves on the pump, allowing water to flow. I found that gently opening and closing the valves helped clear out any remaining air pockets.
As water begins to flow through the pump, the check valves will start their rhythmic “clicking,” which is a good sign the pump is working. I was thrilled when I saw water flowing steadily from the delivery pipe—there's something incredibly satisfying about seeing a homemade machine come to life!
Troubleshooting Tips: What to Do If Things Go Wrong
Of course, not everything went perfectly the first time. I ran into a few hiccups along the way, and here's how I solved them:
- Problem: The pump wasn't delivering water as high as expected.
Solution: I discovered I needed to adjust the length and slope of the drive pipe. Increasing the elevation drop of the drive pipe significantly improved the pump's performance. - Problem: The pump kept losing prime and stopping.
Solution: This was due to air getting trapped in the system. I fixed it by adding a small stick to hold the valve open temporarily, allowing all the air to escape. - Problem: Leaks at the threaded connections.
Solution: I hadn't used enough Teflon tape on some connections. Adding more tape and tightening the fittings resolved the leaks.
Key Lessons Learned
Building a ram pump is a rewarding experience, but it does come with a learning curve. Here are a few lessons I learned that might help you:
- Plan Your Water Source and Elevation Carefully: The amount of water flow and elevation drop are crucial. Make sure your source can supply enough water to keep the pump running.
- Don't Rush the Assembly: Taking the time to properly seal every connection with Teflon tape and ensuring all valves are oriented correctly will save a lot of headaches later.
- Test and Adjust: Every setup is unique, so you may need to make adjustments. Be patient, and don't be afraid to experiment with different configurations.
Advanced Modifications and Upgrades
Discover advanced modifications and upgrades for peak performance. Learn about enhancements, innovative uses, customization, and essential safety upgrades.
1. Enhancements
Discover how to increase efficiency and improve durability with our expert tips and strategies. Boost performance and longevity now!
Increase Efficiency:
- Valve Adjustments: Fine-tune the waste valve and delivery valve to optimize water flow. This can significantly improve the pump's efficiency.
- Pipe Sizing: Use larger diameter pipes for the drive pipe and delivery pipe. This reduces friction and increases water flow.
Improve Durability:
- Material Upgrades: Replace plastic components with metal ones. Metal parts are more durable and can withstand higher pressures.
- Protective Coatings: Apply anti-corrosion coatings to metal parts. This helps in extending the lifespan of the pump.
2. Innovative Uses
Find innovative uses of multi-stage pumping and energy recovery systems, enhancing efficiency and sustainability in industrial applications.
Multi-Stage Pumping:
- Series Connection: Connect multiple ram pumps in series. This can increase the height to which water can be pumped.
- Parallel Connection: Use parallel connections to increase the volume of water pumped. This is useful for larger applications like irrigation.
Energy Recovery:
- Hydroelectric Integration: Integrate a small hydroelectric generator with the ram pump. This allows you to generate electricity from the flowing water.
- Solar-Powered Enhancements: Combine the ram pump with solar panels to power auxiliary components. This makes the system more sustainable.
3. Customization
Optimize your workflow with our adjustable pressure chamber and smart monitoring for precise customizations and efficient operations.
Adjustable Pressure Chamber:
- Variable Volume: Use an adjustable pressure chamber to fine-tune the pump's performance. This allows for better control over water delivery rates.
- Flexible Materials: Consider using flexible materials for the pressure chamber. This can help in absorbing shocks and reducing wear and tear.
Smart Monitoring:
- Sensors and IoT: Install sensors to monitor the pump's performance in real-time. Connect these sensors to an IoT platform for remote monitoring and control.
- Automated Alerts: Set up automated alerts for maintenance needs. This ensures timely intervention and reduces downtime.
4. Safety Upgrades
Ensure safety with top-notch pressure relief valves and secure installations. Protect your systems with our advanced safety upgrades today!
Pressure Relief Valves:
- Overpressure Protection: Install pressure relief valves to prevent overpressure situations. This is crucial for the safety of the system.
- Regular Testing: Regularly test these valves to ensure they are functioning correctly.
Secure Installations:
- Anchoring: Securely anchor the pump and pipes to prevent movement. This reduces the risk of damage due to vibrations or external forces.
- Protective Housing: Use protective housing to shield the pump from environmental factors. This includes protection from debris, animals, and weather conditions.
Enhance your DIY ram pump's performance, durability, and versatility with advanced upgrades. These modifications boost efficiency and broaden its water management applications.
FAQs About DIY Ram Pumps
Discover essential faqs about DIY ram pumps, covering installation, maintenance, and troubleshooting for efficient, cost-effective water pumping solutions.
A DIY ram pump is a simple, mechanical device that uses the energy of flowing water to pump a portion of that water to a higher elevation. It operates without electricity or fuel, relying solely on gravity and water flow. The pump works by using the momentum of a large amount of water falling a short distance to lift a smaller amount of water to a greater height. This is achieved through a cycle of pressure build-up and release within the pump.
Cost-effective: Uses readily available materials and requires no electricity or fuel.
Eco-friendly: Operates solely on water flow and gravity, making it a sustainable option.
Low maintenance: Simple design with few moving parts, reducing the need for frequent repairs.
Reliable: Can operate continuously as long as there is a consistent water source.
The amount of water a DIY ram pump can lift depends on several factors, including the height of the water source above the pump (known as the “head”), the length and diameter of the drive pipe, and the efficiency of the pump. Generally, a ram pump can lift water to a height that is 5 to 10 times the head. For example, if the head is 5 feet, the pump can lift water up to 25 to 50 feet.
A DIY ram pump works best in water sources with a consistent flow and a drop of at least 3-5 feet. It is ideal for streams, rivers, or springs. However, it may not be suitable for water sources with very low flow rates or stagnant water. The pump relies on the kinetic energy of flowing water, so a steady and sufficient flow is crucial for its operation.
Maintaining a DIY ram pump is relatively simple:
Regular inspections: Check for leaks, blockages, and wear on the valves and pipes.
Clean the intake: Ensure the water intake is free from debris and sediment.
Monitor performance: Keep an eye on the water output and pressure to detect any issues early.
Replace worn parts: Over time, some components like check valves may need replacement to maintain efficiency.
Conclusion
Building a DIY ram pump was one of the most satisfying DIY projects I've tackled. Not only does it provide a practical solution for moving water without electricity, but it also gives a great sense of accomplishment. With patience, planning, and a bit of trial and error, anyone can build a ram pump and start harnessing the power of flowing water.
Whether you're looking to water a garden, provide water for livestock, or experiment with sustainable technologies, I hope my journey and tips will help you along the way.


