Building a DIY kitchen range hood was an exciting project I took on last summer. I collected materials like wood, screws, and paint from my local hardware store. Measuring the space above my stove was the first step. Ensuring the dimensions were correct helped me avoid mistakes and save time later on. Watching online tutorials gave me a clear step-by-step guide to follow.
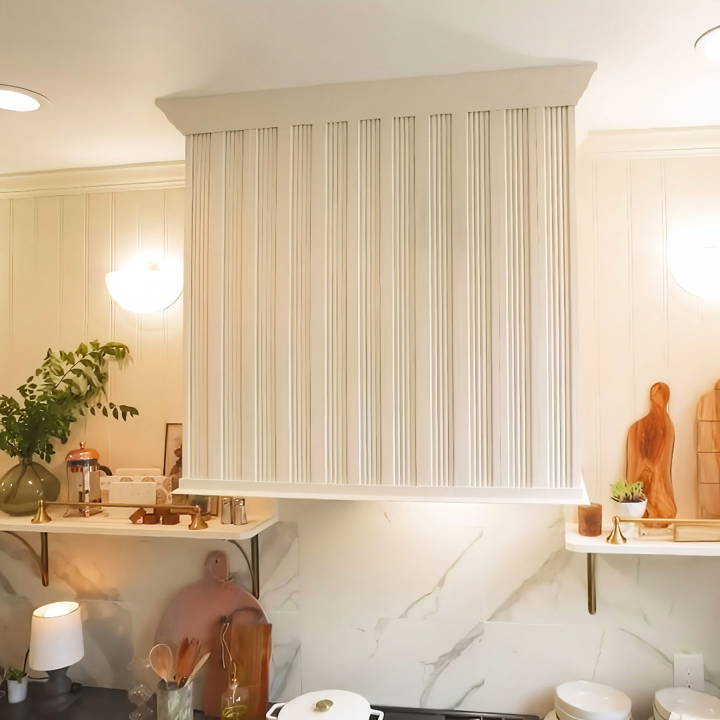
Installing the DIY vent hood took a few hours, but it was worth it. Drilling holes, screwing in parts, and finally seeing it come together was very satisfying. The most challenging part was attaching the vent, yet it worked out well.
Now, my kitchen looks more stylish, and the air stays fresh. I'm sharing this to help you succeed with your DIY range hood project.
Materials Needed:
- A standard range hood
- 1x4 lumber
- Screws (wood and metal)
- Plywood
- Decorative molding of your choice
- Crown molding
- Paint to match your cabinetry
- Tools: screwdriver, saw, paintbrush
Each material plays a vital role in ensuring that your custom range hood is not just visually appealing but also structurally sound and cohesive with your kitchen's overall design.
Step by Step Instructions
Learn how to make a DIY range hood in 5 simple steps! From installation to finishing touches, follow our step-by-step guide for a custom kitchen upgrade.
Step 1: Install the Standard Range Hood
The journey to a custom range hood cover begins with installing a standard range hood. The model and size depend on your kitchen's specific needs, but it's pivotal to select one with underside controls for easy access post-construction. My choice was based on the kitchen's layout and the advice of a knowledgeable Lowe's associate.
Step 2: Building the Frame
Using 1x4 lumber, I buildd a frame around the already installed hood. The process was straightforward - attach the lumber to the ceiling joists and work your way down, ensuring the frame is firmly secured to the hood using metal screws. This step forms the skeleton of your custom cover, so precision and sturdiness are key.
Step 3: Facing with Plywood
Once the frame was up, it was time to cover it with plywood. This not only adds stability but also serves as a canvas for the decorative finishes that follow. For my project, I opted for a simple rectangle shape, extending all the way to the ceiling to amplify the kitchen's elegance.
Step 4: Adding Decorative Molding
The decorative molding is where your range hood cover truly starts to reflect your personal style. Inspired by the original fluted molding in my kitchen, I chose a similar design from Lowe's vast selection. This step allows for immense creativity, from choices like wainscoting to unique textures such as stucco finishes or even faux stone.
Step 5: Finishing Touches
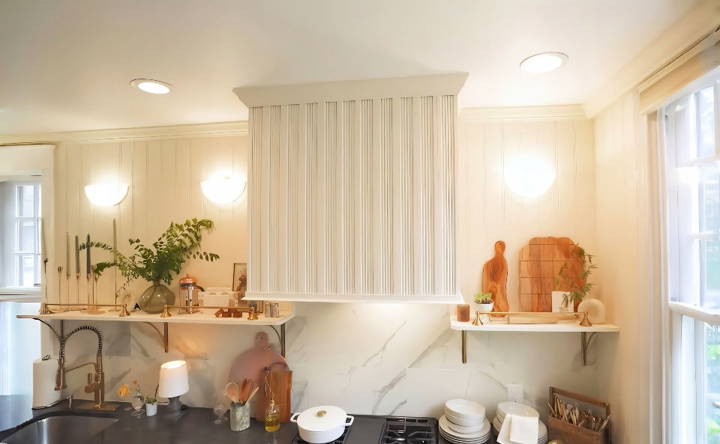
To integrate the range hood seamlessly into the kitchen, I added crown molding at the top and painted the entire structure to match the cabinetry. This final step tied the custom cover to the kitchen's aesthetic, making it appear as if it had always been part of the design.
Building a custom range hood cover added personality to my kitchen and showed that with creativity, materials, and a guide, budget-friendly transformations are possible.
The satisfaction of stepping back and seeing the finished product, knowing the thought, effort, and love that went into it, is unparalleled. It's a testament to the power of DIY and the beauty of customizing your space to fit your vision.
Customization Ideas for Your DIY Range Hood
When it comes to adding a personal touch to your kitchen, customizing your DIY range hood can be both a fun and functional project. Here are some ideas to inspire your creativity:
Choose Your Style
- Match Your Cabinetry: Build a seamless look by using the same materials and finish as your cabinets.
- Go Vintage: Incorporate antique elements or distressed finishes for a rustic charm.
- Modern Minimalism: Opt for sleek lines and a monochromatic color scheme for a contemporary feel.
Play with Colors and Finishes
- Bold Hues: Make your range hood a focal point with a vibrant color.
- Soft Pastels: For a subtle touch, use light pastel shades that complement your kitchen's palette.
- Metallic Accents: Add a touch of elegance with brass, copper, or stainless steel highlights.
Incorporate Art
- Mosaic Tiles: Build a unique pattern with glass or ceramic tiles.
- Hand-Painted Designs: Showcase your artistic skills with custom hand-painted motifs.
- Decals and Stickers: Use removable decals for an easy and temporary design change.
Functional Add-Ons
- Spice Racks: Install spice racks on the sides for easy access while cooking.
- Utensil Hooks: Add hooks to hang frequently used cooking tools.
- LED Lighting: Enhance visibility and ambiance with energy-efficient LED strips.
Material Matters
- Reclaimed Wood: Use reclaimed wood for an eco-friendly option with character.
- Stainless Steel: Choose stainless steel for a durable and professional look.
- Mixed Materials: Combine different materials like wood and metal for a unique contrast.
For a successful DIY project, ensure your customization looks good and maintains the range hood's functionality.
Troubleshooting Common Issues with DIY Range Hoods
When you've installed a DIY range hood, you might encounter a few hiccups along the way. Here's a straightforward guide to solving some common issues:
The Range Hood Isn't Turning On
- Check the Power: Ensure the range hood is plugged in and the outlet is functioning.
- Examine the Wiring: Look for any loose connections or damaged wires.
- Fuse and Circuit Breaker: Check if the fuse has blown or the circuit breaker has tripped.
Poor Ventilation or Suction
- Filter Inspection: Clean or replace the grease filter if it's clogged.
- Ductwork Check: Make sure the ducts are clear of obstructions and are properly sealed.
- Fan Blades: Clean the fan blades to ensure they're moving freely.
Unusual Noises
- Tighten Loose Parts: Screws and panels can loosen over time, causing rattling.
- Lubricate the Motor: If the motor is noisy, it may need lubrication.
- Check for Debris: Sometimes, debris can get caught in the fan and cause noise.
Lights Not Working
- Bulb Replacement: Change any burnt-out bulbs.
- Check Connections: Ensure the light socket and wiring are securely connected.
- Control Switch: Test the light switch for any faults.
Odors Not Clearing
- Proper Venting: Confirm that your range hood vents outside and not just into the attic or another room.
- Airflow: Increase the fan speed to improve airflow.
- Charcoal Filters: If you have a recirculating hood, replace the charcoal filters regularly.
Control Panel Issues
- Reset: Sometimes, simply resetting the range hood can resolve electronic glitches.
- Clean: Keep the control panel clean from grease and dirt to ensure proper function.
- Connections: Check that all control panel connections are secure.
Fix these common issues to keep your DIY range hood running well. If unsure or problems continue, consult a pro.
FAQs About DIY Range Hood
Explore faqs about DIY range hood and get answers to your questions on installation, materials, and maintenance for your custom kitchen project.
A DIY range hood is a custom-built ventilation unit for your kitchen that you can build yourself. It's a great project for those who want a personalized touch in their kitchen, often at a lower cost than purchasing a pre-made unit. Building your own range hood allows you to match the style and materials to your kitchen's decor and can be a rewarding DIY challenge.
Yes, with the right tools and a bit of know-how, you can install a range hood by yourself. It involves building a support frame, installing the vent hood insert, and then finishing with materials that match your kitchen’s design. Detailed guides and tutorials are available to help you through the process.
To ensure effectiveness, choose a high-quality range hood insert with sufficient power to handle the size of your kitchen. The hood should be installed at the correct height above your cooktop, usually 30 to 36 inches, to effectively capture and vent smoke and odors. Also, make sure your ductwork is properly sealed and vented to the outside.
When designing your range hood, consider the overall aesthetic of your kitchen. The hood should complement your space and not overpower it. Think about the size and shape that will fit best with your kitchen layout. Additionally, consider the type of ventilation—ducted or ductless—and the power you'll need based on your cooking habits.
The size of your DIY range hood should be based on the size of your cooktop. As a general rule, the hood should be at least as wide as the cooktop, but it's even better if it extends 3 inches beyond on each side. This ensures it captures all the smoke and steam produced while cooking. The depth should cover the back burners and at least half of the front burners. Remember to also consider the height of your ceiling and the height at which the hood will be mounted to ensure it will be effective and proportionate to your space.
Final Thoughts:
Starting a DIY range hood project can be fun and rewarding. It can also upgrade your kitchen in a unique way. Use this guide to get started and see your hard work pay off.


