If you are looking to grow healthy, productive raspberries, a sturdy trellis is essential to keeping your plants organized and accessible. Trellising helps ensure that your raspberry canes grow upright, making them easier to prune, harvest, and maintain. Additionally, a well-designed trellis can also improve air circulation, reduce disease risk, and help your garden look neat and tidy.
In this step-by-step guide, we'll help you build a DIY raspberry trellis inspired by a highly creative design. This trellis was originally built by Lisa, a community gardener with a unique setup tailored to her needs. We'll break down the process of remaking her design, step by step, using accessible materials and tools. By the end of this guide, you'll have all the knowledge you need to build your very own raspberry trellis.
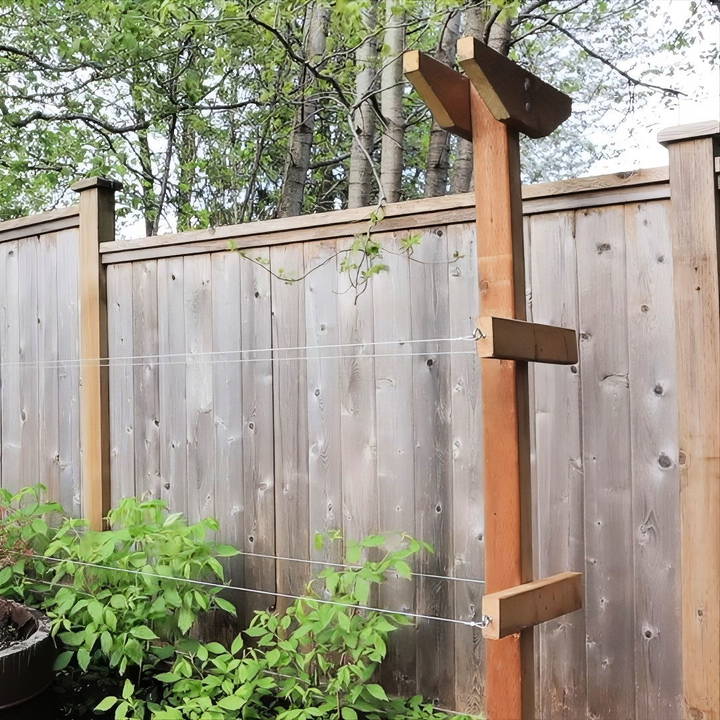
Why You Need a Raspberry Trellis
Before we dive into the build process, let's talk about why a raspberry trellis is such a useful addition to your garden. Raspberries, by nature, are tall, bramble-like plants that can quickly become unruly if left unsupported. Without a trellis, the canes may fall over, leading to tangling, difficulty in harvesting, and increased exposure to pests and diseases.
Key benefits of using a raspberry trellis:
- Improved Fruit Quality: By keeping canes upright, a trellis ensures better air circulation and sunlight exposure, which leads to healthier fruit.
- Ease of Pruning and Harvesting: A well-structured trellis keeps the canes neatly arranged, making it easy to prune, pick fruit, and remove dead or damaged growth.
- Space Efficiency: Trellises help you maximize space by training the plants to grow vertically, which is especially useful in smaller gardens.
Now, let's get into the step-by-step process of building a raspberry trellis.
Materials and Tools You'll Need
For this trellis design, you don't need expensive or hard-to-find materials. Here's what you'll need:
Materials:
- Wooden Posts (ideally 2”x4” or 4”x4”): These will serve as the main support structure for the trellis.
- Wire String: This will be used to support the canes.
- Closed Eye Hooks: For securing the wire to the wooden posts.
- Turnbuckles or Latches: To tighten or loosen the wires when needed.
- Concrete Mix (optional): If you want the posts to be extra secure in the ground.
- Crimping Sleeves: For securing the wire to the hooks and latches.
Tools:
- Power Drill with bits for wood and wire.
- Measuring Tape: To ensure your trellis is evenly spaced.
- Wire Cutters: For trimming excess wire.
- Crimping Tool: For fastening the wire.
- Level: To make sure everything is straight and level.
- Post Hole Digger or Shovel: For digging holes to secure the posts in the ground.
- Pliers: For tightening and securing wires.
Step by Step Instructions
Learn how to build a DIY raspberry trellis step by step with our guide. From planning to pruning, get tips for a thriving berry garden.
Step 1: Planning the Design and Gathering Materials
Before you start building, it's essential to plan where you want to place your raspberry trellis. Ideally, you want a location that gets plenty of sunlight and has good drainage. Make sure you have enough space for the number of raspberry canes you're growing.
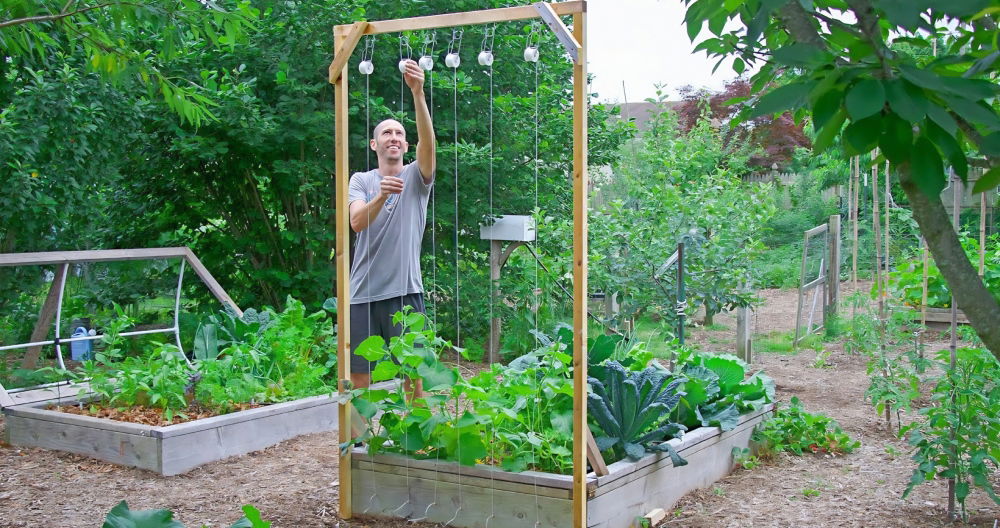
For this trellis, Lisa's design includes adjustable wire clasps to make pruning and harvesting easier. This innovative design allows the wires to be lowered and raised as needed.
Step 2: Measure and Cut the Wooden Posts
To begin, you'll need two main posts for the trellis structure. These posts should be tall enough to support the height of your raspberry canes (at least 6-7 feet). If you already have some leftover wood from previous projects, like in the original project, now's the time to put it to good use.
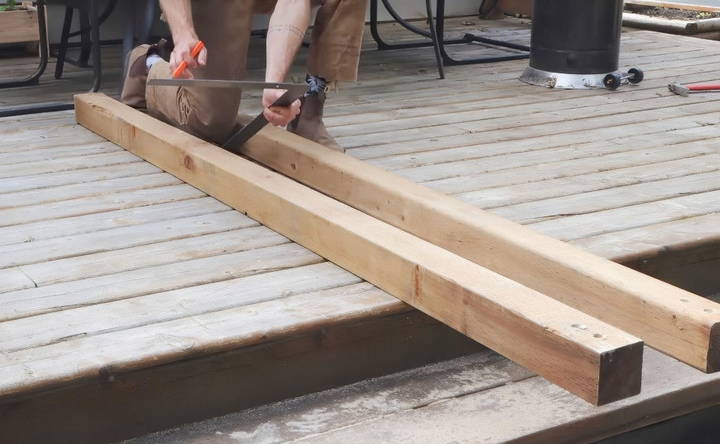
- Measure the height: Ensure the posts are around 7-8 feet in total length.
- Cut to size: If needed, trim any excess length from the wood to ensure symmetry.
Step 3: Preparing the Posts
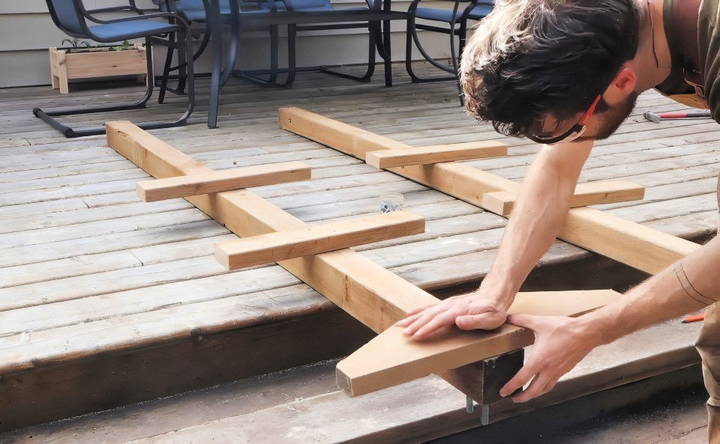
Once your posts are cut to size, you'll need to drill holes into them to attach the wire supports.
- Mark the spots for the wires: Use a measuring tape to mark two points on each post. The lower point should be 2 feet above the ground, and the upper point should be 4 feet above the ground.
- Drill the holes: Use a power drill to build holes at the marked points, where the eye hooks will be installed.
Step 4: Dig Holes and Set the Posts
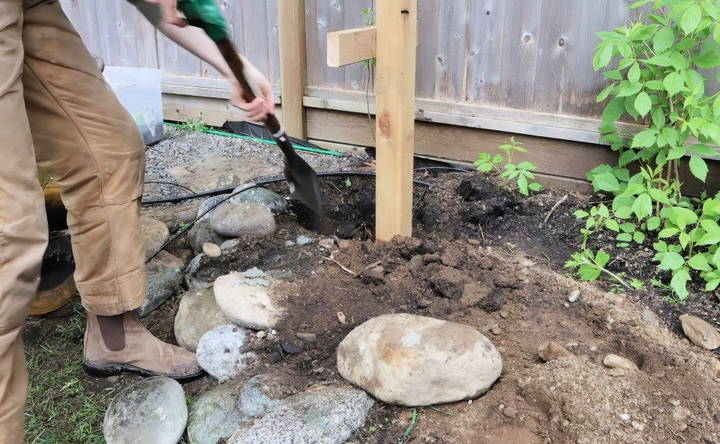
Next, you'll need to secure the posts in the ground. This step requires some muscle, especially if you encounter rocks or roots.
- Dig the holes: Use a post hole digger or shovel to dig two holes approximately 2 feet deep and 6-8 feet apart.
- Position the posts: Place the posts into the holes and use a level to ensure they are standing straight.
- Secure with concrete (optional): If you want the posts to be extra stable, you can pour a quick-setting concrete mix into the hole. Allow the concrete to set for at least 24 hours before proceeding.
Step 5: Installing the Wire Support System
Once your posts are securely in the ground, it's time to add the wire supports that will hold your raspberry canes upright.
- Insert eye hooks: Screw the closed eye hooks into the holes you drilled earlier.
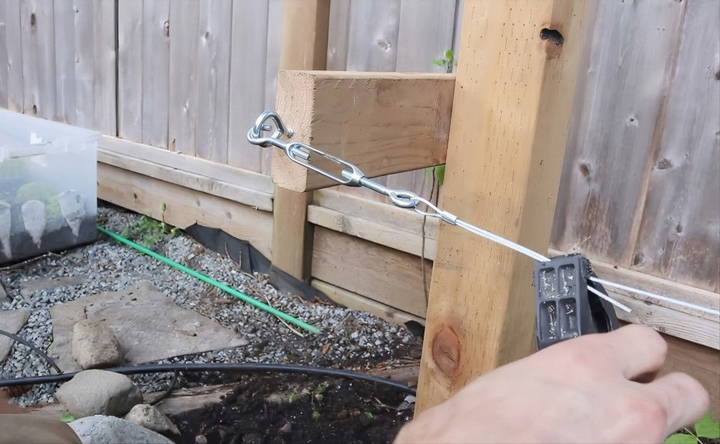
- Thread the wire: Take the wire string and thread it through the eye hooks on one post, then stretch it to the other post and thread it through the corresponding hooks.
- Tighten with turnbuckles: Attach the turnbuckles or latches to the ends of the wires to tighten the structure. This will allow you to adjust the tension in the wires, making it easy to loosen them for pruning and harvesting and tighten them again for support.
Step 6: Pruning and Training the Raspberries
Now that your trellis is built, it's time to start training your raspberry canes. This involves gently tying the canes to the wire supports as they grow.
- Prune in early spring: Trim any dead or weak canes before they start producing new growth.
- Tie the canes: Use soft ties or garden twine to loosely tie the canes to the wire. This keeps them upright and organized.
- Regular maintenance: As your raspberries grow throughout the season, continue tying them to the trellis, and prune out any overcrowded or crossing canes.
Tips and Tricks for Building and Using a Raspberry Trellis
- Reuse Materials: If you have leftover wood or materials from other projects, don't hesitate to use them for your trellis. Just make sure they are in good condition.
- Take your time with leveling: Use a level and string to ensure your trellis posts are straight and even. A crooked trellis can lead to uneven growth and reduced support.
- Concrete for Extra Stability: If you live in a windy area or have soft soil, consider securing your posts with concrete. It adds durability and prevents the posts from shifting over time.
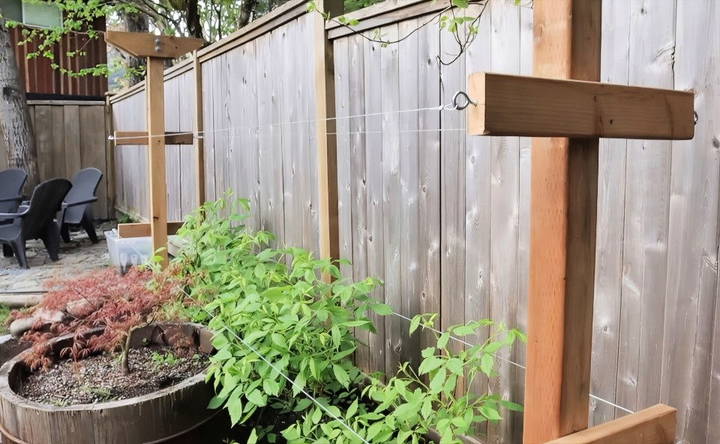
- Adjustable Wires: The adjustable wire design makes this trellis unique and highly functional. Being able to lower the wires for easy pruning or harvesting and then tighten them back up for support is a game-changer in garden management.
- Winter Protection: After your raspberries go dormant, consider adding a mulch layer around the base of the trellis posts. This protects the roots during the cold season and ensures a strong start next year.
Conclusion
Building a DIY raspberry trellis is a rewarding project that will not only improve the health and productivity of your raspberry plants but also make your gardening experience more enjoyable. With this step-by-step guide, you can build a trellis system that is functional, durable, and tailored to your garden's needs.
Lisa's design—complete with adjustable wire supports—offers a modern twist on traditional trellis structures, making it easier to manage your raspberry crop. Whether you're a seasoned gardener or just starting out, this trellis project is a perfect way to improve your raspberry-growing experience. So gather your materials, grab your tools, and get ready to build the best raspberry trellis for your garden!
FAQs About DIY Raspberry Trellis
Explore FAQs about DIY raspberry trellis for tips on building and maintaining a sturdy structure to support your raspberry plants efficiently.
To tension the wire, use turnbuckles. Start with them as loose as possible, pull the wire taut, and then tighten the turnbuckles. This method allows for adjustments over time as the wire naturally loosens.
Yes, you can use various types of wire. Thin wire from home improvement stores works well and is affordable. Some recommend coated wire for added durability, but it's not required for basic use.
Over time, posts may bend inward from the tension. To avoid this, consider adding cross-braces or anchoring the posts with a deadman anchor as farms often do.
Any sturdy wood, like 2x4s or 4x4s, will work. Cedar is a good choice for outdoor use due to its resistance to rot.
Instead of encasing the posts in concrete, use crushed granite or another material that allows water to drain, which will help prevent rot.
Yes, you can plant loganberries and raspberries together. Just ensure each plant has enough space to grow without overcrowding.
Place a screwdriver through the eye of the hook to build leverage, making it easier to screw into the wood.
Yes, you can use traditional wire tensioning methods, like twisting the wire, which is cheaper and works well for small gardens.


