One winter evening, I found several old records in my attic and realized I had no proper space for my record player. This sparked an idea to build a DIY record player stand. I spent hours researching and planning, making sure it would be both functional and stylish.
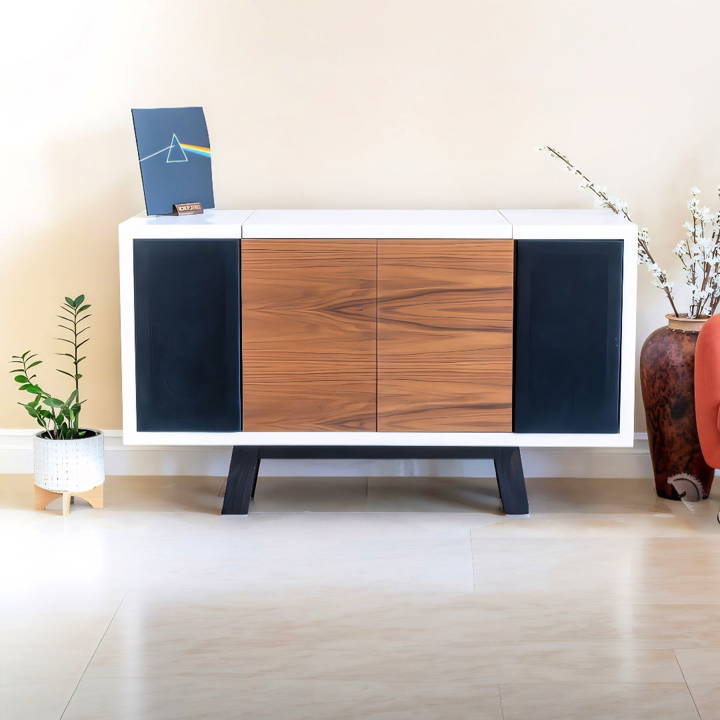
Gathering the right materials was the next step. Wood, screws, and a saw lay before me, ready for action. With patience and attention to detail, I carefully constructed my DIY record player cabinet. Now, my records have a home, and my listening experience is enhanced tenfold.
Feel empowered with this project; these tips will guide you. I'm helping with this: here's how to build a DIY record player stand.
Materials You'll Need
Before we jump into the steps, let's talk about the materials required for this project and why they are important:
- Walnut Boards (1x2): Used for framing the speaker compartments. Walnut is not only strong but also has a beautiful grain.
- Plywood (Walnut and Birch): Provides structural integrity and aesthetic appeal for the interior and exterior layers of the cabinet.
- Rare Earth Magnets: These magnets are strong and will secure your speaker covers effectively.
- Wood Glue and Clamps: Essential for strong, durable joints in your woodwork.
- Pocket Hole Screws: Enable easy and strong joinery in the various parts of the cabinet.
- Lid Support Hinges: Vital for ensuring the top door stays open while you access the storage.
- Paint and Primer: Used for the exterior finish to give your cabinet a professional look.
- Edge Banding: To cover exposed plywood edges for a more polished finish.
- Speaker Fabric: Protects speakers and adds an elegant look.
Step by Step Instructions
Learn how to build a DIY record player stand with our step-by-step instructions. This detailed guide covers everything from frames to final assembly and painting.
Step 1: Building the Frames for Speaker Compartments
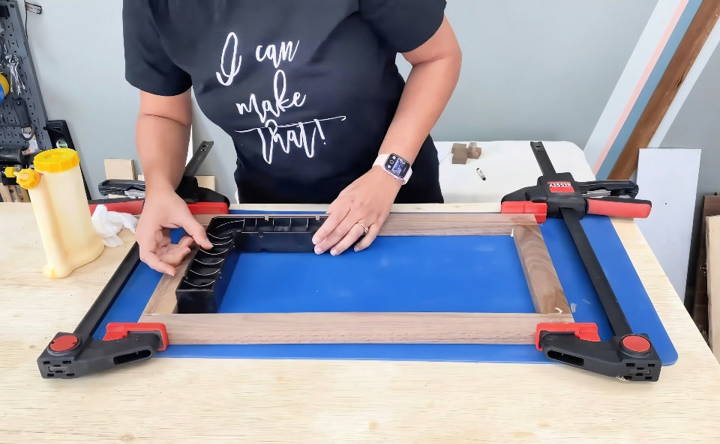
Start by building two frames for the speaker compartments. These frames are the core structure around which the rest of the cabinet will take shape.
- Glue together 1x2 walnut boards.
- Clamp them and leave them to dry overnight.
The frame needs to be sturdy because it will support the weight of the speakers and the rest of the cabinet.
Step 2: Cutting the Plywood
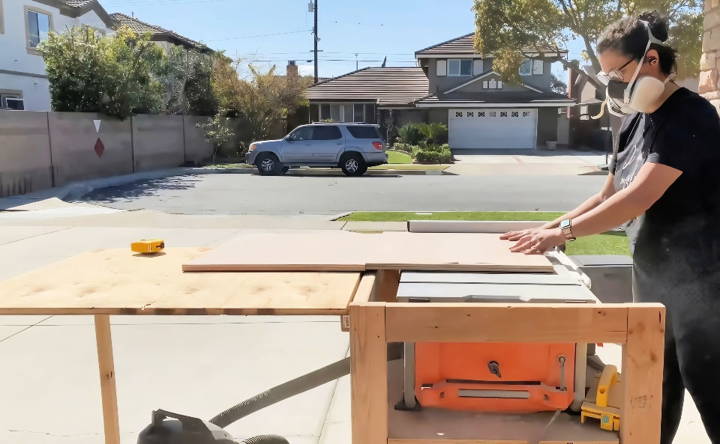
Cut your plywood to the required measurements using a table saw and circular saw. The cabinet has two layers: the interior layer is made from walnut plywood, and the exterior layer is from birch plywood.
- Measure and cut your plywood as per your design plans.
- Ensure the cuts are precise to avoid alignment issues later.
I have detailed measurements and a cut list available on my website, linked below.
Step 3: Drilling Magnet Holes in Frames
Using a Forstner bit, drill holes into the frames to fit the rare earth magnets. These holes should be deep enough to leave only about a quarter inch of material, ensuring the magnets will work through the wood.
- Glue the magnets in place.
- Make sure to orient all the magnets correctly—this step is crucial for the function of the magnetic covers.
Step 4: Assembling the Cabinet
With pocket holes and screws, start assembling the interior parts of your cabinet.
- Attach the speaker base to the frame using pocket hole screws.
- Add the other two sides and attach them to complete the speaker compartment.
- Make sure the magnets are positioned on the inside of the cabinet.
Use clamps to keep everything aligned. Constantly check for squares to maintain a perfect alignment.
Step 5: Exterior Assembly
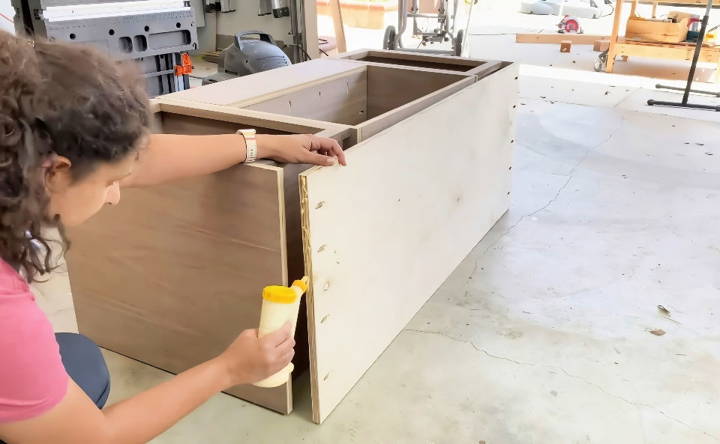
- Build pocket holes on both ends of the plywood piece that will serve as the base of the cabinet.
- Attach the base using wood glue, pocket hole screws, and finish nails.
- Add the top and sides. Use a saw blade set at 45 degrees for bevel cuts, if required.
Apply edge banding to any exposed edges for a more refined look.
Step 6: Adding the Top Door
For the top door, ensure it sits flush when closed and supported when open.
- Use lid support hinges and a jig to make the required holes.
- Mortise the hinges into the lid so it closes flush.
- Attach the lid temporarily before assembling the sides to align everything perfectly.
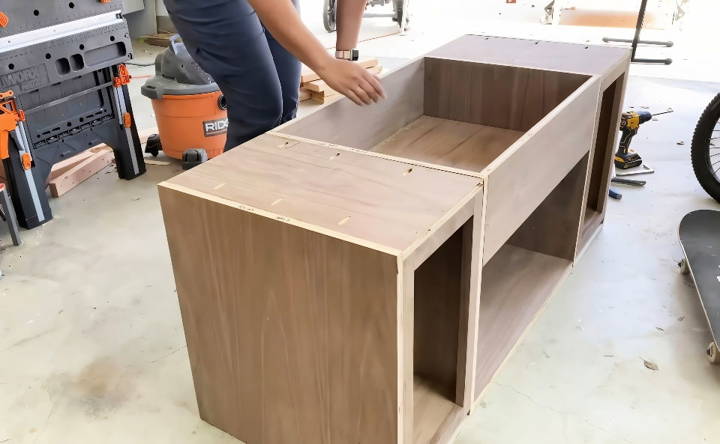
Step 7: Final Assembly
Once you're happy with the lid alignment, attach the sides with wood glue and finish nails. The beveled edges will make the corners look clean.
- Bevel the edges of 1x2 pine boards for the trim.
- Attach the trim with wood glue and finish the nails.
Step 8: Painting and Finishing
- Carefully tape off the walnut plywood to prevent paint from getting on it.
- Apply a coat of primer using a paint sprayer.
- Sand lightly and then apply two coats of paint.
- Peel off the tape once the paint is dry.
Clean any glue residue from the walnut plywood and use finishing oil to highlight the beautiful grain.
Step 9: Adding the Legs and Doors
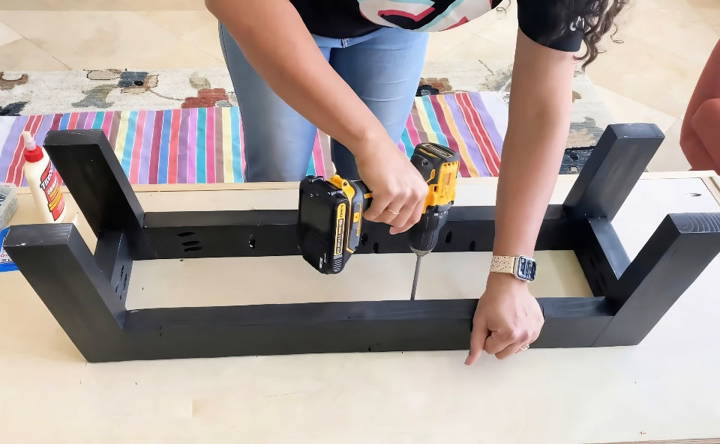
- Cut 2x4 boards for the legs, remove the rounded edges, and make pocket holes.
- Attach the legs to the base using wood glue and pocket hole screws.
- Cut plywood for the doors, apply edge banding, and install the slow-close hinges.
- Attach magnetic push latches for easy door operation.
Step 10: Speaker Front Covers
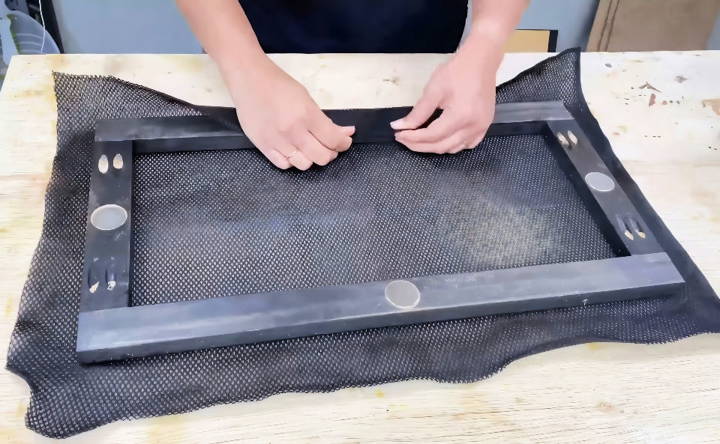
- Cut 1x2 boards for the speaker frames.
- Stain the frames black to match the speaker fabric.
- Attach the magnets and stretch the acoustically transparent fabric over the frames.
Customization Ideas for Your DIY Record Player Stand
When making a DIY record player stand, personalization is key. It's not just about building a piece of furniture; it's about crafting a home for your music that reflects your style and needs. Here are some customization ideas to make your record player stand uniquely yours:
Choose Your Theme
Start by deciding on a theme that resonates with you. Whether it's vintage, modern, industrial, or rustic, your theme will guide the design elements and materials you choose.
Selecting Materials
Pick materials that align with your theme. For a vintage look, consider reclaimed wood or a retro laminate. If modern is more your style, sleek metals or high-gloss finishes might be the way to go.
Color It Your Way
Color is a powerful tool for customization. Stain the wood to bring out its natural beauty, or paint it to match your room's decor. You can even add patterns or artwork for a more personal touch.
Functional Add-Ons
Think about what functionalities you want your stand to have. Maybe you need extra storage for your vinyl collection, or perhaps a built-in amplifier space is essential for you. Design your stand to fit your listening habits.
Fine Details
It's the little things that make a big difference. Add decorative knobs or handles, use creative leg designs, or incorporate LED lighting to set the mood. These details can transform your stand from a piece of furniture to a conversation starter.
Eco-Friendly Options
Consider using sustainable materials or upcycling old furniture parts. Not only is it good for the environment, but it also adds a story to your stand.
Tech Integration
Incorporate modern conveniences like cable management systems, USB ports, or Bluetooth speakers to enhance your music experience.
Make a custom record player stand that reflects your personality and creativity. Aim for functionality and joy in your music experience.
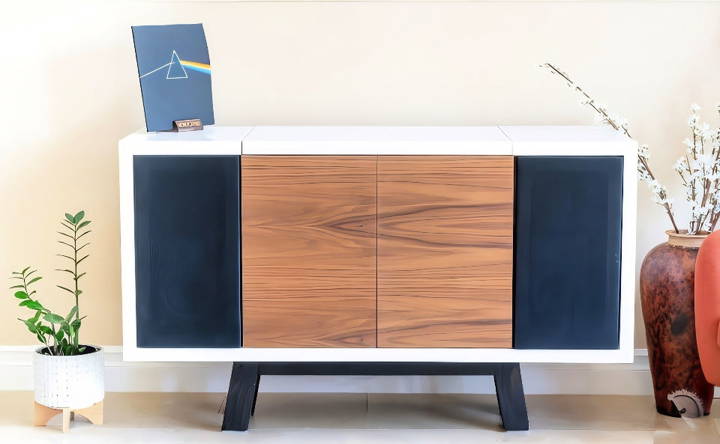
Tech Integration in Your DIY Record Player Stand
Incorporating technology into your DIY record player stand can significantly enhance your listening experience. Here's how you can seamlessly blend tech with your personal style:
Built-In Speakers
Consider installing built-in speakers within the stand. This not only saves space but also builds a clean, integrated look. Choose speakers that match the size and acoustics of your room for the best sound quality.
Wireless Charging
Add a wireless charging pad to the top of your stand. This allows you to charge your phone or other devices conveniently while you enjoy your music.
Bluetooth Connectivity
Integrate Bluetooth connectivity to stream music wirelessly from your devices. Ensure the Bluetooth receiver is compatible with a wide range of devices for versatility.
Cable Management
Design a cable management system to keep wires organized and out of sight. Use hidden channels or compartments within the stand to route cables neatly.
USB Ports
Incorporate USB ports into the design. They're handy for charging devices or connecting USB drives with music files directly to your audio system.
Smart Home Integration
If you use smart home devices, include a space or docking station for your smart home assistant. This way, you can control your music with voice commands.
Vinyl Record Digitization
For those who want to digitize their vinyl records, add a USB turntable that connects to your computer. This allows you to convert your records into digital files easily.
Ambient Lighting
Install LED strips or ambient lighting to build the right mood. You can even use smart lights that change color and intensity based on the music.
Combine these technologies to make your DIY record player stand stylish, convenient, and high-quality. Keep the design user-friendly and ensure tech features enhance the aesthetics.
Troubleshooting Tips for Your DIY Record Player Stand
Building a DIY record player stand can be a rewarding project, but it's not uncommon to encounter a few hiccups along the way. Here are some troubleshooting tips to help you overcome common challenges:
Aligning Components
If parts of your stand aren't aligning properly, double-check your measurements and cuts. Precision is key, so take your time and measure twice before cutting.
Sturdy Construction
Ensure your stand is stable and sturdy. If it wobbles, check that all joints are tight and reinforce any weak spots with additional brackets or screws.
Smooth Finish
For a smooth finish, sand the wood thoroughly before applying any paint or stain. Start with a coarse grit and work your way up to a fine grit for the best results.
Avoiding Warping
To prevent warping, choose quality materials and store them in a dry place before use. If you're using wood, allow it to acclimate to your home's humidity for a few days before starting your project.
Dealing with Skips
If your record player skips when placed on the stand, ensure the surface is level. Adjust the feet of the stand or add shims if necessary.
Handling Buzzing or Humming
Buzzing or humming can be caused by electrical interference. Keep electronics and wiring away from your turntable's signal path and ensure proper grounding.
Managing Vinyl Storage
If your records don't fit in the storage space, check the dimensions and adjust the design as needed. Remember to account for the sleeves when measuring.
Accessorizing
When adding accessories like knobs or handles, make sure they don't interfere with the functionality of the stand. Place them where they are easily accessible but out of the way.
Follow these tips to build a functional, beautiful record player stand. If problems arise, step back, assess, and address them methodically.
FAQs About DIY Record Player Stand
Discover all you need to know about DIY record player stand. Get answers to frequently asked questions and start your DIY project today!
Absolutely! One of the benefits of building your own record player stand is the ability to customize it to your taste and needs. You can design it to fit the size of your vinyl collection and the dimensions of your record player. Feel free to add shelves, compartments, or any additional features you’d like.
To ensure stability, apply wood glue to the edges during assembly and use wood clamps to hold the pieces together while the glue dries. Afterward, reinforce the structure by screwing the pieces together strategically so it’s sturdy without compromising on aesthetics.
There are numerous design ideas you can explore. You can opt for a simple and chic stand on a budget, a classic wooden design, or a geometric veneer stand. Each design offers a unique outcome and can be tailored to fit various needs and preferences.
After assembling your stand, smooth out the surface with sandpaper, starting with coarse grit and moving to finer grits for a polished finish. Then, apply your chosen wood stain or paint evenly, following the manufacturer’s instructions. Finally, apply a coat of varnish or wood sealant for added durability and protection.
When designing your DIY record player stand, consider adding dedicated shelves or compartments for your vinyl records. You can adjust the height and depth of the shelves to accommodate different record sizes. For a more creative approach, you can build sliding drawers or cubbies that not only store but also display your collection. Utilize vertical space efficiently if you have a large collection, and ensure that the weight is evenly distributed to maintain the stand's stability.
Conclusion
Building your own DIY record player stand isn't just fulfilling; it adds character to your space. Get started with confidence and build something truly your own.


