Making your own DIY reed diffuser is a great way to add a personal touch to your home. You don’t need fancy tools or expensive ingredients. By following a few simple steps, you can make a reed diffuser that fills your space with a pleasant aroma. This guide will show you how to choose the right materials and mix your favorite essential oils for a custom fragrance.
Learning how to make a reed diffuser is both fun and rewarding. This straightforward process involves selecting a container, gathering reeds, and mixing oils. The key is to get the ratios right to ensure your diffuser works effectively. Read on to discover more tips and tricks that will make your reed diffuser a success.
Understanding Reed Diffusers
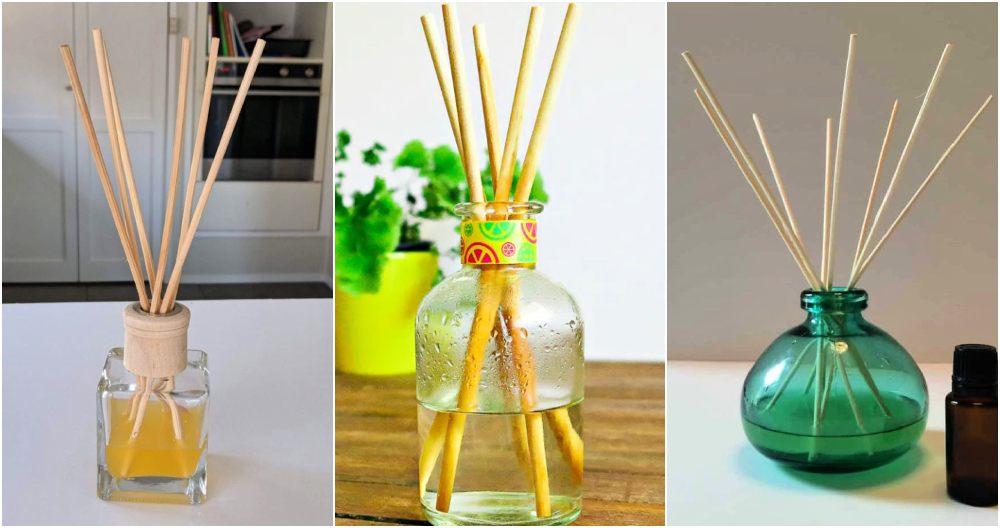
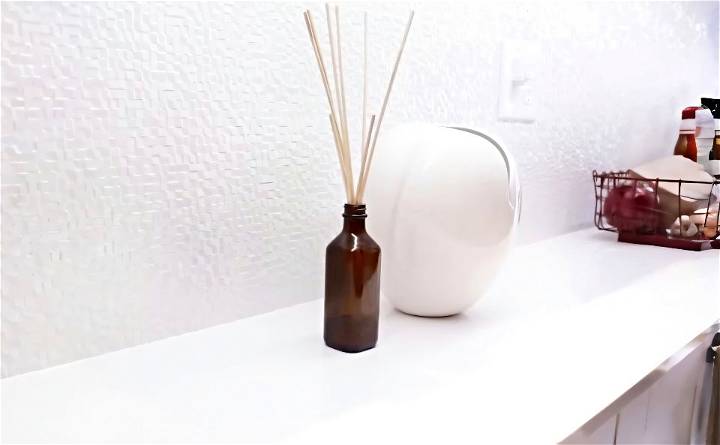
Reed diffusers are a popular way to add a pleasant aroma to your space without the need for electricity or flame. They consist of a container filled with fragrant oil and several reed sticks that absorb and disperse the scent into the air.
How Do They Work?
The diffuser's reeds are porous, allowing the scented oil to travel up the stick and evaporate into the air. This process is called capillary action. As the oil evaporates, it carries the fragrance with it, gently perfuming the room.
Benefits Over Other Fragrance Methods
- Safety: Unlike candles or incense, reed diffusers don’t require an open flame, making them a safer option, especially in homes with children or pets.
- Consistency: Reed diffusers provide a consistent scent release, ensuring your space remains fragranced all day without the need for monitoring.
- Longevity: Depending on the amount of oil in the container, reed diffusers can last several weeks or even months, offering a long-lasting fragrance solution.
- Aesthetic Appeal: With a variety of designs and scents available, reed diffusers can also serve as a decorative element that complements your home decor.
Choosing the Right Diffuser for Your Needs
When selecting a reed diffuser, consider the size of the room and the intensity of fragrance you desire. Larger rooms may require more reeds or a stronger scent concentration to achieve the desired effect.
Find a scent you love and a design that suits your style. With the right setup, your home can be fragranced beautifully, feeling welcoming and relaxing. Keep it simple, and let reed diffusers enhance your space.
The Essentials for Your Homemade Reed Diffuser
Before diving into the mixing and matching of scents, it's essential to gather all the materials you'll need. Here's the rundown:
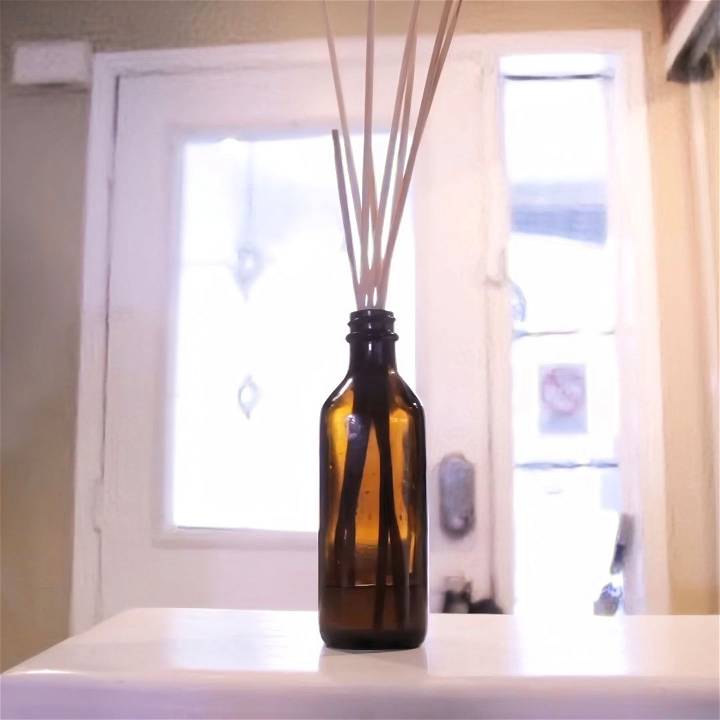
- Dark Glass Bottle - A dark glass bottle is your best choice because it protects the essential oils from light degradation, extending the life of your diffuser. I repurposed a previously used vanilla extract bottle, which not only was the perfect size but also supported my recycling ethos. If you don't have a suitable bottle at hand, fear not, as thrift stores and online retailers offer a plethora of options.
- Rattan Reeds - The unique structure of rattan reeds ensures the effective wicking of your scent mixture from bottle to air. While bamboo skewers might seem like a close substitute, they lack the necessary channels for oil travel. Craft stores or online shops will have what you need.
- Carrier Oil - This oil serves as the base for your fragrance to travel up the reeds. Options like sweet almond oil, safflower oil, or mineral oil strike the perfect balance between too thick and too thin. They ensure the longevity and effectiveness of your diffuser.
- Carrying Agent - High-proof alcohol, such as cheap vodka, acts as a thinning agent and aids in the evaporation process, enhancing scent distribution. The higher the alcohol content, the better (90% or above).
- Essential Oils - The heart of your diffuser, essential oils allow you to customize the scent. From lavender for relaxation to citrus for an energizing kick, the combinations are endless. Opt for high-quality oils for the best scent experience.
Step by Step Instructions
Create your own perfume with our step-by-step guide. Start with the bottle, mix the base, add the scent, then the carrying agent, and assemble.
Prepare Your Bottle
Ensure your bottle is clean and dry. If repurposing, remove any labels and residue for a clean aesthetic.
Mix Your Base
Fill your bottle halfway with your chosen carrier oil. This quantity offers a solid foundation for the diffuser without being wasteful.
Scent It Up
For a balanced aroma, add approximately 30 drops of essential oils to the carrier oil. You can mix and match scents based on your preference; for example, combine ten drops each of three different oils for complexity or stick with one for simplicity.
Add the Carrying Agent
Introduce a teaspoon of your high-proof alcohol to the mixture. This will help thin the oil slightly, facilitating its travel up the reeds.
Assemble
Place your rattan reeds into the bottle. Starting with about eight reeds is a good benchmark, though you can adjust based on the bottle size and desired scent strength.
Key Tips for Success
- Trial and Error - Experiment with different oil combinations until you find the scent profile that fits you. The beauty of DIY is the customization.
- Maintenance - Swap and flip the reeds weekly to ensure continuous scent distribution. If you notice the oil mixture separating, give your bottle a gentle swirl to mix.
- Safety First - If you have pets or are expecting, research the safety of essential oils in your living environment.
Customizing Scents
Creating your own scent for a reed diffuser is not only fun but also allows you to tailor the fragrance to your mood or the ambiance you want to create in your home. Here’s how you can customize scents in a straightforward and enjoyable way.
Start with a Base Note
Your base note is the foundation of your scent. It’s the fragrance that lingers the longest and provides depth. Common base notes include vanilla, cedarwood, and sandalwood. Choose one that appeals to you and will complement the other scents you plan to add.
Add Your Middle Note
The middle note, or the heart of your fragrance, gives body to the blend. Floral scents like lavender, rose, or jasmine work well as middle notes. They should harmonize with your base note and start to introduce the overall character of your custom scent.
Finish with a Top Note
Top notes are the scents you notice first, and they tend to evaporate quickly. Citrusy scents like lemon, bergamot, or peppermint are great top notes. They provide an immediate impression and can influence the energy of the room.
Mixing Your Oils
When you have your notes selected, it’s time to mix them. Start with the base note, then add the middle, and finish with the top. A general guideline is to mix them in a ratio of 2:1:1, but feel free to experiment. Add the oils to a carrier oil like almond or jojoba to dilute them and help them travel up the reeds more effectively.
Test and Adjust
After mixing, let your blend sit for a few hours to meld the scents together. Then, dip a reed in and test the fragrance. Adjust the ratios if needed until you’re happy with the result.
Enjoy Your Personalized Scent
Place the reeds into your diffuser filled with your custom blend and enjoy the unique atmosphere it brings to your space. Remember, there’s no right or wrong when it comes to scents—it’s all about what you enjoy!
By following these simple steps, you can create a scent that’s uniquely yours and perfect for your home. Keep it simple, have fun, and let your nose be your guide!
Troubleshooting Common Issues
A few common issues might arise when it comes to reed diffusers. Here’s how to identify and solve them, ensuring your diffuser works effectively and fills your space with delightful scents.
Weak Scent Throw
If the fragrance from your diffuser isn’t as strong as expected, consider the following:
- Increase the Number of Reeds: More reeds mean more fragrance, as each reed adds to the scent throw.
- Flip the Reeds: Occasionally, flipping the reeds can help to refresh the fragrance release.
- Check the Oil Concentration: Ensure your oil isn’t diluted too much. A higher concentration of essential oil to carrier oil can strengthen the scent.
Reeds Not Absorbing Oil
Sometimes, reeds may not absorb the oil properly. To fix this:
- Replace the Reeds: Over time, reeds can become clogged with dust or lose their effectiveness. Replacing them can help.
- Use High-Quality Reeds: Invest in good-quality reeds that are designed for diffusing. They are more effective at wicking the fragrance oil.
Oil Evaporating Too Quickly
If your diffuser oil is evaporating faster than expected:
- Avoid Direct Sunlight: Place your diffuser away from windows or areas where it gets direct sunlight, which can speed up evaporation.
- Check the Room Temperature: High temperatures can cause the oil to evaporate quicker. Keep your diffuser in a cooler spot if possible.
The scent is Too Strong
In case the aroma is overwhelming:
- Reduce the Number of Reeds: Fewer reeds will decrease the intensity of the fragrance.
- Move to a Larger Room: A more spacious area can help to dissipate the scent and make it less concentrated.
Oil Leakage
To prevent oil from spilling:
- Use a Stable Diffuser: Ensure your diffuser is on a stable surface and in a low-traffic area where it won’t be knocked over.
- Check for Cracks: Regularly inspect your diffuser for any signs of damage that could lead to leaks.
Fixing these issues improves your diffuser's performance, giving your home a steady, pleasant fragrance. Regular maintenance and attention are key. Keep it simple, and your senses will thank you.
Maintenance Tips
Keeping your reed diffuser in top condition is key to ensuring it continues to provide a delightful scent throughout your home. Here are some straightforward maintenance tips to help you get the most out of your diffuser.
Regular Reed Flipping
Flip the reeds every few days to help the oil travel up the reeds and strengthen the scent in your room. This simple action can significantly enhance the fragrance’s reach.
Oil Refills
When the oil level gets low, it’s time for a refill. Don’t wait until it’s completely empty, as this can affect the reeds’ ability to absorb and diffuse the scent effectively.
Clean the Vessel
Before refilling the oil, clean the vessel with soap and water to remove any residue or buildup that could affect the new oil’s purity. Ensure the container is completely dry before adding new oil.
Reed Replacement
Over time, reeds can become saturated and lose their efficiency. Replace them every couple of months or whenever you notice the scent is not diffusing as well as it used to.
Optimal Placement
Place your diffuser in an area with good air circulation but away from direct sunlight and heat sources. This helps the fragrance to disperse evenly and prevents the oil from evaporating too quickly.
Avoid Spillage
Always handle the diffuser with care to prevent oil spills, which can damage surfaces. If you do spill any oil, clean it up immediately with a damp cloth.
Follow these tips to keep your reed diffuser fresh and efficient. Regular maintenance ensures lasting fragrance for your home. Keep it simple, and enjoy the aromatic benefits.
FAQs About DIY Reed Diffuser
Get answers to common questions about DIY reed diffusers, including making, maintaining, and choosing the right oils for your home.
A DIY reed diffuser is a simple, flame-free air freshener you can make at home. It consists of a container filled with scented oil and reeds that absorb and disperse the fragrance into the air. The oil travels up the reeds and the scent is gently released, providing a continuous aroma.
Creating your own reed diffuser is cost-effective and allows for customization of scents to your preference. Unlike candles or wax melts, reed diffusers don’t require supervision and offer a consistent fragrance release without the need for heat or electricity.
Absolutely! You can repurpose glass containers from used-up store-bought diffusers or find unique vessels at thrift stores. Just ensure they are clean before use. Remember, the container should have a wide base for stability and a narrow neck to slow down the evaporation of the oils.
It’s recommended to replace the reeds every time you change the oil or every 3-4 months. Over time, the reeds can become clogged with dust and the oil’s fragrance compounds, which can reduce their effectiveness.
For the best results, use a light, neutral carrier oil like fractionated coconut oil, sweet almond oil, or safflower oil. These oils effectively carry the essential oils and have little to no scent of their own, allowing the fragrance oils to shine.
Conclusion:
In conclusion, making your own DIY reed diffuser is a fun and rewarding project. This step-by-step guide for beginners makes it easy to customize your home's scent with natural ingredients. By following these simple instructions on how to make a reed diffuser, you'll add a personal touch and freshness to any room.


