Taking on a DIY refinishing hardwood floors project can seem daunting, but it is incredibly rewarding. Last weekend, I decided to refinish my hardwood floors to breathe new life into my living room. I started by clearing the room and carefully sanding the old finish off the floors.
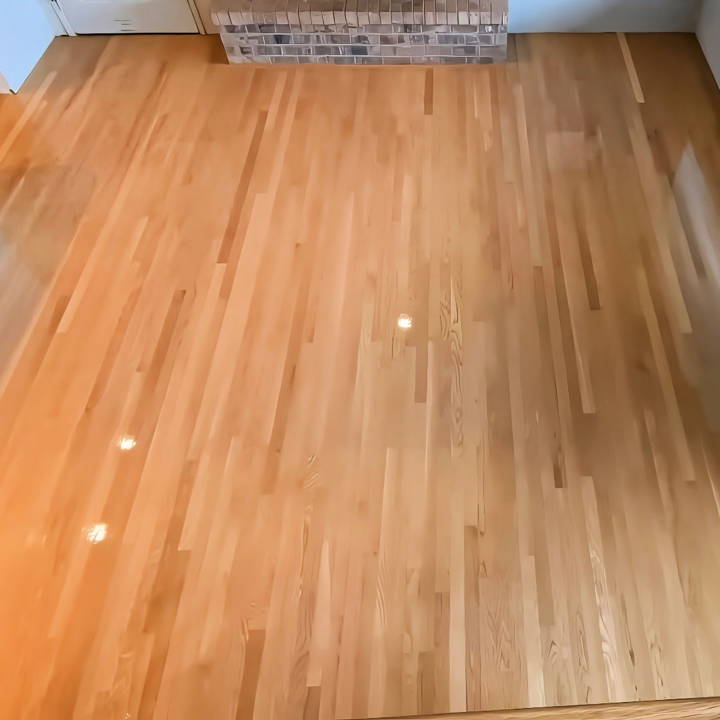
Next, I applied a new stain to restain the hardwood floors, choosing a color that matched the style I was going for. After allowing the stain to dry completely, I applied a protective coat of polyurethane to ensure durability. This restoration process left my floors looking refreshed and renewed.
I'm here to share my experience with you to make your own project easier and more rewarding. Refinishing your floors can make a big difference in your home, and I'm confident these steps will help you achieve beautiful results.
Understanding Your Hardwood Floors
When it comes to DIY projects, refinishing your hardwood floors can be both rewarding and cost-effective. But before you dive in, it's crucial to understand the basics of your floors. This knowledge will help you make informed decisions throughout the refinishing process.
- Types of Hardwood Floors: Hardwood floors come in two main types: solid hardwood and engineered hardwood. Solid hardwood is exactly what it sounds like—planks of solid wood all the way through. Engineered hardwood has a layer of hardwood on top of a core of plywood or another type of wood. Knowing which type you have is important because it affects how you'll refinish them.
- Assessing Your Floors: Look for signs of wear and damage. Are there deep scratches, discolorations, or warped planks? If the damage is superficial, such as light scratches or dullness, refinishing is a great option. However, if there are deep scratches or warping, you might need to replace sections or even consider a new floor.
- Deciding to Refinish: If your floors are solid hardwood, they can likely be sanded and refinished multiple times. Engineered hardwood can be more challenging because the top layer is thinner. If you're unsure, consult with a professional before proceeding.
- Benefits of Refinishing: Refinishing your floors can bring back their original luster and beauty. It's also an opportunity to change the color of the stain for a new look. Plus, it can increase the value of your home and extend the life of your floors.
Knowing your hardwood floors ensures a successful DIY project. Assess, plan, and then act. With preparation, your floors will look new quickly.
Materials and Why We Need Them
- Drum Sander: Essential for evenly sanding down the hardwood floors. We rented ours, making sure to get a variety of grits for the sandpaper.
- Edge Sander: To reach the areas close to the walls that the drum sander can't.
- Finish Sander: For the final pass, ensuring a smooth surface ready for sealing and finishing.
- Sealer and Finish: We chose Bona products for their reliability and quality results. A sealer to protect the wood and a finish to give it a lasting shine.
- Tack Cloth and Vacuum: To thoroughly clean the floor between sanding and applying finishes.
- Safety Gear: Including respirators, eye protection, and ear protection. These keep you safe from dust and noise during the project.
Step by Step Instructions
Discover step-by-step instructions on DIY refinishing a hardwood floor. Easy guide for a flawless finish to revitalize your home's floors.
Step 1: Preparation
After removing the furniture, we labeled and removed the baseboards for easy reinstallation. We taped off areas we wanted to protect from dust, like cabinets and windows, ensuring we wouldn't spend days cleaning up afterward.
Step 2: Sanding
We started with the drum sander, using a higher grit to avoid damage and familiarize ourselves with the machine. Then, we gradually moved to lower grits for a more aggressive sand, always going with the grain of the wood to prevent marks. The edge and finish sanders helped us reach every nook and cranny.
Step 3: Cleaning
After sanding, it was crucial to vacuum thoroughly and use a tack cloth to remove the finest dust particles. This ensured a clean surface for sealing and finishing, preventing any imperfections.
Step 4: Sealing and Finishing
First, we applied the sealer, followed by the Bona Traffic HD waterborne finish. Between coats, we lightly sanded with a high grit to ensure a perfectly smooth finish. Adequate drying time and proper application technique were crucial here.
Step 5: Reassembly
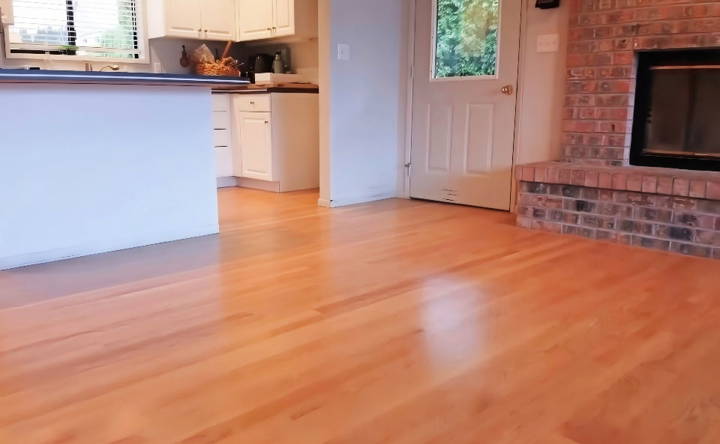
Once the final coat dried, we meticulously cleaned the space once more, removed protection tapes, and reinstalled the baseboards. The transformation was stunning.
Lessons Learned
- Patience is Key: Don't rush through the sanding stages. Taking your time ensures a smooth, even surface.
- Protective Gear: Never underestimate the importance of safety equipment. The dust and noise are not only uncomfortable but can be hazardous.
- Check Your Equipment: Especially if you're renting, ensure the machines work correctly and you're comfortable using them.
- Plan Your Exit: Before applying sealer and finish, know how you'll leave the room without stepping on the newly finished floor.
Tackling the floors at the cabin was not only a way to say thank you but also a fulfilling DIY project. Witnessing the transformation of the floors was incredibly rewarding, and sharing this space with family and friends made all the effort worthwhile.
Troubleshooting Common Issues
Refinishing hardwood floors is a task that often comes with its own set of challenges. Here's a guide to help you navigate through some common issues you might encounter during the process.
- Squeaky Boards: Squeaky floors are usually caused by wood rubbing against wood or loose subfloor nails. To fix this, locate the squeak, and if possible, tighten the boards from below. If you can't access the underside, you can use a special breakaway screw designed to stop squeaks, which can be driven through the carpet or flooring.
- Deep Scratches: For deep scratches, you'll need to sand the area down to the wood. Start with coarse sandpaper and gradually move to finer grits. Once the scratch is removed, apply a matching stain and finish.
- Uneven Staining: Uneven staining can occur if the floor absorbs the stain inconsistently. To prevent this, sand the floor thoroughly and clean it to remove all dust. Apply a pre-stain conditioner if you're working with a soft or porous wood. When applying the stain, work in manageable sections and maintain a wet edge to avoid lap marks.
- Warping or Cupping: This is often the result of moisture imbalances. If the wood is cupping, it means there's more moisture on the bottom of the wood than on the top. Address any moisture sources, like leaks or high humidity, and give the wood time to acclimate before sanding it flat.
- Dull Finish: A dull finish can be revived by screening, a lighter form of sanding. After cleaning the floor, use a floor buffer with a screening pad to lightly abrade the finish. Then, apply a fresh coat of finish for renewed shine.
- Peeling Finish: If the finish is peeling, it's often due to contamination on the floor before the finish was applied or incompatible layers of finish. You'll need to sand the affected area down to the bare wood, ensure the floor is clean, and reapply the finish.
Being prepared for common issues ensures your refinishing project stays on track, leading to beautiful, smooth floors.
Maintenance and Care Post-Refinishing
After the hard work of refinishing your hardwood floors, it's essential to maintain them properly to ensure they stay looking beautiful for years to come. Here's a straightforward guide to help you take care of your newly refinished floors.
Regular Cleaning:
- Sweep or vacuum regularly to remove dirt and grit that can scratch the floor.
- Use a dry microfiber mop for daily cleaning.
- For deeper cleaning, use a damp mop with a hardwood floor cleaner recommended by the floor finish manufacturer.
Prevent Water Damage:
- Wipe up spills immediately to prevent water from seeping into the seams.
- Avoid using steam mops or wet mops, which can damage the finish and the wood over time.
Protect the Finish:
- Place felt pads under furniture legs to prevent scratches.
- Use area rugs in high-traffic zones, but avoid rubber-backed or non-ventilated rugs as they can damage the floor's finish.
- Keep pet nails trimmed to avoid scratches.
Avoid Harsh Chemicals:
- Never use vinyl or tile floor care products on hardwood floors.
- Avoid oil soaps, as they can build up and make problems when it's time to recoat the floor.
Climate Control:
- Maintain a consistent indoor humidity level between 30-50% to prevent the wood from expanding or contracting.
- Use a dehumidifier during humid months and a humidifier during dry months if needed.
Periodic Recoating:
- Depending on traffic and wear, consider recoating your floors every 3-5 years to renew the finish and protect the wood.
Scratch and Scuff Touch-Up:
- For minor scratches, use a touch-up kit compatible with your floors' finish.
- For deeper scratches, you may need to apply a new coat of finish to the affected area.
By following these simple steps, you can keep your hardwood floors in top condition and enjoy the natural beauty they bring to your home.
FAQs About DIY Refinishing Hardwood Floors
Find answers to common questions on DIY refinishing hardwood floors, including tips on preparation, tools, and techniques for a professional finish.
No, you don’t necessarily need professional equipment. While a drum sander can be faster, it’s also more challenging to use without damaging the floors. A random orbital sander is more DIY-friendly and less likely to cause damage. It’s important to keep the sander level and move with or against the grain.
Inspect your floors for signs of wear, such as deep scratches, discoloration, or dullness. If the finish is worn away and the wood is exposed, it’s time to refinish. You can also do a water test: sprinkle a few drops of water onto the floor; if it soaks in quickly, the wood is unprotected and needs refinishing.
Always wear personal protective equipment (PPE), including a respirator mask to avoid inhaling dust, safety goggles to protect your eyes, and ear protection if using loud machinery. Ensure the room is well-ventilated to avoid inhaling fumes from stains and finishes.
Start by removing all furniture and covering anything that can’t be moved out with plastic. Next, fix any loose floorboards or squeaks. Seal doorways and ducts to contain dust. Then, sand the floor starting with coarse grit and moving to finer grits to smooth the surface. Always clean the dust thoroughly before applying any stain or finish.
Typically, you'll need at least three coats of polyurethane finish. Apply each coat with a brush or roller, following the grain of the wood. Allow each coat to dry overnight, lightly sanding between coats to ensure a smooth finish. The final coat should cure for a few days before moving furniture back in.
Final Thoughts
In conclusion, find DIY refinishing hardwood floors can transform your space in just a weekend. This weekend project makes your floors look new and can increase your home's value. Follow this guide on how to refinish hardwood floors meticulously. Remember to restain hardwood floors to achieve the best finish. Happy renovating!


