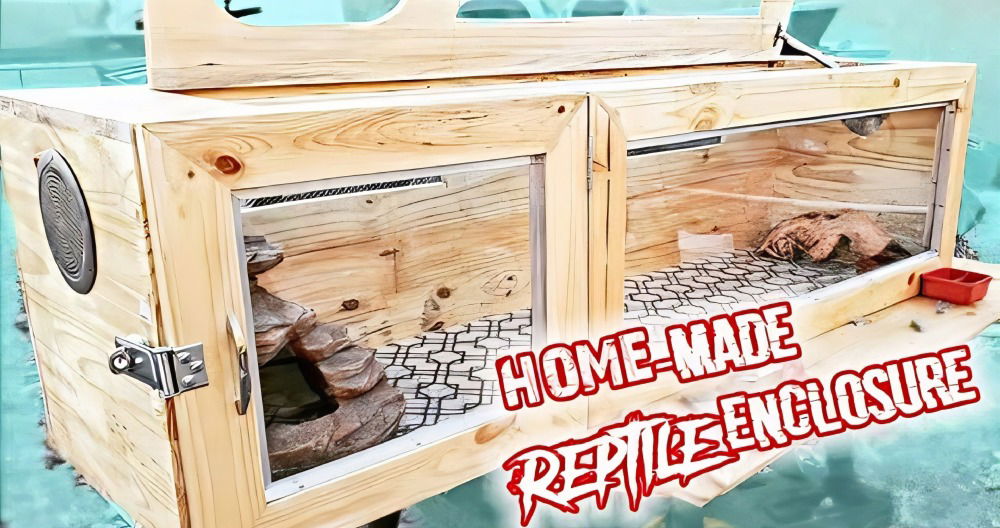
Building my own reptile enclosure was one of the most rewarding projects I ever undertook. At first, I was worried because everything seemed complicated. But I found simple guides on DIY reptile enclosures that made the process much easier. With some basic tools and materials, I build a safe haven for my reptile friends.
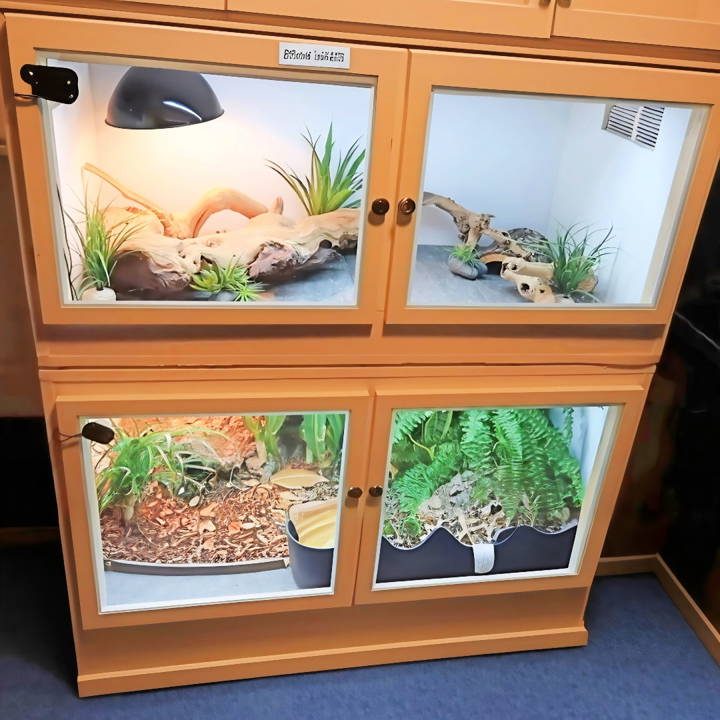
I started with a clear reptile enclosure plan. It helped me gather all the supplies and understand each step. Building a comfortable and secure DIY snake enclosure was straightforward. I followed detailed instructions and made adjustments as needed. Now, my reptiles thrive in their cozy homes.
If you want to build a special place for your reptiles, these simple steps will help you. I'm helping with this guide.
Materials You'll Need:
- Half-Inch Melamine Boards: For the top, bottom, and sides. Melamine is easy to clean and looks great.
- One-Eighth-Inch Melamine Panel: For the back. It's thinner and more lightweight.
- Screws and Finishing Nails: To assemble everything securely.
- Hinges and Latches: For the door to ensure easy access and security.
- Vents: To ensure proper air circulation within the enclosure.
- Door Handles: For easier opening.
- Tools: Including a saw for cutting the wood to size, a drill for pre-drilling screw holes, and a screwdriver.
Step by Step Instructions
Learn how to build a DIY reptile enclosure with our step-by-step instructions. Perfect for reptile enthusiasts! Easy, affordable, and customizable.
Step 1: Planning and Cutting Your Materials
The first step is always planning. I sketched out my design, accounting for the thickness of the melamine to ensure the final exterior dimensions would be exactly what I needed. Once I cut my melamine boards to size (two 48x24 inches for the top and bottom, two 24x23 inches for the sides, and one 48x24 inch panel for the back), I was ready for assembly.
Step 2: Assembling the Frame
I started by attaching the side panels to the bottom panel using screws, ensuring to pre-drill the holes to prevent the wood from splitting. Then, I affixed the top panel in the same way. The key here is making sure everything is perfectly square before adding the thin back panel, which I nailed in place. This back panel not only closed off the enclosure but also added rigidity to the structure.
Step 3: Securing the Back
The back panel is vital for stability but straightforward to attach. Once in place and nailed down, it prevented any wobble in the structure, ensuring the enclosure was sturdy and ready for the next steps.
Step 4: Adding Front Elements
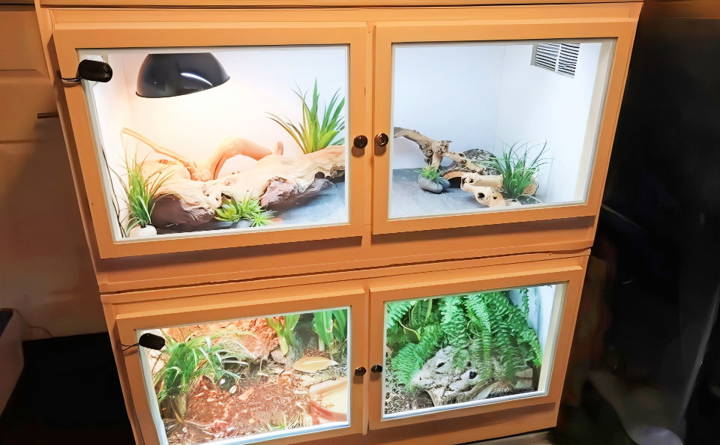
This part was a bit of a puzzle, as I needed to build a frame for the doors and ensure there was a lip at the bottom to keep substrate from spilling out. I measured and cut additional melamine strips for the frame and used hinges to attach pre-made doors (shelves from IKEA that were the perfect size) to the front.
Step 5: Doors and Finishing Touches
Attaching the doors was surprisingly straightforward. After mounting the hinges to the frame and ensuring everything lined up correctly, I added a simple latching mechanism to keep the doors securely shut. Then, I installed vents on the sides for airflow and drilled a hole for electrical cords.
Step 6: Decoration and Inhabitants
The final step was the most enjoyable—decorating the enclosure and moving my reptiles into their new home. Each enclosure was outfitted with appropriate heating, lighting, and decorations to make my pets comfortable and secure.
Advanced Customization Tips for DIY Reptile Enclosures
Building a DIY reptile enclosure can be a rewarding project that allows you to tailor the habitat to your pet's specific needs. Here are some advanced customization tips to help you enhance your reptile's home:
- Automated Climate Control: Reptiles require specific temperature and humidity levels for their health. Installing a thermostat and hygrometer connected to an automated system can ensure that these parameters are consistently maintained. You can use a timer for lights and heating elements to simulate natural day and night cycles.
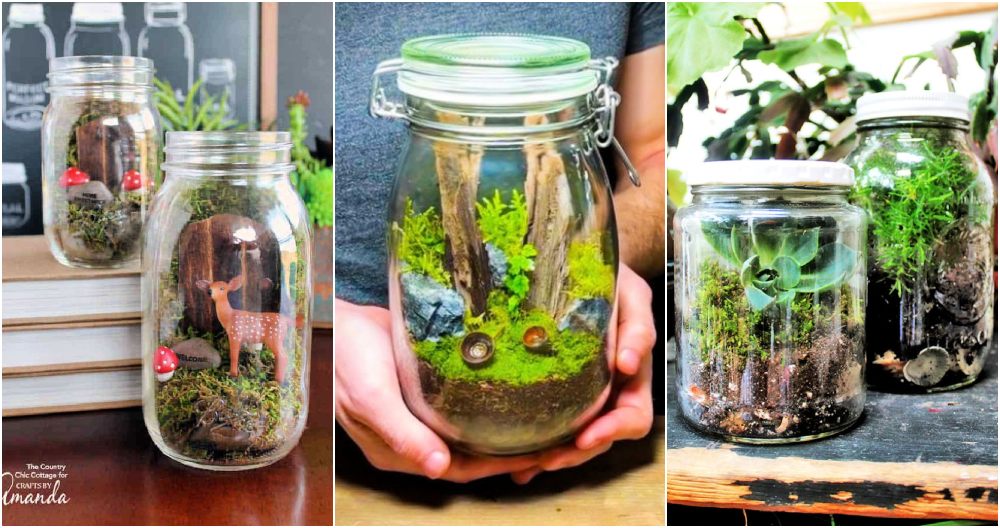
- Bioactive Substrates: A bioactive substrate is a living ecosystem within the enclosure that includes live plants, beneficial bacteria, and clean-up crews like earthworms or isopods. This setup not only looks more natural but also helps with waste breakdown and maintains a healthy microclimate.
- LED Lighting: Proper lighting is crucial for reptiles, especially those needing high levels of UVB. LED lights are energy-efficient and can be programmed to provide a full spectrum of light, which is beneficial for both the reptile and live plants in bioactive setups.
- Escape-Proof Design: Safety is paramount. Ensure that all openings are secure and that the enclosure is made from sturdy materials to prevent escapes. Fine mesh or wire can be used to provide ventilation while keeping the reptile safely inside.
- Enrichment Features: To keep your reptile engaged, include features like climbing branches, hiding spots, and basking areas. These can be made from safe, non-toxic materials and arranged to allow the reptile to exhibit natural behaviors.
- Monitoring Systems: Consider installing cameras or other monitoring systems to keep an eye on your reptile, especially if you are away. This can help you spot any issues early and ensure your pet's well-being.
- Custom Landscaping: Build a unique landscape within the enclosure with rocks, driftwood, and non-toxic plants. This not only makes the enclosure aesthetically pleasing but also provides a more stimulating environment for your reptile.
The key to a successful DIY reptile enclosure is understanding the needs of your specific reptile species and ensuring their safety and comfort.
Health and Wellness in DIY Reptile Enclosures
When it comes to the health and wellness of your reptile, the enclosure you build plays a pivotal role. Here's how you can ensure your DIY reptile enclosure promotes a healthy lifestyle for your pet:
- Adequate Space: Make sure the enclosure is spacious enough for your reptile to move around freely. A cramped space can lead to stress and health issues.
- Proper Lighting: UVB lighting is essential for most reptiles to synthesize vitamin D3, which is crucial for calcium absorption. Ensure your enclosure has a good quality UVB light source that mimics natural sunlight.
- Stable Temperature: Reptiles are cold-blooded and rely on external heat sources. Install a reliable heating system that maintains a consistent temperature suited to your reptile's natural habitat.
- Humidity Control: Many reptiles require specific humidity levels. Use a hygrometer to monitor the humidity and make adjustments as needed with misters or humidifiers.
- Clean Environment: Keep the enclosure clean to prevent the growth of bacteria and fungi. Regularly remove waste and disinfect the habitat without using harsh chemicals.
- Nutritious Diet: Provide a balanced diet that meets all the nutritional needs of your reptile. Research the best food options and feeding schedule for your particular species.
- Enrichment: Include features like branches, rocks, and hiding places to encourage natural behaviors and provide mental stimulation.
- Regular Check-ups: Schedule regular health check-ups with a vet who specializes in reptiles to catch any potential health issues early.
By focusing on these aspects, you'll build a nurturing environment that supports the health and well-being of your reptile.
Common Mistakes to Avoid in DIY Reptile Enclosures
Building a DIY reptile enclosure can be a fulfilling project, but it's important to avoid common mistakes that could compromise your reptile's safety and health. Here are some key errors to steer clear of:
- Overlooking Ventilation: Reptiles need fresh air to stay healthy. Make sure your enclosure has adequate ventilation to prevent respiratory problems.
- Ignoring Temperature Gradients: Reptiles regulate their body temperature by moving between warmer and cooler areas. For this purpose, a temperature gradient in the enclosure must be provided.
- Using Unsafe Materials: Some materials can be toxic to reptiles. Avoid treated wood, certain plastics, and adhesives that might release harmful chemicals.
- Neglecting Escape Routes: Reptiles are escape artists. Ensure there are no gaps or weak points where your pet could squeeze through and get out.
- Forgetting About Lighting: Proper UV lighting is crucial for reptiles. Without it, they can suffer from metabolic bone disease and other health issues.
- Inadequate Size: The enclosure should be large enough for your reptile to grow, move, and exhibit natural behaviors. An enclosure that is too small can lead to stress and health problems.
- Lack of Enrichment: Reptiles thrive in environments that mimic their natural habitats. Include plants, rocks, hiding spots, and climbing areas to keep your reptile engaged.
- Poor Hygiene: Regular cleaning is essential to prevent the buildup of bacteria and parasites. Set up a cleaning schedule and stick to it.
Avoid these pitfalls to build a safe, comfortable home for your reptile. Research, plan well, and consult experts if unsure.
FAQs About DIY Reptile Enclosure
Discover essential FAQs about DIY reptile enclosures, covering materials, design tips, and safety guidelines for making the perfect habitat.
Reptiles require specific temperature and humidity levels for their health. Use a reliable thermostat to control heating elements like heat mats or lamps. Humidity can be managed with misting systems or manual spraying, depending on the species’ needs. Always have accurate thermometers and hygrometers inside the enclosure to monitor these conditions.
Yes, upcycling furniture like bookshelves or entertainment centers into reptile enclosures is a popular DIY project. Ensure the structure is sturdy and seal any gaps. Modify the furniture to include ventilation, heating, and lighting fixtures. Always line or coat the interior with a waterproof material if necessary, especially for high-humidity species.
The size of your DIY reptile enclosure should be based on the species and size of your reptile. As a general rule, the enclosure should be at least twice as long as the length of your reptile and tall enough for them to move comfortably. Larger species or those that are active climbers may require more space to thrive.
Regular maintenance is key to a healthy reptile habitat. Remove waste daily and conduct a thorough cleaning monthly. Use reptile-safe disinfectants and rinse the enclosure thoroughly. Inspect and replace any damaged components like screens or seals to ensure the enclosure remains secure and functional.
Selecting the appropriate lighting for your DIY reptile enclosure is essential for your reptile's health. Most reptiles require a source of UVB light to synthesize vitamin D3, which is crucial for calcium metabolism. Ensure you provide a UVB bulb specific to your reptile's species requirements. Additionally, consider the natural light cycle of your reptile's habitat and mimic this with a timer for your lights to provide a consistent day/night cycle.
Final Thoughts
Wrapping up, building your own terrarium haven with our tips on DIY reptile enclosure is both fun and rewarding. You can build a personalized and safe environment for your reptile friend. Following these steps helps ensure your DIY snake enclosure meets all the necessary needs. Start your project today and provide a cozy home for your reptile!


