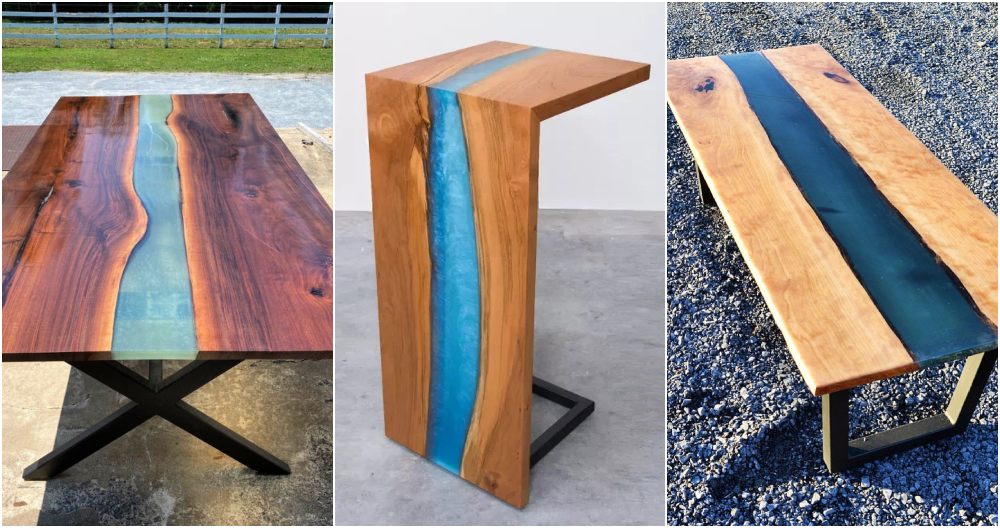
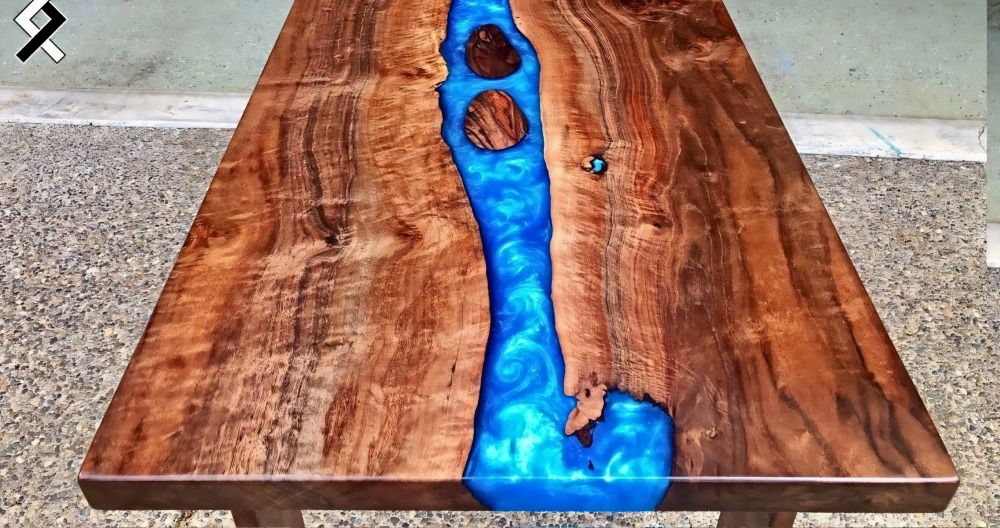
Building a unique piece of furniture has always been a passion project of mine. Recently, I embarked on a challenging yet rewarding venture to design an epoxy coffee table that not only serves its purpose but also stands as a piece of art in my living room. Drawing inspiration from various sources, I decided to document my process, hoping to inspire and guide others who wish to undertake a similar project.

Getting Started: Choosing the Right Wood
The first step in my journey was selecting the perfect wood for my table. I came across a piece of Alligator Juniper wood, known for its distinctive bark and rustic appeal. The wood I chose had character, marked by its survival through a fire. I found its history and appearance fascinating, symbolizing resilience and natural beauty.
Materials Needed and Why:
- Alligator Juniper Wood: Chosen for its unique aesthetics and durability.
- Epoxy Resin (Upstart Epoxy): Required to bind, enhance, and protect the wood.
- HDPE Mold and Clear Silicone: Essential for forming and sealing the table during the epoxy pour.
- Sandpaper (Various Grits): Needed to prepare the wood surface for the epoxy.
- Circular Saw and Router: Tools to ensure precision in shaping and finishing the wood.
Step by Step Instructions
Discover easy-to-follow instructions for making a DIY resin coffee table for beginners. Follow these step-by-step tips for a stunning project!
Prepping the Wood and Mold
Preparation is crucial for a successful epoxy project. I began by thoroughly cleaning the wood, removing all ash and debris from its surface. Sanding the wood down to an 80-grit finish ensured a clean slate for the epoxy adherence. The HDPE mold was then securely sealed with clear silicone to prevent any leaks during the pour.
The Epoxy Pour
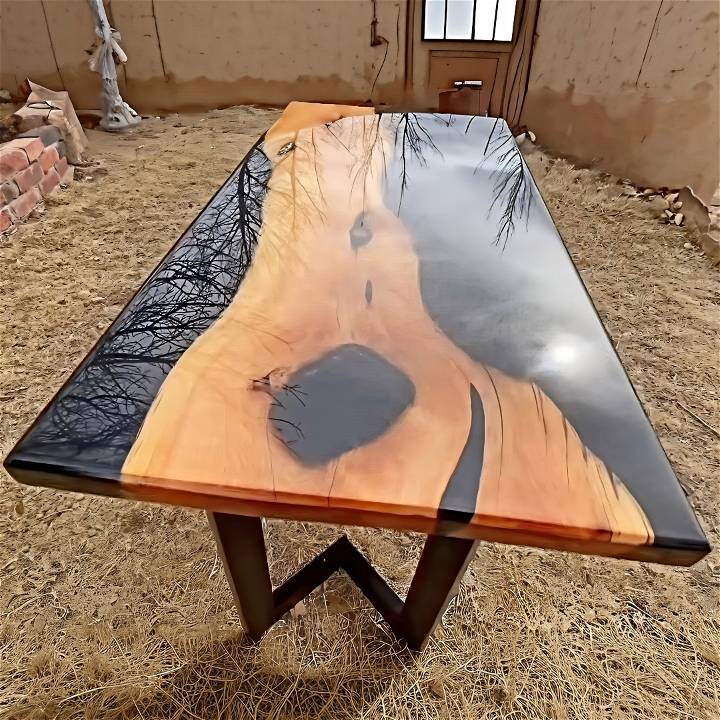
Mixing and pouring the epoxy was perhaps the most exciting yet nerve-wracking part of the project. I used Upstart Epoxy's deep pour and art resin, known for their fast curing and clarity. Aiming for a sophisticated look, I opted for a solid jet-black finish using a water-based epoxy pigment. This step required precision and patience, as I carefully mixed and poured the resin, ensuring all nooks and hollows of the wood were filled.
Finishing Touches: Sanding, Sealing, and Mounting
After allowing the epoxy to cure, it was time to unveil the beauty hidden beneath. Using a mix of sandpaper grits, I sanded the table up to a 1000-grit finish for that glass-like surface. A chamfered beveled edge gave the table its final sophisticated touch. For the final coat, I chose a flood coat for its protective qualities and its ability to make the wood and epoxy truly pop.
Choosing the right legs was essential for the table's functionality and aesthetic. I went with sturdy aluminum bases that complemented the table's contemporary look.
Lessons Learned and Tips for Fellow Creators
- Attention to Detail: Small details, such as sealing molds and choosing the right pigment, significantly impact the final product.
- Patience is Key: Epoxy work cannot be rushed. From mixing to curing, patience ensures a flawless finish.
- Invest in Quality Materials: High-quality wood and epoxy might cost more upfront but lead to a more satisfied outcome.
- Safety First: Always work in a well-ventilated area and wear protective gear when handling epoxy and power tools.
Safety Precautions and Best Practices
When embarking on a DIY project involving resin and woodworking tools, safety should always be your top priority. Here are some essential safety tips and best practices to ensure that your DIY resin coffee table project is not only successful but also safe.
Personal Protective Equipment (PPE):
- Wear gloves: Always use nitrile gloves to protect your skin from direct contact with resin.
- Protect your eyes: Safety goggles are a must to prevent any accidental splashes into your eyes.
- Use a respirator: A respirator mask with organic vapor cartridges is recommended, especially when sanding or if you're sensitive to fumes.
- Cover your arms and legs: Wear long sleeves and pants to protect your skin from splashes and spills.
Workspace Setup:
- Ventilation: Work in a well-ventilated area to avoid inhaling fumes. If possible, work outdoors or use fans and open windows.
- Fire safety: Keep a fire extinguisher nearby. Resin is flammable, and it's important to be prepared for any accidents.
- Neatness: Maintain a clean workspace to prevent contamination of your materials and avoid accidents.
Resin Handling:
- Follow instructions: Always read and follow the instructions provided by the resin manufacturer.
- Mixing: Mix resin and hardener in the correct ratio to avoid improper curing.
- Curing: Allow the resin to cure fully before handling the table. This can take several days, depending on the product.
Tool Safety:
- Inspect tools: Before use, check that all tools are in good working condition.
- Proper use: Use each tool according to its intended purpose and follow the safety guidelines.
- Secure materials: Ensure that the wood and other materials are securely clamped or held in place while working.
Health Considerations:
- Skin contact: If resin gets on your skin, wash it off immediately with soap and water.
- Inhalation: If you feel dizzy or lightheaded, move to fresh air immediately and seek medical attention if symptoms persist.
- First aid: Keep a first aid kit handy for any minor injuries that may occur.
By following safety tips, you can protect yourself while making a DIY resin coffee table. Prep well, stay safe, avoid accidents, and have fun crafting!
Maintenance and Care Instructions
A resin coffee table is not only a beautiful addition to your home but also an investment. Proper maintenance and care are essential to keep it looking its best for years to come. Here's a guide to help you maintain your resin coffee table effectively.
Regular Cleaning:
- Dust regularly: Use a soft, dry cloth or a microfiber duster to remove dust particles.
- Wipe spills immediately: Clean any spills as soon as they occur with a soft, damp cloth to prevent stains.
- Avoid harsh chemicals: Do not use strong cleaners or solvents that can damage the resin's surface.
Protecting the Surface:
- Use coasters: Always place coasters under glasses or mugs to prevent rings and heat marks.
- Avoid direct sunlight: Prolonged exposure to sunlight can cause the resin to yellow over time. Position your table away from direct sunlight or use UV-protective sprays.
Scratch and Heat Resistance:
- Prevent scratches: Lift objects rather than dragging them across the table to avoid scratches.
- Heat protection: Resin has a certain level of heat resistance, but it's best to avoid placing hot items directly on the surface.
Polishing and Shine:
- Polish for shine: You can use a resin polish or a mixture of water and vinegar for a natural shine.
- Buffing: After cleaning, buff the surface gently with a soft, dry cloth to restore its luster.
Dealing with Scratches:
- Light scratches: For minor scratches, a dab of cooking oil rubbed in gently can help reduce their appearance.
- Deep scratches: Deeper scratches may require sanding and a new coat of resin. This should be done with caution and preferably by a professional.
Long-Term Care:
- Regular inspections: Check for any signs of wear or damage regularly and address them promptly.
- Professional help: For significant repairs or refinishing, consider seeking professional assistance.
By following these tips, your resin table will stay beautiful and functional for years. Care preserves the beauty and use of your furniture.

FAQs About DIY Resin Coffee Tables
Building a DIY resin coffee table can be a rewarding project, but it's natural to have questions before you start. Here are five frequently asked questions with clear, jargon-free answers to help you on your journey to making a beautiful piece of furniture.
What type of resin should I use for my coffee table?
The type of resin you choose is crucial for the durability and appearance of your table. For most coffee tables, epoxy resin is recommended because it's strong, clear, and has a high level of resistance to heat and moisture once cured. It's also relatively easy to work with for beginners.
How do I prevent bubbles from forming in the resin?
Bubbles can be a common issue when pouring resin. To minimize them, pour the resin slowly and in a thin stream. After pouring, you can use a heat gun or a handheld torch to gently go over the surface, which helps pop the bubbles. Make sure to keep the heat source moving to avoid overheating any one spot.
Can I add color or objects to my resin coffee table?
Absolutely! Adding color pigments or embedding objects like stones, shells, or even photographs can personalize your table. Just ensure that any items you embed are completely dry and sealed if necessary to prevent reactions with the resin.
How long does it take for the resin to cure?
Curing time can vary depending on the type of resin, the temperature, and humidity of your workspace. Generally, it takes about 24-72 hours for the resin to be touch-dry and about 7 days for it to fully cure. Always check the manufacturer's instructions for the best results.
How do I maintain and clean my resin coffee table?
Maintaining your resin table is straightforward. Dust it regularly with a soft cloth, and clean up spills promptly to avoid staining. For a deeper clean, use a mixture of mild soap and water. Avoid using harsh chemicals or abrasive cleaners that can scratch or dull the surface.
Final Thoughts
Building your epoxy coffee table can be intimidating, but it's profoundly gratifying. The process allows for creative expression and results in a piece of furniture that carries personal significance. The table I crafted not only serves its purpose but also adds a touch of sophistication to my living space, embodying resilience and elegance through its design and materials.
For anyone considering embarking on their epoxy project, remember that with the right preparation, quality materials, and a bit of patience, you can build something truly remarkable.


