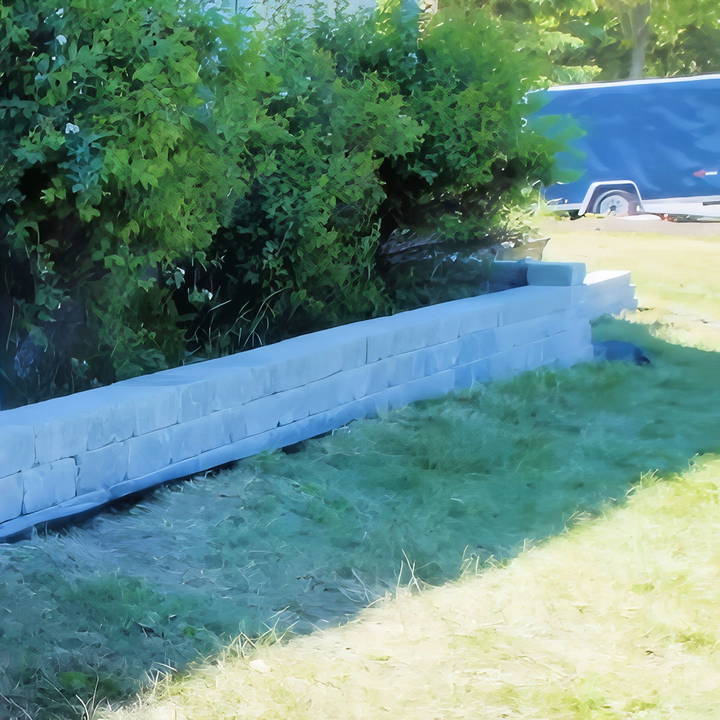
Building a DIY retaining wall is one of the best ways to prevent soil erosion, manage water drainage, and add visual appeal to your landscape. With the right tools, techniques, and materials, you can build a sturdy retaining wall at home without needing high-tech or expensive equipment. This guide will walk you through the process, step by step, to ensure your retaining wall lasts for years to come.
Why You Need a Retaining Wall
Before we dive into the steps, it's important to understand why a retaining wall might be necessary. In many cases, retaining walls are needed to stabilize soil on sloped landscapes, prevent erosion, or build usable garden or yard space. If you live in an area with frequent freeze-thaw cycles, poor drainage, or significant rainfall, building a proper retaining wall with effective water management systems is crucial to prevent structural damage over time.
In this guide, we'll show you how to build a simple, DIY retaining wall designed for any climate, making sure it withstands the test of time.
Step by Step Instructions
Learn how to build a retaining wall with our step-by-step guide, covering everything from digging the trench to final touches and maintenance. Expert tips included.
Step 1: Digging the Trench
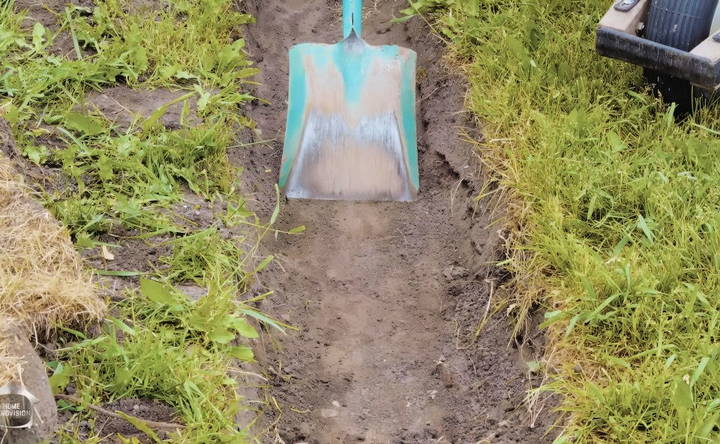
The first and most important step is digging a trench for your retaining wall. This trench is the foundation of your wall, so its stability is crucial. You want to ensure you dig down to stable soil, past the soft, dark topsoil (also called "black earth") and into the clay or solid dirt layer below. This ensures that your wall has a strong foundation.
Here's how you do it:
- Use a flat-bottomed shovel: This tool helps scrape the trench bottom evenly, reducing the need for packing loose soil afterward.
- Trench Width: The trench should be wide enough for both the base layer of your retaining wall stones and a drainage system, such as a weeping tile (discussed later). A width of 12 to 16 inches is usually sufficient.
- Trench Depth: Your trench should be deep enough so that the first course of bricks or stones sits slightly below ground level, adding more stability. This will prevent the base from shifting or sliding due to soil pressure or water accumulation.
The first row of stones needs to be set perfectly for the wall's overall success. If your foundation is off-level or poorly set, the entire structure will be compromised.
Step 2: Installing Geotextile Fabric
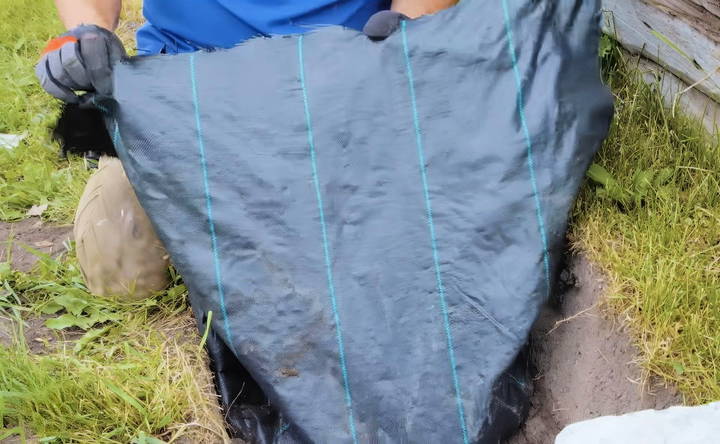
Once your trench is ready, you'll need to install geotextile fabric. This landscape cloth acts as a barrier between the soil and the retaining wall materials. It prevents soil from migrating into your drainage system and protects the integrity of the wall over time.
- Choosing the Right Fabric: Not all landscape fabrics are the same. There are multiple grades available, from thin, flimsy fabrics to thicker, durable ones. Choose a high-quality geotextile fabric that resembles a thick plastic burlap sack. It's more expensive, but investing in the best quality fabric upfront will save you from costly repairs down the line.
Here's what you do:
- Lay the fabric in a "U" shape along the bottom and sides of the trench.
- Ensure that the fabric extends slightly beyond the top of the trench, so you can fold it back over the drainage stone later.
This fabric will help keep the soil from clogging up your drainage system, ensuring that water flows freely and doesn't put excess pressure on the retaining wall.
Step 3: Adding the Base Material (GA Level & Pound)
Next, you'll need to fill the bottom of your trench with a base material to provide stability for your wall. The best material to use is a mix of gravel and sand, often referred to as “GA” (granular aggregate). This mixture builds a firm base that won't shift over time.
How to Apply the Base Material:
- Spread the GA mix evenly in the trench, making a firm base for your first row of stones.
- Use a hand tamper to pack the material down. While some people opt for powered tampers, a manual tamper works just as well for smaller projects and saves money on equipment rentals.
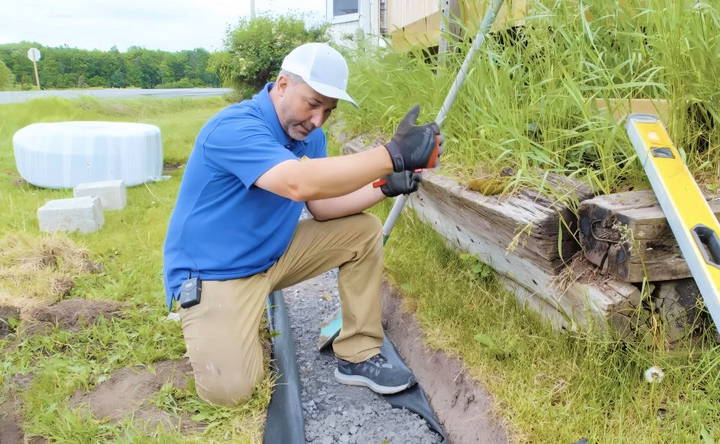
Tip: Mix a little water with your base material before tamping. This helps to compact the stone and sand mixture more effectively.
At this stage, you'll want to ensure that the base is perfectly level. Use a long leveling tool (at least 6 feet) to check that the entire surface is even. This step is critical because any unevenness in the base will affect the overall stability and appearance of your wall.
Step 4: Setting the First Course of Stones
The first row, or course, of stones, is the most important part of building a retaining wall. If this row is not perfectly level, your entire wall will suffer, leading to gaps, leaning, or even collapse over time. This is why about 75% of your time should be spent on this step, ensuring everything is correct.
Here's how to proceed:
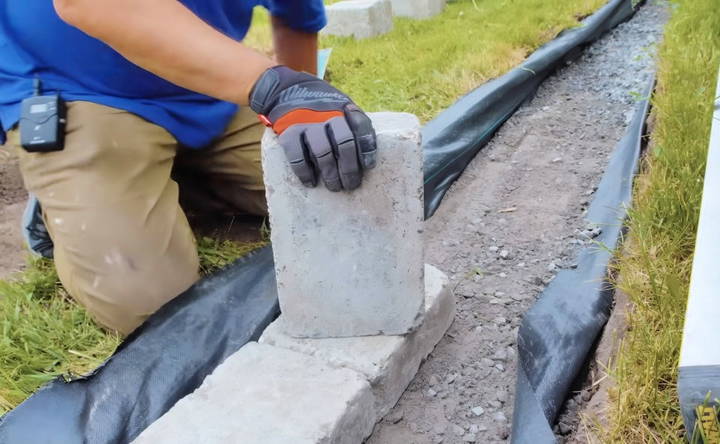
- Set the stones: Start placing your stones in the trench on top of the compacted base. Use a rubber mallet to gently tap them into place.
- Check the level constantly: After placing a few stones, use your 6-foot level to ensure they're perfectly aligned. If you find a stone is too low, add more base material under it. If it's too high, remove the stone, scrape away some base material, and reset it.
- Don't rush: Take your time to make sure this first course is flawless. Once it's set, the remaining layers will be much easier and quicker to complete.
Types of Stones
You can use various types of stones or concrete pavers for your retaining wall. Many of these stones have rough or chiseled surfaces that interlock naturally, providing additional stability. If you use smooth stones, you may need to score them with a quick-cut saw to build a better surface for adhesive (which will be applied in later steps).
Step 5: Laying Subsequent Courses of Stone
Once the first course is in place, it's time to start laying the subsequent layers of stones. The key here is to offset the stones so that each layer overlaps the seams of the layer beneath it, which will help lock everything in place.
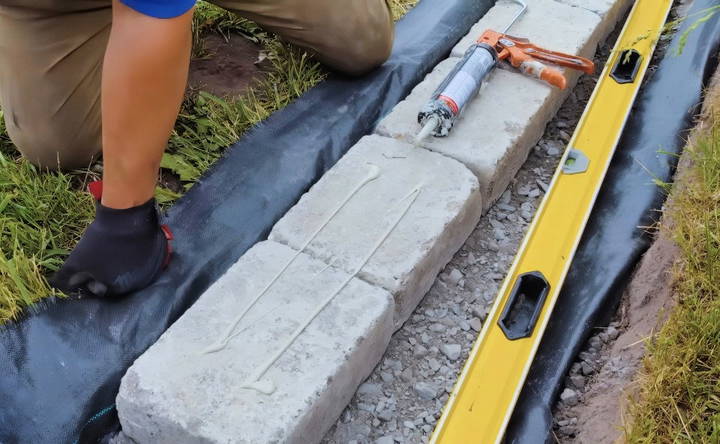
- Apply Construction Adhesive: To ensure that your stones stay in place and don't shift as you backfill behind the wall, you should use a high-quality construction adhesive. Apply the adhesive to the tops of the stones in each course before laying the next layer.
A Few Tips:
- Use an adhesive designed for outdoor use, like a 600-series construction adhesive, which is more cost-effective than ultra-premium products.
- Offset each course slightly backward by about half an inch to build a slight slope. This helps relieve some of the pressure from the soil behind the wall and gives the wall a more natural appearance.
The good news is that after the first course, the subsequent courses are much easier and quicker to install. With the base perfectly level, the rest of the stones will fall into place with minimal adjustment.
Step 6: Installing the Water Diversion System
Now that you have your wall starting to take shape, you need to think about water management. Water is the enemy of retaining walls. Without proper drainage, water will accumulate behind the wall, leading to pressure that can cause the wall to shift or even collapse over time.
- Install Weeping Tile: A weeping tile system is a perforated pipe that collects and diverts water away from the retaining wall. It's critical in regions with heavy rainfall or freeze-thaw cycles.
Steps for Installation:
- Place the perforated pipe behind the first course of stones, ensuring it runs the entire length of the wall.
- Wrap the pipe in a fabric sock to prevent dirt from clogging the pipe.
- Cover the pipe with clean, clear stone (½ inch or ¾ inch in size), which will allow water to flow easily into the pipe while keeping dirt out.
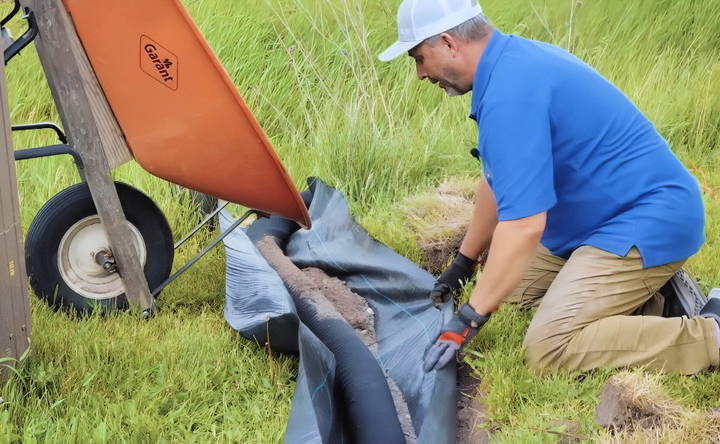
Tip: Make sure the weeping tile slopes slightly downward so water flows away from the wall and doesn't pool up behind it.
This step ensures that water will not accumulate behind your wall, protecting it from the freeze-thaw cycles that can push the wall out of place.
Step 7: Addressing Corners
If your wall has any corners, this step is essential. Corners require special attention because they add complexity to the structure, and poorly constructed corners can cause a lot of problems later. The goal is to alternate the joints where two walls meet so that there is no continuous seam running from top to bottom, which could allow water infiltration.
Cutting the Stones
To make clean, professional-looking corners, you'll need to cut the stones at 45-degree angles. Here's how:
- For a 90-degree corner, cut one stone at a 45-degree angle and place it at the corner.
- The stone from the next course should overlap this joint to prevent water from seeping in.
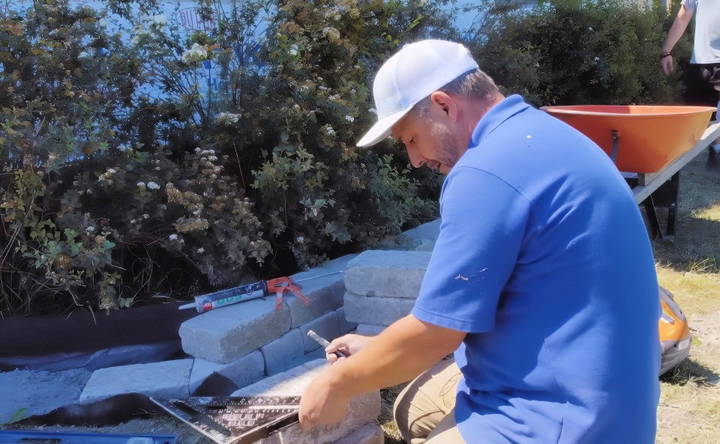
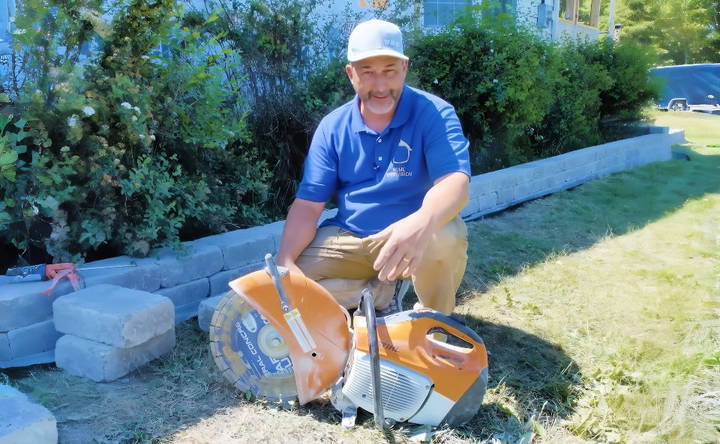
A quick-cut saw can make this process easier. You can rent one for a day, which should be sufficient time to make all your corner cuts.
Step 8: Backfilling Behind the Wall
Once your retaining wall is structurally sound and you've installed the necessary drainage system (like the weeping tile), the next crucial step is backfilling the area behind the wall. Backfilling ensures that the weight of the soil is evenly distributed and that water can flow freely without building up pressure behind the wall.
Materials for Backfilling
- Clear Stone (1/2 inch or 3/4 inch): This is used to cover the weeping tile and build a space where water can flow. The clear stone helps prevent soil from clogging the drainage pipe.
- Granular Aggregate (GA): You can use more of the granular aggregate or a mix of soil and gravel to finish off the top layers of the backfill.
Backfilling Steps
- Fill with Clear Stone: Start by adding clear stone over the weeping tile until you've covered it by at least 3 to 4 inches. This stone allows water to filter down to the drainage pipe without obstruction.
- Layer the Soil: Once the clear stone is in place, add a layer of the GA mix or soil. This should be compacted regularly using a hand tamper to ensure stability. Compaction is important because loose soil can settle over time, leading to shifts in the wall.
- Repeat in Layers: Backfill in layers, compacting after every few inches of material. Continue this process until the area behind the wall is filled to the desired height.
Tips for Proper Backfilling
- Slope the backfill: Slope the top layer of backfill away from the wall to prevent water from pooling behind it. This ensures that water will flow down the slope, into the drainage system, and away from the wall.
- Avoid soil near the base: Ensure that the first few inches of backfill near the base of the wall consist of gravel or clear stone, not just soil. This will enhance drainage and prevent water from sitting behind the wall.
Step 9: Capstones (Optional)
Adding capstones to your retaining wall is a great way to give it a finished, professional look. These stones sit on top of the final layer and can help provide added stability, especially if your wall will be exposed to significant wear and tear (e.g., if people will be sitting on it).
Steps for Installing Capstones:
- Choose Your Capstone: Capstones are typically flat and slightly larger than the stones used in the body of the wall. Make sure to choose capstones that complement the aesthetic of your retaining wall and landscape.
- Apply Adhesive: Apply a generous layer of outdoor-grade construction adhesive along the top row of your retaining wall stones.
- Set the Capstones: Place each capstone on top of the adhesive, ensuring that the edges are aligned neatly. Leave a small gap between each stone for visual appeal.
- Press and Secure: Once all capstones are in place, press them down firmly to ensure they adhere well to the layer below. Wipe off any excess adhesive that may seep out from the seams.
Capstones not only provide a polished look but also offer additional protection against water penetration and weathering, extending the life of your retaining wall.
Step 10: Final Touches and Clean-Up
With the structure of your retaining wall complete, it's time for the finishing touches. This stage is all about ensuring the wall blends seamlessly into your landscape and stands the test of time.
Grading and Landscaping:
- Grading the Land: After the wall is built, you should grade the soil around it to ensure proper drainage. The ground should slope away from the wall slightly, guiding water away from your structure.
- Planting: Consider planting grass, shrubs, or other landscaping features near the wall. These can help with erosion control and add to the visual appeal of your garden or yard.
- Add Topsoil: If you plan to plant grass or other vegetation near the top of your wall, spread a layer of topsoil over the backfilled area. Be sure to smooth it out and blend it into the surrounding landscape.
Inspect for Stability:
- Double-Check Levels: Before calling the project complete, take a few minutes to check that the entire wall is level and stable. Ensure there are no gaps or uneven spots in the structure.
- Secure Stones: If any stones appear loose or uneven, now is the time to secure them. Use a rubber mallet to adjust the stones, or apply more adhesive where necessary.
Cleaning:
- Clear the Site: Remove any excess materials, tools, or debris from the site to reveal your finished wall in all its glory.
- Rinse the Stones: If you notice dirt or dust on the stones, give them a quick rinse with a hose to bring out their natural color and texture.
Common Mistakes to Avoid
Even with careful planning, DIY projects can sometimes go wrong. Here are a few common mistakes to avoid while building your retaining wall:
- Inadequate Drainage: Skipping or improperly installing a drainage system (like the weeping tile) can cause your wall to collapse due to water pressure. Make sure your drainage system is installed correctly to prevent water buildup.
- Poor Foundation Preparation: Failing to dig deep enough or not compacting the base properly can result in your wall shifting or sinking over time. Always ensure that your trench reaches stable soil and that your base is level and well-compacted.
- Uneven First Course: If the first row of stones is not perfectly level, your entire wall will be off-balance. Spend extra time ensuring that the base course is laid correctly before moving on to the next steps.
- Incorrect Backfilling: Backfilling with soil alone or failing to compact the material can cause the wall to shift or bulge. Use clear stone and compact each layer thoroughly as you backfill to maintain the stability of the wall.
- Skipping the Adhesive: Some DIYers think they can get away with not using adhesive between the layers of stones. However, the adhesive helps prevent the stones from shifting over time, especially during the backfilling process or in freeze-thaw cycles.
Maintaining Your Retaining Wall
Even the most well-built retaining walls require some maintenance over the years. Here are a few tips to help you keep your retaining wall in top condition:
- Inspect Regularly: Periodically check your retaining wall for signs of wear, such as cracks, shifts, or bulging. Address any issues immediately before they worsen.
- Keep the Drainage Clear: Ensure that your weeping tile and drainage system remain unobstructed. Check for clogs, debris, or plant roots that may block water flow and cause pressure to build up behind the wall.
- Manage Water Runoff: Make sure that water is not pooling behind or around your retaining wall. Consider adding or adjusting landscaping to divert excess water away from the structure.
- Prevent Plant Overgrowth: Avoid planting large trees or shrubs too close to the retaining wall, as their roots can grow into the structure and cause damage over time. Stick to smaller plants or grasses to reduce the risk of structural damage.
Step-by-Step Video Tutorial
Final Thoughts
Building a retaining wall may seem like a daunting task, but with the right tools, materials, and careful attention to detail, it's an achievable DIY project. By following the steps outlined in this guide, you can construct a sturdy, attractive retaining wall that will stand the test of time, add value to your property, and enhance your landscape.
Remember, the key to success is in the preparation and execution of the foundational steps—digging, leveling, and ensuring proper drainage. With patience and effort, you'll have a wall that not only looks great but performs its essential function for years to come.
Whether you're managing erosion, making a terraced garden, or simply adding some structure to your outdoor space, a well-built retaining wall is a rewarding addition to any landscape.
FAQs About Building a Retaining Wall
Discover essential faqs about building a retaining wall. Learn about materials, costs, and tips to ensure a sturdy and lasting structure.
For most DIY projects, a retaining wall should not exceed 4 feet. Beyond this height, you may need a structural engineer’s approval due to the increased pressure exerted by the soil. Additionally, local regulations might require permits for walls above this height.
No, you should not skip drainage. Even in dry climates, water from occasional rain or irrigation can accumulate behind the wall, causing pressure and eventual failure. A weeping tile system or perforated pipe is necessary to divert water away, ensuring long-term stability.
Use a heavy-duty geotextile fabric that is thick and durable. Avoid the thinner landscape fabrics that tear easily. A strong fabric will prevent soil from clogging your drainage system and keep the wall stable.
No, using dirt alone is not recommended. You should use clear stone (½ inch or ¾ inch) and granular aggregate (GA) for proper drainage. Regular soil can retain water and add pressure to the wall, potentially causing it to fail.
Start with a perfectly level base. Use a long level (at least 6 feet) to constantly check each row of stones. The first row is the most crucial, and it's recommended to spend extra time on it to ensure it's perfectly aligned.
For sloped landscapes, you need to "step up" the wall in increments. This means adjusting the height of the wall in stages, making a stair-step effect that maintains structural integrity. Each step should be filled and compacted properly.
Yes, using a construction adhesive between courses of stones helps hold the wall together during construction, especially when backfilling. It also prevents the stones from shifting. However, the adhesive is not a substitute for proper drainage.
Offset each subsequent course by about half an inch to build a slight backward slope. This helps prevent gaps and ensures the wall remains aligned, even if the base course is slightly imperfect.
Yes, frost can cause significant damage to retaining walls. To prevent this, install proper drainage behind the wall and use materials that resist freezing and thawing cycles. Clear stone and a well-installed weeping tile system will help protect the wall from frost.
Yes, a mixture of sand and stone dust can be used as a base. However, make sure the mixture is compacted well to provide a solid foundation for the wall.


