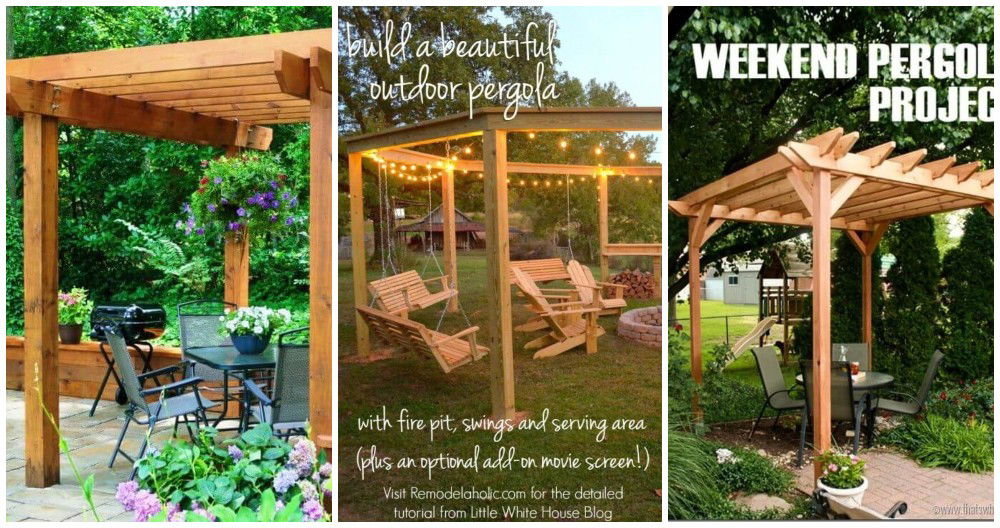
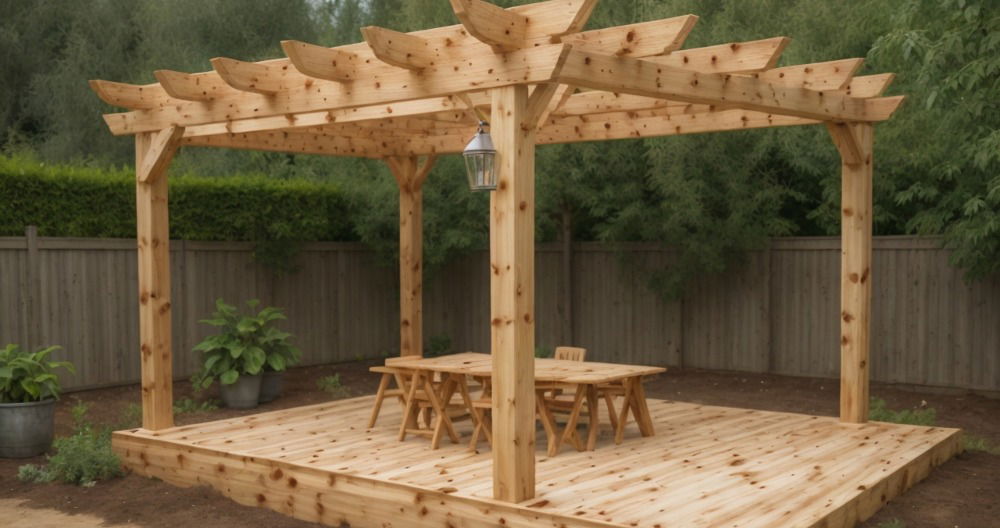
A pergola can be the perfect addition to any outdoor space, providing a relaxing shaded area where you can enjoy the beauty of your garden or backyard. However, adding a retractable canopy to your pergola makes it even more versatile, allowing you to adjust the amount of sunlight you let in at any given moment. The best part? You can do it all for under $100! This easy guide will show you how to build a beautiful, functional, and affordable DIY retractable pergola canopy using simple materials and tools.
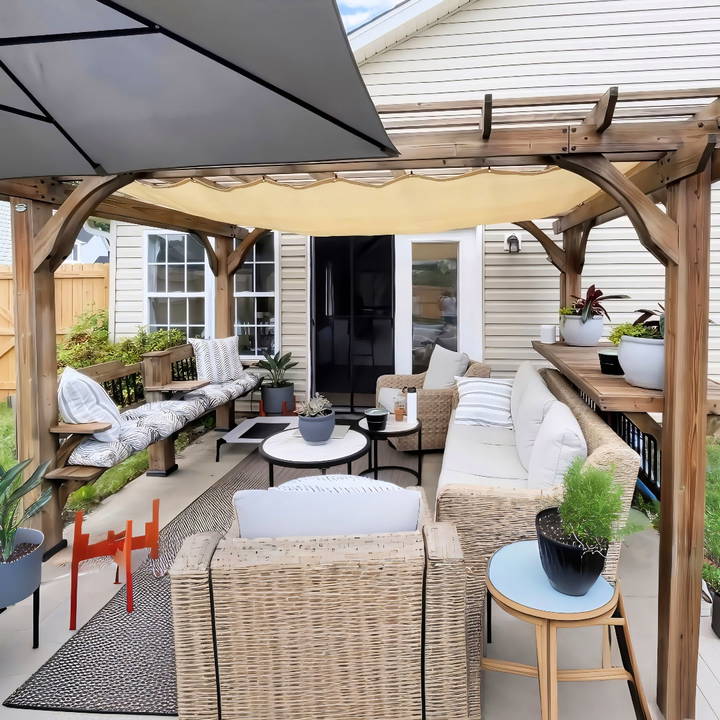
In this guide, we'll break down everything you need to know to build your own retractable pergola canopy step-by-step, so you can enjoy a customized shade that fits your needs and style.
Materials You Will Need
Before diving into the process, it's important to gather all the materials and tools you'll need for this DIY project. Here's a list of what was used in this project, which kept the total cost under $100:
- 4 screw eyes: These will serve as the anchors for your canopy wire.
- 2 turnbuckles: Essential for tightening and adjusting the tension of the clothesline wire.
- Clothesline wire (30 feet): This will hold the canopy in place. It's important to use a durable wire that can withstand outdoor elements.
- Wire cutters: You'll need these to trim the wire to the appropriate length.
- Curtain clips: These handy clips will attach the canopy fabric to the wire, allowing for easy sliding and retraction.
- Tarp (8x12 feet): This is the actual shade material. You can opt for a heavy-duty tarp that offers UV protection, or use outdoor fabric for a softer look.
- Drill and screws: To secure the screw eyes into the pergola.
Most of these items can be found at your local hardware store or online, and they're fairly inexpensive, making this a budget-friendly project.
Step by Step Instructions
Learn how to make a DIY retractable pergola canopy with easy step-by-step instructions. Perfect for enhancing your outdoor space!
Step 1 – Prepare Your Space
Before you begin installing the canopy, make sure your pergola is clean and ready for the project. Remove any furniture or plants that might be in the way, and give the pergola a quick inspection to ensure it's in good condition.
This is also a good time to measure the dimensions of your pergola so you know how much wire and tarp you'll need. For this project, the canopy was buildd for a pergola smaller than the 8x12 tarp used, so a bit of trimming was necessary. Measure carefully to avoid excess material and to ensure a snug fit.
Step 2 – Install the Screw Eyes
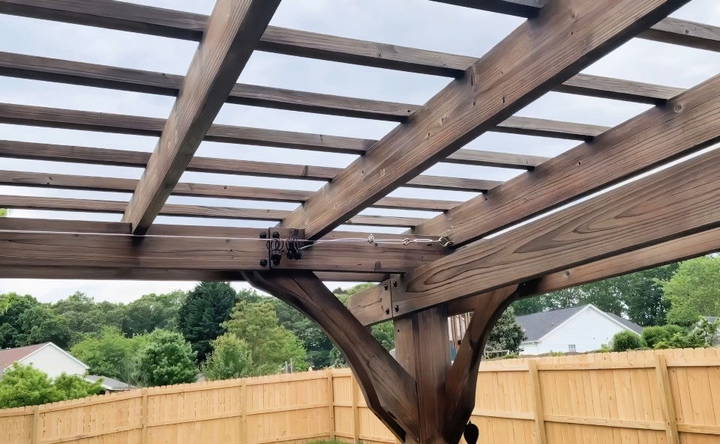
The first hardware components to install are the screw eyes, which will anchor the wire that supports your canopy. Using a drill, make holes on each side of the pergola's frame where the wire will run. These holes should be placed about halfway into the wood to ensure the screw eyes don't go all the way through.
After drilling the holes, screw in the four screw eyes at the corners where the wire will be threaded. These will serve as the main supports for the wire, which will ultimately hold the canopy in place. Be sure that the screw eyes are well-secured to handle the weight of the wire and tarp.
Step 3 – Thread the Wire
Next, it's time to thread the clothesline wire through the screw eyes. Start by cutting the wire to the appropriate length using wire cutters. In this project, the wire was cut to 30 feet, which is plenty for most pergolas.
Once your wire is cut, thread it through the screw eyes on one side of the pergola, and loop it back to the opposite side. This wire will be what your canopy glides on, so it's crucial to ensure that it's taut. Attach the turnbuckles at the end points of the wire to help you adjust the tension later on. Tightening the wire securely with the turnbuckles will ensure that the canopy can glide smoothly and stay in place when extended.
Step 4 – Attach the Curtain Clips
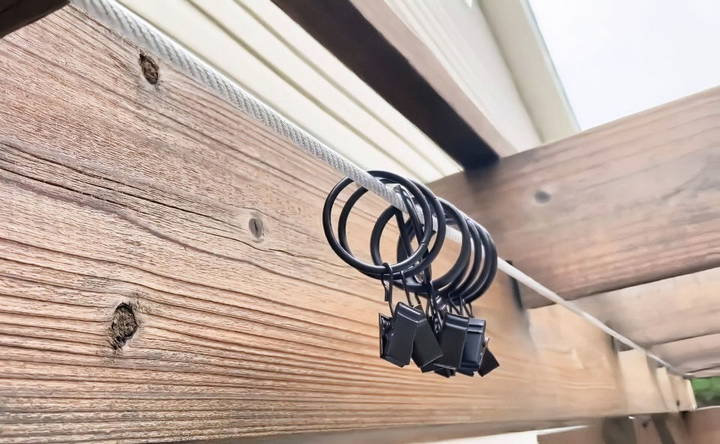
The next step is attaching the curtain clips to the wire. These clips will hold the tarp in place and allow it to slide back and forth. It's recommended to use sturdy clips that are designed for outdoor use, as they need to withstand exposure to the elements.
Before tightening the wire completely, attach the number of clips you'll need along the wire. For even coverage, space the clips about 12 inches apart along the wire. Once the clips are in place, you can fully tighten the turnbuckles to secure the wire.
Step 5 – Prepare the Canopy (Tarp)
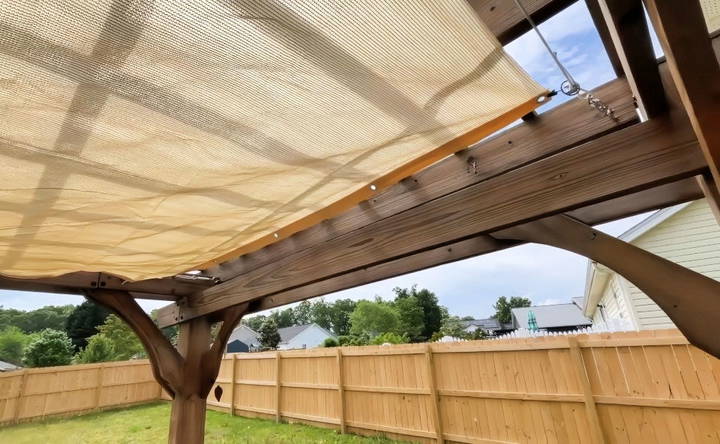
Now it's time to prepare the canopy itself. For this project, an 8x12 tarp was used, which provided ample coverage. Depending on the size of your pergola, you may need to trim the tarp to fit properly.
Lay the tarp flat and attach the curtain clips to the edges. Make sure the tarp is centered and evenly distributed along the wire. You may need to adjust the placement of the curtain clips to ensure the tarp doesn't bunch up or drape unevenly.
A useful tip is to leave a little bit of slack in the tarp, which allows it to move smoothly when you retract or extend the canopy.
Step 6 – Test the Canopy
Once the tarp is attached, it's time to test your retractable canopy. Gently pull on the clips to slide the canopy back and forth along the wire. The canopy should glide smoothly without any resistance. If the wire feels too loose or the canopy sags, use the turnbuckles to tighten the wire further.
Test the retraction and extension several times to ensure the canopy moves easily. If necessary, you can make adjustments to the tension or add more clips to improve the functionality.
Step 7 – Optional Add-Ons
At this point, your retractable pergola canopy is fully functional. However, there are a few optional add-ons that can enhance both the look and utility of your space:
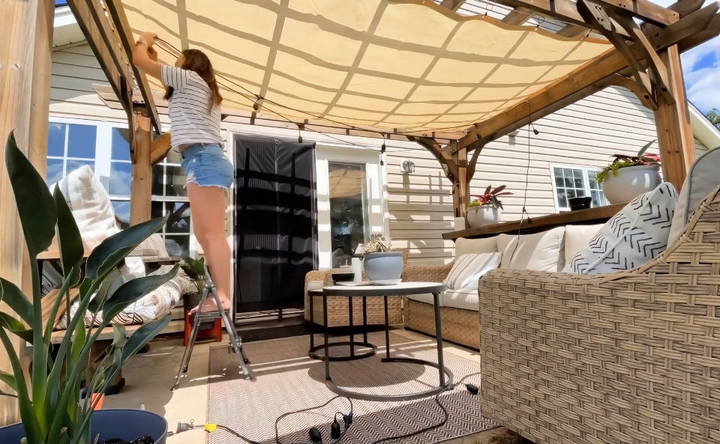
- String lights: Adding string lights can build a cozy, inviting ambiance in your outdoor space. You can hang the lights along the edges of the pergola or drape them underneath the canopy.
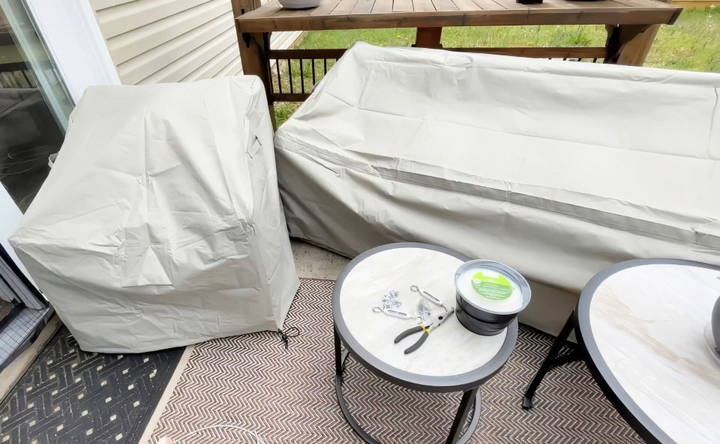
- Outdoor furniture covers: If you plan to leave furniture outdoors, consider getting covers to protect them from rain and UV rays. This will help extend the life of your outdoor furniture and keep your space looking neat.
- Plants and decor: Elevate the aesthetic of your pergola with hanging plants, decorative lanterns, or weatherproof cushions. Incorporating greenery or personal touches will make your space even more enjoyable.
Tips and Tricks for Success
While the process of building a retractable pergola canopy is relatively straightforward, here are a few tips to ensure your project goes smoothly:
- Use high-quality materials: Opt for materials like stainless steel screw eyes and UV-resistant tarps to ensure longevity. Investing in quality materials will save you from having to replace parts frequently.
- Consider adding a second wire: If you notice that your canopy sags in the middle, you can install a second wire in the center of the pergola for additional support.
- Maintain the tension: Over time, the wire may loosen due to weather conditions or natural wear. Keep an eye on the tension and tighten the turnbuckles as needed.
- Install a pull string: For easy retraction, especially if your canopy is large, you can attach a string to one end of the tarp. This will make it easier to pull the canopy back without needing to use a ladder or step stool.
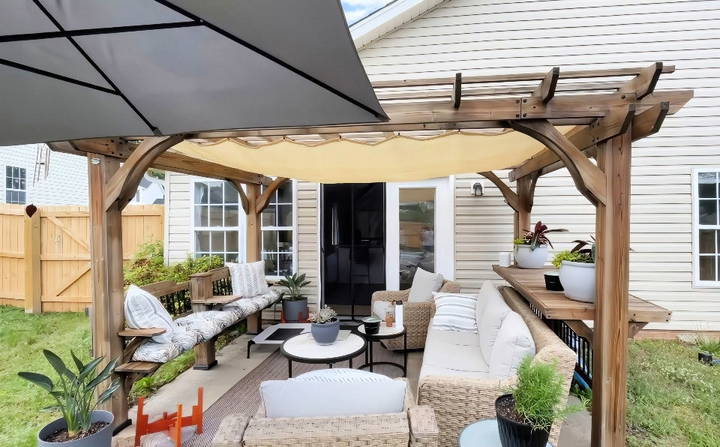
Maintenance and Longevity of Your DIY Retractable Pergola Canopy
Once your retractable pergola canopy is installed and functioning, it's important to maintain it properly to ensure it lasts as long as possible. Regular maintenance and care can keep the canopy in great shape and prevent costly repairs or replacements. Here are a few maintenance tips to consider:
Clean the Canopy Regularly
Outdoor elements such as dust, pollen, and bird droppings can accumulate on your canopy over time. To keep your canopy looking fresh and clean, it's essential to clean it periodically. Here's how to do it:
- Remove the Canopy for Deep Cleaning: If possible, remove the tarp or fabric and lay it flat on a clean surface. Use a mild detergent and water to scrub away dirt and debris. For more stubborn stains, a soft-bristled brush may be necessary.
- Rinse Thoroughly: After scrubbing, rinse the canopy thoroughly with a garden hose to ensure no soap residue remains. This will prevent streaks and potential damage to the fabric.
- Let it Dry Completely: Allow the canopy to air-dry completely before reinstalling it. Moisture trapped in the fabric can lead to mold or mildew, which could shorten the lifespan of your canopy.
For minor cleaning, you can wipe the canopy down with a damp cloth while it's still installed, but deep cleaning every few months will help extend its life.
Tighten the Wires as Needed
Over time, the tension in the clothesline wire might loosen due to the weight of the tarp or external conditions like wind and rain. Looser wires can cause the canopy to sag or move unpredictably. Regularly check the tension and tighten the turnbuckles if needed.
As a general rule, inspect the wire system at least once a season, especially after heavy storms or harsh weather conditions. This ensures the canopy remains taut and functional.
Check for Wear and Tear
Since the canopy and wire system are exposed to the elements, it's essential to check for any wear and tear that could compromise the structure. Here are a few things to look out for:
- Rust or corrosion on hardware: While using stainless steel or galvanized hardware can help resist rust, over time, exposure to rain and humidity may cause some corrosion. If you notice any rust on the screw eyes, turnbuckles, or wire clamps, consider replacing them before they weaken.
- Fraying or tearing in the tarp: Even durable tarps with UV protection can wear out over time. Check for small tears or frays along the edges, especially where the curtain clips attach. Minor tears can be patched, but a larger rip may require a tarp replacement.
- Clip malfunction: The curtain clips that hold the canopy in place can sometimes become weak or break, especially after heavy use. If a clip breaks, replace it promptly to prevent any sagging or uneven distribution of the canopy.
Customizing Your Retractable Pergola Canopy
One of the great things about a DIY retractable pergola canopy is that it can be customized to suit your specific needs and preferences. Here are a few ideas for how you can modify or enhance your canopy design:
Use Different Canopy Materials
While a tarp is a cost-effective and durable choice for this project, it's not your only option. Depending on the look and feel you want for your outdoor space, you might consider using different materials, such as:
- Outdoor fabric: If you want a softer, more decorative look, consider using outdoor fabric instead of a tarp. Outdoor fabrics are designed to withstand sun exposure and moisture while offering a variety of colors and patterns. The downside is that they may not last as long as a heavy-duty tarp.
- Shade cloth: Another alternative is shade cloth, a material that blocks some sunlight while still allowing air to flow through. Shade cloth is typically used in gardening applications but can be repurposed for a pergola canopy to provide partial shade without completely blocking out sunlight.
- Canvas: Canvas can provide a stylish, rustic look while also offering sun and rain protection. Make sure to use weather-resistant canvas to prevent mold and mildew growth.
Build a Two-Wire System
As mentioned earlier, if your canopy tends to sag in the middle, consider adding a second wire for additional support. This system can be installed parallel to the first wire or run diagonally across the pergola.
The second wire provides extra stability and prevents the canopy from drooping or shifting out of place. If you plan to build a larger canopy that spans a wide pergola, this two-wire system is highly recommended to ensure the weight is evenly distributed.
Add a Pulley System
For even easier retractability, you can add a pulley system to your pergola canopy. This allows you to retract and extend the canopy with minimal effort by pulling on a cord. A pulley system is especially helpful if you're working with a large or heavy canopy, as it removes the need for climbing ladders or manually pulling the tarp back and forth.
You can purchase basic pulley systems at hardware stores or online, and they're relatively simple to install. Just ensure the pulleys are weatherproof and sturdy enough to handle the weight of your canopy.
Incorporate Side Panels
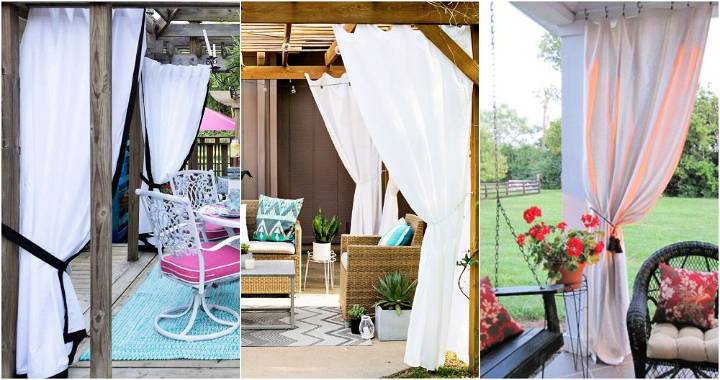
If you live in an area with lots of wind or strong sun, adding side panels to your pergola can provide extra protection and privacy. Side panels can be made from the same material as your canopy or from a different, complementary fabric. They can be attached with curtain clips or grommets, just like the canopy, allowing them to be retractable as well.
Side panels not only provide more shade but also build a cozy, enclosed atmosphere, making your outdoor space feel like an outdoor room.
Why a Retractable Pergola Canopy Is Worth It
If you're still wondering whether it's worth the effort to build a retractable pergola canopy, here are some benefits that make it a valuable addition to your outdoor space:
Flexibility with Sunlight and Shade
One of the main advantages of a retractable pergola canopy is the flexibility it offers. Unlike a fixed canopy or a permanent roof, a retractable canopy allows you to adjust the amount of sunlight or shade you get. On cooler days, you can retract the canopy to let the sun in, and on hot summer days, you can extend it to build a cool, shaded area.
Extended Outdoor Living Space
A shaded pergola extends the usability of your outdoor space. You can enjoy your backyard or patio even during the hottest parts of the day without worrying about sunburn or overheating. It's also a perfect space for entertaining guests, dining outdoors, or simply relaxing with a good book.
Protection from the Elements
In addition to providing shade from the sun, a retractable canopy also offers some protection from light rain. While it won't shield you from heavy downpours, the canopy can allow you to enjoy your pergola even in less-than-perfect weather.
Cost-Effective Solution
Purchasing a pre-made pergola canopy can be expensive, with some systems costing hundreds or even thousands of dollars. By building your own DIY retractable canopy, you can achieve the same functionality and aesthetic appeal for a fraction of the cost—typically under $100 if you follow the instructions and use budget-friendly materials.
Final Thoughts
Building your own DIY retractable pergola canopy is a rewarding project that not only enhances the functionality of your outdoor space but also allows you to customize it to suit your personal style and needs. With a small budget and a few basic tools, you can build a high-quality shade system that will provide comfort, style, and flexibility for years to come.
Recall to maintain your canopy regularly to extend its life, and don't hesitate to get creative with your materials and design choices. Whether you choose to add lights, decorative fabrics, or side panels, the possibilities are endless when you take a DIY approach to outdoor design.
Enjoy the process of building your retractable pergola canopy, and relish the extra shade and comfort it brings to your backyard oasis!
This concludes your comprehensive guide to building a DIY retractable pergola canopy. With careful planning, quality materials, and attention to detail, you'll have a beautiful and functional addition to your outdoor space at a fraction of the cost of a store-bought solution.
FAQs About DIY Retractable Pergola Canopy
Discover everything you need to know about DIY retractable pergola canopies with our detailed FAQs. Perfect for enhancing your outdoor space!
While the project in this guide uses a tarp, it is not fully waterproof. For better rain protection, look for tarps or fabric specifically designed to be waterproof, or consider adding a layer of waterproof coating to the material.
Curtain clips are recommended for ease of use and smooth retraction. However, if your tarp or shade cloth has grommet holes, you can thread the wire directly through these for a lower-hanging effect.
You can manually retract the canopy by pulling it along the wire using your hands. For larger canopies or ease of use, consider adding a pulley system or attaching a pull string to make operation simpler.
Ensure the wire is taut by adjusting the turnbuckles regularly. If sagging persists, you may need to add a second wire across the middle of the canopy to provide additional support.
The canopy design in this guide uses a mesh material, which allows water to pass through. It's not suitable for heavy rain protection, but you can upgrade to waterproof fabric or tarps to enhance its rainproof capabilities.
A sturdy clothesline wire or other durable outdoor wire is recommended. It should be strong enough to support the weight of the canopy without sagging but flexible enough to retract smoothly.
Yes, lights can be added for ambiance, but ensure they are placed far enough from the canopy to avoid heat buildup, which could pose a fire hazard. Use hooks or additional support to secure the lights along the pergola's edges.
The tarp mentioned in this project includes UV protection, but if you're using different fabric, verify that it offers this feature, especially for outdoor use where prolonged sun exposure is expected.
The wire tension should be checked regularly, especially after heavy wind or storms, as they can cause loosening. Seasonal checks will help keep the canopy functioning smoothly.
Yes, by incorporating a motorized system or pulleys, you can automate the retraction of your canopy. While this would increase costs, it provides additional convenience for frequent adjustments.


