Making your own DIY ring box is a wonderful way to personalize your jewelry storage. Not only does a handmade ring box add a unique touch, but it also ensures your rings are kept safe and snug. With a few simple materials and a bit of creativity, you can design a ring box that reflects your personal style. Follow the steps below to start crafting your very own custom ring box.
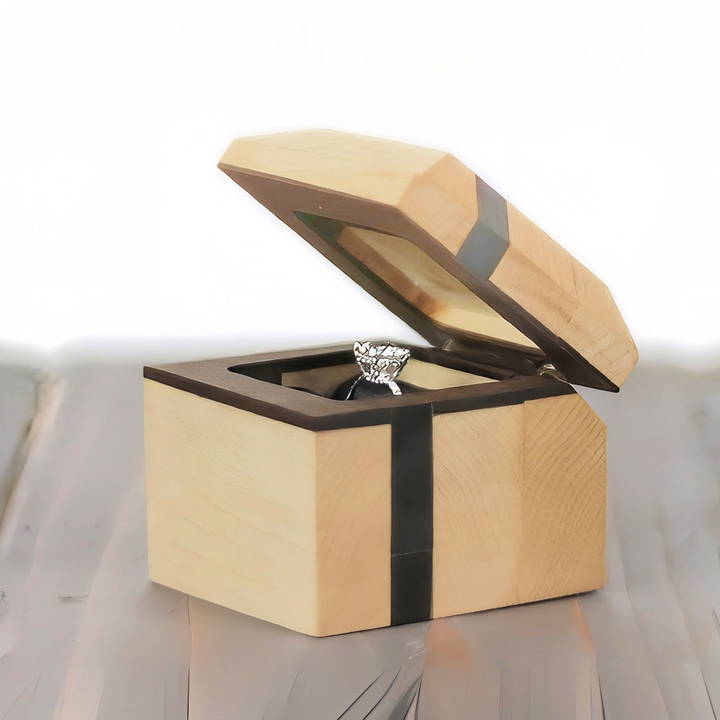
Learn how to make a ring box with this easy guide. From selecting the right materials to assembling the pieces, every step is straightforward and achievable. Whether it's for storing wedding rings, gifts, or everyday accessories, a DIY ring box can cater to your specific needs.
Ready to get started? Let's explore the detailed instructions and tips in the next section.
Materials and Tools You'll Need
- Wood (Maple and IPE): I chose these for their contrasting colors. They add a stylish touch to the final product.
- Sandpaper (Various Grits): Essential for smoothing and refining the wood.
- Wood Glue: To securely bond the pieces together.
- Miter Saw: For cutting wood accurately.
- Stationary Sander: For smoothing out the block.
- Router with Chamfer Bit: To shape edges and build a box with a lid.
- Sawzall: Makes the cutting process faster and easier.
- Drill with Bit Set: To build holes for barrel hinges.
- Barrel Hinges (5 mm): These small hinges are perfect for this project.
- Superglue: For quick and strong bonding.
- Packing Foam and Black Fake Leather: To build the ring cushion.
- Tung Oil: To add a final finish and shine to the box.
Step by Step Instructions
Make a custom DIY ring box with these step-by-step instructions, from preparing wood to finishing touches, for an unforgettable proposal.
1. Preparing the Wood
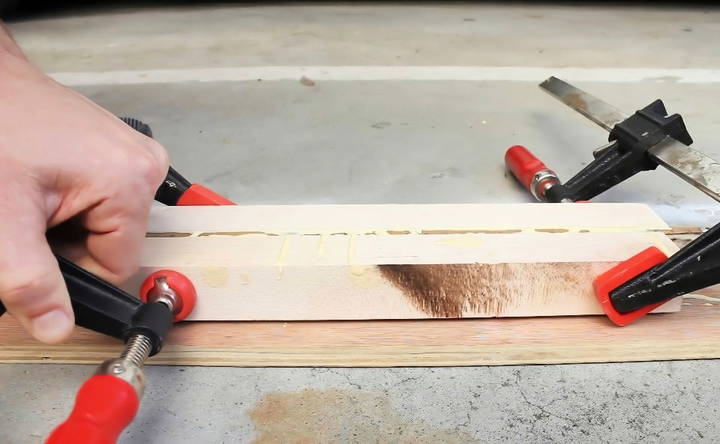
I began with three pieces of wood: two pieces of maple and one of IPE. I lightly sanded the rough IPE wood to prep it. Why these woods? Their contrasting colors would make the box visually appealing. I then glued the three pieces together and left them to cure overnight.
- Pro Tip: Make sure the glue is evenly spread for a strong bond.
2. Cutting and Shaping the Wood
Once the glue dried, I cut one side of the wood block to match the thickness I had planned. This process involved using a miter saw to cut the wood into smaller strips, about 2¼ inches. These would form the sides of the box.
I had an extra piece from the initial cuts, which I also cut into strips. It's always good to have spare pieces to work with.
3. Assembling the Box
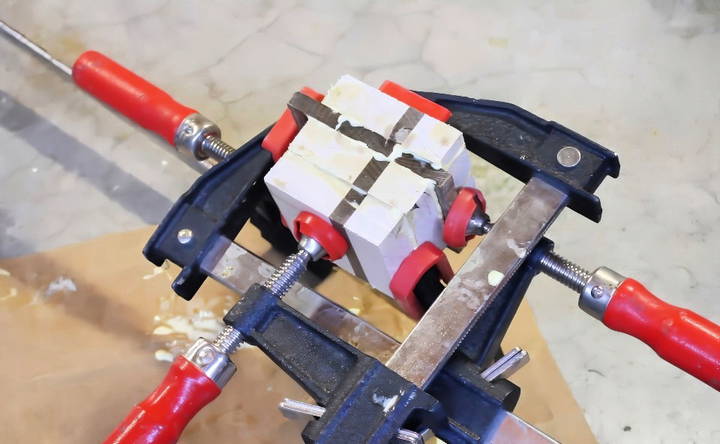
I glued the strips together to form a large block. This took a bit of patience. When dried, it looked a bit rough, but nothing a stationary sander couldn't fix. I made sure to keep my platform and miter gauge at 90 degrees to achieve a perfectly square block.
- Pro Tip: Always check for squareness when sanding and gluing.
4. Adding a Chamfer
Without a proper router table, I improvised. I flipped my router upside down and used a ¼-inch chamfer bit to build an appealing edge. This method might not be the safest, but with careful passes, it worked perfectly.
5. Cutting the Box in Half
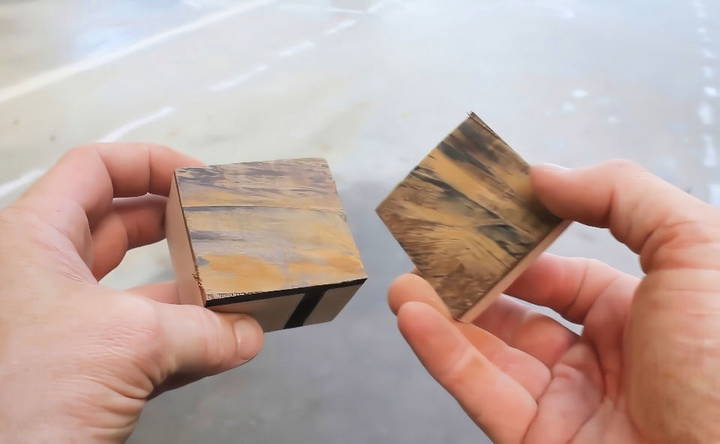
To build a lid and base, I clamped the block to my miter box and started sawing. It was slow and tedious, so I swapped to a Sawzall. This sped up the process, though the cut was quite rough. I had to sand it down to smooth the edges.
6. Making the Ring Holder Space
Originally, I wanted to use a Forstner bit but didn't have one. Instead, I devised a routing jig using scrap pieces of 2x4s, pocket hole screws, and finished nails. This jig allowed me to build a precise and efficient routing space for the ring holder.
I made several passes with the router, lowering the depth by an eighth of an inch each time. This process was slow but worked well.
7. Installing the Hinges
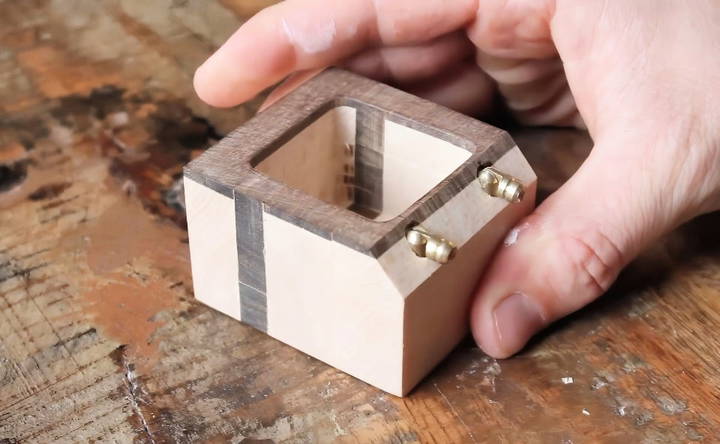
Finding the right hinges was a challenge. I opted for 5mm barrel hinges, which I found online. Precision is key here: I used a digital caliper to mark the holes and drilled pilot holes carefully.
Next, I needed to chamfer a 45-degree angle on the back end to allow the hinges to flex. I then glued everything together, making sure the two halves aligned perfectly without sticking together.
8. Making the Ring Pillow
For the ring pillow, I used packing foam and black fake leather. Cutting the foam to fit the box, I rolled it into a cylinder and glued it together. Repeating this with the leather, I made two cylindrical pillows to hold the ring securely.
9. Finishing Touches
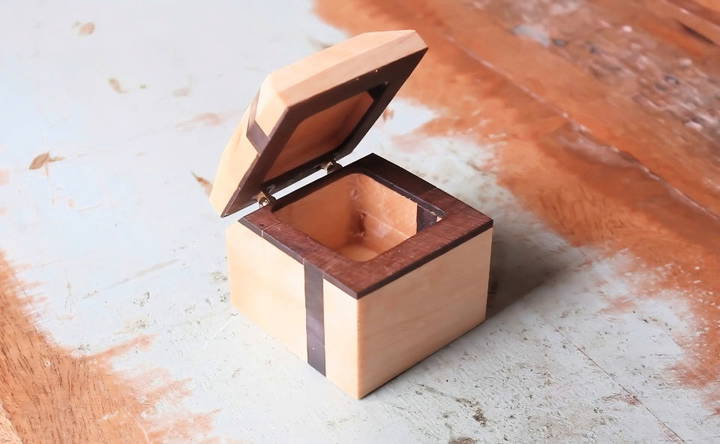
The final step was applying tung oil to the wood, which enhanced the grain and added a beautiful shine. After letting the oil dry, I inserted the pillows using a pair of scissors to push them into place.
Customization Ideas for Your DIY Engagement Ring Box
Making a DIY engagement ring box is not just about making a container for a precious item; it's about crafting a personal symbol of love and commitment. Here are some thoughtful and creative customization ideas to make your engagement ring box truly one-of-a-kind.
Reflect Your Journey Together
Think about the special moments you've shared with your partner. Perhaps you can incorporate elements from the place you first met, your first vacation together, or a shared hobby. For example, if you enjoy hiking together, you might use wood from a tree in your favorite forest or sand from a memorable beach visit to line the box's interior.
Personalize with Initials and Dates
Engraving your initials and the date of your engagement adds a romantic touch that personalizes the box. You can do this by hand if you have a steady hand and the right tools, or you can take it to a professional engraver for a polished look.
Choose a Meaningful Design
The design of the box can be as simple or intricate as you like. Consider a shape that has significance to you both, like a heart or a lock and key. You can also add decorative elements like inlays or carvings that represent your relationship.
Add a Secret Compartment
A hidden compartment within your ring box can be a delightful surprise. It could hold a written note, a small photo, or another piece of jewelry to be discovered later.
Incorporate Favorite Colors and Textures
Use fabric or paint in your partner's favorite color to line the box or decorate its exterior. If they love a certain texture, like velvet or satin, include that in the lining where the ring will rest.
Make It Interactive
Consider a box that requires a special action to open, like a puzzle box. This adds an element of fun and anticipation to the proposal.
Include a Light for a Dramatic Effect
A small LED light that illuminates when the box is opened can make the moment even more magical, especially if the proposal is in a dimly lit setting.
With these ideas, your DIY ring box will be both a beautiful home for the ring and a cherished keepsake of your love story, showing your thoughtful care.
Advanced Techniques for Crafting a DIY Engagement Ring Box
For those who are ready to take their DIY skills to the next level, advanced techniques can transform a simple engagement ring box into a masterpiece of craftsmanship. Here's how you can apply sophisticated methods to build an exceptional and intricate ring box.
Precision Woodworking
Advanced woodworking is all about precision and attention to detail. Use a digital caliper to measure your materials accurately. Consider using a miter saw and a stationary bench sander for exact cuts and smooth finishes. A plunge router can help you build detailed patterns and grooves.
Joinery Techniques
Explore joinery techniques beyond basic glue and nails. Dovetail joints or mortise-and-tenon connections not only add strength to your box but also a touch of elegance and craftsmanship.
Inlay Work
Inlaying contrasting woods or materials can build stunning visual effects. Use a router set to carve out precise recesses for your inlays. Choose materials like mother-of-pearl, metals, or even stones to add luxury to your design.
Secret Compartments
Adding a secret compartment to your ring box can be a delightful surprise. This requires careful planning and the creation of hidden hinges or latches. Barrel hinges are an excellent choice for their compact size and seamless look.
Finishing Techniques
The finish on your ring box will protect the wood and enhance its natural beauty. Tung oil is a popular choice for a finish that's both durable and visually appealing. Apply it with a soft cloth in thin layers, allowing it to cure fully between applications.
Tool Mastery
Your skill in using tools will improve the quality of your work. Practice with hand planes, chisels, and saws to refine your technique. The more comfortable you are with your tools, the more control you'll have over the final product.
With these advanced techniques, your DIY engagement ring box will showcase your woodworking skills and dedication. Your effort will build a unique, special box, just like the bond it represents.
Troubleshooting Common Issues
When crafting a DIY engagement ring box, you might encounter a few hurdles along the way. Here's a guide to help you overcome common challenges, ensuring your project is successful and enjoyable.
Wood Selection and Preparation
- Issue: Choosing the wrong type of wood or not preparing it properly can lead to cracks or warping.
- Solution: Select hardwoods like maple or rosewood for durability. Ensure the wood is properly dried and acclimated to your workspace's humidity before starting.
Measurements and Cutting
- Issue: Inaccurate measurements or cuts can result in a box that doesn't fit together well.
- Solution: Use a digital caliper for precise measurements. Double-check all measurements before cutting, and use sharp, well-maintained tools for clean cuts.
Joinery and Assembly
- Issue: Loose or misaligned joints can make the box feel flimsy.
- Solution: Practice joinery techniques like dovetails or box joints for a snug fit. Use clamps to hold pieces together as the glue dries.
Finishing
- Issue: A poor finish can ruin the look of the box and leave the wood unprotected.
- Solution: Sand the wood through a progression of grits until smooth. Apply a finish like tung oil in thin layers, allowing each layer to dry completely.
Lining Material
- Issue: The lining material can bunch up or detach, making the interior look unprofessional.
- Solution: Cut the lining material slightly smaller than the interior dimensions. Use an appropriate adhesive and apply it evenly to prevent wrinkles.
Hinges and Hardware
- Issue: Incorrectly installed hinges can cause the lid to misalign or not open smoothly.
- Solution: Mark the hinge placement accurately and pre-drill holes for screws. Consider barrel hinges for a seamless look.
Design and Customization
- Issue: Overcomplicating the design can lead to mistakes or an overwhelming project.
- Solution: Start with a simple design and add personalized elements gradually. Keep grain continuity in mind for a cohesive appearance.
By anticipating these common issues and knowing how to address them, you'll be better prepared to build a beautiful and sturdy engagement ring box.
FAQs About DIY Engagement Ring Box
Discover key answers to FAQs about making a DIY engagement ring box. Learn tips, materials, and steps for making a personalized keepsake.
Selecting the right wood for your ring box depends on a few factors:
Durability: Hardwoods are preferred for their strength.
Grain and color: Choose a wood with a grain pattern and color that appeals to you and suits the occasion.
Availability: Consider locally sourced wood to support local businesses and reduce environmental impact.
Absolutely! Personalization adds a special touch to your ring box. Here are some ideas:
Engrave initials or a date on the lid.
Choose a unique shape or design that has significance to you and your partner.
Use a wood that has a special meaning, like where you first met or a favorite shared location.
Yes, there are many online tutorials available. Websites like Instructables offer step-by-step guides complete with pictures and videos to help you through the process. You can find detailed instructions, materials lists, and tools required for the project. These resources are great for both beginners and experienced crafters.
To ensure the ring fits perfectly, follow these steps:
Measure the ring’s dimensions carefully using a digital caliper.
Make a snug slot or cushion for the ring to sit in, which can be done using soft materials like foam or velvet.
Test the fit before final assembly to make sure the ring is secure and presented beautifully.
When crafting your ring box, try to avoid these common pitfalls:
Not planning your design thoroughly: Sketch out your design and consider all aspects before cutting the wood.
Ignoring wood grain continuity: Ensure the grain flows smoothly across the box for a professional look.
Over-sanding: This can lead to uneven surfaces and affect the box's appearance.
Rushing the process: Take your time with each step to ensure the best quality work.
Conclusion
After several weeks of secret work, my DIY ring box was complete. It served its purpose and added a personal touch to a very special moment.
This project required a combination of patience, precision, and creativity. The final product was a testament to the effort and love put into it. I hope this guide inspires you to build something unique for your special moment.


