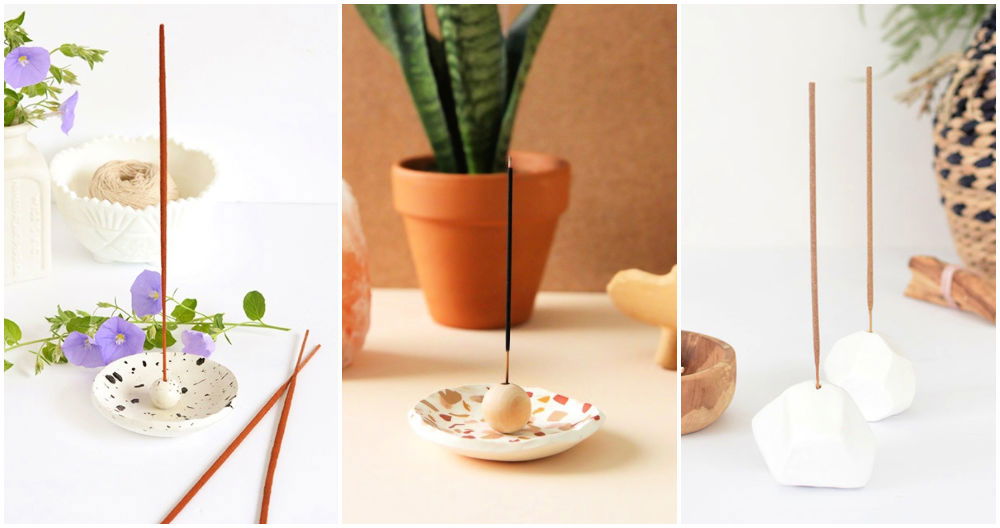
Making a DIY ring holder was a game-changer for me. I had a pile of rings on my dresser, and they were always getting lost. So, I decided to make my own holder. It was simpler than I expected. I gathered some materials like a small dish, decorative stones, and a glue gun. It only took a few minutes to put everything together.
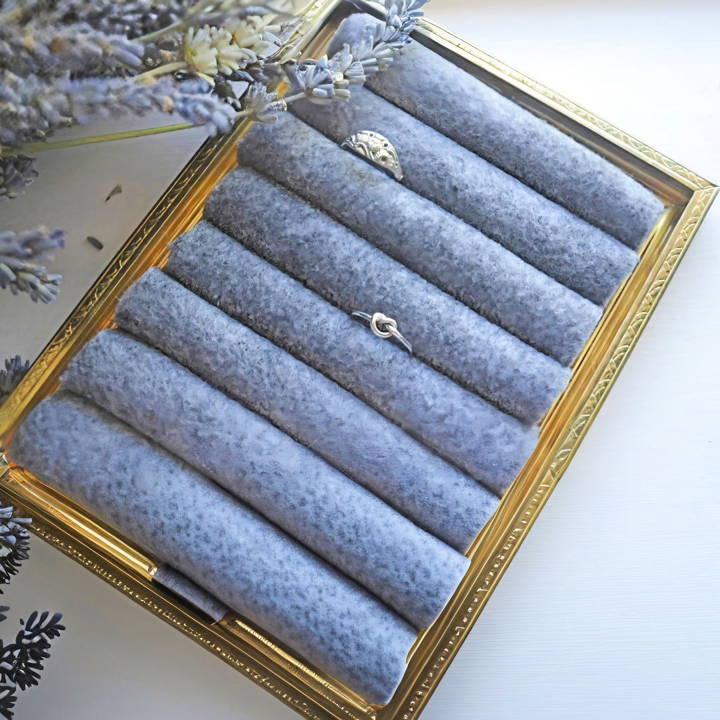
The result was fantastic. My rings were neatly organized, and they looked great on display. Plus, it felt satisfying to use something I made myself. Through this tiny project, I learned that small DIY tasks can make a big difference. So, if you need a way to keep track of your rings, making a ring holder is a great place to start. Trust me, these steps will make it easy for you, too.
Materials Needed:
- Old Frame: A sturdy frame acts as the perfect base for your ring display, giving it structure and style.
- Several Sheets of Felt: Felt is soft and provides a cushion for your rings, preventing any scratches or damage.
- Scissors: Needed for cutting the felt into strips.
- Pen: To mark measurements accurately on your materials.
- Hot Glue Gun: Essential for securing the felt rolls to the backing, providing a strong hold.
- Rings to Display: The stars of the show! Having a few rings on hand helps test the firmness of the felt rolls.
Step by Step Instructions
Learn how to make a DIY ring holder with our easy step-by-step instructions. Perfect for organizing your rings stylishly and affordably!
Step 1: Prepare the Frame
Firstly, I grabbed my old frame and removed the back and glass parts. This exposed the frame, which will later be filled with our felt rolls. The importance of starting with the frame is to ensure all subsequent components fit precisely within its confines.
Step 2: Trace and Cut the Cardboard Backing
Using the glass part as my template, I traced its outline onto a piece of cardboard with my pen. I cut this piece about a quarter inch inside the traced lines to ensure it fits snugly inside the frame. This piece serves as the backbone of the ring holder, providing necessary support.
Step 3: Measure and Cut the Felt
Next, I measured a strip of felt to match the length and width of the cardboard. Each roll of felt, when rolled up, forms a cushion that your rings can snugly fit into. Remember, the number of felt rolls you need depends on the size of your frame, so have plenty of felt on hand.
Step 4: Roll and Glue the Felt
Once I had my strips cut, I started rolling the felt tightly from one end, applying hot glue halfway through to secure the roll. After completing a roll, I trimmed any excess felt on the sides. This process was repeated until I had enough rolls to cover the length of the cardboard.
Step 5: Attach the Felt Rolls to Cardboard
By applying a line of hot glue on the cardboard, I positioned each felt roll tightly against its neighbor, seam side down. This step was quite satisfying as I saw the base for my ring display holder come together. The compact arrangement of the rolls ensures your rings stay securely in place.
Step 6: Assemble the Display Holder
With all the felt rolls glued in place, I carefully positioned the frame over my now-covered piece of cardboard. It fit perfectly, and the transformation was almost complete. The frame not only adds a visual appeal but also allows the holder to be easily hung on a wall or placed on a dresser.
Step 7: Add the Rings
The final step was the most exciting: adding my rings to the display holder. Slipping them into the felt rolls, I was pleased to see how neatly and securely they were held. This not only organized my collection but turned it into a piece of art.
Hanging or Placing Your Ring Display
The versatility of this DIY ring display holder is one of its greatest benefits. Depending on the frame and your personal preference, you can either hang it on a wall or place it upright on a dresser or shelf. Mine found a cozy spot on my dresser, where it added a touch of elegance and organization.
Design Customization Ideas
When it comes to making a DIY ring holder, personalization is key. Here are some ideas to inspire your own unique designs:
- Choose Your Base: Start with a base that reflects your style. Common options include small dishes, picture frames, or even a branch from your favorite tree. Consider the overall aesthetic you're aiming for—whether it's rustic, modern, or whimsical.
- Select a Theme: Themes can guide your color and decoration choices. Love the beach? Use seashells and sand. Prefer a garden vibe? Opt for floral patterns and greenery.
- Play with Colors: Pick a color palette that complements your space. Use paint, fabric, or colored paper to bring your ring holder to life. Remember, lighter colors can make small spaces feel larger.
- Add Texture: Introduce different textures for a tactile experience. This could be through the use of materials like burlap, lace, or felt. Textures can add depth and interest to your design.
- Incorporate Personal Items: Make your ring holder truly yours by adding elements that have personal significance, such as a piece of jewelry that's been passed down or a charm from a memorable trip.
- Functional Decor: Consider how your ring holder can double as decor. If it's going on a nightstand, perhaps it could hold a small lamp or a succulent plant as well.
- Safety First: Ensure that any additions to your ring holder don't compromise the safety of your rings. Avoid materials that might scratch or damage your jewelry.
- Keep It Practical: While aesthetics are important, functionality is key. Make sure your design allows for easy access to your rings and holds them securely.
By following these tips, you can make a ring holder that's not only functional but also a reflection of your personal style.
Troubleshooting Common Issues
Making a DIY ring holder can be a fun and rewarding project. However, you might encounter a few hiccups along the way. Here's how to solve some common issues:
The Holder Isn't Stable
- Solution: Make sure the base is heavy enough to support the rings without tipping over. Consider attaching a wider base or adding weight to the bottom.
Rings Don't Stay On
- Solution: If rings are slipping off, increase the friction. Wrap the area where the rings sit with a thin layer of velvet or felt.
Materials Aren't Sticking Together
- Solution: Use the right adhesive for your materials. For example, hot glue works well for porous materials, while super glue is better for non-porous surfaces.
The Finish Isn't Smooth
- Solution: Sand down any rough edges with fine-grit sandpaper before painting or decorating. Always move in the direction of the grain.
Paint Is Peeling Off
- Solution: Apply a primer suitable for the material of your base before painting. Let it dry completely before adding your topcoat.
Decorations Are Overwhelming
- Solution: Less is often more. Choose one or two focal points for decoration and keep the rest minimal to avoid clutter.
The Holder Looks Unfinished
- Solution: Add a clear sealant over your completed project to give it a polished look and protect it from wear and tear.
Patience is key. If something doesn't work the first time, don't be afraid to try again. With a little troubleshooting, you'll end up with a beautiful and functional ring holder that you can be proud of.
FAQs About DIY Ring Holder
Discover answers to common questions about DIY ring holder projects. Learn tips, materials, and techniques for making your own ring holder.
Yes, there are many simple DIY projects available. One of the easiest is using an egg carton as a ring holder, which requires minimal materials and time. Another beginner-friendly project is making a ring holder hand using a glove to achieve a realistic shape.
Absolutely! DIY ring holders can be very cost-effective. Many designs utilize everyday items like old nail polish bottles or items found at craft stores. By repurposing materials and using a bit of creativity, you can make a beautiful ring holder on a budget.
Get creative with your ring holder by exploring different designs like an octopus made from clay, a birch log transformed into a ring box, or a wooden bobbin rack repurposed for ring storage. These unique ideas not only serve as functional storage solutions but also as conversation pieces.
To ensure durability, choose high-quality materials like oven-bake clay for sculpted holders or hardwood for carved designs. Seal your finished product with a clear varnish or protective coating to prevent wear and tear. If you're using fabric, opt for a sturdy material like canvas, and consider a backing to maintain shape.
For an eco-friendly approach, repurpose materials you already have at home. For example, transform a small glass jar into a ring holder by filling it with rice or small stones to keep rings upright. Alternatively, use biodegradable clay or reclaimed wood to make a sustainable yet stylish ring storage solution.
Why This Project Matters
In conclusion, making a DIY ring holder to organize your jewelry is a simple and rewarding project. With minimal materials and tools, you can craft a useful and stylish accessory. Follow this guide on how to make a ring holder and enjoy a neat and tidy jewelry collection. Happy crafting!


