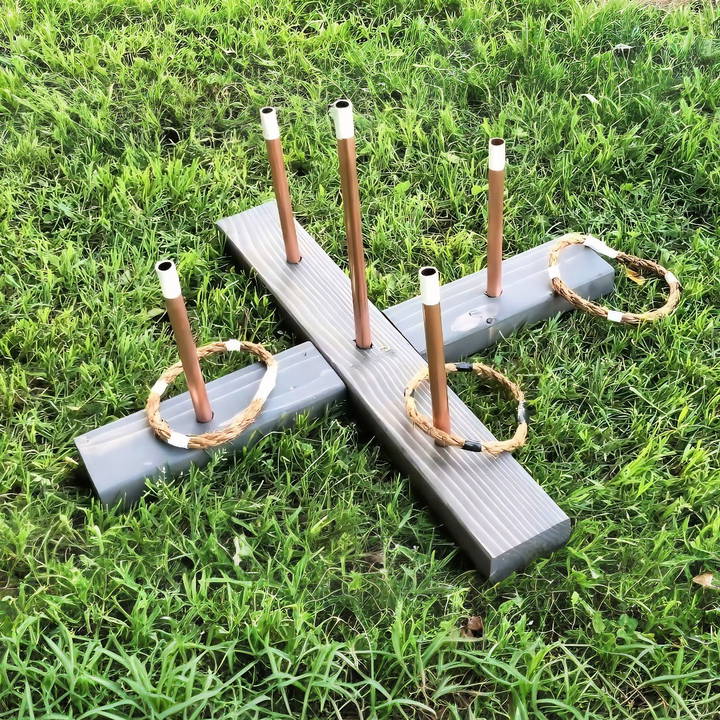
Building your own DIY ring toss game is a simple and enjoyable project that adds fun to any outdoor gathering. Not only is this project easy to make, but it's also portable and can be dismantled for storage, making it perfect for anyone who loves a quick game and needs flexibility. Plus, there's a personal touch to building something that everyone can enjoy. In this guide, I'll walk you through how I crafted my own ring toss game using materials I had at home.
Materials You'll Need:
- Two 2x4 boards (for the base and structure)
- Copper tubing (for the pegs)
- Manila rope (for the rings)
- Tube cutter (for cutting the copper)
- Masking tape
- 5/8 inch drill bit
- Stain or paint (optional for finishing)
- Marble contact paper (optional for decoration)
- Electrical tape (for securing the rings)
- Cotton buds (for detailed staining/painting)
Step by Step Instructions
Learn how to make a DIY ring toss game with our step-by-step instructions. Perfect for all ages, this guide covers everything from prep to play.
Step 1: Preparing the Boards
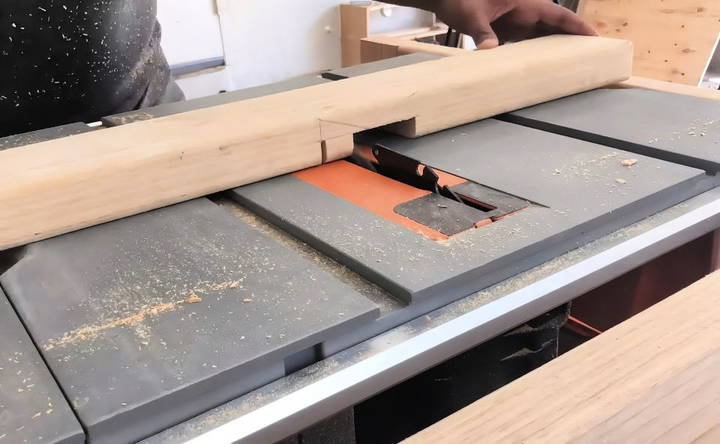
The first step in making this project is cutting the 2x4 boards. I needed two main pieces of wood to serve as the base and the cross-support of the ring toss game. Using lap joints makes it easier to connect the boards securely without the need for screws or other fasteners.
- Lap Joint Tip: If you're unfamiliar with lap joints, don't worry! You can build them easily with a table saw, circular saw, or even a handsaw. I measured and marked out the areas I wanted to cut, making sure the joints fit snugly when overlapped. Using this technique makes the structure sturdier while keeping the game portable.
After carefully marking the cutouts, I moved on to the table saw, cutting precise lines to build the half-lap joints. These cuts allow the two pieces of wood to fit together seamlessly and form a solid base.
Step 2: Cutting the Copper Tubes
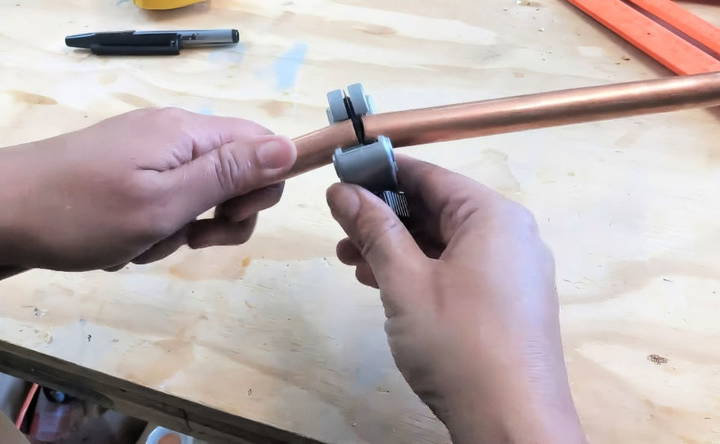
For the pegs that the rings will be tossed onto, I used copper tubing. It's a great material because it's both durable and adds a sleek aesthetic. Cutting the copper tubing was easier than I thought! With a simple tube cutter, I was able to get clean, precise cuts quickly. Plus, copper gives a polished, modern look, which I love.
- Copper Cutting Tip: If you've never cut copper tubes before, it's a simple process. Just tighten the tube cutter around the tubing and rotate it until it cuts through. Don't forget to deburr the edges to keep everything smooth and safe for play.
Step 3: Drilling the Holes for the Pegs
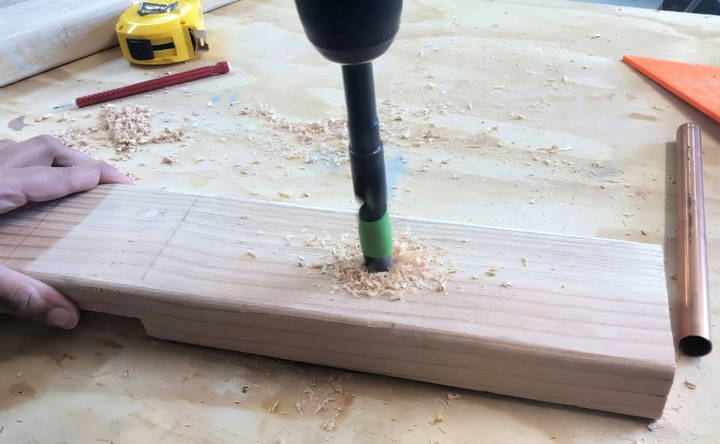
Now, it's time to drill holes in the boards where the copper tubes will be inserted. I used a 5/8 inch drill bit for this, ensuring that the copper tubes would fit snugly inside. To ensure consistency, I measured and marked each hole evenly across the board.
- Drilling Depth Tip: A helpful trick for drilling holes to the right depth is to use masking tape. I wrapped a piece of tape around the drill bit at the point where I wanted to stop drilling, so every hole was exactly the same depth. This ensures that all the pegs stand uniformly.
For the center peg, I made sure to drill a hole that was deeper than the others. This peg will help hold the two boards together at the center, ensuring that the base remains stable.
Step 4: Sanding and Staining the Wood
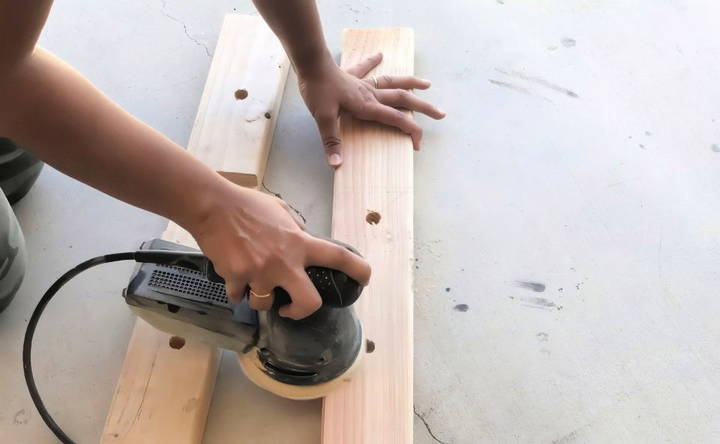
Once the holes were drilled, I gave the entire board a good sanding. This step is crucial to remove any rough edges or splinters, especially where the lap joints were cut. A smooth surface is not only safer but also allows for better staining.
- Sanding and Staining Tip: To get stain or paint into the smaller holes where the copper tubes will sit, I used cotton buds. They're perfect for getting into tight spaces and ensuring an even finish. For this project, I chose a natural wood stain that complemented the copper's shiny finish.
Step 5: Adding Decorative Touches
I love the look of copper paired with marble, so I decided to take the extra step and wrap the tops of the copper tubes with marble contact paper. It's a small detail, but it adds a touch of elegance to the game. If you want to personalize your ring toss, you could also paint the tubes, use colorful tape, or add decals.
Step 6: Making the Rings
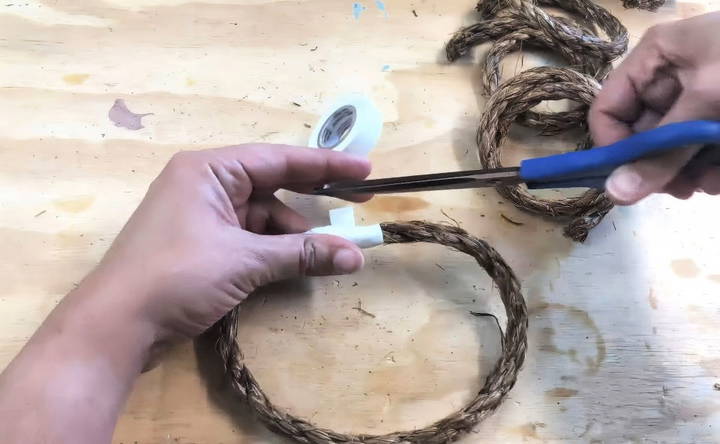
No ring toss game is complete without the rings! For this, I used Manila rope, cutting it into 15-inch lengths for each ring. To form the rings, I simply connected the ends using electrical tape, wrapping it tightly to secure them. Manila rope is a great option because it's sturdy, and the rough texture gives the rings some weight, making them easier to toss.
- Ring-Making Tip: If you want your rings to have a bit more heft or a polished look, you could wrap them with different colored electrical tapes or even use a thicker rope for larger rings.
Step 7: Assembling and Playing
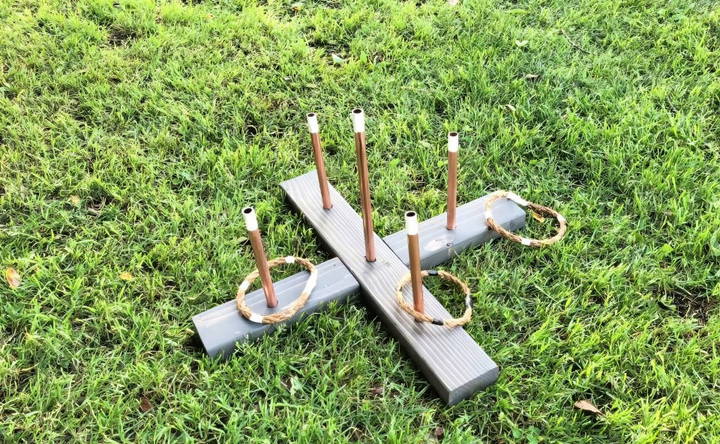
With everything cut, drilled, and finished, it's time to assemble the game! The beauty of this design is that it can be easily dismantled and reassembled in just a few minutes. The lap joints slide into place, the copper tubes fit into the holes, and the rings are ready to be tossed.
When you're done playing, the entire game can be taken apart and stored in a small box or bag, making it ideal for small spaces or transport to outdoor parties or picnics.
Customization Ideas
Customizing your DIY ring toss game can make it more fun and personal. Here are some easy and creative ideas to help you get started:
1. Paint and Colors
- Bright Colors: Use bright, vibrant colors to make the game more appealing, especially for kids.
- Themes: Choose a theme like a beach, jungle, or space and paint the rings and posts accordingly.
- Patterns: Add stripes, polka dots, or other patterns to the rings and posts for a unique look.
2. Materials
- Wood: Use different types of wood for a rustic or polished look.
- Recycled Materials: Use old bottles, cans, or other recycled items to build the posts and rings. This is eco-friendly and cost-effective.
3. Decorations
- Stickers and Decals: Add stickers or decals that match your theme. This is an easy way to add detail without much effort.
- Glitter and Gems: For a sparkling effect, use glitter or stick-on gems. This can make the game more attractive, especially for parties.
4. Additional Features
- Scoreboard: Make a simple scoreboard to keep track of points. You can use a chalkboard, whiteboard, or even a piece of cardboard.
- Handles: Add handles to the rings for easier throwing, especially for younger children.
5. Personalization
- Names: Paint the names of family members or friends on the rings or posts. This adds a personal touch and makes the game more special.
- Messages: Write fun messages or motivational quotes on the posts to encourage players.
6. Lighting
- Glow-in-the-Dark Paint: Use glow-in-the-dark paint for the rings and posts. This allows you to play the game even in low-light conditions.
- LED Lights: Attach small LED lights to the posts for a fun, illuminated effect.
7. Portable Design
- Foldable Posts: Design the posts to be foldable or detachable for easy storage and transport.
- Carry Case: Make a carry case to store and transport the game. This can be a simple bag or a custom-made box.
8. Interactive Elements
- Sound Effects: Add small bells or chimes to the posts that ring when hit. This adds an auditory element to the game.
- Moving Targets: Make posts that move or spin to increase the difficulty level and make the game more challenging.
By incorporating these customization ideas, you can make your DIY ring toss game more engaging and enjoyable for everyone.
Troubleshooting Common Issues
When making a DIY ring toss game, you might encounter some common issues. Here are some troubleshooting tips to help you overcome these challenges and ensure your project is a success.
1. Rings Not Landing on Posts
- Problem: The rings often miss the posts.
- Solution: Check the size and weight of the rings. They should be balanced and not too light. You can add some weight by wrapping tape around them. Also, ensure the posts are stable and not wobbling.
2. Posts Falling Over
- Problem: The posts keep falling over during the game.
- Solution: Make sure the base of the posts is wide and heavy enough to support them. You can use a larger piece of wood or add weights to the base. If using recycled materials, fill the base with sand or small stones for added stability.
3. Rings Breaking or Bending
- Problem: The rings break or bend easily.
- Solution: Use durable materials like thick plastic or sturdy rope for the rings. Avoid using brittle materials that can snap under pressure. If using rope, ensure it is tightly wound and secured.
4. Paint Chipping Off
- Problem: The paint on the rings or posts chips off quickly.
- Solution: Use high-quality, outdoor-grade paint that is designed to withstand wear and tear. Apply a clear sealant over the paint to protect it from chipping. Make sure the surfaces are clean and dry before painting.
5. Difficulty Assembling the Game
- Problem: Assembling the game is more complicated than expected.
- Solution: Follow a clear, step-by-step guide with images or diagrams. Lay out all the materials and tools before starting. If possible, watch a video tutorial to see the assembly process in action.
6. Uneven Playing Surface
- Problem: The playing surface is uneven, affecting the game.
- Solution: Choose a flat, level surface for setting up the game. If playing outdoors, avoid areas with slopes or bumps. You can also build a portable base for the posts to ensure a level playing field.
7. Rings Getting Stuck
- Problem: The rings get stuck on the posts and are hard to remove.
- Solution: Sand the edges of the posts to make them smooth. Ensure the rings are slightly larger than the posts to allow easy removal. Avoid using materials that can expand or contract with temperature changes.
8. Game Not Engaging Enough
- Problem: Players lose interest quickly.
- Solution: Add variations to the game to keep it interesting. Introduce different scoring rules, or build challenges like hitting specific posts in a sequence. Customize the game with themes or decorations to make it more appealing.
By addressing these common issues, you can ensure your DIY ring toss game is fun, durable, and easy to play.
FAQs About DIY Ring Toss
Get answers to FAQs about DIY ring toss. Learn tips, tricks, and essential info to build the perfect ring toss game at home!
Yes, you can customize your game by:
Painting the base and dowels in different colors.
Adding numbers to the base for scoring.
Different materials for the rings, like plastic or metal, are used.
Yes, ring toss is a great game for children. It helps improve hand-eye coordination and can be adjusted for different skill levels by changing the distance.
To increase the difficulty:
Increase the distance between the player and the base.
Use smaller rings or pegs.
Add obstacles or different scoring zones.
Yes, ring toss can be played outdoors. However, ensure the materials used are weather-resistant or bring the game indoors after use to prolong its lifespan.
Yes, you can use recycled materials:
Old wooden boards for the base.
Bottle caps or jar lids for the rings.
Scrap wood for the pegs.
Final Thoughts and Lessons Learned
Building this DIY ring toss game was a rewarding experience, especially because I could personalize it to fit my style. The game itself is fun for all ages, and the portability means I can take it with me wherever I go. If you're looking for a simple but enjoyable project that you can complete in an afternoon, I highly recommend giving this a try.
Reflecting on the process, I found that the most challenging part was getting the lap joints just right, but with some patience and careful measuring, everything fit perfectly. Additionally, using simple household tools like masking tape and cotton buds for drilling and staining was a great way to get precise results without needing specialty tools.
Whether you're a seasoned DIY enthusiast or just starting, this project offers a fun and creative way to spend your time.


