Roasting a turkey is a hallmark of holiday cooking, but what do you do when you don't have a roasting rack? Enter the ingenious and accessible DIY roasting rack, a quick and cost-effective solution that ensures your turkey is evenly cooked, juicy, and golden brown. This guide explains step-by-step how to make a roasting rack using materials you likely already have in your kitchen.
Why You Need a Roasting Rack
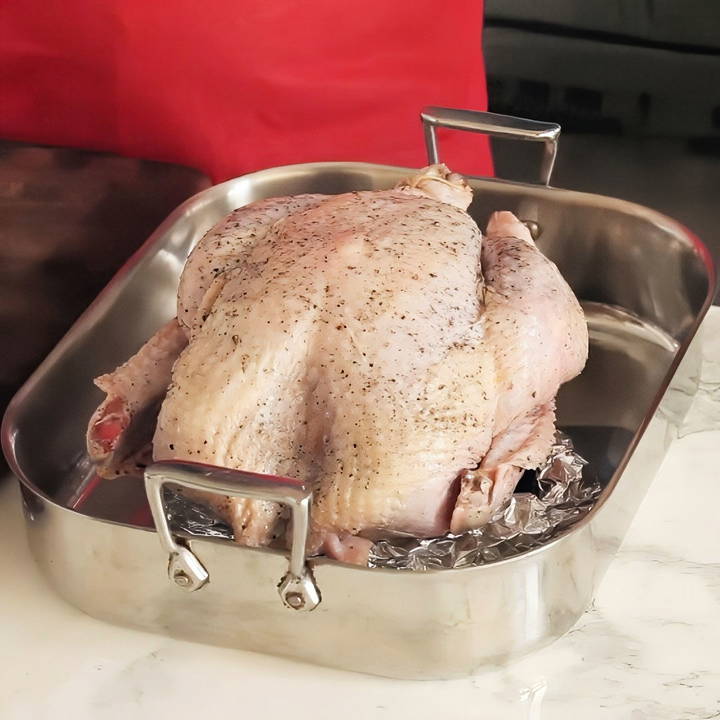
A roasting rack is essential for achieving that perfect roast. By elevating the turkey off the pan, hot air circulates around the bird, ensuring it cooks evenly. Without it, the underside of the turkey sits in its juices, leading to uneven cooking and a less desirable texture. But if you don't have a roasting rack, don't worry—this simple hack using aluminum foil will save the day.
Materials You'll Need
Making a DIY roasting rack is as simple as gathering these common kitchen items:
- Aluminum foil: A sturdy and heat-resistant material that can be molded into any shape.
- Roasting pan: A large, oven-safe pan to hold the turkey and your DIY rack.
- Turkey or any roastable item: Properly prepped for roasting with seasoning or marinade.
Step by Step Instructions
Learn how to make a DIY roasting rack with step-by-step instructions, tips, and benefits for perfect turkey roasting every time.
1. Prepare the Aluminum Foil
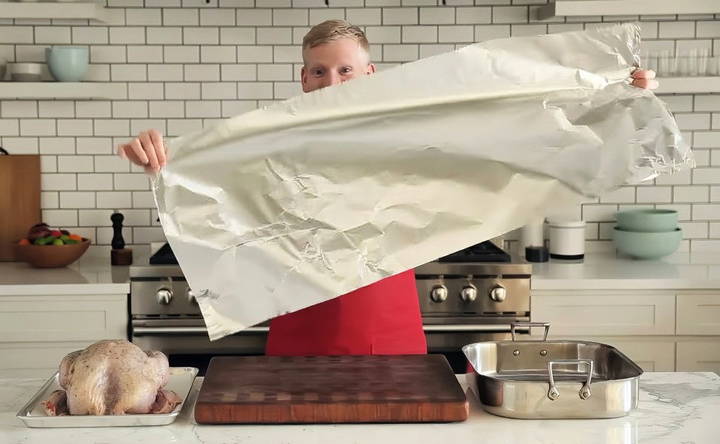
- Tear off a large sheet of aluminum foil. The length will depend on the size of your roasting pan and the turkey.
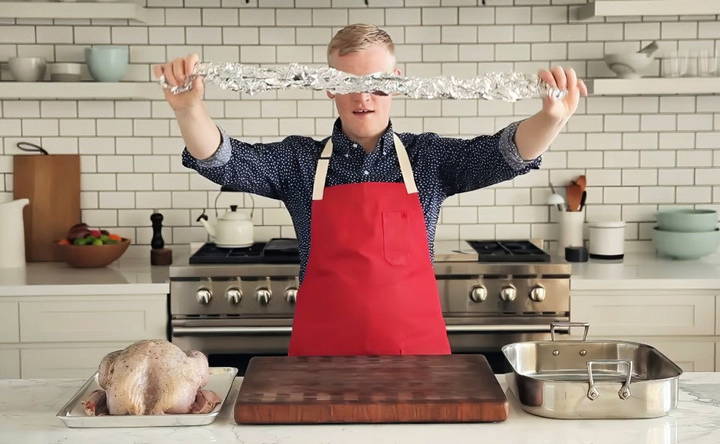
- Roll the aluminum foil into a long, cylindrical shape, making a "rope." Ensure the rope is thick enough to support the weight of the turkey without flattening under pressure.
2. Shape the Foil
- Lay the foil rope on a flat surface.
- Coil it into a circular or oval shape, similar to a snake curling up or a spiral. This design provides a stable base for the turkey.
3. Place the Foil in the Roasting Pan
- Transfer the coiled aluminum foil to the center of your roasting pan. Adjust the shape if needed to ensure it fits snugly within the pan and provides even support.
4. Prepare the Turkey
- Season your turkey as desired. Rub it with oil and add salt, pepper, or any preferred spices to enhance flavor and crispness.
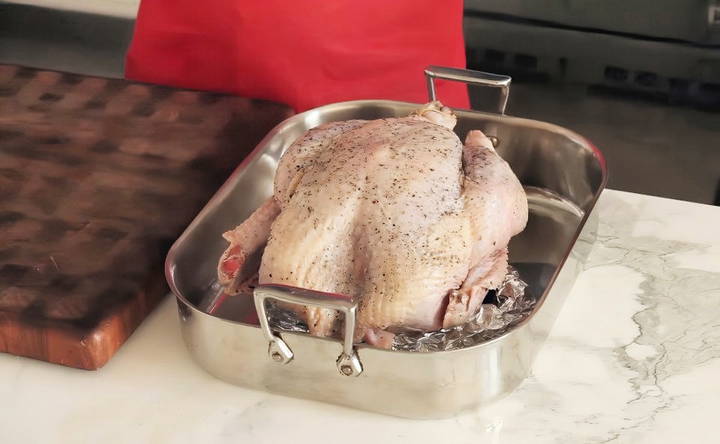
- Carefully place the seasoned turkey on top of the aluminum foil rack, ensuring the bird is evenly balanced.
5. Roast the Turkey
- Follow your recipe's roasting instructions. The DIY rack will keep the turkey elevated, allowing hot air to circulate and ensuring even browning and cooking.
Benefits of Using a DIY Roasting Rack
- Cost-Effective: No need to invest in a specialized roasting rack. Aluminum foil is inexpensive and readily available in most kitchens.
- Customizable: Shape the foil to fit any roasting pan or accommodate different sizes of poultry or meats.
- Effective Cooking: Elevating the turkey allows hot air to circulate beneath it, ensuring even cooking and a crisp, golden exterior.
- Convenience: This method is quick to set up, making it ideal for last-minute cooking emergencies.
Expert Tips for Best Results
- Use Heavy-Duty Aluminum Foil: Thicker foil offers better support for larger turkeys.
- Double-Layer the Foil: For additional stability, roll two sheets of foil together before shaping them into a rope.
- Avoid Overcrowding the Pan: Ensure there's enough space around the turkey for air to circulate freely.
- Check Stability: Before placing the turkey on the foil rack, press down lightly to confirm it can hold the weight without collapsing.
- Monitor Roasting: Periodically baste the turkey and check for even browning to enhance flavor and texture.
Why This Hack Works
The aluminum foil's reflective surface helps distribute heat evenly, mimicking the function of a traditional roasting rack. Its ability to be shaped into sturdy supports makes it versatile for various roasting tasks.
This DIY solution ensures the underside of the turkey doesn't become soggy, resulting in a perfectly roasted bird with a crisp, golden skin and juicy interior. Plus, cleanup is a breeze—simply discard the foil after use.
Alternatives to Aluminum Foil
If aluminum foil isn't an option, consider these other DIY rack ideas:
- Vegetable Bed: Use sturdy vegetables like carrots, celery, and onions as a natural roasting rack. Lay them in the pan to elevate the turkey and infuse it with flavor.
- Oven-Safe Cooling Rack: If you have a cooling rack designed for baking, place it in the roasting pan for a similar effect.
- Bundt Pan: Place the turkey on the central column of a bundt pan to elevate it and allow juices to drip away.
Cleaning and Reusing Materials
While aluminum foil is typically discarded after use, consider these tips for eco-friendliness:
- If the foil isn't heavily soiled, wash and reuse it for other purposes.
- Recycle aluminum foil whenever possible to reduce waste.
Conclusion
This DIY roasting rack hack is a lifesaver for anyone caught without a traditional rack on a major cooking day. It's easy, affordable, and highly effective, ensuring your turkey comes out crispy, juicy, and evenly cooked every time. With just a roll of aluminum foil and a little ingenuity, you can master the art of roasting and impress your guests with a perfect holiday centerpiece.
Next time you're in a pinch, remember this simple tip—it's truly a mad genius solution!
FAQs About DIY Roasting Racks
Discover answers to common questions about DIY roasting racks, including materials, benefits, and tips for perfect roasting results.
To support a large turkey, use heavy-duty aluminum foil and roll it into a thick rope. Double-layer the foil or combine two ropes for extra stability. Test the rack by pressing on it to ensure it holds firm under weight.
Yes, rolling aluminum foil into golf-ball-sized shapes and placing them under the turkey is another effective method. Arrange the balls evenly to create a stable base and allow air circulation.
No, aluminum foil is food-safe and won’t alter the flavor of your turkey. It simply serves as a sturdy and heat-resistant support during roasting.
Ensure the foil coil or balls are evenly placed in the pan and shaped to support the turkey’s base. Adjust the rack or add more foil if necessary for a snug and stable fit.
Absolutely! Adjust the size of the foil rack to suit the smaller roast. This technique is versatile for a variety of meats and even some baked goods.
Discard the used foil after roasting for an easy cleanup. If you prefer to reuse, gently rinse and dry the foil if it isn’t heavily soiled.
Yes, you can use sturdy vegetables like carrots, celery, or onions to make a natural rack. These will add flavor to your drippings for gravy-making.
Tying or trussing your turkey helps it cook more evenly and maintain a compact shape. This step isn't required but is recommended for best results.
If the top of the turkey is browning too quickly, tent it with a loose sheet of foil during the roasting process. Remove the foil in the last 20-30 minutes to achieve a golden crust.
Yes! Elevating fatty birds like geese is crucial to prevent them from sitting in rendered fat. The DIY foil rack effectively keeps the bird out of the drippings for a better texture.


