Making my own DIY roller shades for my she shed was a project driven by a need for privacy, aesthetic appeal, and practicality. I was motivated to avoid traditional curtains that would inevitably collect dust, especially amidst woodwork and sawdust. Instead, I embarked on a journey to make custom roller shades.
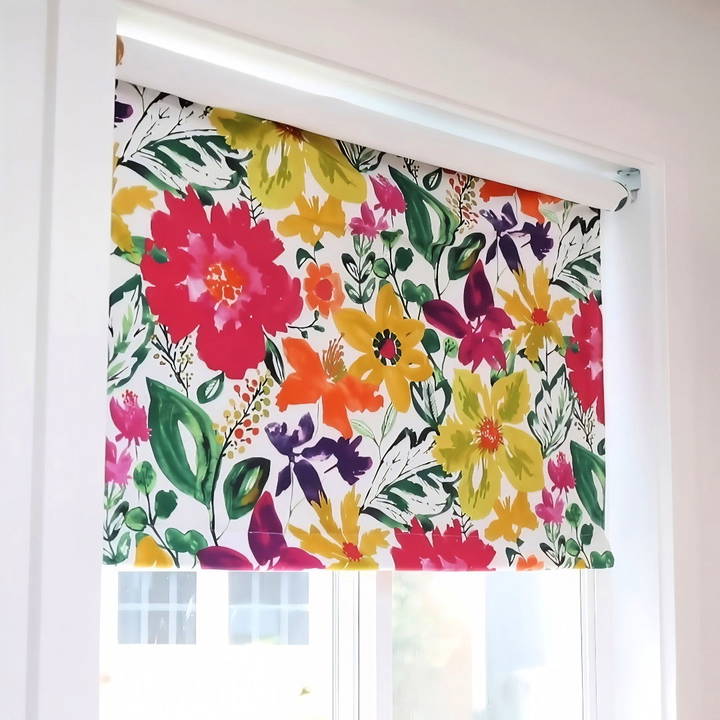
In this step-by-step guide, I'll walk you through how I achieved this, highlighting both the challenges and the solutions I discovered along the way. Let's dive in and craft some beautiful and functional roller shades together!
Why Roller Shades?
Before diving into the detailed process, I pondered over why roller shades felt like the optimal option for my she shed. Curtains were a definite no — they attract dust easily and in my active workspace, that was simply impractical. On the other hand, roller shades offered a dust-resistant, streamlined solution that also allowed the flexibility of controlling light and maintaining privacy.
Gathering the Right Materials
Discover the essential materials you need in gathering the right materials. Perfect guide to ensure you're prepared for any project.
Essential Materials
Each item in the materials list was selected with mindful consideration of its role in the process:
- Adjustable Roller Rods: I picked these because they save the hassle of cutting rods to size. They extend and retract as needed, fitting the window frame perfectly. The ones I found at Walmart were particularly convenient.
- Blackout Fabric: This is a crucial choice for anyone wanting to block excessive sunlight and ensure privacy. The blackout fabric serves not just as a barrier to light but also insulates the area, making the space cooler in summer and warmer in winter.
- Regular Fabric: The fabric that faces your room should align with your aesthetic preferences. Choose something easy to clean and pleasing to the eye.
- Double-sided Tape: Vital for adhering the fabric securely to the rod. Ensuring a straight alignment with tape guarantees your shades roll evenly.
- Spray Adhesive: This helps to prevent shifting and bunching of the fabrics. Employ this to keep fabrics flat and smooth during the assembly process.
- Mounting Brackets: Surprisingly, many rods don't come with these. You'll need them to affix the rods securely within or over the window frame.
- Framing Square: To achieve precise, straight cuts and avoid crooked blinds, this tool is indispensable.
- Pins and an Iron: These are for aligning, folding, and fixing seams; essential for a neat finish.
Step by Step Instructions
Learn how to make your own roller shades with our DIY roller shades step-by-step instructions. Easy-to-follow guide to customize your windows efficiently.
Step 1: Measure Your Windows
Before starting with any cutting or assembling, measure the windows carefully. This determines both the size of rods and fabric cuts required. Remember to measure both width and height for the best fit.
Step 2: Cut Your Fabric
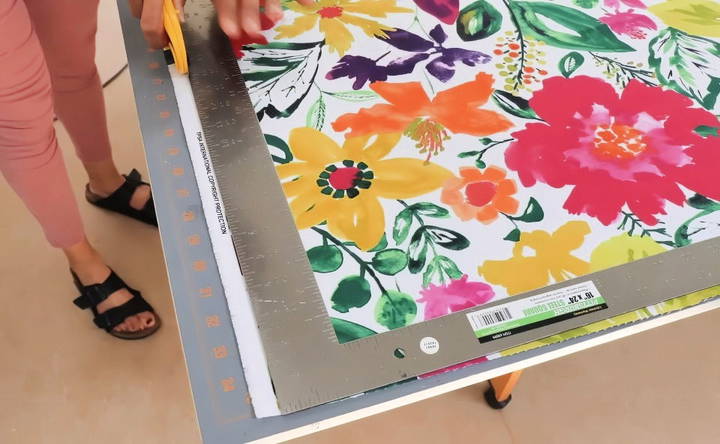
Armed with measurements and a framing square, cut the regular and blackout fabric. I added an extra inch on each side for seam allowances, cutting my fabric to 37.5 inches wide for a required 35.5 inches finish. This proactive approach ensures there is adequate fabric for a neat and secure fit.
Step 3: Layer and Align Fabrics
Layer your regular and blackout fabrics. Align and pin them along the edges, ensuring that your black fabric is slightly smaller to avoid excess bulk at the edges. This step forms the foundation, so take time to ensure everything is straight and lined up.
Step 4: Tackling Seams
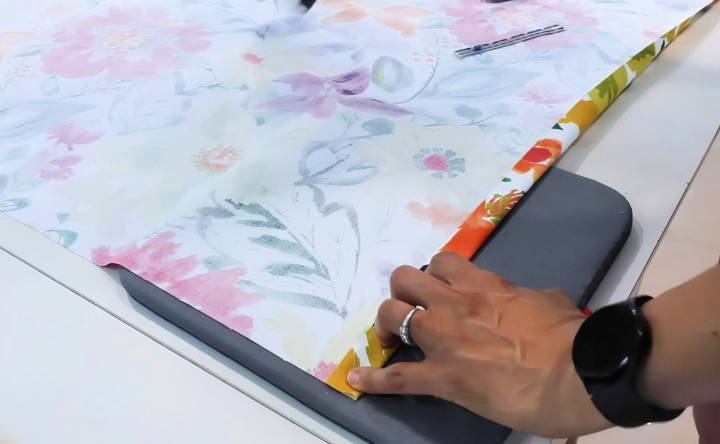
Make a one-inch seam on each side of the fabrics. By folding and ironing these edges, I was ready to see a smooth and professional finish. I did not initially fold the blackout fabric since it adds unnecessary bulk.
Step 5: Secure with Spray Adhesive
This was trial and error for me. Dismissing this at first, I soon realized the adhesive's essential role in preventing the fabrics from shifting during rolling. Apply the adhesive in small sections and align as you progress.
Step 6: Attach Fabric to Rod
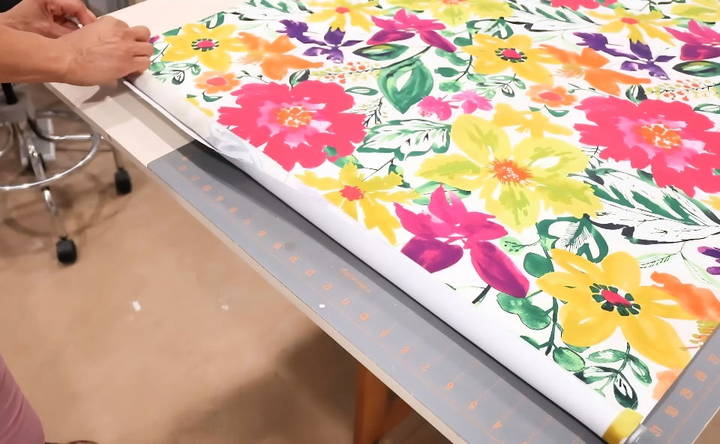
Here, double-sided tape is crucial. Attach the top edge of the regular fabric to the rod using the tape, making sure it's perfectly straight. Misalignment at this stage means crooked rolling, and trust me, you'll want to avoid this — offset shades are as frustrating as they sound!
Step 7: Roll Up the Fabric
With the fabric securely adhered, roll it up onto the rod. Take care to ensure that it goes up evenly and without lumps. This is straightforward but requires some patience. It makes a big difference in the final appearance.
Step 8: Install Mounting Hardware
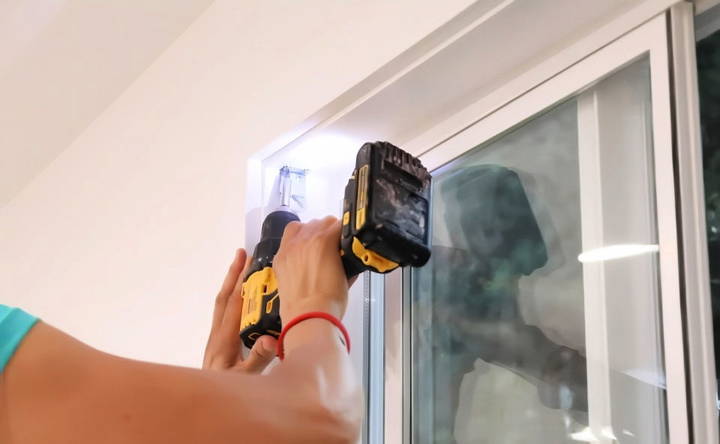
Decide if you want an inside or outside mount. For me, an inside mount seemed optimal, providing a tighter fit to block light effectively. Screw in the brackets, ensuring they are stable.
Step 9: Setting the Tension
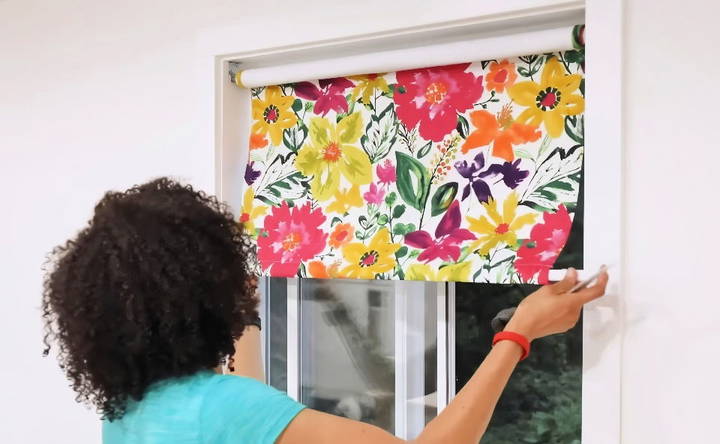
This can be tricky with basic rods. By pulling the shades down about 18 inches and allowing them to coil back up, I set the tension tight enough to hold them in place but not overly so that they risk rolling back too quickly.
Step 10: Finishing Touches
The final step was reinserting the plastic piece at the bottom of the fabric's seam, providing structure and a handle of sorts for operating the shade. This step, though simple, ensures that your shades have a polished and rigid finish.
Lessons Learned
Through this hands-on experience, several valuable lessons emerged. First, the spray adhesive was more indispensable than initially thought, easing the process and making the shades lie flat. Secondly, precision in cutting and alignment is paramount. You cannot overemphasize how much measurements matter. Lastly, allowing for flexibility with the hardware made the process adaptable to any unforeseen issues, like uneven window frames.
Cost Efficiency
Doing this myself, I managed to save considerable money. Each shade came to approximately $33. This frugality without compromising quality added satisfaction to the accomplishment.
Customization Ideas
Customizing your DIY roller shades can add a personal touch and make them fit perfectly with your home decor. Here are some easy and creative ideas to get you started:
Fabric Choices
Choose fabrics that match your room's theme. You can use light, airy fabrics for a breezy look or heavier, blackout fabrics for better light control. Consider patterns and colors that complement your existing decor.
Adding Trims and Embellishments
Enhance the edges of your roller shades with decorative trims or ribbons. You can sew or glue these on for a polished look. Tassels, beads, or lace can also add a unique flair.
Painting and Stenciling
If you enjoy painting, consider adding a custom design to your roller shades. Use fabric paint and stencils to make patterns or images. This is a great way to add a personal touch and make your shades one-of-a-kind.
Layering with Curtains
Combine your roller shades with curtains for a layered look. This not only adds depth to your windows but also provides additional light control and insulation. Choose complementary colors and fabrics for a cohesive design.
Using Decorative Pulls
Replace the standard pull cord with a decorative one. You can use a stylish knob, a piece of driftwood, or even a vintage doorknob. This small change can make a big difference in the overall look.
Incorporating Blackout Lining
For bedrooms or media rooms, consider adding a blackout lining to your roller shades. This will block out more light and provide better privacy. You can attach the lining to the back of the fabric with fabric glue or by sewing.
Personalized Prints
Print your favorite photos or designs onto fabric and use it for your roller shades. Many online services offer custom fabric printing. This is a fantastic way to showcase personal memories or artwork.
Eco-Friendly Materials
Opt for sustainable fabrics like organic cotton, bamboo, or recycled materials. These not only look great but are also better for the environment. You can find these materials at specialty fabric stores or online.
Seasonal Themes
Change your roller shades with the seasons. Use light, floral fabrics for spring and summer, and switch to warm, cozy fabrics for fall and winter. This keeps your decor fresh and exciting throughout the year.
Interactive Elements
For children's rooms, consider adding interactive elements like pockets or Velcro strips where they can attach their favorite toys or drawings. This makes the shades fun and engaging for kids.
By incorporating these customization ideas, you can make roller shades that are not only functional but also a true reflection of your personal style.
Common Mistakes and How to Avoid Them
Making DIY roller shades can be a rewarding project, but there are some common mistakes that can make the process frustrating. Here are some of the most frequent errors and how to avoid them:
Incorrect Measurements
One of the most common mistakes is not measuring the window correctly. This can result in shades that are too small or too large.
- How to Avoid: Measure the width and height of your window frame accurately. Measure at least twice to ensure accuracy. If you plan to mount the shade inside the frame, measure the inside dimensions. For outside mounts, measure the width and height of the area you want to cover.
Choosing the Wrong Fabric
Selecting the wrong type of fabric can affect the functionality and appearance of your roller shades. Some fabrics may be too thick, too thin, or not suitable for rolling.
- How to Avoid: Choose a fabric that is specifically designed for roller shades. Look for fabrics that are durable, easy to clean, and have the right opacity for your needs. Light-blocking fabrics are ideal for bedrooms, while lighter fabrics work well in living areas.
Improper Mounting
Improperly mounting the roller shades can lead to uneven rolling or shades that do not stay in place.
- How to Avoid: Follow the mounting instructions carefully. Use a level to ensure the brackets are aligned properly. Secure the brackets firmly to the wall or window frame to prevent them from coming loose.
Not Testing the Adhesive
If you are using adhesive to attach fabric to the roller, not testing it first can result in poor adhesion or damage to the fabric.
- How to Avoid: Test the adhesive on a small piece of fabric and roller material before applying it to the entire shade. Make sure it holds well and does not damage the fabric.
Ignoring Fabric Orientation
Placing the fabric incorrectly on the roller can cause it to roll unevenly or show the wrong side when rolled up.
- How to Avoid: Ensure the fabric is aligned straight and attached evenly to the roller. Pay attention to the direction in which the fabric rolls to ensure the correct side is visible when the shade is up.
Skipping the Bottom Weight
Not adding a weight to the bottom of the shade can cause it to hang unevenly and not roll up smoothly.
- How to Avoid: Use a wooden or plastic dowel at the bottom of the shade to add weight. This will help the shade hang straight and roll up evenly.
Overlooking Maintenance
Neglecting to maintain your roller shades can lead to wear and tear over time.
- How to Avoid: Regularly clean your roller shades according to the fabric's care instructions. Check the mounting brackets and roller mechanism periodically to ensure they are functioning properly.
By being aware of these common mistakes and taking steps to avoid them, you can make beautiful and functional DIY roller shades that enhance your home.
FAQs About DIY Roller Shades
Discover the essential FAQs about DIY roller shades. Learn installation tips, benefits, and troubleshooting to enhance your home decor effortlessly.
First, decide if you want an inside or outside mount. For an inside mount, measure the width and height inside the window frame. For an outside mount, measure the width and height from the outer edges of the window frame. Add a few extra inches to the width for better coverage.
Yes, you can customize your roller shades in many ways:
Fabric choice: Pick any fabric that suits your style.
Decorative trim: Add trim to the edges for a unique look.
Blackout lining: Use blackout fabric to block light and add privacy.
To keep your roller shades looking great:
Dust regularly: Use a feather duster or a vacuum with a brush attachment.
Spot clean: Use a damp cloth and mild detergent for any stains. Avoid soaking the fabric.
Check the mechanism: Ensure the roller mechanism is functioning smoothly. Lubricate if necessary.
DIY roller shades offer several benefits:
Cost-effective: Making your own shades can be cheaper than buying pre-made ones.
Customization: You can choose any fabric and design that matches your decor.
Satisfaction: There's a sense of accomplishment in making something yourself.
Functionality: You can add features like blackout lining or decorative trims to suit your needs.
DIY roller shades can be adapted for most window types, including:
Standard windows: Perfect for living rooms, bedrooms, and kitchens.
Large windows: Use wider fabric and a stronger roller mechanism.
Odd-shaped windows: Custom-fit the fabric and roller to match the window's dimensions.
Doors: Ideal for adding privacy to glass doors.
Conclusion:
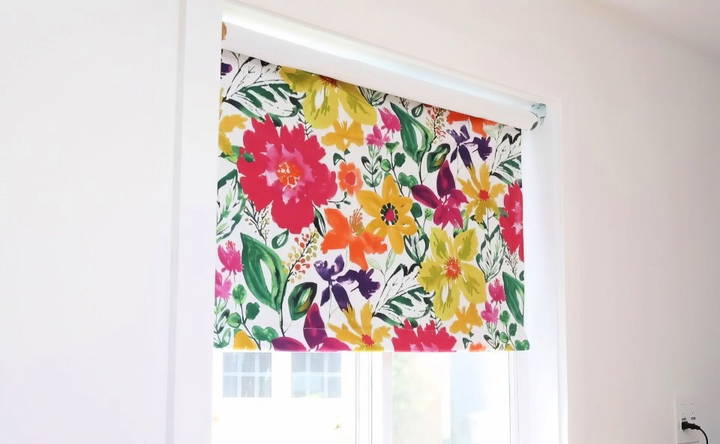
In conclusion, learning how to DIY roller shades for your windows is a rewarding project that enhances your home's aesthetics and functionality. With simple materials and steps, you can make custom shades that match your style. Enjoy the process and transform your space!


