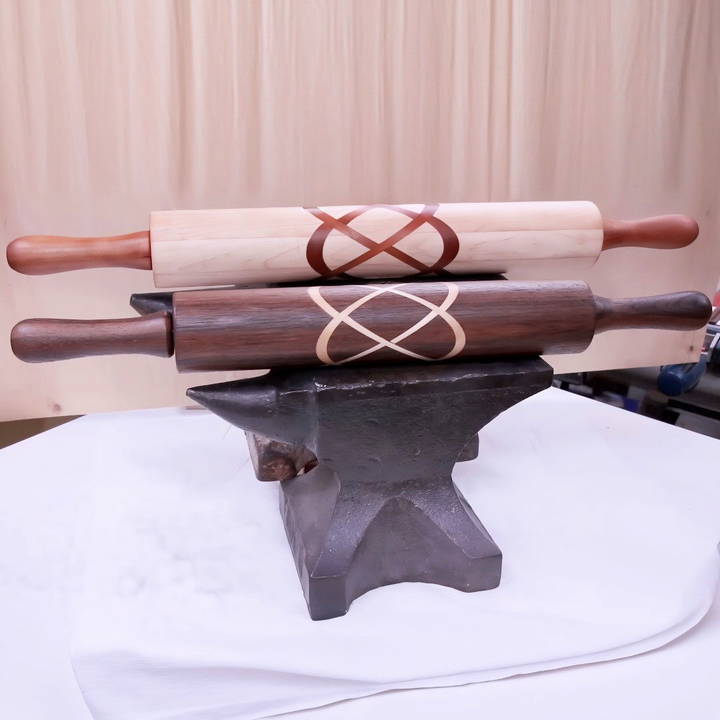
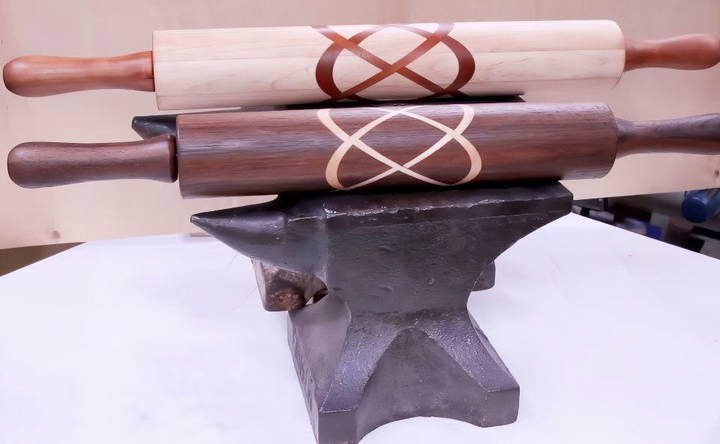
If you're looking to make a functional, beautiful, and personalized gift, a DIY rolling pin might be the perfect project. Not only is it a unique gift, but it also gives you a chance to work with wood and experiment with different designs. This guide will take you through each step of the process, including the tools, materials, and techniques needed to build a Celtic knot-inspired rolling pin. By following these steps, you'll have a handcrafted rolling pin ready for gifting in no time!
Why Make Your Own Rolling Pin?
A handmade rolling pin offers a personal touch that store-bought options simply can't match. Crafting it yourself allows for customization in design, type of wood, and finish, making it a truly special and one-of-a-kind item. Whether you're making it as a gift or for your own kitchen, this project is relatively simple and incredibly rewarding. In this guide, we'll use maple, cherry, and walnut woods, each offering unique tones and patterns for a stunning final product.
Materials You'll Need
Before you begin, make sure you have all the necessary materials and tools. Here's what you'll need:
Wood
- Maple, Cherry, and Walnut: These are hardwoods with varying colors that add contrast and beauty to the design. You can choose any combination based on the look you want to achieve.
Tools
- Lathe: A woodworking lathe is essential for shaping the rolling pin smoothly.
- Table Saw: For precise cuts, especially when making the Celtic knot design.
- Sanding Block and Sandpaper (up to 600 grit): To achieve a smooth finish on the rolling pin.
- Drill: For making holes in the handles, if your design includes them.
- Wood Glue: Strong wood glue is essential for securing different wood pieces together.
- Clamps: To hold the glued pieces tightly while they dry.
Finishing Products
- Walnut Oil: Food-safe finishing oil gives the wood a beautiful sheen while preserving its natural look.
Step by Step Instructions
Learn how to make a DIY rolling pin with easy step-by-step instructions, from preparing wood to adding a Celtic knot pattern and optional handles.
Step 1: Prepare the Wood Blocks
Start by selecting your wood. You'll need a block large enough for the rolling pin and any decorative elements. Here's how to get your wood ready:
- Cut the Wood to Size: Measure and cut your chosen wood into the approximate dimensions you want for your rolling pin. For a standard rolling pin, aim for a length of about 18-20 inches and a diameter of 1.5-2 inches.
- Make a Block for the Celtic Knot Design: Choose the primary wood for the body of your rolling pin (e.g., maple) and cut it into a solid block. This block will serve as the foundation for adding the Celtic knot design.
Step 2: Making the Celtic Knot Pattern
Adding a Celtic knot design is a creative way to make your rolling pin truly unique. This step involves precise cutting and careful gluing to build the pattern.
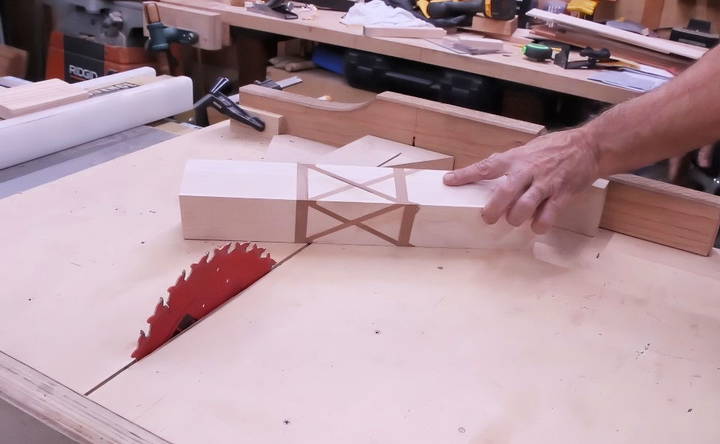
- Set Up the Jig: Use a table saw and a jig set at a 30-degree angle. This angle is crucial for making a consistent pattern. Mark the direction on one side of the block to ensure each cut lines up.
- Cut the Notches: Make cuts into the wood block at a 30-degree angle. After each cut, rotate the block, glue in a piece of contrasting wood (e.g., cherry or walnut), and let it set. Repeat this process for each side until the entire block has the pattern in place.
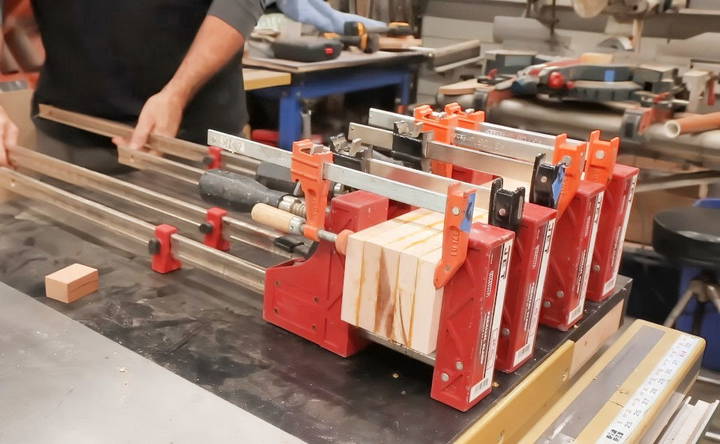
- Glue and Clamp: Apply wood glue to the end grain, allowing it to soak in for a few moments. Make sure each piece lines up precisely, then clamp it securely to dry. Let the glue set overnight for the best results.
Step 3: Sand and Shape the Rolling Pin
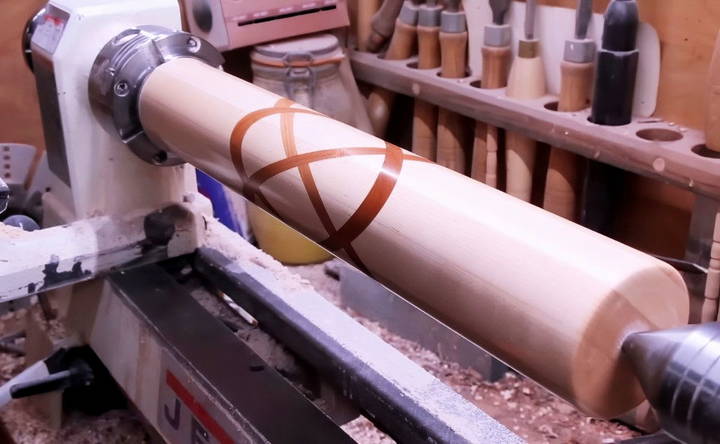
Once the glue has dried, it's time to shape the rolling pin. This step will involve turning the wood on a lathe and smoothing it to a uniform diameter.
- Mount the Block on the Lathe: Secure your wood block on the lathe, ensuring it's centered. Turn the lathe on and slowly shape the block into a cylindrical rolling pin form.
- Smooth the Surface: Use coarse sandpaper to remove any rough spots. Gradually work your way to finer grits, finishing with 600-grit sandpaper to achieve a polished look.
- Check for Symmetry: Take your time to make sure the rolling pin is evenly cylindrical. You may need to go back and make minor adjustments to ensure balance and consistency.
Step 4: Drilling and Adding Handles (Optional)
If you prefer a rolling pin with handles, this step will guide you through adding them.
- Mark the Ends for Drilling: Decide where you want the handles to be attached and mark the center points on each end of the pin.
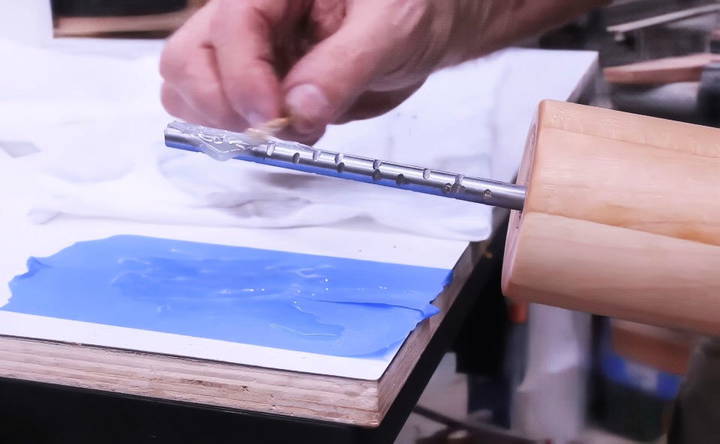
- Drill Holes for Handle Dowels: Use a drill to build holes in the ends of the rolling pin. The holes should be slightly smaller than the diameter of your dowels to ensure a snug fit.
- Attach the Handles: Glue the dowels into the drilled holes. Allow the glue to set before moving on to the final finishing steps.
Step 5: Finishing Touches
A beautifully finished rolling pin not only looks good but also has a smooth, food-safe surface that's easy to work with in the kitchen.
- Apply Walnut Oil: Using a clean cloth, apply a thin coat of walnut oil to the entire rolling pin. This finish enhances the wood's natural color and protects it from moisture.
- Buff the Surface: After letting the oil soak in, buff the rolling pin with a soft cloth. Repeat the oiling process two or three times for a deeper finish.
- Cut Off Any Remaining Tenons: If your rolling pin still has the tenons from the lathe setup, carefully saw them off and sand down the ends to match the rest of the surface.
Step 6: Presenting Your DIY Rolling Pin
Once the finishing touches are complete, your rolling pin is ready! Wrap it up as a thoughtful handmade gift or display it proudly in your kitchen.
Tips for Success
- Use Straight and Tight Joints: Ensure your wood pieces are aligned and glued tightly to prevent any gaps in the final product.
- Experiment with Different Wood Combinations: Maple, cherry, and walnut are popular choices, but feel free to explore other hardwoods to build unique color contrasts.
- Take Your Time with Sanding: The smoother the surface, the better your rolling pin will look and feel. Don't rush this step!
- Keep it Food-Safe: Use only food-safe finishes like walnut oil to ensure your rolling pin is safe for use in the kitchen.
Final Thoughts
Making a DIY rolling pin is an enjoyable and rewarding project that combines woodworking skills with creativity. Whether you're a seasoned woodworker or a beginner, this guide provides a straightforward approach to crafting a beautiful and functional kitchen tool. By following these steps and tips, you'll have a unique rolling pin ready for gifting or for adding to your own kitchen collection.
So, roll up your sleeves, gather your materials, and start crafting! With patience and precision, you'll build a rolling pin that's as practical as it is beautiful.
FAQs About DIY Rolling Pin
Discover answers to common questions about DIY rolling pins, including materials, techniques, and tips for making your own kitchen essentials.
This project can take a day or two, depending on drying times for glue and finish. Setting aside ample time for sanding and finishing is essential for achieving professional results.
Absolutely! The Celtic knot is just one of many design options. You can experiment with straight stripes, diagonal cuts, or even inlays of different shapes for a unique rolling pin design.
A lathe is ideal for achieving a perfectly round and smooth rolling pin. If you don’t have access to a lathe, you can shape the rolling pin using hand tools, but it will require more patience and precision.
In addition to walnut oil, you can use mineral oil or beeswax, both of which are food-safe and suitable for kitchen utensils. However, walnut oil tends to bring out the wood’s natural grain more vibrantly.
Yes, clamps help hold the wood pieces tightly together while the glue dries, ensuring a strong and seamless bond.
To keep the Celtic knot aligned, always replace the exact thickness you cut out. If you remove 1/8" of wood, insert an inlay piece that’s precisely 1/8". Using clamps carefully to avoid shifting during glue-up can also help maintain alignment.
A drying time of around 45 minutes between cuts should be sufficient, but drying times may vary based on temperature and glue type. If it’s warm, you may get by with shorter intervals. Fully dry before starting the next cut.
Yes, a compound miter saw can be used if set accurately to the required angle. Some woodworkers prefer table saws with sleds for stability, but a compound miter is a suitable alternative.
Drilling halfway from each end and meeting in the middle can work well. Ensure the bit is centered and proceed slowly to reduce wobbling. This method allows for accuracy without needing an exceptionally long bit.
Mineral oil is a great alternative to walnut oil, especially if there are concerns about allergies or potential rancidity. Mineral oil is food-safe and doesn’t go rancid, making it a durable choice for kitchen tools.
A small gap prevents the handles from rubbing against the roller and allows for smooth rolling. Additionally, it helps manage any glue squeeze-out that could interfere with movement.
Some find it helpful to leave a slight edge when cutting, rather than cutting through the entire blank. This keeps the piece stable while gluing. Another tip is to apply diluted glue to end grain for better adhesion, especially when joining intricate parts.
Yes, coating the rod with beeswax or another lubricant reduces friction and enhances the roller's movement. This small detail can prolong the rolling pin's lifespan and maintain smooth operation.
Yes, you can add multiple inlay pieces, but keep the cuts precise to avoid misalignment. Start with simple patterns before adding more complexity to get comfortable with the process.


