Making DIY Roman shades can be a fun and rewarding project. I remember the first time I made my own Roman shades; it was for my living room. The experience was lovely, and the end result was a set of elegant, custom shades that fit my windows perfectly. It made my room feel more personal and polished.
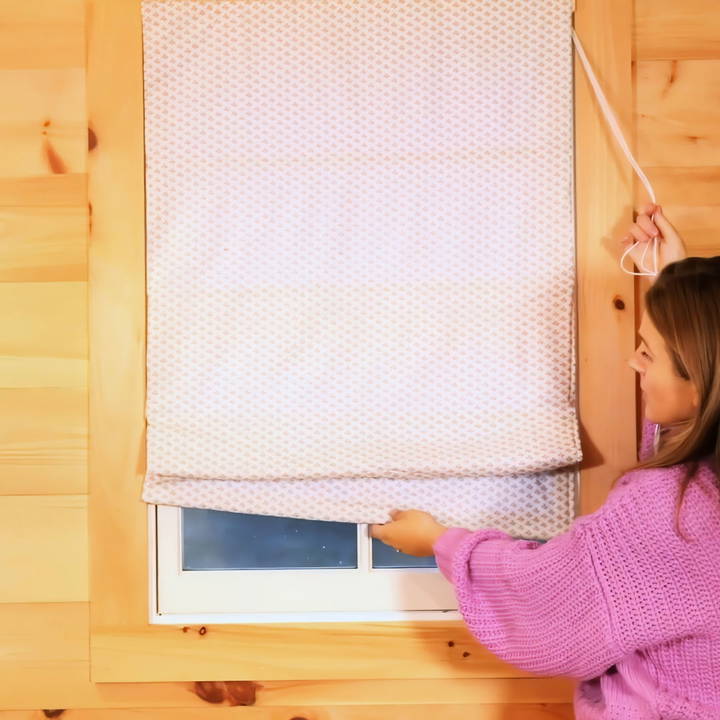
Starting the project was simpler than I expected. I gathered some fabric I liked, a sewing machine, and basic tools like scissors and measuring tape. Following step-by-step instructions, I was able to cut, sew, and assemble the shades. It gave me a sense of accomplishment and saved money compared to buying ready-made ones.
Materials Needed
- Drapery Fabric: This is the main fabric for your Roman shade. It should be three inches wider and six inches longer than your window.
- Lining Fabric: This provides additional backing and structure. It needs to be the same length as your drapery fabric but one inch narrower.
- Wooden Dowels: These make the pleats in your shade. Cut them to be a quarter inch narrower than your window.
- Metal Rod: Used to weigh down the bottom of your shade. Cut it to the same length as the dowels.
- Stitch Witchery: This helps to attach the pockets for the dowels to the fabric.
- Sew-in Rings: These are attached to the lining fabric to guide the cords for pulling up the shade.
- Piece of Wood: This secures the top of the shade to the window frame. Drill three holes aligned with the sew-in rings, plus an extra eye hook on the pull-up end.
- Cord: Used to pull up the shade.
- Staple Gun: To secure the piece of wood to the fabric.
- Sewing Machine: For stitching the fabric.
- Pins: To hold the fabric in place while sewing.
Step by Step Instructions
Learn how to make DIY Roman shades with our step-by-step guide. Measure, sew, and install your custom shades effortlessly. Perfect for home projects!
Step 1: Measure and Cut Your Fabrics
Learn how to measure and cut your drapery and lining fabrics accurately. Step-by-step tips for the perfect fit every time!
Measuring the Drapery Fabric
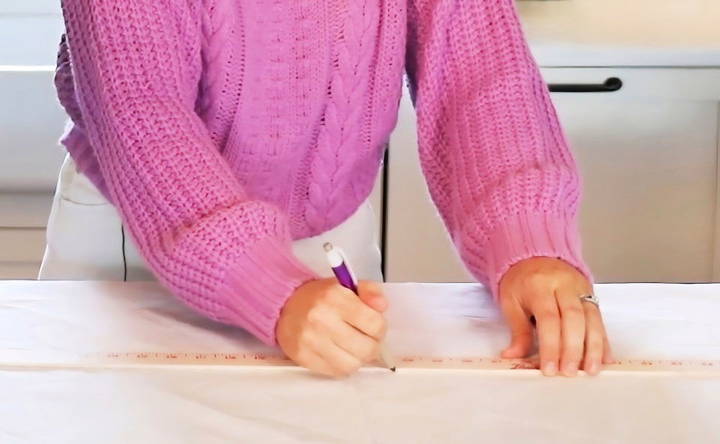
First, measure your window. Add three inches to the width and six inches to the length. Cut your drapery fabric to these dimensions.
Measuring the Lining Fabric
Next, cut the lining fabric to the same length as the drapery fabric but make it one inch narrower than your window width.
Step 2: Sew the Fabrics Together
Learn how to sew fabrics together with expert tips on layering and pinning, sewing techniques, and ironing edges for a flawless finish.
Layering and Pinning
Lay the lining fabric on top of the drapery fabric with the right sides facing each other. Pin them together loosely along the sides.
Sewing the Fabrics
Run the fabrics through the sewing machine along the pinned sides. Now, repeat this process for the other edge.
Ironing the Edges
Once sewn, iron down the edges to make a crisp, clean edge for your shade.
Step 3: Make Pockets for the Dowels
Learn how to make perfect pockets for dowels with our guide on measuring and sewing the pockets seamlessly. Get step-by-step instructions now!
Measuring and Sewing the Pockets
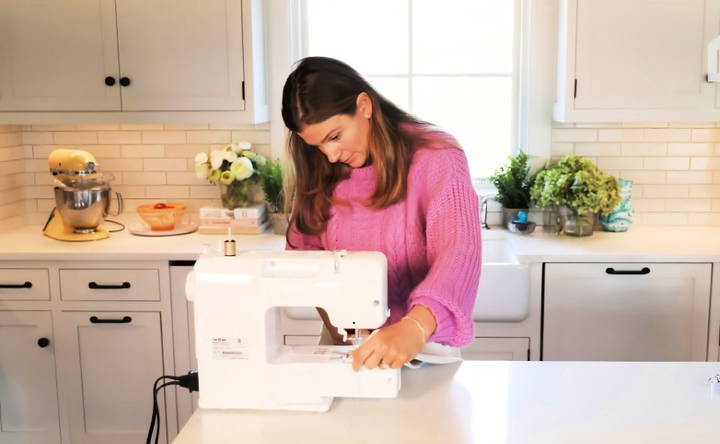
Cut pieces of the lining fabric to the width of your Roman shade. Iron them as needed. Sew these pieces to make pockets for the dowels.
Step 4: Attach the Pockets to the Drapery Fabric
Use Stitch Witchery to attach the pockets to the back of your drapery fabric. This involves ironing over the Stitch Witchery to adhere to it.
Step 5: Insert the Dowels and Metal Rod
Learn how to insert dowels and attach a metal rod for your DIY project with easy step-by-step guidance. Perfect for beginners and experts alike!
Placing the Dowels
Slide the wooden dowels into the sewn pockets. These dowels will help form the pleats when the shade is pulled up.
Attaching the Metal Rod
Fold up the bottom of your shade, measure two and a half inches, and sew a seam along this line, leaving the sides open to insert the metal rod.
Step 6: Attach the Sew-in Rings
Learn how to attach sew-in rings with precision. From measuring the placement to sewing on the rings, follow these steps for a perfect finish.
Measuring the Placement
Mark where the rings need to be attached, typically about eight to ten inches apart. Make sure to mark two and a half inches in from each edge.
Sewing on the Rings
Sew the rings onto the lining fabric at each of the marked locations.
Step 7: Secure the Top of the Shade
Learn how to secure the top of the shade with our step-by-step guide on preparing the piece of wood and attaching the fabric. Perfect for DIY enthusiasts!
Preparing the Piece of Wood
Drill three holes along the length of the wood, aligning with the positions of the sew-in rings. Add an extra eye hook at the end where you want the cord to pull up.
Attaching the Fabric
Secure the piece of wood to the top of the shade fabric using a staple gun.
Step 8: Run the Cord Through the Rings
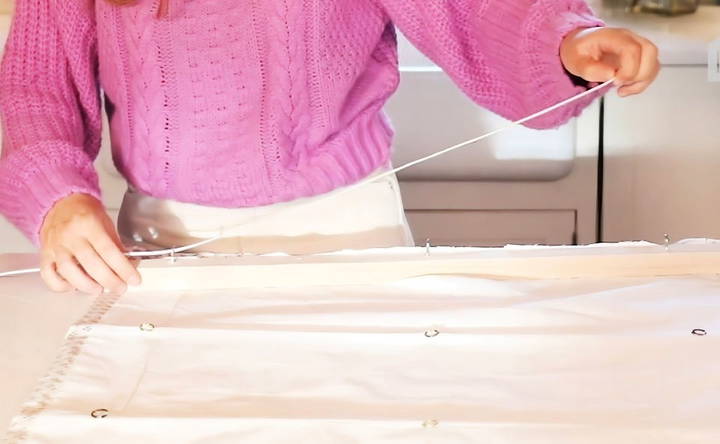
Run the cord through the sew-in rings and eye hooks in a systematic manner:
- Start at the bottom right ring, thread the cord up to the corresponding eye hook on the wood, and continue threading horizontally through the top row of eye hooks.
- Repeat the process for the middle and left rows.
Securing the Cords
Once threaded, trim the cords and knot them securely. You should have three cords of the same length, which will be used to pull up the shade.
Step 9: Install Your Roman Shade
Learn how to install your roman shade and train the fabric with our step-by-step guide. Perfect for adding style and function to any room.
Installing the Shade
Use the pre-drilled holes in your wood piece as guides and screw it into your window frame.
Training the Fabric
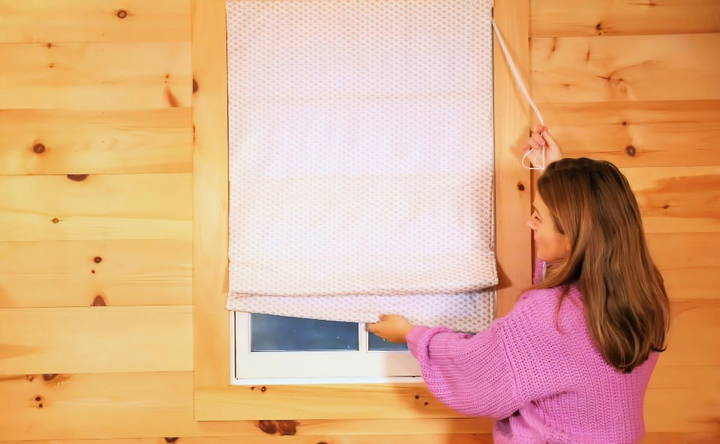
Initially, you'll need to "train" your fabric to form the pleats correctly. This simply means pulling the shade up and down a few times to set the folds in place.
Styling Tips for Roman Shades
When it comes to styling Roman shades, the key is to blend functionality with aesthetic appeal. Here are some tips to help you style your Roman shades in a way that's both trendy and timeless:
- Embrace Bold Colors and Prints: Don't shy away from vibrant colors and energetic patterns. Bold hues and dynamic designs can turn your Roman shades into a statement piece in any room.
- Mix and Match Materials: Combining different materials can add depth and texture to your space. Consider a mix of cotton-polyester or linen-silk to bring a luxurious feel to your Roman shades.
- Textured Fabrics: Textured fabrics like brocade or jacquard can add an element of sophistication to your windows. They not only look good but also provide varying degrees of light filtration.
- Patterned Variants: Geometric patterns or abstract prints can complement contemporary decor, while oversized floral designs can add a touch of elegance to more traditional spaces.
- Layering: Pair your Roman shades with sheer curtains for a layered look that allows for privacy while still letting in natural light.
- Cordless and Motorized Options: For a clean and modern look, opt for cordless Roman shades. Motorization adds convenience and is a safe option for homes with children.
- Smart Home Integration: If you're tech-savvy, consider integrating your Roman shades with your smart home system. This allows for ease of use and can help in managing energy efficiency.
The goal is to make a harmonious balance between the practicality of the shades and the overall design theme of your home.
Troubleshooting Common Issues
When crafting your own Roman shades, you might encounter a few hiccups along the way. Here's a guide to help you solve some of the most common issues, ensuring your shades look and function their best.
- Sagging: If your Roman shades droop in the middle, it's often due to the weight of the fabric or the width of the window. To prevent this, ensure your shades are properly supported and consider using lighter materials for wide windows.
- Uneven Hanging: Shades that hang unevenly are usually the result of unequal cord lengths. Adjust the cords so they're even, and make sure they're securely attached to the shade's rings.
- Cord Tangle: A tangled lift cord can hinder the smooth operation of your shades. Gently untangle the cords and check for any knots or snags that could cause future issues.
- Heat and Humidity Damage: Exposure to heat and moisture can harm your shades. Use materials that resist these elements and avoid placing shades in high-moisture areas like bathrooms.
- Sticking or Jamming: If your shades won't move up or down smoothly, the problem might be with the cord lock or the pulley system. Lubricate moving parts with silicone spray and ensure the cords are not frayed.
- Fabric Not Folding Correctly: For crisp folds, the fabric should be stiff enough. You can use iron-on interfacing to add body to the fabric, which helps maintain the folds.
By addressing these common issues, you'll extend the life of your Roman shades and keep them looking elegant.
FAQs About DIY Roman Shades
Learn everything about DIY Roman shades! Find answers to common questions on materials, measurements, installation, and maintenance.
Roman shades are a type of window covering used to block out the sun, but they also add a touch of elegance and style to a room. They are different from standard curtains or blinds because they stack up evenly when being opened. Making your own Roman shades can be a cost-effective and rewarding DIY project, allowing you to customize the design to fit your decor perfectly.
Yes, there are no-sew options available for making Roman shades. These typically involve using adhesive fabric tape or glue to make hems and attach the lining. However, for a more durable and professional finish, sewing is recommended.
To measure your window for Roman shades, decide whether you want an inside mount (within the window frame) or an outside mount (covering the frame and part of the wall). Measure the width and height of the area you want to cover. For inside mounts, measure the width and height inside the frame. For outside mounts, add extra width and height to cover the desired area.
Yes, there are several styles of Roman shades, including flat, hobbled, relaxed, and London. The style you choose depends on your personal preference and the aesthetic you want to achieve. Flat Roman shades provide a clean, modern look, while hobbled shades have soft, horizontal folds. Relaxed Roman shades have a gentle curve at the bottom, and London shades have decorative winged sides.
Choosing the right fabric for your Roman shades is crucial for both aesthetics and functionality. Consider the following when selecting fabric:
Light Filtering: Decide if you want your shades to block out light completely or allow some light to filter through. Heavier fabrics will provide more privacy and light control, while lighter fabrics will brighten the room with natural light.
Style Match: Ensure the fabric complements the room's decor. Whether you're going for a bold statement or a subtle accent, the fabric should align with your room's style.
Durability: High-quality fabric will ensure your shades withstand wear and tear over time. If the window gets a lot of sun, consider fade-resistant materials.
Ease of Maintenance: Some fabrics are easier to clean than others. If you're placing the shades in a high-traffic area, choose a fabric that's easy to spot-clean or wash.
Final Touches
A beautiful, custom-made DIY Roman shade that you crafted yourself. From cutting the fabric to hanging the shade, every step is a valuable skill that makes the finished product so satisfying. Enjoy your new window treatment, and feel free to start on another for a different room!


