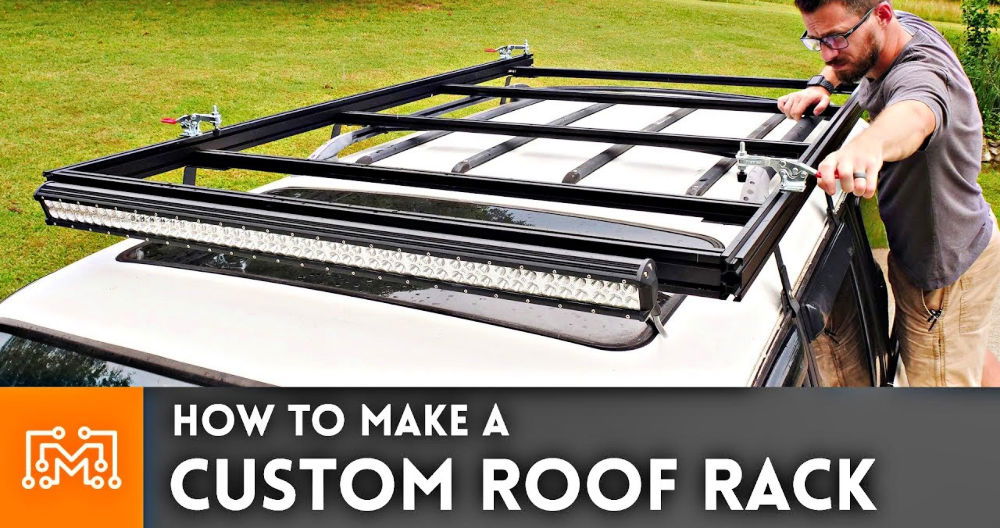
Building a DIY roof rack on a budget is a rewarding endeavor for anyone who loves overlanding adventures. Unlike store-bought options that are often expensive and might not fit your exact needs, a DIY roof rack can offer customizability, strength, and significant savings. This tutorial provides steps for constructing a reliable and versatile roof rack with common parts, mainly high-quality aluminum extrusions and some basic hardware. Whether you're looking to mount a rooftop tent or carry extra gear, this rack will be up to the challenge.

Why Build Your Own Roof Rack?
- Cost-Effectiveness: Building a roof rack from scratch can be far cheaper than buying a commercial option, especially high-end racks that can run over $1,000.
- Strength and Durability: Many commercial roof racks use lighter aluminum extrusions, which may not handle heavy loads well. By choosing thicker and stronger materials, you can build a roof rack that exceeds the strength of most market options.
- Customizability: A DIY roof rack allows for endless configuration possibilities, enabling you to add accessories, mounts, and handles precisely where you want them.
- Skill Development: Learning how to build and assemble your roof rack can make you more self-sufficient, especially helpful if you're planning remote excursions.
Materials and Tools Needed
Here's a list of materials and tools to make a roof rack that's both strong and cost-effective.
Materials
- Aluminum Extrusions: 1.5 x 1.5-inch extrusions for the frame.
- 1.5 x 3-inch extrusions for crossbars.
- Brackets and Hardware: Right-angle brackets for interior connections.
- Gusset brackets for corner strength.
- T-nuts, bolts, and spring nuts to secure crossbars and accessories.
- Go Fast Campers (GFC) Roof Rails (Optional): These are specialized roof rails that allow for easier mounting of the rack to your vehicle without drilling into the roof.
Tools
- Allen wrench or hex wrench set
- Miter saw with an aluminum blade (if cutting extrusions)
- Measuring tape
- Drill (for building holes if needed)
Step by Step Instructions
Learn how to build a DIY roof rack with step-by-step instructions, from design to installation, and customize for durability and performance.
1. Planning the Rack Design
Begin by planning the dimensions of your roof rack. This guide assumes you're building a rectangular rack roughly 90 inches in length and 50 inches wide, but you can adjust the size based on your vehicle's measurements.
- Outer Frame: Use 1.5 x 1.5-inch aluminum extrusions for the sides of the frame.
- Crossbars: Space five 1.5 x 3-inch crossbars along the width of the rack for increased support and to accommodate different mounting setups.
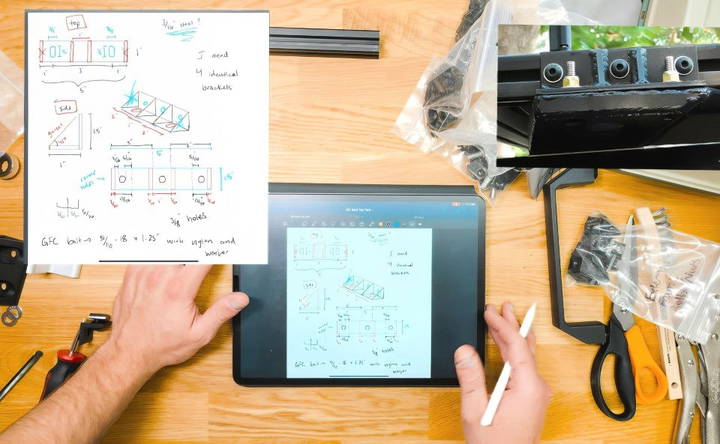
- Mounting Points: Plan where you'll need brackets and mounting points for items like rooftop tents, storage boxes, and other accessories.
2. Cutting and Preparing the Aluminum Extrusions
If you've ordered pre-cut extrusions, you may skip this step. However, if you're cutting the extrusions yourself:
- Measure Twice, Cut Once: Measure each piece to ensure it matches your desired dimensions.
- Use a Miter Saw: Equip the saw with an aluminum blade to ensure clean cuts. If you have the ends tapped for bolts, avoid cutting off these sections unless necessary.
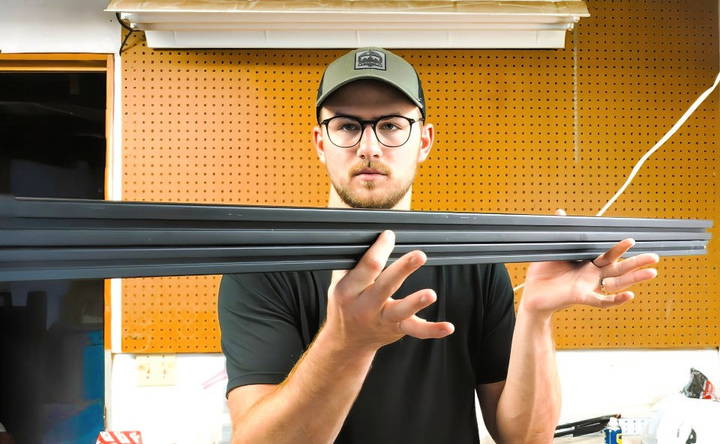
3. Assembling the Outer Frame
The frame forms the backbone of your roof rack. Follow these steps to assemble it:
- Position the 1.5 x 1.5-inch extrusions: Lay them out in a rectangular shape on a flat surface.
- Attach Gusseted Corner Brackets: Use gusseted brackets to reinforce each corner, ensuring the frame remains sturdy. Insert T-nuts into the channels of the extrusions and tighten them with an Allen wrench.
- Secure the Frame: Check all bolts to make sure they're snug but avoid overtightening, which could strip the aluminum channels.
4. Installing Crossbars
Crossbars provide structural support and mount accessories such as storage boxes, tents, and more.
- Position Crossbars: Place the 1.5 x 3-inch crossbars at evenly spaced intervals along the length of the frame.
- Attach with Right-Angle Brackets: Use right-angle brackets to connect each crossbar to the frame's sides. Insert T-nuts into the channels, and fasten each crossbar.
- Ensure Adjustability: If you anticipate needing to move crossbars in the future, leave some flexibility with the T-nuts so they can be loosened and repositioned without disassembling the entire rack.
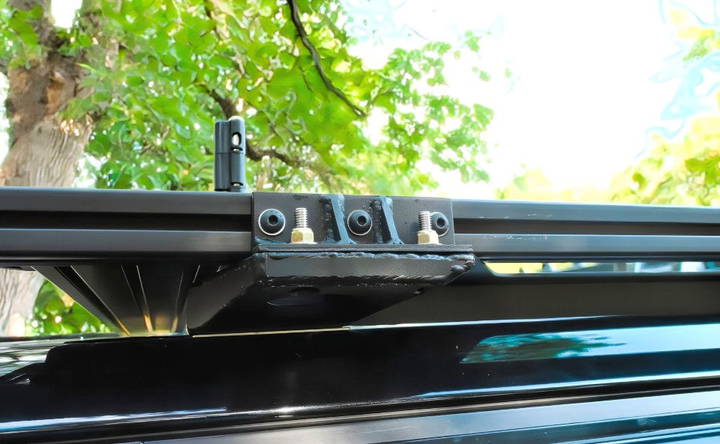
5. Adding Mounting Rails (Using GFC Roof Rails)
If using GFC roof rails, this step is essential as it lets you securely mount the rack to the vehicle without drilling.
- Position the GFC Roof Rails on the Roof: Follow GFC's installation instructions to attach the rails to your roof.
- Make Mounting Brackets: Use 3/16-inch steel to fabricate mounting brackets that will connect your DIY roof rack to the GFC rails. Drill holes in the steel that align with the rails and rack's frame.
- Attach the Brackets to the Rack: Bolt the brackets onto the frame, then secure the other end to the GFC rails using bolts, washers, and T-nuts.
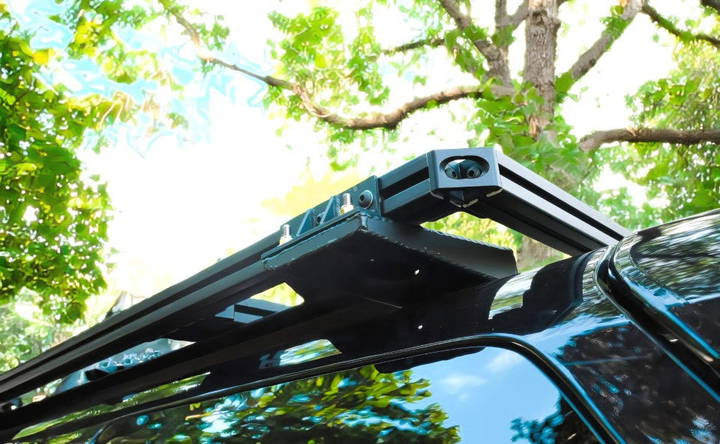
Note: If fabricating steel brackets is beyond your skill level, a local custom fabrication shop can typically make these for you at a reasonable price.
Customizing Your Roof Rack
One of the greatest benefits of a DIY roof rack is customization. With aluminum extrusions, it's easy to add accessories or change the configuration of your rack.
Accessories You Can Add
- Handles: Adding handles to the sides of your rack can make it easier to access when loading gear. These handles are inexpensive and can be attached with T-nuts.
- Brackets for Mounting Gear: Use brackets to attach recovery boards, shovels, or additional lights. These can be easily added or removed as needed.
- Hinges and Moving Parts: If you want sections of your rack to hinge open or provide adjustable mounting options, you can buy hinges compatible with aluminum extrusions.
Adjusting Crossbars
Since all crossbars are connected with T-nuts and bolts, they can be repositioned as needed. If you acquire new gear or change your rooftop tent, simply adjust the crossbars to fit.
Weatherproofing and Finishing Touches
To protect your rack from the elements, consider these finishing touches:
- Coating Steel Parts: If using steel for brackets, coat them in rust-resistant paint or powder-coat them for added durability.
- Weatherproofing Nuts and Bolts: Use stainless steel bolts and nuts to prevent rust and extend the life of your rack.
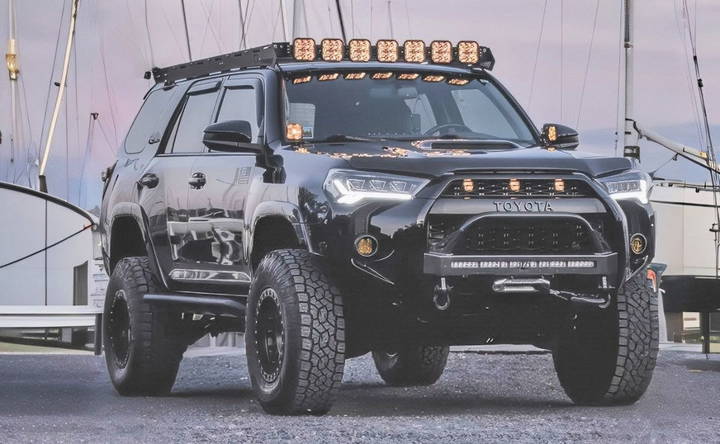
Roof Rack Comparison: Why a DIY Rack Excels
Many DIY builders compare their roof rack to high-quality commercial options, such as the Prinsu, Sherpa, and Front Runner racks. Here's how a DIY roof rack can stand out:
- Strength: DIY racks use larger and thicker aluminum extrusions than most entry-level commercial options, making them ideal for heavy loads.
- Cost Savings: A DIY roof rack, even with premium materials, can often be built for less than $900, compared to over $1,000 for commercial alternatives with similar load capacities.
- Customizability: Most commercial racks have fixed crossbars, while a DIY rack allows complete adjustability, letting you reposition crossbars to fit any setup.
Tips for Maintaining Your DIY Roof Rack
To ensure your roof rack remains reliable over time, follow these maintenance tips:
- Regularly Check Bolts and Nuts: Vibrations from off-road driving can loosen bolts over time. Periodically check and retighten them as needed.
- Inspect for Rust and Corrosion: If using any steel components, look for signs of rust. Touch up any paint or coating as necessary.
- Keep Channels Clean: Debris can get caught in the channels of the extrusions. Clean them occasionally to prevent dirt buildup.
Conclusion: An Affordable, Durable Solution for Adventurers
A DIY roof rack is not only an affordable alternative to commercial products, but it's also a project that lets you make a rack tailored specifically to your needs. With sturdy materials, customization options, and the knowledge gained through building it yourself, you can head out on adventures with confidence. A roof rack project like this is not only practical for hauling gear but also enhances your vehicle's utility and gives you invaluable experience in vehicle modifications.
Whether you're mounting a rooftop tent, adding additional storage, or just looking to improve your rig for off-road use, this DIY roof rack project will empower you to tackle new adventures with a stronger, more capable vehicle.
FAQs About DIY Roof Rack
Discover answers to common questions about DIY roof racks, including installation tips, material choices, and safety precautions.
Yes, this guide uses aluminum extrusions and brackets that connect with bolts and T-nuts, eliminating the need for welding. It’s like assembling a kit that can be modified anytime.
Using 1.5 x 3-inch extrusions for crossbars gives your rack a high weight capacity, comparable to high-end commercial racks. With sturdy mounting and GFC rails, it can hold rooftop tents, gear boxes, and other accessories.
Absolutely, as long as you use quality materials and assemble it securely. For heavy loads, avoid using the cheaper aluminum commonly found in budget roof racks, as it may bend or flex.
Aluminum is a popular choice due to its light weight and resistance to rust. Opt for thicker extrusions (e.g., 1.5 x 1.5-inch for the frame, 1.5 x 3-inch for crossbars) to increase durability. Some builders prefer steel, especially for heavy loads, but remember it adds significant weight.
Yes, it’s crucial to consider both the strength of the rack and the roof's load capacity. Under stress, the weakest component will bear the risk of failure. It’s generally better to design the rack to withstand your intended load and ensure it doesn't exceed your vehicle's roof rating.
Yes, repeated side-to-side movement (lateral forces) over rough terrain can wear out mounting points and stress the rack. Adding additional mounting feet and securing crossbars can help reduce lateral movement and prolong the life of your setup.
One option is to use mounting rails from companies like Go Fast Campers (GFC), which include a "fin delete" kit. These can securely mount the rack without drilling, though they may require adjustment based on your rack’s dimensions.
Wind noise can be an issue with any roof rack. Adding fairings or low-profile components can help reduce it. Experiment with different placements of crossbars and accessories to find the quietest configuration.
Yes, you can add or replace parts like crossbars on existing racks. For example, using extrusions with wider profiles (1 x 3 inches or 1 x 4 inches) can offer added strength if you’re modifying for heavier loads.
For GFC roof rails, a “fin delete” kit removes the shark fin antenna, but some builders prefer to stagger the mount to avoid interference. Either method works depending on the rack's height and spacing from the roof.
Use spring nuts or slide-in T-nuts to easily add attachment points. These nuts make it easy to secure bolts without disassembling the rack and offer flexible mounting options for accessories.
For steel components, use rust-resistant coatings like primer and spray paint or consider powder coating for long-lasting protection. This is especially important if you frequently drive in wet or salty conditions.


