Making a DIY rope basket is a fun and simple way to add stylish storage to your home. This project turns ordinary materials into attractive and functional baskets for various uses. With easy-to-follow steps and some basic supplies, you'll be able to craft your own baskets quickly. Making your own rope baskets is an excellent opportunity to personalize your home while staying within budget.
In this guide, we'll show you how to make a rope basket from scratch. From choosing the right rope to assembling the basket, we cover everything you need to know. The process is straightforward and suitable for anyone willing to give it a try. You'll find the instructions clear and easy to understand, perfect for ensuring a successful project. Keep reading to discover how you can make beautiful and practical storage solutions!
Materials You'll Need
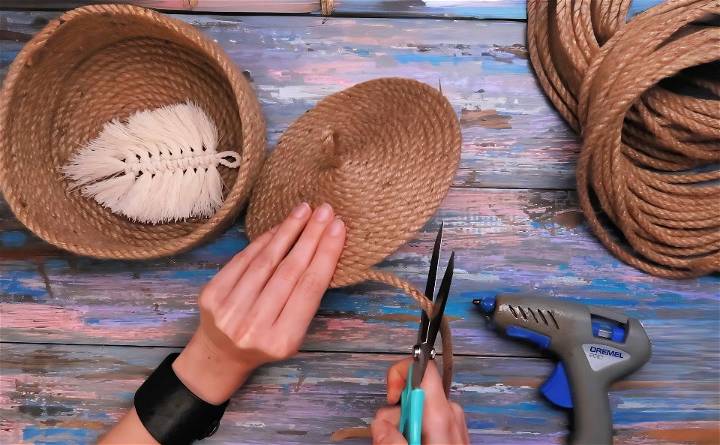
- Rope: Pick a flexible rope about seven millimeters thick. I got mine from a DIY store. The thickness is perfect for making a sturdy yet flexible basket.
- Glue: A strong adhesive like hot glue is essential to hold the rope together securely.
- Scissors: For cutting the rope cleanly.
- Glue Gun: To easily apply the glue.
Having the right materials is key to ensuring your basket is strong and long-lasting.
Step by Step Instructions
Learn how to make a DIY rope basket with our step-by-step instructions: from preparing the rope to crafting the base, walls, and cover—perfect for beginners!
Step 1: Preparing the Rope
First, take one end of the rope and use a drop of glue to keep it from fraying. This is crucial so the rope stays intact while you work with it. Hold the end in place until the glue dries.
Step 2: Crafting the Base
Now, it's time to roll the rope to form the base of the basket. Start by making a small coil with the glued end and apply another drop of glue to secure it. Keep rolling the rope around this center, adding small drops of glue and pressing the rope firmly each time.
It might be a bit tricky at first, but as the base grows larger, it becomes easier to handle. Continue this process, making sure to pull the rope slightly to stretch the glue and prevent it from leaking between the layers. This method will help you achieve a neat and tidy base.
Keep going until the base reaches your desired size. It's important to wait for the glue to dry completely after every few turns.
Step 3: Building the Walls
When you're happy with the size of the base, it's time to start building the walls of the basket. Apply a line of glue on the top edge of the base and start wrapping the rope upwards, making the sides of the basket. Press the rope down firmly and continue gluing and wrapping.
Tip: As you build the walls, control the direction of the rope to maintain an even height around the basket. Stretching the glue will again help keep everything tight and secure.
Stop wrapping once the basket is as tall as you want. Cut the rope and fix the end with a drop of glue to prevent fraying.
Step 4: Crafting the Cover
If you want to add a cover to your basket, follow these simple steps:
- Make a small loop with the rope for the starting point of the cover.
- Begin rolling the rope around this loop, securing each turn with a drop of glue, just as you did for the base.
- Continue until the cover matches the size of the basket's opening.
When you're finished, fluff the end of the rope before securing it to ensure it looks tidy. Make sure to stretch the glue and wait for it to dry completely after every few rounds.
Final Touches
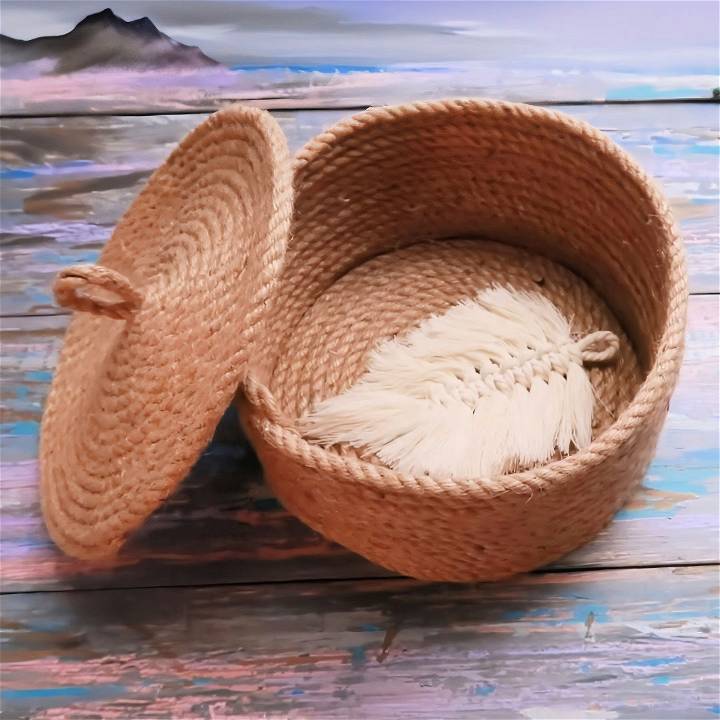
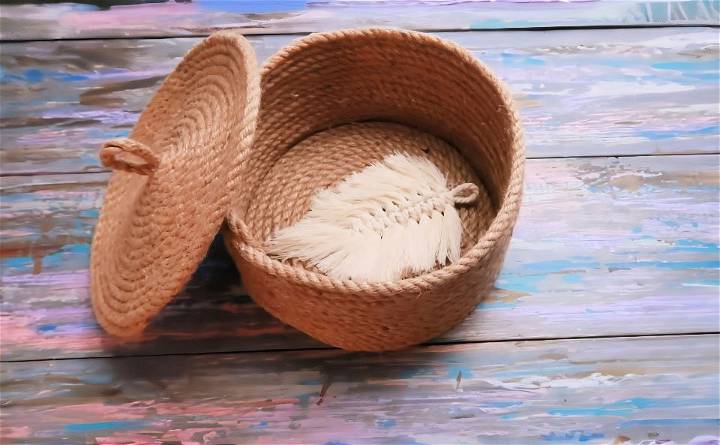
After the cover dries, your rope basket is ready to use! It's not only practical but also adds a rustic charm to your home decor. I use this basket to store my daughters' hair accessories, but it can hold anything from toys to office supplies.
Tips for Success
Keywords: DIY rope basket tutorial, craft a rope basket
- Patience is Key: Take your time to let the glue dry after each step to ensure your basket is as sturdy as possible.
- Stretch the Glue: This helps to make a cleaner appearance and avoid excess glue leaking through the layers.
- Customize: Feel free to experiment with different rope thicknesses or colors. You can also decorate the basket with ribbons or paint once it's finished.
Customization Ideas for DIY Rope Baskets
Making a DIY rope basket is not just about functionality; it's also an opportunity to express your personal style and add a unique touch to your home decor. Here are some customization ideas to inspire you:
- Choose Your Colors: Start by selecting rope in colors that complement your home. Natural tones offer a rustic feel, while bright colors can add a playful touch. If you're using cotton rope, you can even dye it yourself with fabric dye for a custom palette.
- Add Patterns: Introduce patterns into your basket by using different colored ropes or by adding painted designs. Stripes, spirals, and geometric shapes can transform a simple basket into a statement piece.
- Embellish with Textures: Mix materials by weaving in strands of yarn, ribbon, or fabric strips. This adds texture and can highlight the handmade quality of your basket.
- Personalize with Embroidery: If you're skilled with a needle and thread, consider embroidering initials, dates, or simple icons onto your basket. This is a lovely way to personalize a gift basket.
- Attach Handles or Lids: For added functionality, attach leather straps or fabric handles to make your basket portable. A matching lid can turn it into a stylish storage option.
- Line Your Basket: Sew a fabric liner that fits inside your basket. This will add a pop of color and protect the rope from wear and tear.
- Experiment with Size and Shape: Don't be afraid to experiment with the size and shape of your basket. From small, round containers perfect for keys to large, oval laundry hampers, the possibilities are endless.
- Incorporate Nature: Attach shells, driftwood, or dried flowers for a natural, earthy look. This works especially well with baskets made from jute or sisal rope.
- Functional Add-ons: Consider adding pockets on the outside for additional storage or make compartments inside for better organization.
DIY lets you make something unique. Enjoy and experiment! Your rope basket can be simple or detailed to match your style.
Advanced Techniques for Crafting DIY Rope Baskets
For those who have mastered the basics of making DIY rope baskets, advanced techniques can add complexity and uniqueness to your creations. Here's how you can elevate your rope basket-making skills:
- Incorporate Weaving Patterns: Beyond the simple coil and stitch, try basket-weaving patterns like the herringbone or zigzag. These patterns require careful planning and execution but result in stunning designs.
- Use Macramé Knots: Integrate macramé knots into your basket for decorative flair. Knots such as the square knot and spiral knot can make intricate textures and patterns.
- Experiment with Shapes: Move beyond the traditional round basket. Try making oval, square, or even triangular baskets. This will involve calculating angles and planning the placement of your rope coils more carefully.
- Make a Lid: A matching lid can turn your basket into an elegant storage solution. Measure the top diameter of your basket and make a slightly larger coil. Attach it with a hinge or make a snug fit to use as a lift-off lid.
- Add Feet or a Base: Give your basket a raised base by attaching small wooden or rope feet. This not only adds to the aesthetic but also keeps the basket off damp surfaces, protecting it from moisture.
- Layer Different Materials: Combine rope with other materials like fabric, leather, or metal for a mixed-media effect. This can add both visual interest and functionality.
- Try Different Stitches: Use stitches like the blanket stitch or cross stitch for joining your coils. Each stitch offers a different look and level of sturdiness.
- Play with Rope Thickness: Use varying thicknesses of rope within the same basket for a textured look. Thicker ropes make for a sturdier base, while thinner ropes can be used for detailed work on the sides or rim.
- Incorporate Functional Elements: Design your basket with specific uses in mind. Add compartments, pockets, or dividers to organize items within the basket.
- Focus on Finishing Touches: Pay attention to the finishing touches. Smooth edges, even stitching, and a consistent pattern can make a big difference in the overall look of your basket.
By applying these advanced techniques, you'll not only challenge your crafting skills but also make rope baskets that are both functional and artistic.
Design Variations for DIY Rope Baskets
When it comes to DIY rope baskets, the design possibilities are as vast as your imagination. Here are some creative variations that can add a personal touch to your baskets, making them not only practical but also a reflection of your style.
- Shape Your World: Don't limit yourself to the traditional circular basket. Explore other shapes like squares, rectangles, or even a heart shape for a special gift. The key is to form the base in your desired shape and continue building up.
- Color Me Beautiful: Introduce color into your baskets by using dyed rope or painting sections of the basket. A dip-dyed effect or ombre transition can add a modern twist to your design.
- Texture Talk: Combine ropes of different textures for a tactile experience. Mix smooth cotton with rough jute or incorporate braided sections to make visual interest.
- Size Matters: Make a set of nesting baskets that fit inside each other. This not only saves space but also offers a cohesive look when displayed together.
- Pattern Play: Weave in patterns as you construct your basket. Alternating colors of rope can make stripes, chevrons, or even a houndstooth pattern.
- Functional Flair: Add functionality to your baskets with pockets on the outside for additional storage or loops to hang them on the wall.
- Lid Love: Craft a lid for your basket to keep contents dust-free. You can make a simple flat lid or a domed one for extra space.
- Handle It: Attach handles made from rope, leather, or fabric for easy carrying. Consider the weight of the basket and contents to ensure the handles are sturdy.
- Feet First: Give your basket a base by adding small feet. This can be as simple as knots of rope or small wooden blocks glued to the bottom.
- Personal Touch: Monogram your basket with initials or a special date. Use a stencil and paint or a hot glue gun to affix decorative elements.
Use these design ideas to craft a functional and unique rope basket. Enjoy experimenting with different styles to make each one your own.
FAQs About DIY Rope Basket
Discover answers to your FAQs about DIY rope baskets and learn tips, materials needed, and step-by-step guides for perfect crafting.
Yes, you can make a no-sew rope basket by using a hot glue gun to bond the rope as you coil it around the mold. This method is simple and doesn't require any sewing skills.
Once your base is ready, place the mold on top of the rope disk. Start gluing the rope around the mold, building up the walls. Continue this process until the basket reaches your desired height.
Absolutely! You can add a flower design, use different colored ropes, or even wrap fabric strips around the rope for a unique look. Feel free to get creative with the design to suit your style or the intended use of the basket.
Yes, you can wash your rope basket. If you use a washable rope and glue, you can gently hand wash it in cold water with mild detergent. Avoid machine washing to prevent the basket from losing its shape. Let it air dry completely before using it again.
Personalizing your rope basket is a great way to make it blend seamlessly with your home decor. Here are some ideas:
Dye the rope before you start crafting to match your color scheme.
Wrap fabric strips around the rope for added texture and color.
Attach decorative elements like buttons, beads, or tassels to the finished basket.
Paint patterns on the completed basket with fabric paint for a unique touch.
Conclusion
In conclusion, making a DIY rope basket is a simple and enjoyable craft that can add stylish storage solutions to your home. By following these steps on how to make a rope basket, you can transform ordinary materials into functional and trendy décor. Grab your supplies today and start your next DIY rope basket project to enhance your living space with a personal touch.


