Building my own DIY router sled was an exciting project. I started by gathering all materials, including some wood and metal parts. Then, I consulted some router sled plans that I found online. This helped me ensure I had everything I needed. The step-by-step guides were helpful and made the process simpler. I followed the plans meticulously to avoid any mistakes.
Putting together the sled piece by piece was satisfying. Once assembled, I tested it out and it worked great! Now, it's easier for me to get smooth, even surfaces on my woodworking projects. This guide on how to build a DIY router sled will help you build your own too. It's practical and fun, just like my experience.
So, go ahead and dive into this project. The guide will provide you with the confidence to start building your own router sled. Trust me, it's worth the effort and will make your woodworking much easier!
What is a Router Sled?
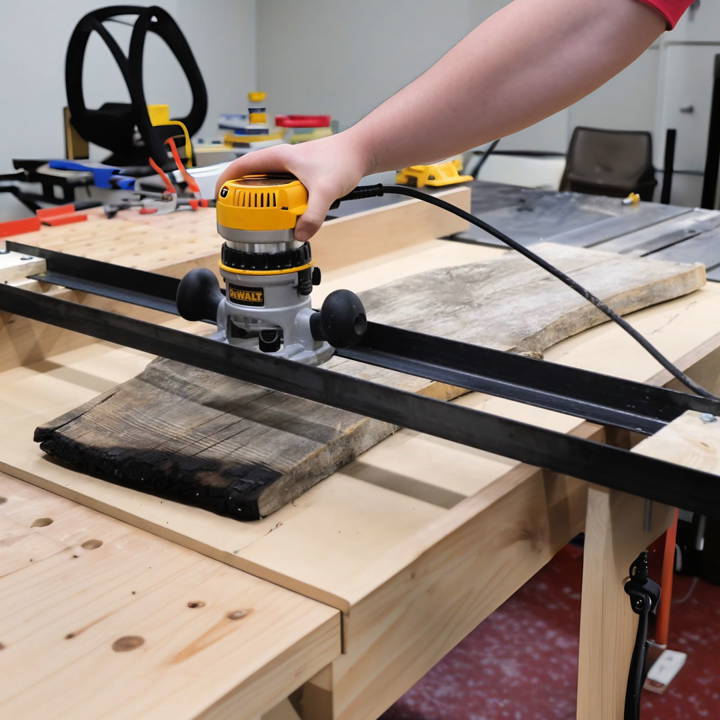
A router sled consists of a flat base that slides over two parallel rails, with a router mounted in the middle. As you move the sled across the wood, the router bit protrudes slightly below the base, shaving off thin layers of wood to build a level surface. This method is highly effective for materials that are too wide or too long for traditional planers or joiners.
Why Build Your Own?
Building your own router sled has several advantages. It's cost-effective, as commercial sleds can be expensive. It also allows for customization; you can tailor the size and features to suit your specific projects. Moreover, the process of building one can enhance your woodworking skills and understanding of tool mechanics.
The DIY Advantage
Building a DIY router sled is not just about saving money; it's about crafting a tool that meets your unique needs. You can decide on the size, the type of rails, the router mount, and many other features. Plus, there's a sense of accomplishment and pride that comes with using a tool you've built yourself.
A router sled is essential for serious woodworkers, allowing work on large wood pieces and ensuring flat surfaces and building your own offers a customized, versatile tool and DIY satisfaction.
Materials Needed and Why
- Router Base: To determine the required width of your sled.
- Angle Iron: Provides a sturdy and straight guide for the sled.
- Pine Board: Serves as the base where the router will sit.
- Screws, Bolts, Washers, and Nuts: For assembling the sled securely.
Each material was chosen for its durability and ease of acquisition. Pine is affordable and easy to work with, while angle iron ensures the sled remains straight and true during use.
Step by Step Instructions
Learn how to make a DIY router sled with our step-by-step instructions. Perfect for woodworking projects. Easy, detailed, and efficient guide!
Step 1: Laying Out Your Design
I began by placing my router base between two pieces of angle iron on the pine board to mark the width needed. This step is crucial as it determines the path your router will take across the sled.
Step 2: Cutting and Adjusting the Pine Board
With my width identified, I cut the pine board to size using a miter saw and adjusted its width on the table saw to about four inches for a comfortable fit.
Step 3: Attaching the Angle Iron
I drilled holes through the pine and into the angle iron, securing them with bolts and washers. This connection is vital as it holds the structure together. Although my bolts were longer than necessary, they didn't hinder the sled's functionality. However, for a cleaner look, consider using appropriately sized bolts.
Step 4: Building the Fence Guides
To prevent lateral movement, I cut additional pieces of pine to build perpendicular fence guides and attached them to the sled using screws. This ensures your router moves smoothly along the predetermined path without veering off course.
Step 5: Finishing Touches with Paste Wax
Applying paste wax to the angle iron and the pine bed reduced friction and protected the wood. This not only makes the sled glide more smoothly but also extends its life by minimizing wear.
Step 6: The Rail System
Since storing a permanently assembled bed was impractical for my small workshop, I opted for using two parallel jointed lumber pieces clamped to my workbench. This flexible setup allowed me to accommodate larger slabs and dismantle everything for efficient storage.
The Test
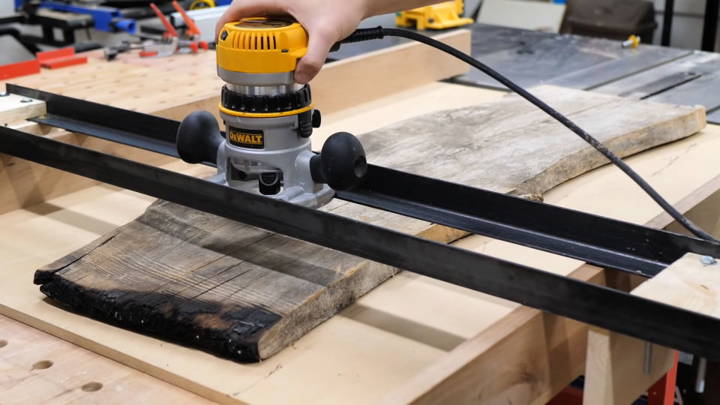
After assembly, it was time to put my router sled to the test. I secured a piece of wood that was too large for my planer and began flattening. The process was mesmerizing. The sled moved smoothly, and the router made consistent cuts across the slab. It was a moment of pride and a realization that woodworking is not just about having the right tools but also about the ingenuity in making solutions.
This project was a significant learning curve, emphasizing the importance of precision and patience in woodworking. While the build wasn't perfect, the imperfections were lessons in disguise.
Tips for Future Builders
- Measure Twice, Cut Once: Accuracy is key to ensuring the sled functions correctly.
- Customize for Comfort: Adapt dimensions based on your specific needs and workspace.
- Maintenance Matters: Regularly check bolts for tightness and apply paste wax for smooth operation.
Customization Tips
When it comes to making a DIY router sled, one of the most exciting aspects is the ability to customize it to your specific needs. Here are some tips to help you make a router sled that's not just functional but also tailored to your personal woodworking style.
Choose the Right Materials
The materials you choose for your sled can affect its performance and durability. For the rails, consider using aluminum or steel for strength and stability. For the base, plywood or MDF offers a flat, smooth surface that's easy to work with.
Adjustable Rails
To accommodate different sizes of wood, build adjustable rails. You can do this by adding slots in the base where the rails attach, allowing you to move them closer together or further apart as needed.
Router Bit Selection
The type of router bit you use can greatly impact the quality of the cut. For general use, a straight bit is versatile, but for finer finishes, consider a spiral upcut bit which can reduce tear-out and leave a smoother surface.
Handles for Control
Adding handles to your sled can give you better control and make it easier to use. Position the handles so they're comfortable to grip and provide good leverage when moving the sled across the wood.
Dust Collection
Wood routing can build a lot of dust. Incorporate a dust collection system into your sled design to keep your workspace clean. This could be as simple as attaching a vacuum hose near the router bit.
Incremental Depth Stops
For precision work, add a system for setting incremental depth stops. This will allow you to make consistent cuts, especially when you're working on a project that requires multiple passes.
Visual Guides
Consider adding clear visual guides on the sled, such as measurement markings or alignment indicators. These can help ensure accuracy and repeatability in your cuts.
Test and Refine
Before using your sled on a project, test it on scrap wood. This will give you the chance to make any necessary adjustments and get a feel for how it performs.
Keep It Simple
While it's tempting to add many features, remember that the best tools are often the simplest. Don't overcomplicate your design; focus on what will make the sled most useful for your projects.
Customize your router sled to enhance your woodworking needs and add a personal touch to your workshop. A well-designed sled is both enjoyable to use and a valuable tool.
Troubleshooting Common Issues
Working with a DIY router sled can sometimes present challenges. Here's a guide to help you troubleshoot common issues, ensuring your woodworking projects continue smoothly.
Uneven Surfaces
- Symptom: Your sled leaves dips or ridges, making the surface uneven.
- Cause: This could be due to uneven pressure distribution or an unstable sled.
- Solution: Ensure your sled and workpiece are level. Check the rails and base for flatness and stability.
Router Bit Problems
- Symptom: The router bit burns the wood or fails to cut properly.
- Cause: This might happen if the bit is dull or if you're removing too much material at once.
- Solution: Sharpen or replace the bit. Adjust the depth of cut to be shallower, and take multiple passes if needed.
Sled Movement Issues
- Symptom: The sled sticks or is hard to move along the rails.
- Cause: Debris on the rails or insufficient lubrication can cause this issue.
- Solution: Keep the rails clean, and consider applying a dry lubricant to help the sled glide smoothly.
Deflection and Tilting
- Symptom: The router tilts, causing an uneven cut or damage to the wood surface.
- Cause: This can occur if the sled is not rigid enough or if the rails are not parallel.
- Solution: Reinforce the sled's structure and ensure the rails are parallel and securely mounted.
Dust Management
- Symptom: Excessive dust accumulation during routing.
- Cause: Lack of an effective dust collection system.
- Solution: Attach a vacuum hose near the router bit or incorporate a dust collection port into your sled design.
Inaccurate Cuts
- Symptom: The cuts are not straight or the dimensions are off.
- Cause: This could be due to misaligned guides or measurement errors.
- Solution: Double-check the alignment of your sled and use reliable measuring tools for setting up your cuts.
Fixing these common problems keeps your DIY router sled efficient and precise. Regular maintenance and setup are crucial for top woodworking results.
Safety Precautions and Best Practices
When working with a DIY router sled, safety is paramount. Here are some essential safety precautions and best practices to ensure you work safely and effectively:
Personal Protective Equipment (PPE)
Always wear PPE when operating your router sled. This includes:
- Safety goggles to protect your eyes from sawdust and debris.
- Ear protection, such as earmuffs or earplugs, to guard against the loud noise from the router.
- Dust masks or respirators to prevent inhalation of fine dust particles.
Workpiece Security
Secure the workpiece properly to prevent any movement while routing. Use clamps or stops to hold the wood in place firmly.
Router Bit Selection
Use the correct router bit for the task at hand. Ensure it's sharp and appropriate for the material you're working with.
Hands and Fingers Safety
Keep your hands and fingers away from the router bit. Always be aware of the bit's location and maintain a safe distance.
Power Safety
Unplug the router when changing bits or making adjustments. Never adjust the router or the sled while the router is connected to power.
Clean Workspace
Keep the router and work area clean. Sawdust can be slippery and may cause the router to not plane the wood flat if it rolls over the debris.
Proper Technique
Use the router sled with controlled and steady movements. Avoid forcing the router; let the bit do the cutting at a pace it can handle.
Regular Inspections
Before each use, inspect your router sled for any loose parts, damage, or wear. Tighten any loose bolts and replace parts as necessary.
Stay Informed
Stay up-to-date with the latest safety standards and best practices for woodworking. Knowledge is a key component of safety.
Follow these safety measures to enjoy woodworking with your DIY router sled and reduce the risk of accidents.
FAQs About DIY Router Sled
Discover answers to common questions about DIY router sleds, including tips for building, using, and maintaining your own router sled.
A DIY router sled is a homemade tool that allows you to flatten large pieces of wood. It consists of a flat base, two parallel rails, and a sled that holds the router. As you move the router back and forth across the wood, it trims off thin layers, resulting in a smooth, level surface.
Yes, you can customize your router sled to fit the size of your projects. For smaller projects like end tables, a 2-foot square sled may suffice. For larger projects like coffee tables or dining tables, you might need a sled that’s 3-by-4 feet or even a full sheet of plywood (8-by-4 feet). The key is to ensure the rails are tall enough to accommodate the thickness of the wood you’re milling.
While a DIY router sled is not the quickest method for flattening wood, it is straightforward to use. It can be time-consuming and build a lot of sawdust, but it's an effective way to flatten wood without industrial-sized milling equipment. It's important to follow safety precautions and use the sled correctly to achieve the best results.
To ensure accuracy, make sure your rails are perfectly parallel and level. Use a spirit level to check the baseboard and rails. Also, confirm that your router bit is perpendicular to the sled base. A precise setup will result in a more uniform flattening process.
Safety is paramount when using any woodworking tools. Always wear safety glasses, ear protection, and a dust mask. Secure the wood you're flattening to prevent it from moving. Keep your hands clear of the router bit, and never reach under the sled while the router is running. Ensure your workspace is well-ventilated to manage sawdust.
Conclusion
Now that you have the basics don't wait. Get started on your DIY router sled today and experience the satisfaction that I did.


