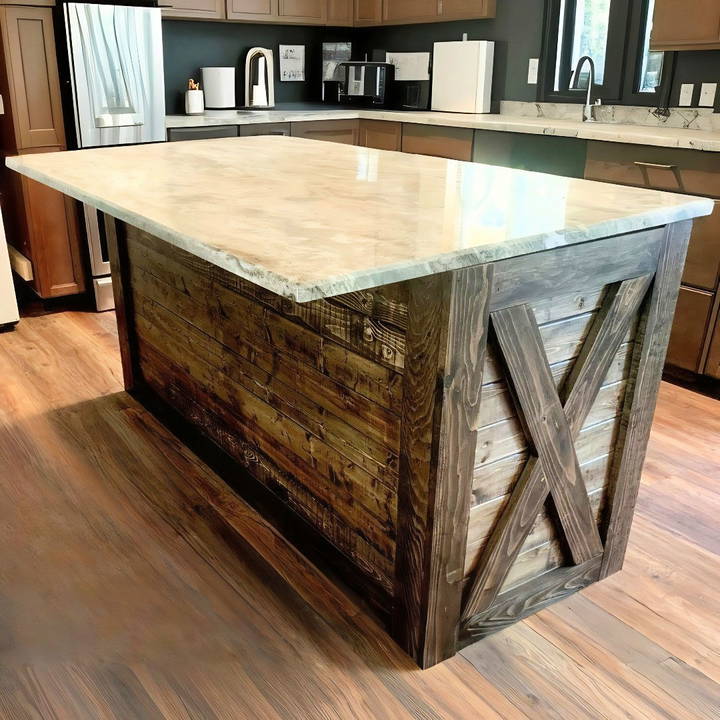
Building a DIY rustic kitchen island is a fantastic way to add a unique and functional piece to your kitchen without breaking the bank. This guide will take you step by step through making a rustic kitchen island using budget-friendly materials and easy methods. Whether you're new to woodworking or have some experience, this project is a great way to add charm and utility to your space for under $150.
Why Build a Rustic Kitchen Island?
A kitchen island can transform your kitchen, providing extra counter space, storage, and a place for family and friends to gather. But custom-built or store-bought islands can be costly, often exceeding $500 or more. Building your own allows you to build a piece that matches your style while saving money. The rustic style adds warmth and character, making your kitchen feel inviting and personalized.
Materials and Tools Needed
Before starting your project, gather all necessary materials and tools. This will streamline the process and help avoid unexpected trips to the store.
Materials:
- Stock base cabinets (e.g., from Lowe's or similar hardware stores)
- Quarter-inch plywood sheets
- Tongue-and-groove pine boards
- Wood glue
- Stain (choose a darker shade for contrast)
- Gel stain (optional, for a richer finish)
- Trim pieces (to cover edges and add detail)
- Brad nails and a brad nailer
- Sandpaper
Tools:
- Measuring tape
- Circular saw or table saw
- Miter saw (for precision cuts)
- Hammer or pneumatic brad nailer
- Sanding block or electric sander
- Paintbrushes and cloths for staining
- Safety goggles and gloves
Step by Step Instructions
Learn how to build a DIY rustic kitchen island under $150 with step-by-step instructions for each stage, from choosing materials to finishing touches.
1. Choosing and Preparing the Base Cabinets
Start by selecting stock base cabinets. These can be found at most hardware stores and offer a sturdy base for your island. Stock cabinets are a budget-friendly choice compared to custom-made options, and they serve as the foundation of your project. Here's how to prepare them:
- Measure the area where you plan to place the island to ensure the cabinets fit properly.
- Choose cabinets that match the width and depth you desire for your island.
- Sand the surfaces lightly to prepare them for finishing later.
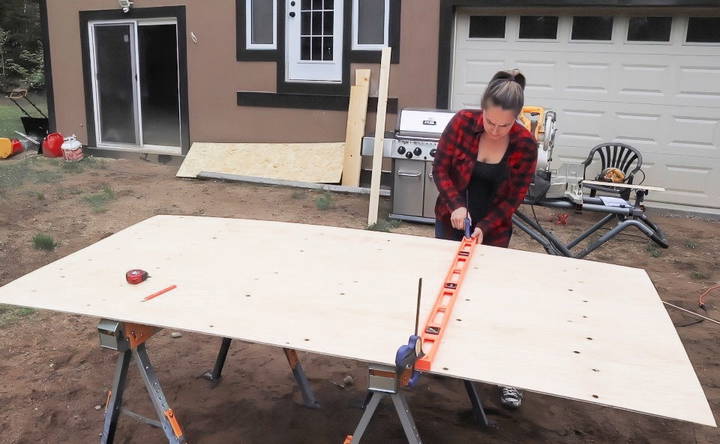
2. Cutting the Plywood Backing
To build the base for your rustic planked look, you'll use quarter-inch plywood. This backing provides a stable surface to attach the tongue-and-groove pine boards.
- Measure the sides and back of the cabinet to determine the size of the plywood pieces.
- Cut the plywood to size using a circular or table saw.
- Make sure the plywood pieces are slightly larger than the cabinet's sides to cover any edges and imperfections.
3. Attaching the Pine Boards
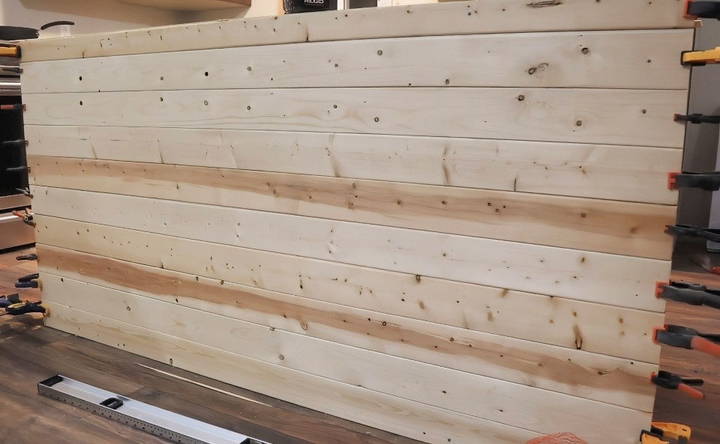
The tongue-and-groove pine boards give your island the desired rustic charm. Here's how to attach them:
- Cut the pine boards to fit the height and width of the plywood backing.
- Lay out all your pine pieces before attaching to ensure a good fit.
- Apply wood glue to the back of each board and press it onto the plywood.
- Use a brad nailer to secure each board firmly in place.
- Repeat the process for all sides of the island that you want to cover with the pine boards.
Tip: Doing all your cuts ahead of time can save you time during assembly, especially if you're working against the weather or other time constraints.
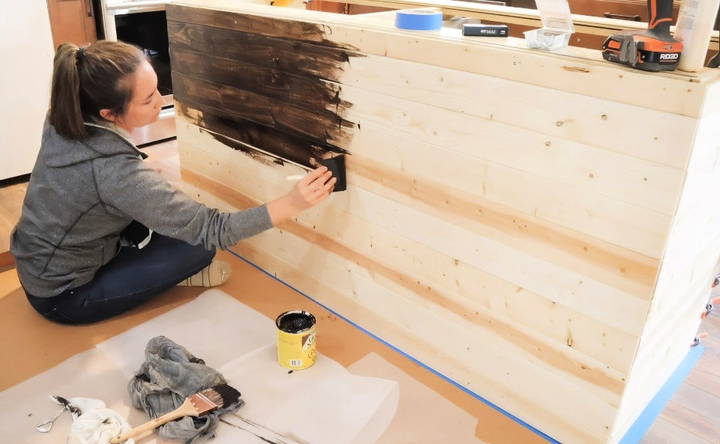
4. Applying the Stain
Staining adds depth and enhances the natural look of the wood. It also helps protect the surface from moisture and wear.
- Choose a stain that contrasts slightly with your stock cabinets for a layered look.
- Use a brush to apply the stain evenly, following the grain of the wood.
- Allow the stain to penetrate the wood for a few minutes, then wipe off any excess with a cloth.
- Consider using a gel stain for a deeper color and a more uniform finish, especially on larger panels.
- Let the first coat dry thoroughly before deciding if a second coat is needed.
5. Adding Trim for a Finished Look
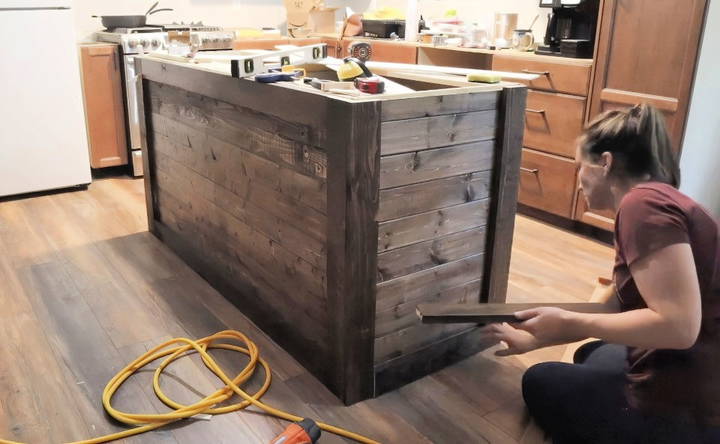
Trim pieces help cover edges and provide a polished, cohesive look. It also helps to hide any gaps between the planks and the plywood backing.
- Cut trim pieces using a miter saw for precise 45-degree angles at the corners.
- Sand the edges of the trim to ensure a smooth finish.
- Stain the trim pieces before attaching them to avoid any accidental drips on your finished island.
- Use wood glue and a brad nailer to secure the trim along the edges of the cabinet.
- Be careful with measurements to ensure that each trim piece fits snugly, providing a seamless look.
6. Building the X-Design (Optional)
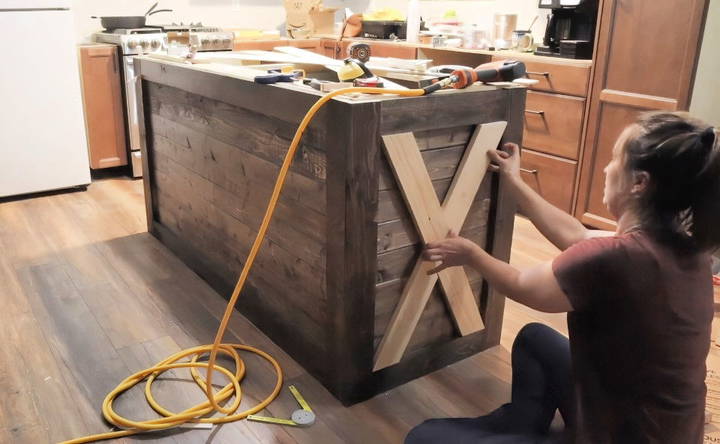
Adding an X-design to the sides of the island can give it an extra rustic flair. This part requires precision but is worth the effort for a farmhouse-inspired look.
- Measure the diagonal length of the side panels where you want the X-design.
- Cut your wood pieces to match the measurements, making sure the ends are angled for a tight fit.
- Test fit the pieces before staining and attaching them.
- Glue and nail the pieces into place once you are satisfied with the fit.
7. Final Touches and Assembly
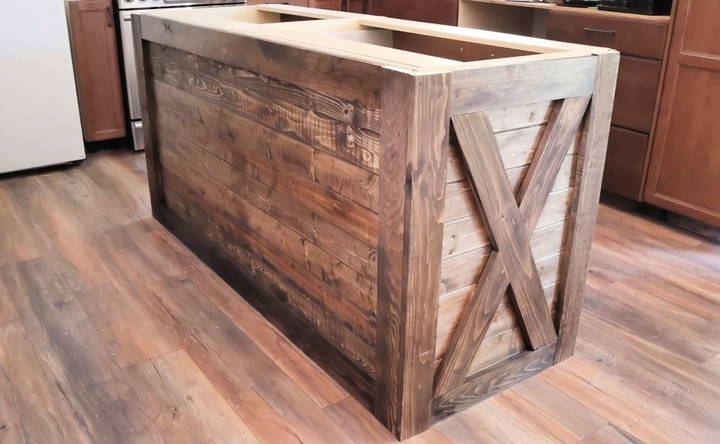
With the trim and X-designs in place, your rustic kitchen island is almost complete.
- Sand down any rough edges or uneven spots.
- Apply a final coat of stain to any exposed wood.
- Seal the wood with a polyurethane finish if desired, especially if the island will see heavy use or frequent spills.
- Allow the entire island to dry for at least 24 hours before use.
Budget Breakdown: Keeping It Under $150
Building a DIY rustic kitchen island on a budget is possible by choosing affordable materials and repurposing items where you can. Here's an estimated budget breakdown:
- Stock base cabinets: $50-75 (depending on size and quality)
- Quarter-inch plywood: $20-30
- Tongue-and-groove pine boards: $30-40
- Wood glue, stain, and finish: $20
- Trim pieces: $10-15
- Miscellaneous (nails, sandpaper): $10
By focusing on cost-effective materials and doing the work yourself, you can keep the total cost under $150, well below the price of a pre-made kitchen island or stock panels.
Tips for a Successful DIY Rustic Kitchen Island
- Plan Ahead: Measure twice, cut once! Precise measurements ensure that your pieces fit together well.
- Safety First: Wear safety goggles and gloves when using saws and handling wood. Follow all tool instructions carefully.
- Don't Rush the Stain: Allow the stain to dry thoroughly between coats to avoid smudges and uneven color.
- Consider the Environment: If working outdoors, plan your project around the weather to avoid issues with moisture during staining and assembly.
What's Next? Adding Countertops and Finalizing Your Island
Once your rustic kitchen island is complete, the final step is to add a countertop. Depending on your preference, you can use butcher block, stone, or even repurposed wood for the surface. Here are a few options to consider:
- Butcher Block: A classic choice that complements the wood's natural look.
- Granite or Quartz Remnants: For a more modern contrast, choose stone remnants from local fabricators.
- Reclaimed Wood: Adds to the rustic appeal and can often be sourced for free or at a low cost.
Once your countertop is installed, enjoy your new kitchen island! It's more than just a piece of furniture—it's a functional space that adds warmth and character to your kitchen.
Conclusion: Transform Your Kitchen with a DIY Rustic Island
Building a DIY rustic kitchen island is a rewarding project that offers a blend of style, functionality, and personal satisfaction. With careful planning, attention to detail, and a little patience, you can build a stunning centerpiece that enhances your kitchen's aesthetic while staying well within your budget. So gather your tools, follow these steps, and enjoy the process of making a custom piece that's uniquely yours. Happy building!
FAQs About DIY Rustic Kitchen Island
Discover answers to common questions about making a DIY rustic kitchen island, including materials, design tips, and step-by-step guides.
We used 3.5" x 8" tongue-and-groove pine boards for the project. These boards were ideal for making a rustic look and provided a sturdy and consistent backing for the island's panels.
To cut the X-design, measure the diagonal length of the panel where the design will go. Use a miter saw to cut the ends of each piece at the correct angles to ensure a snug fit. Test-fit before securing them with glue and nails.
We used MINWAX Gel Stain in Coffee for the darker stain, which added contrast to the lighter cabinets and gave the island a warm, rustic look.
Yes, you can use a regular stain, but a gel stain may provide a richer and more even finish, especially on vertical surfaces where drips are a concern.
Apply glue in manageable sections and press the boards firmly into place right after applying the glue. If needed, use a clamp to hold the pieces together while the glue sets.
Yes, sanding ensures a smooth surface and helps the stain absorb evenly. Use a fine-grit sandpaper (around 120-220 grit) to lightly sand the wood before applying the stain.
If you encounter uneven edges, you can sand down minor imperfections or use wood filler to close small gaps before attaching trim. Precision is key, so take time with measurements and cuts.
It's possible but much more time-consuming. Power tools like a miter saw and brad nailer speed up the process and ensure cleaner cuts and better attachment of trim pieces.


