Are you a horse owner or enthusiast looking for a cost-effective way to store your saddle? If so, you're in the right place! In this guide, I'll walk you through the process of building your very own DIY saddle rack. Whether you're an experienced DIYer or just starting, this project is straightforward, fun, and budget-friendly. Plus, you'll have a sense of accomplishment when you place your saddle on the stand you built yourself.
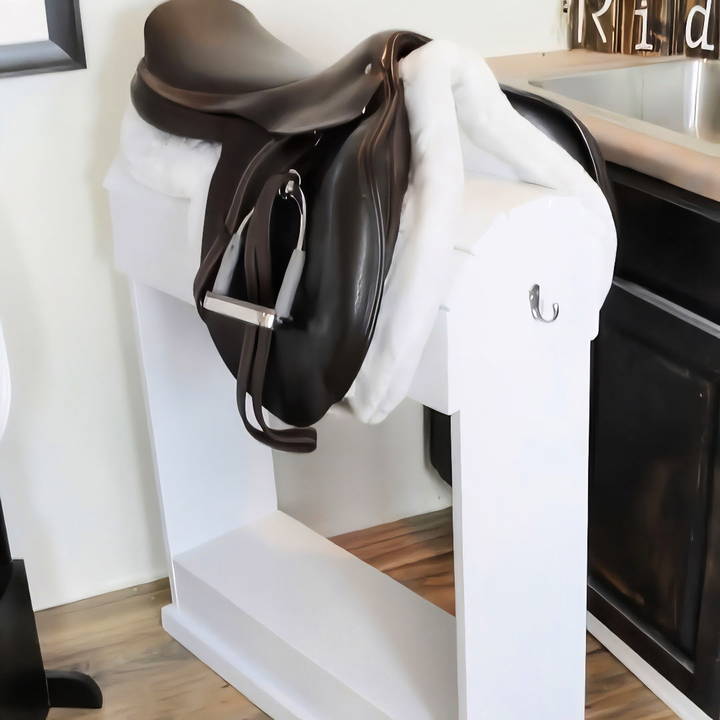
By the end of this tutorial, you'll have a fully functional saddle rack that you can customize to your liking. Let's dive into the tools, materials, and steps needed to get your saddle stand up and ready.
Why Build Your Own Saddle Rack?
You might be wondering why you should make a saddle rack when you can buy one. Well, here's why:
- Cost-effective: Building your own saddle rack is cheaper than purchasing one, especially with simple materials.
- Customization: You can make it to your exact needs, ensuring it fits your saddle perfectly and matches your style.
- Durability: By choosing sturdy materials and building it yourself, you ensure that it can withstand the weight of your saddle and last for years.
Now, let's start with what you'll need to get going.
Materials Needed
The materials for this DIY saddle rack are simple and easy to find at your local hardware store. Here's what you need:
- 1x10 Lumber: This will form the primary structure of the saddle stand.
- 1x6 Lumber: These pieces will be used to build the sides of the saddle stand.
- 1x3 Lumber: For the top rungs of the saddle rack.
- Brad Nailer: A tool that helps you attach wood pieces together without splitting the wood.
- 5-gallon Paint Bucket: Used as a template to build the rounded ends of the rack.
- Sandpaper: To smooth rough edges, ensuring the wood doesn't damage your saddle.
- Primer and Paint: To give your saddle stand a sleek, professional finish.
- Hooks: Optional, but useful for hanging extra tack, bridles, or other equipment.
Optional Add-ons:
- Paint or stain of your choice.
- Latex caulk or wood filler to seal any gaps.
Tools You'll Need:
Before starting, gather the following tools:
- Jigsaw: To cut the wood pieces.
- Tape Measure: To ensure accurate cuts.
- Clamps: To secure the wood pieces while sanding or cutting.
- Brad Nailer: Ideal for securing pieces without splitting the wood.
- Paintbrush or Roller: To apply primer and paint evenly.
Step by Step Instructions
Learn how to build a DIY saddle rack with easy step-by-step instructions from cutting components to customization ideas. Perfect for organizing your tack room!
Step 1: Cutting the Main Components
Start by cutting the main components for the saddle rack. The backbone of the rack is made from 1x10 lumber. Here's how:
- Cut two pieces of 1x10 lumber to your desired length. For this project, a 30-inch length works well for most saddles.
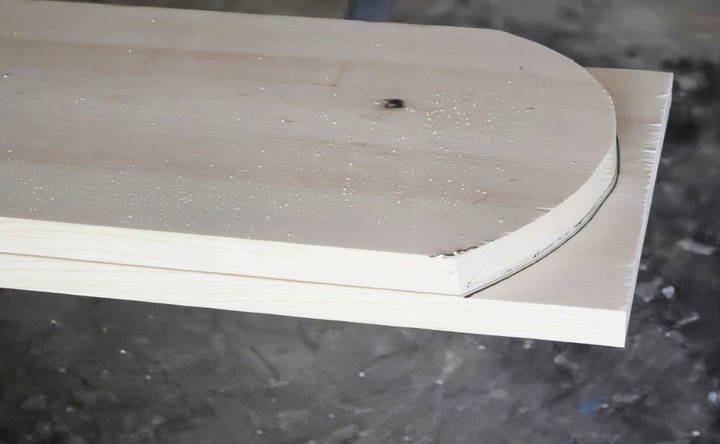
- To build a rounded top where the saddle will rest, use a 5-gallon paint bucket as a template. Place the bucket on one end of the cut wood, trace the rounded edge, and cut it using a jigsaw.
- Now that you have one rounded piece, use it as a template for the second piece. This ensures both pieces are identical, providing a balanced look.
Step 2: Shaping and Sanding
After cutting the wood:
- Secure the two rounded pieces together using clamps.
- Sand both pieces together to ensure they are smooth and identical. Sanding prevents rough edges that could damage your saddle or saddle pad.
Take your time with this step, as smooth edges are essential to protect your saddle. It also helps with the aesthetics of the stand.
Step 3: Assembling the Saddle Rack
Now that the main components are cut and sanded, it's time to assemble the saddle rack.
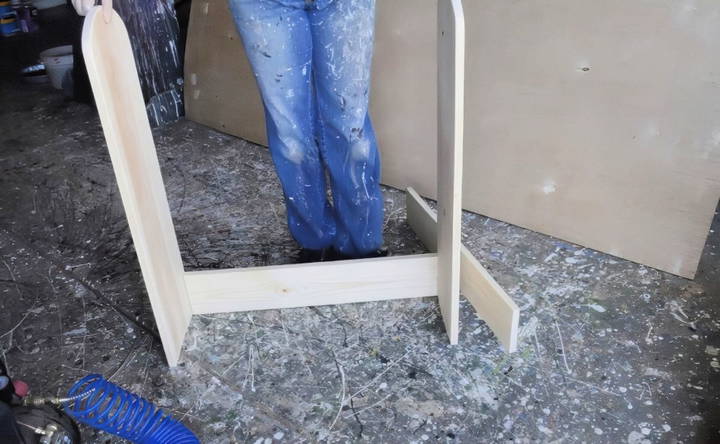
- Attach the sides: Cut two pieces of 1x6 lumber, each 30 inches long. These pieces will serve as the sides of the saddle rack.
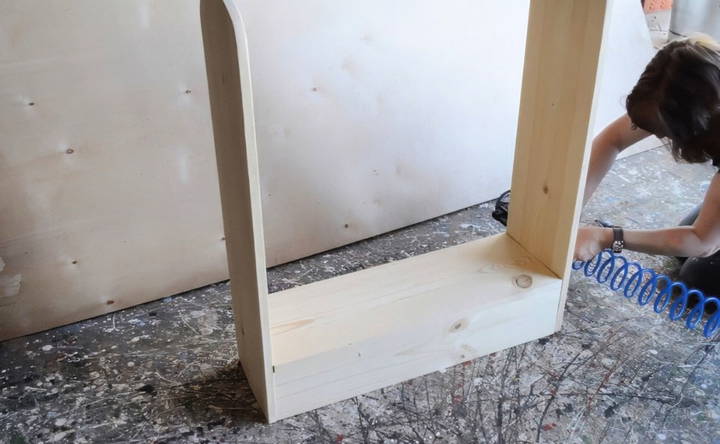
- Use a brad nailer to attach the sides to the rounded pieces. This builds a rectangular frame that will support your saddle.
Step 4: Adding the Top Rungs
To provide support for your saddle, add rungs to the top of the rack. These rungs help distribute the weight of the saddle evenly.
- Cut 1x3 lumber to a 30-inch length for the rungs.
- Sand the rungs thoroughly to remove any rough spots. Smooth rungs ensure that the saddle rests securely without any risk of damage.
- Attach the rungs to the top of the rack using the brad nailer.
Be careful during this process, as 1-inch lumber can split if mishandled. The brad nailer makes this step faster and safer.
Step 5: Strengthening the Base
For stability, you need a strong base for your saddle rack.
- Use some scrap wood (or another piece of 1x10 lumber) to build the base. Attach this piece to the bottom of the saddle rack, making sure it sits flush with the ground.
- The base should offer enough stability to prevent the saddle rack from wobbling. While some DIYers prefer to add "feet" to their saddle racks for extra stability, this design uses a flush base to keep things sleek and simple.
Step 6: Filling Gaps and Sanding Again
Once the rack is assembled:
- Fill any visible gaps between wood pieces using latex caulk or wood filler.
- Sand the entire rack one more time to ensure smoothness, paying extra attention to any areas where you applied filler.
Step 7: Priming and Painting
At this stage, the saddle rack is fully assembled, but to give it a professional finish and added durability, it's time to prime and paint.
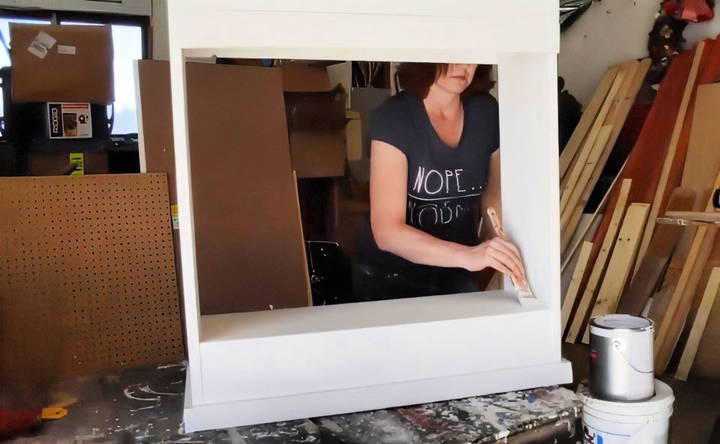
- Start by applying primer (like Kilz 2 primer) to the entire stand. Priming helps seal the wood, making it more durable and resistant to wear.
- After the primer dries, choose a durable, oil-based paint like Rustoleum. This type of paint provides a tough, glossy finish that can withstand scratches and dings from regular use.
- Apply several coats of paint, ensuring you cover all corners, edges, and surfaces. Let the paint dry fully between coats.
Step 8: Adding Hooks (Optional)
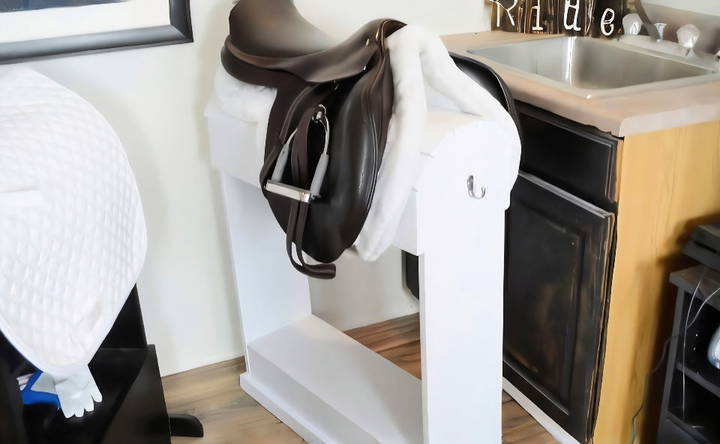
If you want to add functionality to your saddle rack, consider attaching hooks to either side of the stand. Hooks are perfect for hanging bridles, halters, or other small tack items.
- Simply screw a hook into each side of the saddle rack, ensuring they are securely fastened.
- You can place additional hooks as needed depending on how much equipment you want to store.
Finishing Touches
Now that your saddle rack is built and painted, give it a final inspection. Ensure all surfaces are smooth and that the rack is sturdy. If everything looks good, place your saddle on top and enjoy your handiwork!
Customization Ideas
Once you've built the basic rack, there are plenty of ways to customize it:
- Stain instead of paint: If you prefer a rustic look, you could stain the wood instead of painting it.
- Add a shelf or basket: Install a lower shelf or basket for additional storage space.
- Personalize it: Paint your name or your horse's name on the rack, or add decals to make it uniquely yours.
Conclusion
Building a DIY saddle rack is a rewarding project that saves you money and provides you with a functional, customizable piece of equipment. With a few hours of work and basic materials, you'll have a beautiful, durable saddle rack to display your tack.
So, grab your tools, head to the workshop, and start building! Your saddle will thank you, and so will your wallet.
FAQs About DIY Saddle Rack
Discover everything you need to know with our FAQs about DIY saddle racks. Get answers to common questions about materials, design, and construction.
Yes! To accommodate the larger size of a Western saddle, consider making the rack a little longer than 30 inches. The structure is sturdy enough to support the weight, but adding length ensures a better fit for larger saddles.
Not as originally built. To safely hold your weight, you'll need to reinforce the structure using screws and wood glue instead of brad nails. Adding a stronger base or feet also helps improve stability.
You can add hooks on either side for hanging tack like bridles or saddle pads. Some users have also recommended adding a bottom rack or basket for additional storage. Make sure the wood can support these attachments securely.
Consider adding a base with feet for more stability, especially if the stand will bear significant weight. Gluing and screwing the wood pieces, rather than just nailing, increases overall strength.
If you want the stand to fit flush against a wall, install hooks on only one side. This allows you to save space while keeping the functionality of the rack intact.
To avoid splitting thin wood, pre-drill pilot holes before inserting screws. Using wood glue along with screws can also strengthen the connections and prevent splitting.
Yes! Adding wheels is a great way to increase the rack's mobility. This transforms it into a portable tack station that can be easily moved around your barn or home. Just make sure the wheels can lock for safety.


