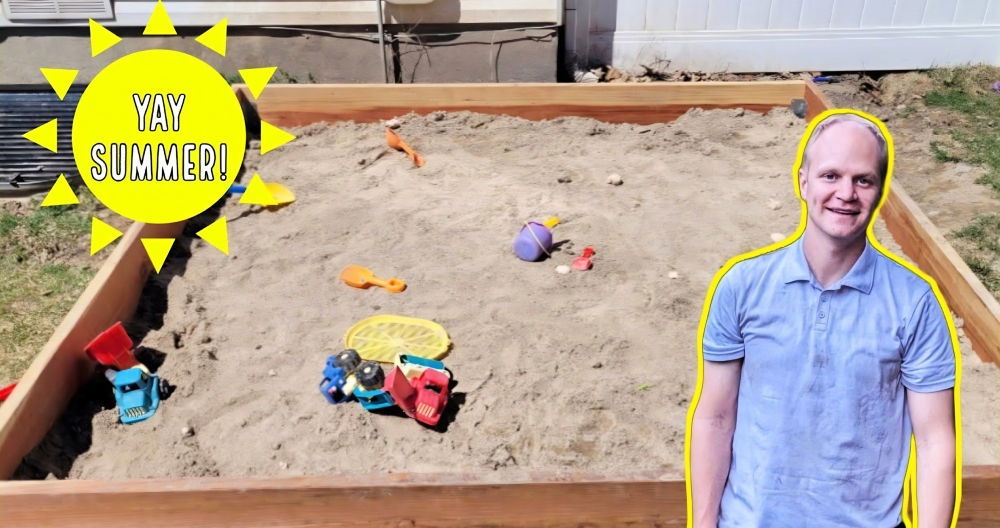
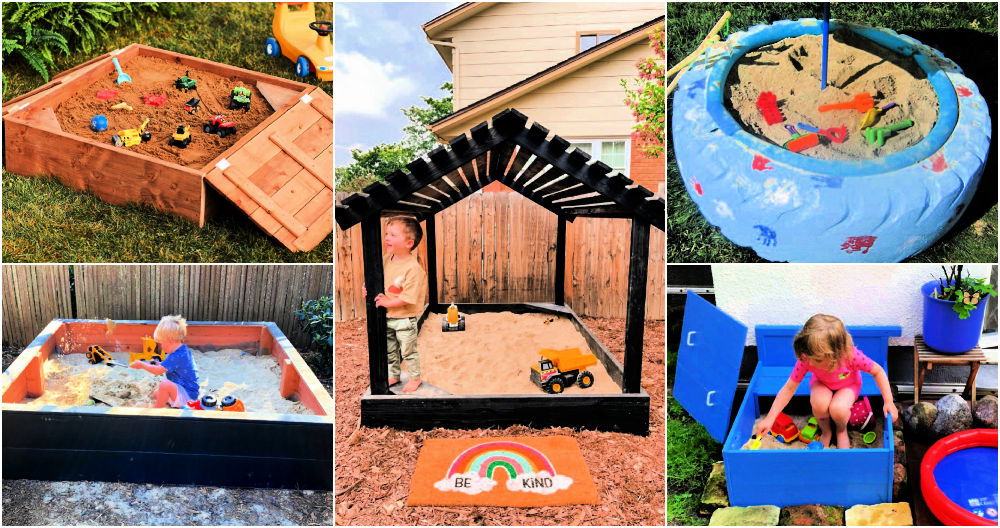
Building a DIY sandbox with a cover was one of the most fulfilling projects I worked on for my kids. I wanted a safe and fun play area where they could let their imaginations run wild. It didn't take much time or money, just some effort and basic supplies. The process was straightforward and made for a great bonding experience.
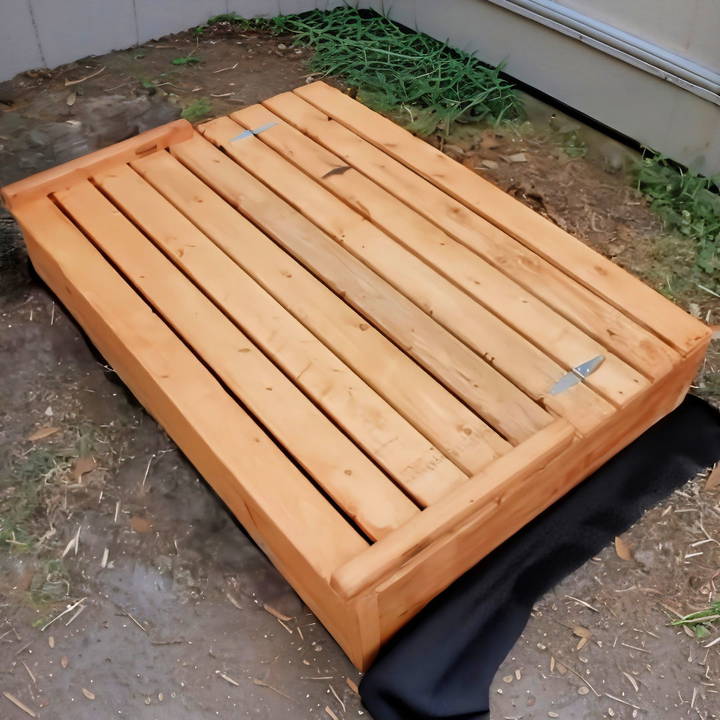
Completing the sandbox plans gave me a sense of accomplishment. Seeing my kids' smiles when they played in their new sandbox was priceless. I'm thrilled to share this information because I believe it can bring joy and safety to other families too. If you're considering this project, I'm confident these steps will help you build a fun play space for your kids.
Gathering the Materials
One of the initial steps involved visiting a well-recommended DIY website to gather a complete list of materials and cuts required for the sandbox. This was crucial for organizing my work and ensuring I had everything needed without making multiple trips to the hardware store.
Why Each Material is Essential:
- 2x8s for the Sandbox Base: These provide a sturdy foundation for the sandbox, ensuring durability and resistance to the weight of the sand.
- 1x4s for the Cover: They build a lightweight yet robust top that's easy to maneuver, essential for ensuring easy access to the sandbox.
- 3-Inch Deck Screws: These are necessary for securing the wood pieces together, offering a strong hold to withstand various weather conditions and usage.
- 2x2s for Bench Supports: They make the bench seating stable and comfortable, providing a spot where kids or adults can sit while playing.
- Strap Hinges: These connect the sections of the cover, facilitating easy opening and closing, which is key for protecting the sand from natural elements and animals.
Step by Step Instructions
Learn to build a DIY sandbox with a cover easily. Follow step-by-step instructions to build a sturdy base, custom top, and unique personal touches!
Building the Sandbox Base
Starting with the 2x8s, I measured and cut them to the required length, referring to the online guide for precise dimensions. I used a circular saw and a combination square, ensuring each cut was straight and accurate.
- Marking and Drilling Pilot Holes: To keep the structure aligned, I marked a line the width of my material on one of the sides and drilled pilot holes to prevent the wood from splitting.
- Assembly: Laying out the four boards, I drove the 3-inch deck screws to connect them, forming the sandbox's base. This step solidified the foundation of the entire structure, making it critical to get right.
Crafting the Covered Top
With the base ready, I focused on making a covered top that would not only protect the sand but also function as a seating area.
- Laying Out 1x4s: I arranged the boards on top of the base frame, ensuring the ends were flush. Pilot holes were a necessity to avoid splitting the wood.
- Using Spacers for Even Spacing: To maintain even spacing between each board, I utilized spacers, which were a simple yet effective technique to achieve consistency without the need to measure constantly.
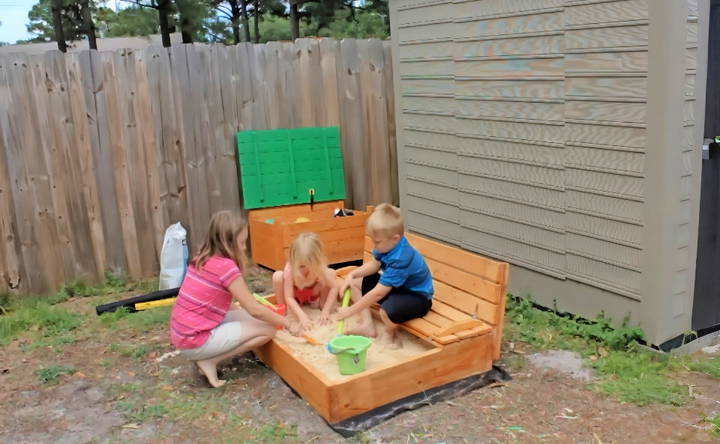
- Building Bench Seats: For the bench seating, I attached two 2x2s just inside the sides of the box frame, securing them with screws. The precise distance inside didn't matter much; what was important was making a stable foundation for the seating.
- Attaching the Sections: With strap hinges, I connected the sections of the top cover, allowing them to fold back on themselves, making a versatile and user-friendly mechanism.
Finishing Touches and Adding a Personal Touch
I wasn't content with just following the plans to the letter—I wanted to make the sandbox safer and more comfortable for the kids.
- Sanding Edges: To eliminate harsh edges, I ran a sander over the wooden surfaces, especially focusing on the areas where little fingers might wander.
- Adding a Shade Canopy: Though the original plans included a shade canopy, I decided to improvise and build something unique, which I planned to showcase in a future update. This underscored the importance of customizing projects to fit personal needs and preferences.
Customization Ideas for Your DIY Sandbox
Building a DIY sandbox is not just about giving kids a place to play; it's about crafting a unique space that stimulates imagination and creativity. Here are some customization ideas to make your sandbox truly special:
- Choose a Theme: Kids love themed play areas. Consider themes like a pirate ship, a fairy garden, or a miniature cityscape. Use non-toxic paint and decorations to bring the theme to life.
- Add Fun Elements: Incorporate elements such as a steering wheel, periscope, or flags for imaginative play. You can also add a chalkboard on the inside of the cover for drawing.
- Seating Options: Build seats into the corners of the sandbox or add removable benches that can be stored under the cover when not in use. This provides comfort for children and caregivers alike.
- Sandbox Cover: A sturdy cover is essential for keeping the sand clean. Design a cover that's easy to remove and secure. You can make it double as a stage for performances or a flat play area.
- Incorporate Nature: Plant flowers or grass around the outside of the sandbox to integrate it with your garden. Choose plants that are non-toxic and child-friendly.
- Sensory Play: Mix in different textures like smooth pebbles, shells, or even rice for varied sensory experiences. Ensure all materials are safe for children to handle.
- Interactive Sides: Turn the sides of the sandbox into interactive panels. Attach items like gears, spinners, or abacuses for additional play options.
- Storage Solutions: Include built-in storage for toys and sandbox tools. This keeps the play area tidy and everything within easy reach.
- Lighting: For evening play, add some solar-powered lights around the sandbox. Ensure they are safely out of reach and provide soft illumination.
- Water Play: If space allows, consider adding a small water table or a water channel around the edge of the sandbox for combined sand and water play.
Incorporate these ideas to make a fun sandbox that encourages learning through play. Prioritize safety and use durable, child-friendly materials.
Troubleshooting Common Issues with Your DIY Sandbox
When building and maintaining a DIY sandbox, you might encounter a few common issues. Here's how to troubleshoot them effectively:
Sand Keeps Getting Wet
- Solution: Ensure your sandbox cover is waterproof and fits snugly. Check for any holes or gaps and seal them. Consider adding a tarp under the cover for extra protection.
Sand Is Clumping Together
- Solution: Clumping can be due to moisture. Mix in some cinnamon or cornstarch to help absorb moisture and prevent clumping. Also, make sure the sandbox has proper drainage.
Insects in the Sandbox
- Solution: Keep the sandbox covered when not in use. If insects persist, sprinkle diatomaceous earth around the sandbox's perimeter, which is a natural insect deterrent.
Sandbox Wood is Splintering
- Solution: Sand down any rough edges or splinters. Treat the wood with a non-toxic sealant to protect it from the elements and prevent future splintering.
Sandbox Smells Unpleasant
- Solution: Bad smells can come from mold or mildew. Replace any wet sand, and ensure the sandbox has good drainage and ventilation. Regularly dry out the sandbox by leaving the cover off on sunny days.
Cover Won't Stay Put
- Solution: If the cover blows away or doesn't stay on, add some weight to the corners or install a locking mechanism to keep it in place during windy conditions.
Weeds Growing in the Sandbox
- Solution: Lay down a weed barrier cloth at the bottom of the sandbox before adding sand. This will prevent weeds from sprouting up through the sand.
Fading or Peeling Paint
- Solution: Use outdoor-grade, non-toxic paint for any colorful decorations. Reapply a fresh coat as needed to keep the sandbox looking vibrant and new.
Address these issues to keep your sandbox clean, safe, and fun for kids. Regularly check and maintain it to prevent problems.
Safety Considerations for Your DIY Sandbox
When making a DIY sandbox, safety is paramount. Here's how to ensure your sandbox is a secure play area for children:
- Non-Toxic Materials: Use materials that are free from harmful chemicals. If you're using wood, select untreated, natural wood to avoid the risk of chemical exposure.
- Smooth Surfaces: Sand down any rough edges or corners on the sandbox and cover. This prevents splinters and cuts, ensuring a safer play environment.
- Sturdy Construction: Make sure the sandbox is well-built and stable. Check that all parts are securely fastened to prevent collapse or tipping.
- Secure Cover: A cover is essential to keep animals out and protect children when the sandbox is not in use. Design a cover that is easy for adults to move but secure enough to stay in place.
- Adequate Drainage: Ensure your sandbox has proper drainage to prevent water accumulation, which can lead to mold and bacteria growth.
- Age-Appropriate Design: Tailor the sandbox size and depth to the age of the children who will be using it. Keep the sand depth appropriate to prevent it from being too heavy or hard to move.
- Regular Inspections: Periodically check the sandbox for wear and tear, especially before and after the winter season. Repair any damage promptly.
- Sun Protection: Consider placing the sandbox in a shaded area or adding a canopy to protect children from direct sunlight.
- Play Sand: Use natural play sand specifically designed for sandboxes. It's cleaner, less dusty, and generally safer for children than building sand.
- Emergency Plan: Have a clear plan in place for injuries or accidents. Keep a first aid kit nearby and ensure all caregivers know basic first aid.
By following these safety considerations, you can build a fun and secure play space that parents can trust and children will love.
FAQs About DIY Sandbox with Cover
Discover essential answers to FAQs about DIY sandboxes with covers. Get tips, materials, and safety info for making a fun, safe sandbox for kids.
When choosing a location for your sandbox, consider the following:
Accessibility for children and adults.
Sunlight exposure to keep the sand dry.
Visibility from your house for easy supervision.
Level ground to ensure stability.
Drainage to prevent water accumulation.
Yes, you can! There are many simple and easy-to-follow tutorials available that require minimal woodworking skills. Look for plans that offer step-by-step instructions and use basic tools. Some designs even include hinged doors or folding lids with integrated seats, making them practical and user-friendly.
To maintain your sandbox and keep the sand clean, follow these tips:
Cover the sandbox when not in use to protect it from animals and debris.
Rake the sand regularly to aerate it and remove any foreign objects.
Replace the sand periodically to ensure it stays fresh and clean.
Check for splinters or rough edges on the wood and sand them down if necessary.
Absolutely, safety is paramount. Here are some safety considerations:
Smooth edges: Ensure all wood edges are smooth to prevent splinters.
Sturdy construction: Make sure the sandbox is well-built to handle the weight of children and sand.
Non-toxic materials: Use non-toxic, child-safe materials and finishes.
Supervision: Always supervise children while they play in the sandbox to ensure their safety.
To ensure the cover is secure and easy to use, consider the following:
Hinges: Use durable hinges to attach the cover to the sandbox. This allows for easy opening and closing.
Handles: Install handles on the cover to help lift it. Choose handles that are comfortable to grip and strong enough to support the weight of the cover.
Safety: Make sure the cover fits snugly to prevent any gaps where little fingers could get caught.
Weight: Ensure the cover is not too heavy for a child to open, but heavy enough to stay put in windy conditions.
Locks: If desired, add locks or latches to secure the cover when the sandbox is not in use.
Reflections
Building a DIY sandbox with a cover is more than just a project; it's a chance to build memories. The joy it brought to my family was immense. I encourage you to try it yourself. These simple steps can help you get started on your own amazing journey.


