Embarking on the journey of building a simple screen door can be an invigorating DIY project. Whether it's to let the fresh air in while keeping the bugs out, or simply adding a personal touch to your home's facade, building your own screen door is both rewarding and practical. And trust me, if I can do it, so can you. Let's break down the process into easy-to-follow steps based on my firsthand experience.
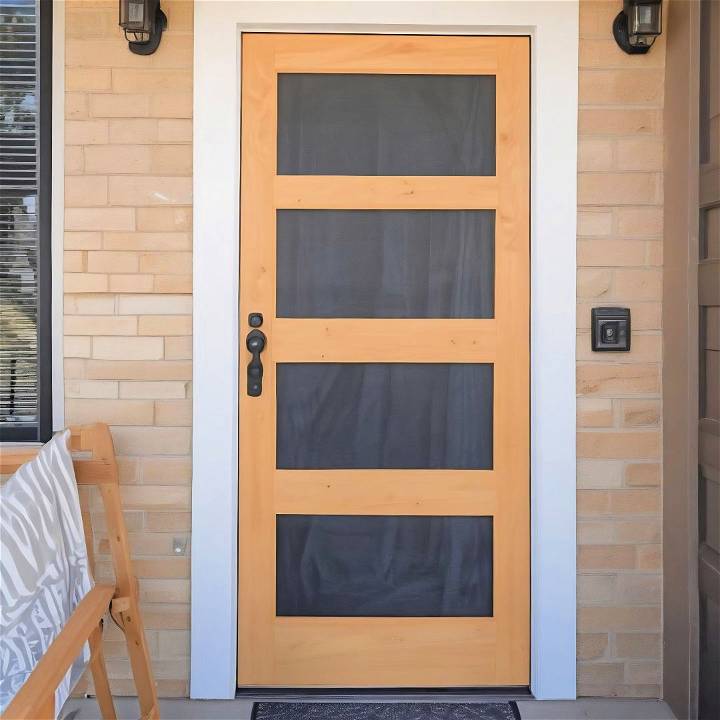
Materials Needed and Their Purpose:
- 1x4s (For the frame): These are the bones of your door; sturdy yet lightweight.
- Pocket hole screws: Essential for strong, hidden connections between your boards.
- Wood glue: For that extra bit of hold and durability in your joins.
- Screening material: The barrier against bugs; choose a durable one.
- Hinges and hardware: To attach and handle your door properly.
- Paint or stain (Optional): To protect and beautify your door.
- Tools (Saw, drill, pocket hole jig, planer, etc.): For cutting, joining, and finishing the wood.
Step by Step Instructions
Learn how to build your own screen door with step by step instructions. Includes cutting, drilling, assembling, attaching screen, and installation tips.
Step 1: Cutting Your 1x4s to Size
Start by measuring and cutting your 1x4s to build the styles (sides) and rails (top, bottom, and center) of your door. For my standard door, I needed two styles at 80 and 3/4 inches and several rails at 32 and 1/2 inches to match the total width I was aiming for. Precision is key here; a miter saw ensures clean, straight cuts.
Step 2: Drilling Pocket Holes
Before joining the pieces, practice drilling a few pocket holes on some scrap wood to get the settings right. You want your pocket screws to fasten tightly without poking out. The right depth and screw length are crucial for a strong frame.
Step 3: Assembling the Frame
Lay out your styles and rails according to your door design. Apply wood glue at each join for added strength, then secure them with pocket hole screws. Remember, it's easier to start with attaching the rails to one style first, then adding the second style.
Quick Tip:
To avoid sharp edges that could snag or cause splinters, I took the time to slightly chamfer (bevel) the edges of all my pieces with a planer. It's a small step that can make a big difference in the finished feel of your door.
Step 4: Attaching the Screen
Once the frame is assembled and any touch-up sanding is done, it's time to attach the screen. Lay your door flat and roll your screening material over the frame, ensuring it's taught but not overstretched, as it can warp the frame. Staple the screen in place, then trim any excess.
Step 5: Painting or Staining (Optional but Recommended)
Painting or staining not only makes your door stand out but also protects the wood from the elements. I opted for a paint that matches the exterior of my house. Remember to cover the screen carefully to avoid splatters.
Step 6: Installing Hinges and Hardware
Once your paint or stain is dry, attach the hinges to your door. Positioning them about 15 inches from the top and bottom worked well for balance. Then, attach the door hardware (handle and latch). Before mounting your screen door to the frame, ensure all screws are painted or stained to match.
Step 7: Mounting Your Screen Door
Align your screen door with the door frame, checking for even spacing on all sides. Secure the hinges to the frame, adjust as necessary, and voila, your very own handmade screen door, ready to serve.
Installation Tips for Your DIY Screen Door
Installing a DIY screen door can be a straightforward task if you follow these tips. They will help ensure that your screen door fits well, functions properly, and looks great.
- Measure Accurately: Before you start, measure the door frame from top to bottom and side to side. Do this at the top, middle, and bottom to account for any irregularities. Subtract a quarter inch from the shortest measurements to allow for a proper fit.
- Choose the Right Hinges: Select hinges that are appropriate for the weight and size of your door. Mark the placement for the hinges on the door—typically about eight inches from the top and bottom.
- Level and Shim: Use shims to level the door within the frame. This will prevent sticking and ensure smooth operation. Secure the door with mounting screws once it's level.
- Attach the Handle and Lock: Install the door handle and lock according to the manufacturer's instructions. Make sure they are positioned for easy access and operation.
- Check the Swing: Determine the swing direction of your door. The hinges should be installed on the opposite side of the handle. This will allow the door to open and close correctly.
- Test and Adjust: After installation, test the door to make sure it swings freely and latches securely. Make any necessary adjustments to the hinges or latch for smooth operation.
- Add a Closer: Consider adding a spring or pneumatic closer to ensure your screen door closes automatically. This is especially helpful if you have kids or pets who might leave the door open.
By following these installation tips, you'll have a screen door that not only enhances the look of your home but also provides functionality and convenience.
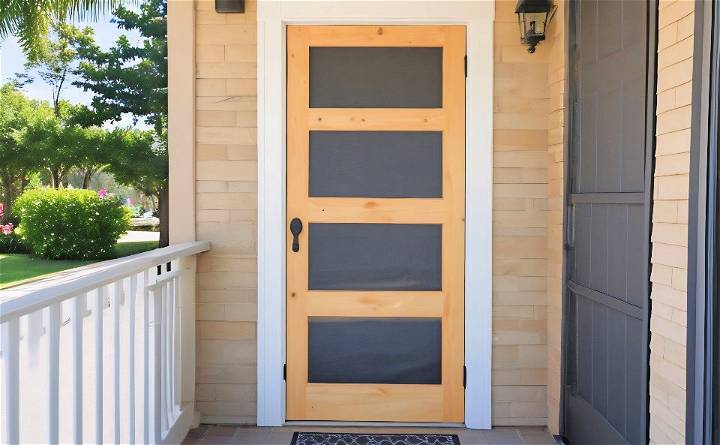
Advanced Features for Your DIY Screen Door
Enhancing your DIY screen door with advanced features can significantly improve its functionality and convenience. Here's a detailed guide on incorporating these features into your screen door project:
- Pet-Friendly Additions: If you have pets, consider installing a pet door. This allows your pets to come and go as they please without compromising the insect-blocking capabilities of your screen door. Choose a pet door that locks to maintain security when not in use.
- Automatic Closing Mechanisms: An automatic closing mechanism, such as a pneumatic or hydraulic closer, can ensure your screen door closes gently and securely every time. This is especially useful if you have children or other family members who might forget to close the door.
- Security Enhancements: For added security, install a sturdy lock or a deadbolt. You can also add a grille or a security bar to prevent intruders from breaking through the screen.
- Smart Home Integration: Incorporate smart home technology by installing a screen door that can be controlled remotely. This could include features like automatic locking or alerts when the door is left open.
- Weatherproofing: To protect against harsh weather, consider weather-stripping or a storm insert. This will help keep out rain and wind while still allowing for ventilation when needed.
- Custom Handles and Hinges: Customize your screen door with unique handles and hinges that match your home's style. This not only adds a personal touch but can also improve the door's functionality.
- Decorative Elements: Add decorative elements like a custom paint job, stenciling, or even a carved wooden insert to make your screen door stand out. This is a chance to express your creativity and add curb appeal to your home.
By adding advanced features to your DIY screen door, you'll enhance its functionality and security while reflecting your style and boosting your home's value. Choose features that suit your needs and complement your door's design.
FAQs About DIY Screen Door
Discover answers to common questions about DIY screen door projects. Learn tips and tricks for building your own custom screen door at home.
What is a DIY screen door?
A DIY screen door is a door frame fitted with a mesh screen, which allows fresh air to circulate into your home while keeping insects and debris out. It's a project you can undertake yourself using simple tools and materials, offering a custom fit to your doorway.
Can I install the DIY screen door myself?
Yes, you can install the screen door yourself. Attach the hinges to the door frame, then to the door jamb, ensuring it swings freely. Install a door handle and a latch to keep the door closed. You might also consider adding a pneumatic closer to ensure the door shuts automatically.
Certainly! Here are four additional questions to the DIY Screen Door FAQs section:
How do I ensure my screen door fits properly?
To ensure a proper fit, measure the door opening width and height at multiple points. Use the smallest measurements to build your door frame. Remember to account for any necessary clearance space to prevent sticking and allow easy opening and closing.
What type of wood is best for a screen door?
The best wood for a screen door is one that is durable and resistant to weather. Cedar, redwood, and cypress are excellent choices as they naturally resist rot and insects. However, if these are not available or too costly, you can use pine or fir and treat it with a weather-resistant sealant.
How can I make my screen door more durable?
To make your screen door more durable, consider using a thicker mesh or a pet-resistant screen material. Additionally, reinforce the corners of the frame with metal brackets or use a doweling technique for stronger joints. Apply a protective finish to the wood to guard against the elements.
What maintenance does a screen door require?
Regular maintenance for a screen door includes checking the screen for tears and patching or replacing it as needed. Lubricate the hinges and latch mechanism to keep them working smoothly. Tighten any loose screws and apply a fresh coat of paint or sealant every few years to protect the wood.
Closing Thoughts
Building a simple screen door was a project that tested my patience and honed my DIY skills. Every measurement, cut, and screw drove home the importance of precision and craftsmanship. It's a project that I'm proud to have accomplished, not only for the practicality of the finished product but for the experience gained through the process.
Whether you're a seasoned carpenter or a beginner looking to tackle a new challenge, building a screen door from scratch is a rewarding endeavor. Follow the steps, don't rush the process, and you'll end up with not just a screen door, but a story of creation you can share.


