To make your own DIY security camera using the ESP32-CAM, follow this hands-on tutorial. We'll explore step by step how to turn this tiny yet powerful module into a functional home surveillance device. As someone who has worked with the ESP32-CAM module, I can share some tips and tricks I've picked up along the way.
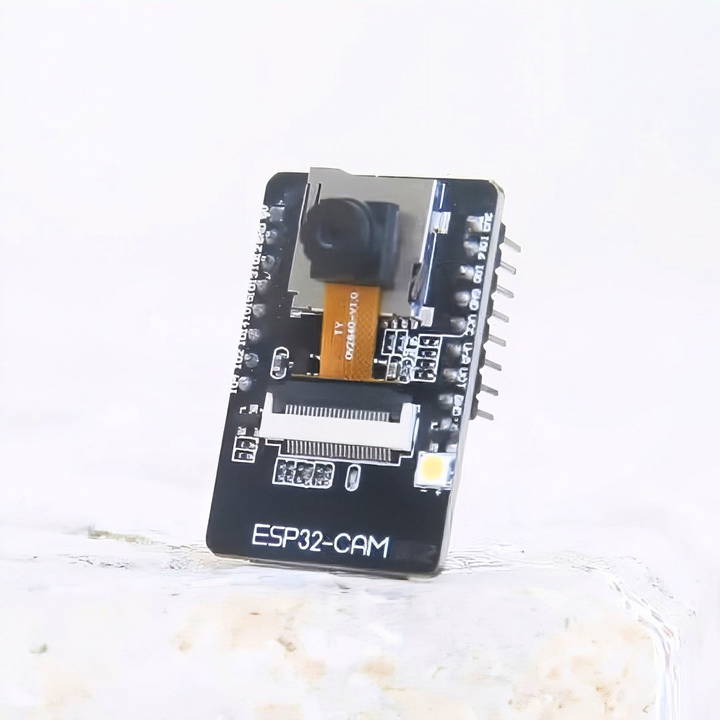
What is the ESP32-CAM, and Why Use It?
The ESP32-CAM is a versatile development board equipped with a camera. Unlike traditional cameras, this one comes with Wi-Fi and Bluetooth capabilities, which makes it perfect for DIY security cameras, home automation, or even robotics projects. This tiny powerhouse costs around $10 or less and can be used in applications like facial recognition, object tracking, or live video streaming.
One of the standout features of the ESP32-CAM is its ability to function as a web server, streaming live footage to your devices. For this project, we'll focus on using it for security purposes. In addition to the camera, the board includes a microSD card slot, which can store recorded footage and photos.
Materials You'll Need:
- ESP32-CAM board
- FTDI USB to serial converter (for programming the ESP32)
- Jumper wires (female-to-female connectors)
- MicroSD card (4GB or more)
- USB cable (to connect the FTDI converter to your computer)
- Arduino IDE (for programming)
- Wi-Fi connection (for remote access)
Each component plays a crucial role in making this project successful. For instance, since the ESP32-CAM lacks a USB port, the FTDI converter is needed to program it. I've made the mistake of not using one before and found myself stuck, so this is something to keep in mind from the start.
Step by Step Instructions
Learn how to make a security camera, from wiring to viewing your camera feed, and enhance home security with ease!
Setting Up Your ESP32-CAM
Easily set up your esp32-cam with our step-by-step guide on wiring, preparing arduino ide, uploading code, and viewing the camera feed.
Step 1: Wiring the ESP32-CAM to the FTDI Converter
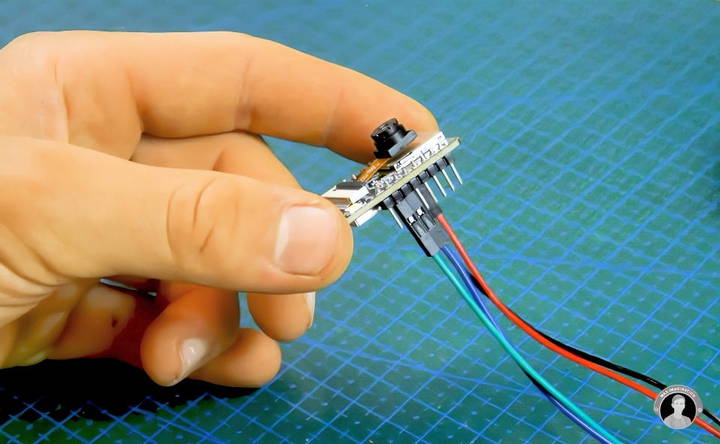
Begin by wiring your ESP32-CAM to the FTDI converter:
- Connect the VCC pin on the FTDI to the 5V pin on the ESP32-CAM.
- The GND pin goes to GND.
- TX on the FTDI goes to U0R on the ESP32-CAM.
- RX on the FTDI goes to U0T on the ESP32-CAM.
The FTDI converter helps in both powering the ESP32-CAM and programming it. Double-check your connections before proceeding. I once mistakenly swapped the RX and TX pins, which prevented the board from functioning. Avoid that pitfall by carefully following the pinout.
Step 2: Preparing Arduino IDE
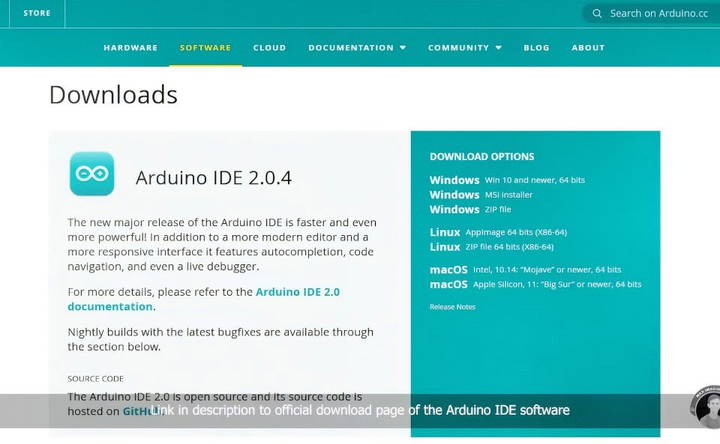
Next, download and install the Arduino IDE if you haven't already. You'll need this to write and upload code to the ESP32-CAM. In the IDE, go to File > Preferences and paste the following URL into the “Additional Boards Manager URLs” section:https://raw.githubusercontent.com/espressif/arduino-esp32/gh-pages/package_esp32_index.json
Then, go to Tools > Board > Boards Manager, search for ESP32, and install the ESP32 package. This ensures that the IDE recognizes the ESP32-CAM and allows you to upload code.
Step 3: Uploading the Web Server Code
With the board installed, it's time to upload the web server code. You can find the code under File > Examples > ESP32 > Camera. Select CameraWebServer, which is a basic code that sets up the ESP32-CAM as a web server capable of live video streaming.
Before you upload, choose ESP32 Wrover Module as the board type under Tools > Board. Also, ensure the PSRAM is enabled by selecting Tools > PSRAM > Enabled.
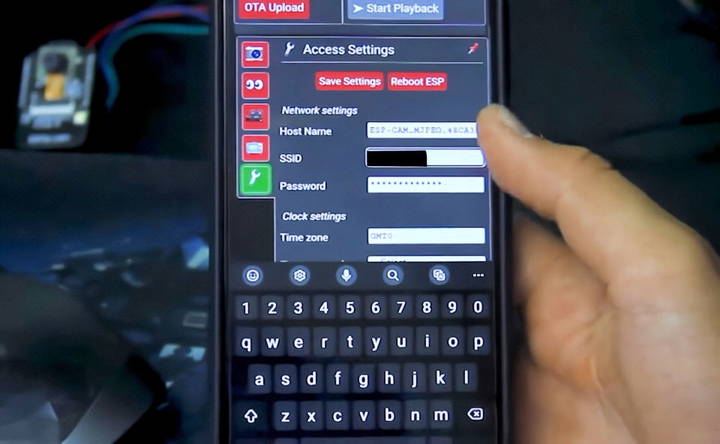
Step 4: Modifying Wi-Fi Credentials
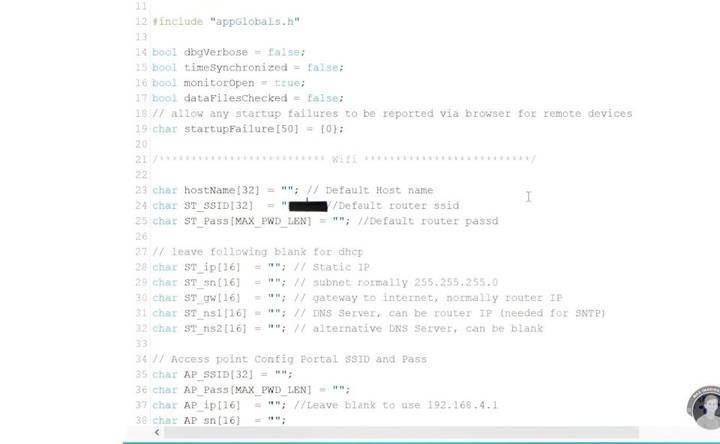
In the code, find the section where you input your Wi-Fi credentials. Enter your SSID (Wi-Fi network name) and password. This allows the ESP32-CAM to connect to your local network and stream footage.
Step 5: Putting the ESP32-CAM into Flash Mode
Before uploading, you need to put the ESP32-CAM into flash mode. To do this, connect a jumper wire between the GPIO 0 and GND pins. Then, press the reset button on the ESP32-CAM. This is a critical step, and missing it will prevent the code from uploading.
Step 6: Uploading and Viewing the Camera Feed
Once everything is set, hit the upload button in Arduino IDE. After uploading, disconnect the GPIO 0 jumper and press the reset button again to exit flash mode.
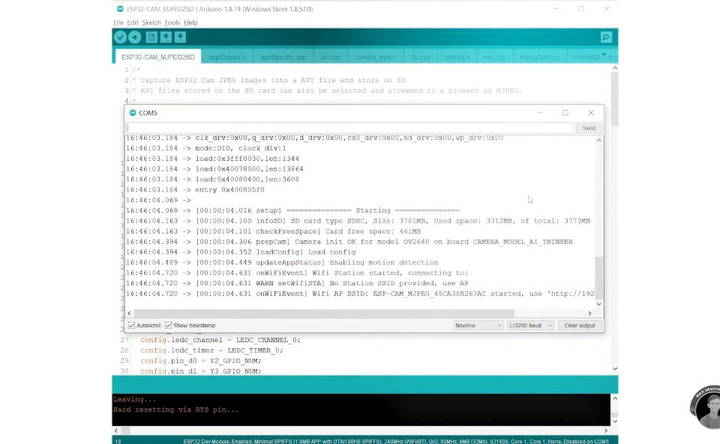
Open the Serial Monitor (Ctrl+Shift+M) in the IDE, and you'll see the IP address of the ESP32-CAM. Copy this IP address and paste it into a web browser. You should now be able to access the camera feed via the web interface.
Exploring the ESP32-CAM Web Interface
The web interface gives you various options. You can:
- Start and stop live streaming.
- Capture photos.
- Adjust the camera resolution.
- Turn the onboard LED on or off.
One lesson I've learned is that while the highest resolution (UXGA 1600x1200) provides the best image quality, it can result in a low frame rate. If smooth streaming is a priority, I usually lower the resolution to SVGA (800x600), which strikes a good balance between image clarity and frame rate.
Storing Footage on the MicroSD Card
To store footage, insert a microSD card into the ESP32-CAM. You can configure the camera to record videos or capture images when motion is detected. This is ideal for a security camera, as it won't record unnecessary footage.
In the web interface, navigate to the Recording section and enable motion detection. You can adjust the sensitivity based on your needs. I've found that a medium sensitivity setting works well in most situations, avoiding false triggers like shadows but still catching actual movements.
Troubleshooting Common Issues
If you run into issues, here are a few troubleshooting tips that have helped me:
- Compilation errors: If you get errors during code compilation, ensure that the correct board is selected (ESP32 Wrover Module) and that PSRAM is enabled.
- Failed uploads: This could be due to incorrect wiring or missing the flash mode step. Double-check your RX and TX connections and make sure GPIO 0 is grounded during flashing.
- No image: If the web interface loads but shows no video, try reducing the resolution. High resolutions can be demanding on the ESP32-CAM, especially if your Wi-Fi signal is weak.
Enhancing Wi-Fi Range
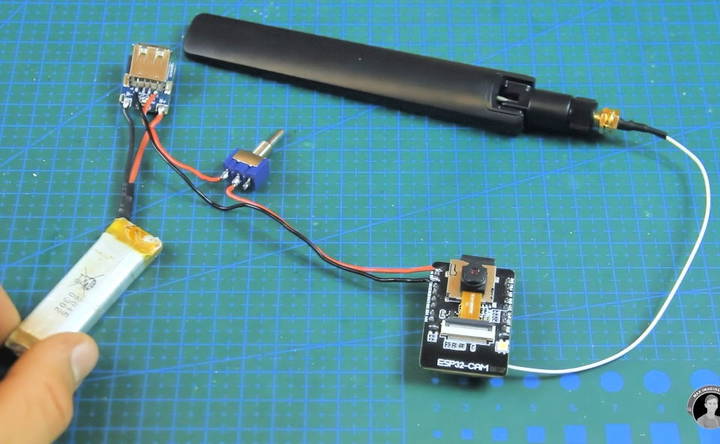
For projects where the camera needs to be far from the router, you can improve the Wi-Fi range by adding an external antenna. The ESP32-CAM has a built-in PCB antenna, but there's also a provision for attaching an external one. Soldering a simple external antenna can significantly boost the range.
Powering the ESP32-CAM
For permanent installations, you'll need a reliable power source. I've used a 5V power bank connected to the 5V pin on the ESP32-CAM. If you want a more portable solution, you could use a LiPo battery with a DC-DC converter to step the voltage up to 5V.
In outdoor setups, consider using a solar panel to keep the battery charged. This way, your security camera remains powered 24/7, even in remote locations.
Advanced Features and Upgrades
Learn the advanced features and upgrades like 4k resolution, cloud vs. local storage, wide-angle lenses, wireless capabilities, facial recognition, and more.
Cloud Storage vs. Local Storage
When setting up a DIY security camera system, choosing between cloud storage and local storage is crucial.
- Cloud Storage: This option stores your video footage on remote servers. It offers easy access from anywhere and often includes features like automatic backups and enhanced security. However, it usually comes with a monthly fee.
- Local Storage: This involves storing footage on a physical device like an SD card or a network-attached storage (NAS) device. It can be more cost-effective in the long run and doesn't rely on internet connectivity. However, it may be vulnerable to theft or damage.
4K Resolution
Modern DIY security cameras now offer 4K resolution, providing crystal-clear images. This high resolution helps in identifying details like faces and license plates, which can be crucial in security situations.
Wide-Angle Lenses
Wide-angle lenses provide a broader field of view, allowing a single camera to cover more area. This reduces the number of cameras needed and ensures comprehensive coverage of your property.
Wireless Capabilities
Wireless cameras are easier to install and more flexible in terms of placement. They connect to your home Wi-Fi network, eliminating the need for extensive wiring. This makes them ideal for renters or those who want a hassle-free setup.
Facial Recognition
Some advanced cameras come with facial recognition technology. This feature can differentiate between familiar faces and strangers, reducing false alarms and enhancing security. It can also send specific alerts when an unknown person is detected.
Two-Way Audio
Two-way audio allows you to communicate through your security camera. This can be useful for greeting visitors, deterring intruders, or even talking to pets. It adds an extra layer of interaction and control to your security system.
Integration with Other Security Systems
Advanced DIY security cameras can integrate with other security systems and smart home devices. This includes alarms, smart locks, and lighting systems. Integration allows for automated responses, like turning on lights when motion is detected, enhancing overall security.
Night Vision and Infrared Capabilities
Night vision and infrared capabilities are essential for 24/7 security. These features ensure that your cameras can capture clear footage even in low-light conditions. Some cameras offer color night vision, providing even more detail.
Regular Software Updates
Manufacturers often release software updates to improve functionality and security. Regular updates ensure your system stays up-to-date with the latest features and protections. Always check for and install updates to keep your system running smoothly.
Enhance your DIY security camera system's effectiveness and reliability for better home protection and family peace of mind.
Maintaining Your DIY Security System
Proper maintenance of your DIY security system is essential to ensure it functions effectively and reliably. Here are some key steps to keep your system in top shape:
Regular Cleaning
- Camera Lenses and Sensors: Dust and dirt can accumulate on camera lenses and sensors, affecting image quality. Clean them regularly with a soft, dry cloth to maintain clear footage.
Battery Checks
- Wireless Components: Many DIY security systems use wireless components that rely on batteries. Check and replace batteries regularly to ensure uninterrupted operation.
System Testing
- Monthly Tests: Test your system monthly to ensure all components are working correctly. This includes cameras, sensors, alarms, and any connected devices.
Software Updates
- Firmware and App Updates: Manufacturers often release updates to improve functionality and security. Regularly check for and install updates for both the system firmware and the mobile app.
Inspecting Connections
- Wired Components: For systems with wired components, inspect the connections periodically. Ensure that cables are secure and free from damage.
Storage Management
- Cloud and Local Storage: Regularly check your storage capacity. For cloud storage, ensure you have enough space and consider upgrading if needed. For local storage, back up important footage and clear old files to free up space.
Environmental Considerations
- Weatherproofing: If your cameras are installed outdoors, ensure they are weatherproof and check for any signs of wear or damage. Protect them from extreme weather conditions to prolong their lifespan.
Motion Detection Settings
- Adjust Sensitivity: Periodically review and adjust the motion detection settings. This helps to reduce false alarms and ensures the system responds appropriately to real threats.
Reviewing Footage
- Regular Review: Make it a habit to review footage regularly. This helps you stay aware of any unusual activity and ensures your system is capturing everything correctly.
Professional Inspection
- Annual Check-Up: Consider having a professional inspect your system annually. They can identify and fix issues that you might overlook.
By following these maintenance tips, you can ensure your DIY security system remains reliable and effective, providing you with peace of mind and enhanced security for your home.
FAQs About DIY Security Camera
Explore the top FAQs about DIY security cameras. Learn about installation, features, and benefits for ultimate home protection.
A DIY security camera system is a setup you can install yourself without professional help. It typically includes cameras, a recording device, and sometimes a monitoring app. These systems are customizable and can be tailored to fit your specific security needs.
No, most DIY security camera systems are designed to be user-friendly. They come with detailed instructions and often have online tutorials to guide you through the installation process. Basic tools and a bit of patience are usually all you need.
Generally, DIY security cameras do not require a monthly fee. However, some features like cloud storage or advanced monitoring might come with a subscription fee. Always check the product details before purchasing.
Yes, most DIY security camera systems allow remote monitoring. You can view live footage and receive alerts on your smartphone or computer through a dedicated app.
There are several types of DIY security cameras, including wired, wireless, indoor, outdoor, and doorbell cameras. Each type has its own features and benefits, so choose based on your specific needs.
Conclusion
The ESP32-CAM is an affordable and versatile option for DIY security cameras. By following these steps, you'll have a working camera streaming live video over Wi-Fi. With features like motion detection and SD card recording, it's a great project for anyone interested in home automation or DIY electronics.
By adding additional features like cloud access or integrating it with services like FTP for remote file storage, you can further enhance your setup. Don't be afraid to experiment and tweak the settings based on your specific needs.


