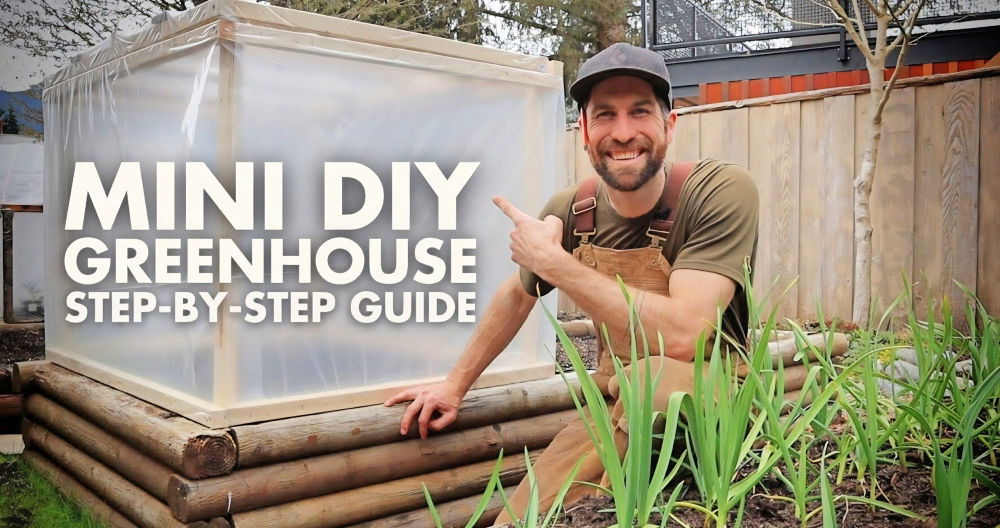
Making my own DIY seed starter greenhouse was an amazing learning experience. I used a clear plastic container, some potting soil, and seeds. It was so easy to set up. I placed the container in a sunny spot, and within days, I saw little green sprouts. This small project made a huge impact on my gardening journey and brought me so much joy.
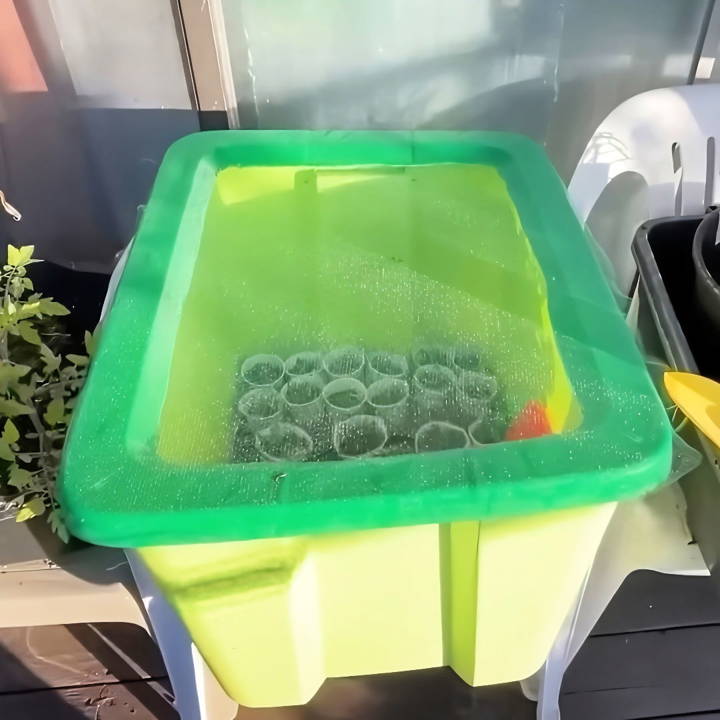
Seeing those tiny plants grow from seeds was so satisfying. It showed me the importance of having a good environment for seeds to sprout. A mini greenhouse is perfect for this, and even beginner gardeners can do it. With this guide, I'm helping you start your own greenhouse.
These steps can help you grow healthy plants and add green beauty to your space.
Why a Mini Greenhouse?
Before diving into the "how," let's talk about the "why." A mini greenhouse offers a protected environment that manages light, moisture, and temperature—three crucial factors for seed germination and seedling development. It's particularly handy in early spring when the weather can be a bit unpredictable. Plus, building one yourself can be incredibly cost-effective and rewarding.
Materials You'll Need
- A clear plastic tote: Choose a light-colored one to allow a bit of light through but not too much to overheat your seedlings.
- Potting soil: Bagged potting soil is sterile, reducing the risk of pests and diseases.
- Tulle fabric: This will cover the tote, keeping insects out while letting light and air in.
- Stapler: To secure the tulle to the tote.
- Leaves/grass clippings: Optional, for building heat through decomposition if your environment is cooler.
- A sharp knife or box cutter: For modifications to the tote.
- Drill or nail: For making drainage holes.
Step by Step Instructions
Learn how to make a DIY seed starter greenhouse in 6 steps: from prepping the tote to planting seeds and positioning your greenhouse for optimal growth.
1. Prepare the Tote
Using the knife or box cutter, carefully remove the center of the tote's lid. This step will help you customize the cover with tulle later on. With the drill or nail, make several drainage holes at the bottom of the tote to prevent waterlogging.
2. Add Potting Soil
Fill the bottom of your tote with about two inches of potting soil. This amount is sufficient for seedlings to root well without wasting soil.
3. Fabric Cover
Cut a piece of tulle large enough to cover the opening you've made in the tote's lid. Secure the fabric around the edges with a stapler, ensuring there are no gaps for pests to enter.
4. Optional: Make a Heat Source
If you're in a cooler climate, adding a layer of leaves or grass clippings under the soil can help generate additional warmth from decomposition. Cover this layer with potting soil before planting your seeds.
5. Plant Your Seeds
With your tote ready, it's time to plant your seeds. Follow the planting depth and spacing recommendations on your seed packets. Once planted, lightly water the soil until it's moist but not soggy.
6. Position Your Greenhouse
Place your mini greenhouse in a location where it will receive gentle sunlight. Avoid direct, harsh sun exposure to prevent overheating. If necessary, use a light cloth as a sun shield.
Caring for Your Mini Greenhouse
- Watering: Keep the soil consistently moist. The lid will help retain moisture, but check periodically, especially after sunny days.
- Ventilation: On warm days, prop open the lid slightly with a stick to allow some air circulation and prevent overheating.
- Monitoring: Keep an eye on your seedlings' growth. As they sprout and grow, they might need thinning to prevent overcrowding.
Transitioning Seedlings to the Outdoors
When your seedlings have grown strong indoors, they're ready for the next big step: moving outdoors. This process is called hardening off, and it's crucial for helping your plants adjust to the outside world. Here's how to do it right:
Gradual Introduction
Start by placing your seedlings outside in a shaded, protected spot for just a few hours each day. Gradually increase their time outdoors over a week, exposing them to more sunlight and varying temperatures. This slow introduction helps them adapt without shock.
Weather Watch
Keep an eye on the forecast. You want to avoid moving your seedlings out during extreme weather conditions like strong winds, heavy rain, or cold snaps. Ideal conditions are mild, overcast days with little to no wind.
Watering Wisely
Before and during the hardening off period, ensure your seedlings are well-watered. This helps prevent stress and wilting. However, avoid overwatering, as soggy soil can lead to root rot and other issues.
Tough Love
As the week progresses, expose your seedlings to the elements they'll face in your garden. This includes direct sunlight, rain, and the natural day-night temperature fluctuations. But always be ready to protect them if the weather turns harsh.
Final Planting
After a week or so, your seedlings should be ready for transplanting into your garden. Choose a cloudy day or late afternoon for the move, as this will reduce transplant shock. Gently plant them in pre-moistened soil and water them in well.
By following these steps, you'll give your seedlings the best chance to thrive in their new outdoor home.
Troubleshooting Common Seedling Issues
Growing seedlings can sometimes be a tricky affair, but don't worry, most issues have simple solutions. Here's a guide to help you identify and fix common problems, ensuring your seedlings grow healthy and strong.
Damping Off
This is when seedlings suddenly collapse and die. It's usually due to a fungal disease that thrives in wet conditions.
- Solution: Use sterile soil and clean pots. Water from the bottom to keep the surface dry and provide good air circulation.
Yellowing Leaves
If your seedlings' leaves turn yellow, it might be a sign of overwatering or poor soil nutrition.
- Solution: Let the soil dry out a bit between watering and use a balanced fertilizer at half strength.
Leggy Seedlings
Tall, thin, and weak stems are often due to insufficient light.
- Solution: Move your seedlings closer to a light source or use grow lights to provide enough light for strong growth.
Mold Growth
White fuzzy mold on the soil surface is another common issue.
- Solution: Reduce humidity by removing any covers and increasing air flow around your seedlings.
Slow Growth
Seedlings that are not growing as expected could be due to cold temperatures or lack of nutrients.
- Solution: Ensure a warm growing environment and feed with a gentle, organic fertilizer.
Leaf Curl
Leaves curling up or down can be caused by too much fertilizer or incorrect pH levels.
- Solution: Flush the soil with water to remove excess fertilizer and test the soil pH, adjusting as necessary.
By keeping an eye out for these signs and taking prompt action, you can solve most seedling issues before they become serious.
FAQs About DIY Seed Starter Greenhouse
Discover answers to common questions about DIY seed starter greenhouses, including setup tips, materials needed, and best practices for healthy seedlings.
A DIY seed starter greenhouse is a small, controlled environment that you can create at home to start growing plants from seeds before the outdoor conditions are suitable. It’s like a mini nursery where your seeds can germinate and grow into healthy seedlings, ready for transplanting into your garden.
To make your own seed starter greenhouse, you'll need:
Seeds: Choose varieties that are suitable for your climate.
Containers: Use seedling trays, pots, or even repurposed items like egg cartons.
Growing Medium: A seed starting mix is best, as it's lighter than regular soil.
Light: If natural light is limited, consider grow lights.
Warmth: A heat mat can help maintain a consistent temperature.
Water: Keep the soil moist but not waterlogged.
Air Circulation: A small fan can provide airflow to strengthen the seedlings.
The best time to start seeds in your greenhouse depends on the plant variety and your local climate. Generally, start seeds 6-8 weeks before the last expected frost date in your area. Check the seed packet for specific timing recommendations.
Maintain the right conditions by:
Monitoring Temperature: Keep it warm enough for seeds to germinate, usually between 65-75°F (18-24°C).
Controlling Moisture: Water regularly to keep the soil moist, and use a humidity dome if needed.
Ensuring Light: Provide 12-16 hours of light daily for most seedlings.
Providing Airflow: Use a fan to prevent disease and strengthen plants.
Common problems include:
Damping Off: A fungal disease that can be prevented by not overwatering and ensuring good air circulation.
Leggy Seedlings: Caused by insufficient light; solve this by moving lights closer or adding more light.
Pests: Keep the area clean and inspect regularly. Use organic pest control methods if necessary.
Transferring Your Seedlings
Get ready to see the magic of plant growth! Making a DIY seed starter greenhouse is rewarding and fun. Let this guide help you start and enjoy growing your plants.


