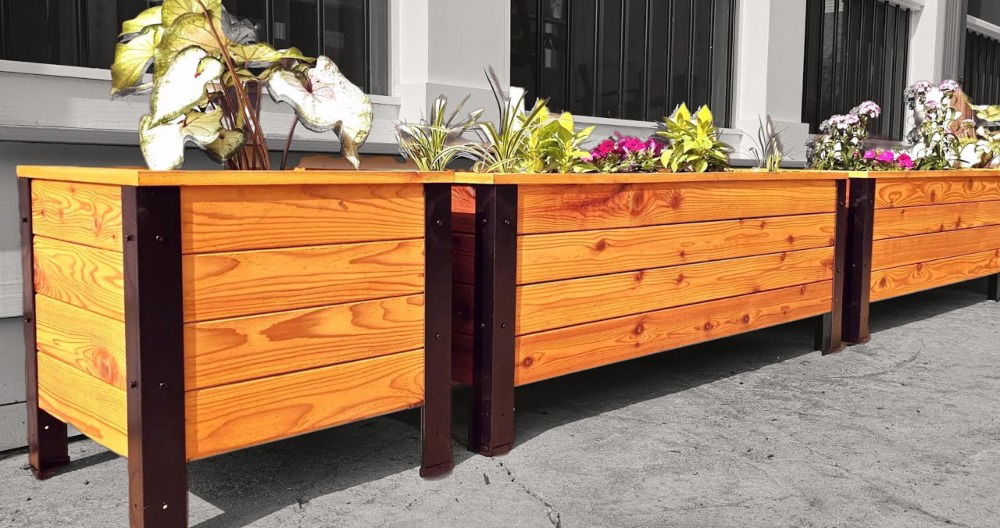
Starting a new project is always exciting. Building a DIY self-watering planter has been one of my rewarding projects. I remember the thrill when I saw my plants thriving with minimal effort. It's a perfect solution for those with a busy schedule or if you simply want an easier way to take care of plants.
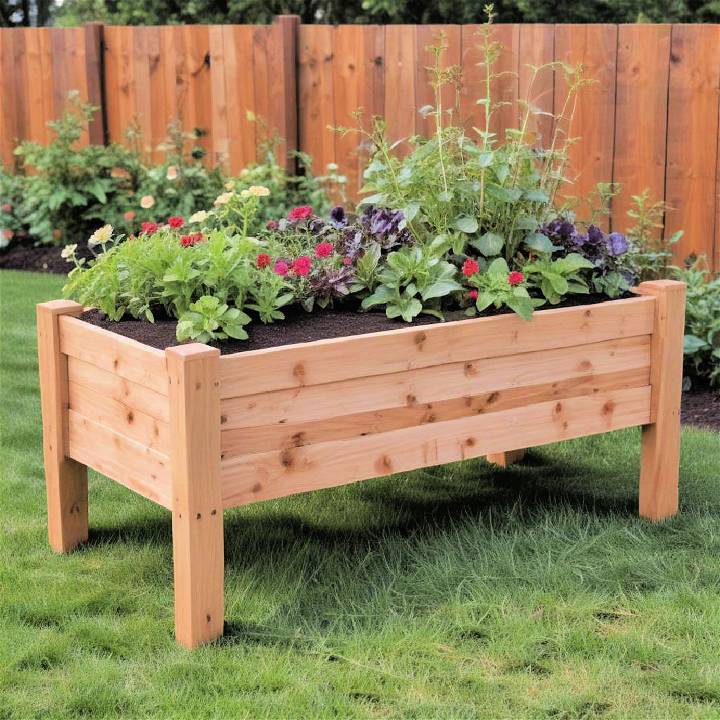
Making a self-watering planter is surprisingly simple. You only need a few household materials. This handy container helps plants get the right amount of water without constant monitoring. I'm sharing my experience to guide you step-by-step on how to make one. Trust me, it'll improve your gardening experience.
Understanding Self-Watering Planters
Self-watering planters are a fantastic way to keep your plants hydrated without the daily hassle. They work on a simple principle: a reservoir holds water, and the plants draw up moisture as needed through a wicking system. This method ensures that the plants receive a consistent amount of water, which is especially beneficial for those who have busy schedules or tend to forget watering.
How Do They Work?
At the bottom of the planter, there's a water reservoir. Above it, there's a separator, often a perforated platform, that keeps the soil from mixing with the water. A wicking system, which can be as simple as a strip of fabric or a porous material, connects the soil to the reservoir. The soil draws water up through capillary action—just like a sponge soaking up a spill.
Benefits of Self-Watering Planters:
- Consistent Moisture: Plants get the right amount of water at all times, which can lead to healthier growth.
- Water Efficiency: These planters use water more efficiently and need refilling less often, saving time and resources.
- Less Stress for Plants: Plants aren't subjected to the ‘feast or famine' cycle of irregular watering, reducing stress and improving health.
- Convenience: Perfect for busy individuals or for when you're away from home.
Setting Up Your Planter:
- Fill the reservoir with water.
- Place the separator and ensure the wicking system is in contact with both the water and the soil.
- Add soil and your plant to the planter.
- Top up the reservoir when needed, usually indicated by a water level gauge.
Tips for Success:
- Use a high-quality potting mix that retains moisture well but also allows air to reach the roots.
- Make sure the wicking system is properly installed; it should touch the bottom of the reservoir.
- Monitor the water level, especially during hot weather when plants may use more water.
By understanding and utilizing self-watering planters, you can enjoy lush, thriving plants with minimal effort.
Materials Needed and Their Importance
To bring my self-watering planter to life, I gathered:
- Two by six boards and two by fours: These would form the body and base of the planter. The choice of these materials was due to their durability and suitability for outdoor conditions.
- Four by fours: These were used for the legs, elevating the planter and making space for the water reservoir beneath it.
- Exterior grade screws and wood glue: Essential for ensuring the planter could withstand the elements without falling apart.
- Pond liner: This waterproof material lines the inside of the planter, making a water-tight reservoir.
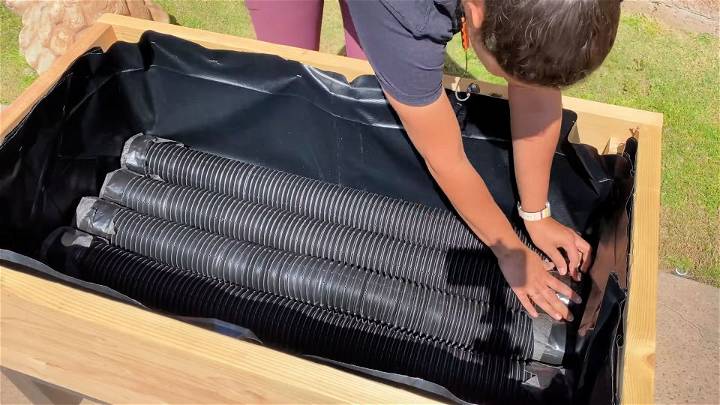
- Corrugated perforated pipe: This pipe, laid at the bottom of the planter, distributes water evenly across the reservoir.
- PVC pipe and flexible hose: Serve as the inlet and outlet for the water, allowing for easy filling and drainage.
- Landscape fabric: Used to cover the ends of the perforated pipe to prevent soil from entering and clogging it.
- Staple gun, utility knife, and saw: Tools needed for cutting and assembling the materials.
Step by Step Instructions
Build a raised garden planter: a step-by-step guide from frame prep to finishing touches. Learn how to line and set up a water system easily and efficiently.
Preparing the Frames
Firstly, I cut the boards to size according to the desired dimensions of my planter. I chose a size that would comfortably fit on my balcony while offering ample growing space for a variety of plants.
Assembling the sides required attaching the boards using exterior grade screws. Precision was key to ensuring a snug fit and overall stability.
The Base and Legs
For the base, I connected the two by fours to the four by fours using pocket holes. This step required careful alignment on a flat surface to avoid any wobbling legs.
Once the framework was ready, I decided to stain the wood. Opting for a dark black stain not only provided protection but also added a sleek aesthetic that would complement my outdoor space.
Lining the Planter
With the structure in place, I lined the interior with the pond liner, securing it with a staple gun. The corners required special attention to ensure a watertight fold rather than cuts that could lead to leaks.
The Water Distribution System
Cutting the corrugated pipe to fit snugly at the bottom, I then covered its ends with landscape fabric secured with duct tape. This was to ensure the soil didn't clog the water passages.
I placed the inlet (PVC pipe) and outlet (flexible hose) at opposite ends, ensuring the reservoir was easy to fill and capable of draining excess water to avoid oversaturation.
Finishing Touches
After assembling everything and making sure it was as water-tight as possible, I gave the wooden parts a few coats of deck stain. While ensuring the stain didn't contact the soil, it added an extra layer of durability against the weather.
The Result
It was a moment of pride seeing the planter come together, not just as a vessel for my plants, but as a testament to what can be achieved with some research, patience, and a weekend's worth of effort. I mixed vermiculite and peat moss as the base layer within the planter, above the water distribution system but below the potting soil, to aid in moisture retention and aeration.
Customization Ideas
When it comes to self-watering planters, customization is key to making your gardening space uniquely yours. Here are some creative ideas to personalize your self-watering planters:
Choose Your Colors
- Paint the exterior of your planters to match your patio furniture or to add a pop of color to your garden.
- Use non-toxic, water-resistant paints for durability and safety.
Get Creative with Materials
- Repurpose old containers like wine bottles, mason jars, or even take-out boxes as the reservoir for a quirky look.
- Experiment with different materials for the wick, such as cotton rope, felt strips, or even old t-shirt pieces.
Design Patterns and Art
- Add patterns or artwork to the planter's exterior using stencils or freehand painting.
- Consider using waterproof stickers or decals for an easy decorative touch.
Incorporate Technology
- For those who love tech, add a moisture sensor that alerts you when the water level is low.
- Set up a simple automated system using a timer and a small pump to refill the reservoir.
Adjust the Size
- Build or modify planters to fit specific areas in your home, like narrow windowsills or expansive decks.
- Build tiered planters for a vertical garden effect, saving space and adding visual interest.
Personal Touches
- Engrave or attach nameplates to your planters for a personal touch or to label plant types.
- Integrate your planters into furniture, like a table centerpiece or a living wall divider.
Customizing self-watering planters adds functionality and expresses your creativity, making gardening more enjoyable and rewarding.
Advanced Tips for Seasoned Gardeners
For experienced gardeners looking to get the most out of their self-watering planters, here are some advanced tips:
Optimize Water Usage
- Experiment with different wicking materials to find the most efficient water transfer for your plants.
- Adjust the size of the reservoir based on the water needs of specific plants to prevent over or under-watering.
Enhance Plant Nutrition
- Incorporate a slow-release fertilizer into the potting mix to provide a steady supply of nutrients.
- Use a liquid fertilizer in the water reservoir for an extra boost during the growing season.
Monitor Plant Health
- Keep an eye on the moisture level of the soil at different depths to ensure even water distribution.
- Look out for signs of over-watering, such as yellowing leaves or root rot, and adjust your system accordingly.
Automate Care
- Install a water level indicator to know exactly when to refill the reservoir without guessing.
- Consider a solar-powered pump to automate the refilling process, making your system even more self-sufficient.
Experiment with Plant Varieties
- Try growing plants that are typically more challenging in self-watering systems, like tomatoes or peppers, and note the differences in care.
- Use your experience to build a guide for growing these more demanding plants in self-watering planters.
Build a Microclimate
- Use mulch or a cover crop in the planter to maintain humidity levels and temperature, making a microclimate that can benefit plant growth.
- Experiment with companion planting in larger self-watering planters to take advantage of natural plant interactions.
By using these techniques, you can perfect your self-watering planters, saving time and improving your gardening experience.
Plant Selection
Choosing the right plants for your self-watering planter is crucial for success. Here's a guide to help you pick plants that will thrive in this environment:
Ideal Plants for Self-Watering Planters:
- African Violets: These beauties prefer consistent moisture without water on their leaves, making them perfect for self-watering systems.
- Peace Lilies: They enjoy moist soil and benefit from the steady water supply a self-watering planter provides.
- Pothos: Known for their adaptability, they do well with the even moisture levels in self-watering pots.
- Fiber Optic Plants: As semi-aquatic plants, they appreciate the constant access to water that these planters offer.
Plants to Avoid:
- Succulents and Cacti: These plants prefer dry conditions and are prone to root rot if over-watered.
- Orchids: They have specific watering needs that may not align with the continuous moisture of self-watering planters.
Tips for Planting:
- Check the Soil: Before planting, ensure the soil is suitable for self-watering systems—well-draining and rich in organic matter.
- Monitor Water Levels: Keep an eye on the reservoir to prevent over-watering, especially for plants that don't need as much water.
- Adjust as Needed: Some plants may require a period of drying out between waterings, so adjust your system accordingly.
By selecting the right plants and monitoring their needs, you can build a lush, self-sustaining garden that requires minimal maintenance.
FAQs About DIY Self-Watering Planter
Discover essential faqs about DIY self-watering planters. Learn how to make, maintain, and optimize your planter for healthier plants.
A DIY self-watering planter is a container that waters the plants it holds by itself. It usually has a reservoir at the bottom that holds water. The water moves up to the plant’s roots through a wicking system. This type of planter is great for keeping your plants hydrated, especially if you’re away or busy.
The planter has a water reservoir at the bottom. Above it, there’s a support that holds the soil and plants. Between the water and the soil, there’s a wicking material that draws water up to the roots as needed. This ensures the plant gets a consistent amount of water without over or under-watering.
Yes, you can! Many DIY self-watering planters are made from recycled materials like plastic bottles, containers, or even old air conditioner parts. You’ll need to be creative and ensure the materials you choose can hold water and support the weight of the soil and plants.
Most plants that thrive in consistently moist soil are well-suited for self-watering planters. These include vegetables like tomatoes and peppers, as well as houseplants like ferns and African violets. Avoid using plants that prefer dry conditions, as they may not do well in this type of planter.
The frequency of refilling the water reservoir in your self-watering planter depends on several factors, including the size of the reservoir, the type of plants, the weather, and the planter's location. Generally, in the height of summer, you might need to refill once a week. However, always check the water level regularly and refill when it's low to ensure your plants stay hydrated.
Conclusion:
In conclusion, making your own DIY self-watering planter for effortless greenery is a fantastic project that benefits both your plants and your schedule. This DIY self-watering planter allows you to keep your greenery thriving with minimal effort, ensuring they receive just the right amount of water. By following these steps on how to make a self-watering planter, you'll enjoy a low-maintenance and highly effective solution for your gardening needs.


