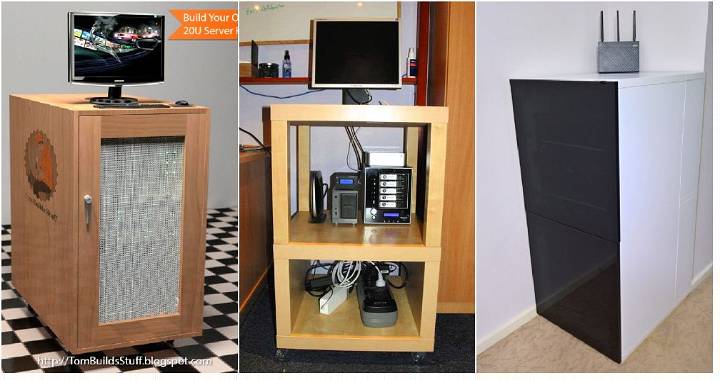
Building my DIY server rack was a unique and rewarding experience. Initially, I felt a bit overwhelmed with the idea of constructing something so technical. But with some research and a clear vision, I began gathering all the parts: metal brackets, screws, and wooden planks. With each step, I became more confident, piecing together the structure that would soon house my servers.
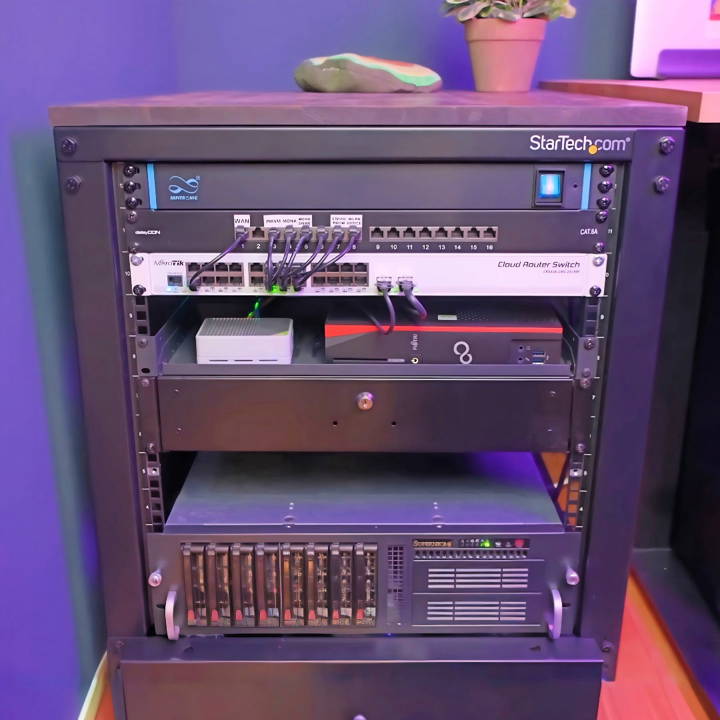
Building a DIY home network rack was equally fulfilling. I needed a central place to organize my routers, switches, and other networking equipment. Step by step, I measured, cut, and assembled a sturdy rack that fit my needs perfectly. By the end, I not only had a functional piece of furniture but also a deeper understanding of my home network setup.
What Exactly Is a Server Rack?
It's a structure designed to hold, organize, and protect various IT equipment. This includes servers, which are powerful computers that store, send, and process data. But it's not just about servers; racks can also house network switches, routers, and other critical gear.
Why Are They Important?
Think of server racks as the unsung heroes keeping your internet and business applications running smoothly. They help with:
- Airflow: By aligning equipment in a certain way, server racks promote better air circulation. This prevents overheating, which is like avoiding sunstroke on a hot day.
- Space-saving: Racks make use of vertical space, stacking equipment in a compact manner. It's like a high-rise building for tech, saving precious floor space.
- Security: Locked server racks protect against unauthorized access, much like a safe for your valuables.
- Maintenance: With everything neatly arranged, it's easier to manage and fix any issues, just like having a well-organized toolbox.
Server racks are essential for a reliable IT setup. They ensure the digital world runs smoothly.
Step by Step Instructions
Learn how to build a DIY server rack with our step-by-step instructions. Perfect for home setups, save money, and customize your server storage.
Step 1: Recognizing the Need for Change
My journey began with the realization that my current setup—a melange of devices crammed into a cheap IKEA cupboard—was neither efficient nor sustainable. The cluttered wires and the inability to easily manage or upgrade the equipment were becoming serious hindrances. Not to mention the visual eyesore it presented in my work area.
Step 2: Selecting the Server Enclosure
The cornerstone of my new home lab was the server enclosure. After extensive research, I decided on a 3U case with hot-swap storage bays. My heart sank at the price tags on new models, nudging me toward the secondary market, where I struck gold with a Supermicro SC833 enclosure. At $119 with eight hot-swap bays and a power supply, it was a steal—though it lacked rails, an additional expense I was willing to bear.
Why a 3U Case?
- Expandability: The hot-swap bays would make managing drives infinitely easier.
- Cost-Effectiveness: Second-hand, it was much more affordable without sacrificing quality.
- Size Consideration: A 3U case fits my needs without towering over my workspace.
Step 3: Choosing the Rack
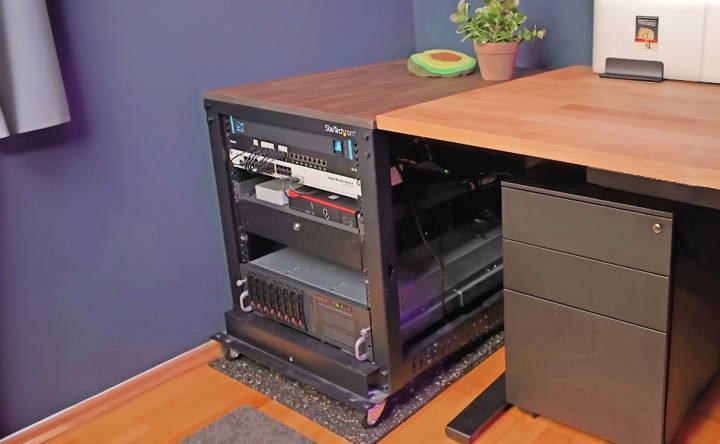
My initial choice was a Samson 12-unit rack meant for musical equipment, and I was attracted by its affordability. However, a critical detail almost slipped by—the depth was insufficient for server enclosures. After more digging, I settled on a 12U rack from StarTech. Though pricier, its adjustability and sturdy build offered the flexibility I needed.
Open Rack vs. Closet
An open rack was my final choice for several reasons:
- Cost: Full enclosures were conspicuously more expensive.
- Accessibility: Open racks allow easier component handling.
- Airflow: Ensuring my equipment stayed cool was simpler with an open design.
Step 4: Assembly and Preparation
Building the rack was unexpectedly straightforward—easier than assembling IKEA furniture! This part was crucial, as the right foundation set the stage for a smooth transition of equipment into this new arrangement.
Next came preparing the Supermicro enclosure. Despite its excellent condition, some modifications were in order:
- Fans and Power Supply: Out went the loud, original components, replaced by quieter and more efficient counterparts (like a Corsair SF450 PSU for its energy efficiency and low noise).
- Cabling and Peripheral Setup: Managing cables for a neater appearance and better airflow was a task, but one that paid off in both aesthetics and function.
Step 5: The Actual Build
Transferring my server from its old case to the new enclosure was a mix of nostalgia and excitement. Every component, from SATA cables to PCIe devices, was methodically arranged for optimal performance and ease of access. Non-traditional fixes like zip ties for fan installation were part of my unconventional approach, prioritizing functionality and noise reduction over textbook methodologies.
Step 6: Hard Drive Upgrade
The data storage aspect received a significant upgrade with Western Digital Red Pro hard drives, thanks to their CMR technology, which is suitable for ZFS setups. This move toward a more professional, reliable storage solution was a leap toward data integrity and efficiency.
Customization Options
Customizing your server rack is like tailoring a suit; it should fit your needs perfectly. Here's how you can make your server rack truly yours:
- Size and Dimensions: Start by measuring your equipment. Make sure your rack has enough room for everything, plus a little extra for future additions. It's like packing a suitcase; you want to have space for that extra pair of shoes you might buy on vacation.
- Adjustable Shelves: Choose shelves that can move up and down. This way, you can rearrange them as your setup changes, just like adjustable seats in a car.
- Cable Management: Keep cables tidy with hooks, clips, or ties. It's like using drawer organizers; everything has its place, and you can find what you need without digging through a mess.
- Cooling Systems: Add fans or a liquid cooling system to keep your equipment at the right temperature. Think of it as climate control for your tech.
- Power Distribution: Install power strips and UPS systems to manage electricity flow and keep your gear safe during outages. It's like having a generator during a storm.
- Security Features: Protect your equipment with locks and sensors. It's like a security system for your home; you'll know your gear is safe.
- Aesthetic Touches: Choose a color or add LED lights to match your style. It's like picking out curtains; it doesn't change the function, but it makes the space yours.
The goal is to build a server rack that works for you. It should be easy to use, maintain, and upgrade.
Troubleshooting Common Server Rack Issues
Troubleshooting is like being a detective; you're solving the mystery of why something isn't working right. Here are some common server rack issues and how to fix them:
- Overheating: If your server rack is too hot, it's like a car overheating on a summer day. Check if the fans are working and if there's enough space for air to flow. Sometimes, rearranging equipment can help.
- Power Problems: If your equipment suddenly stops working, it might be a power issue. It's like checking the fuse box when the lights go out. Make sure all cables are plugged in securely and that your power strips are functioning.
- Cable Confusion: A mess of cables can lead to unplugged or misconnected wires. It's like untangling headphones; take your time to trace each cable to its source and destination.
- Rack Instability: If your rack wobbles, it's not safe. It's like a shaky table; you need to make sure it's balanced and secured to the floor or wall.
- Hardware Failures: Sometimes, a piece of equipment might fail. It's like a lightbulb burning out. You'll need to identify the faulty hardware and replace it.
- Security Alerts: If you have alarms or sensors, they might go off without an obvious reason. It's like a car alarm; check for false alarms and ensure everything is secure.
- Noise Issues: Server racks can get loud. If it's too noisy, it's like a busy street. Look into soundproofing options or move the rack to a less disruptive location.
The key to good troubleshooting is staying calm and methodical. Take it step by step, and you'll find the solution.
Maintenance and Upgrades
Keeping your server rack in tip-top shape is like taking care of a garden; it needs regular attention and the right tools. Here's how to maintain your server rack and plan for upgrades:
- Regular Cleaning: Dust and debris are like weeds; they can choke your equipment if you let them build up. Use a soft brush or a can of compressed air to clean the surfaces and components gently.
- Check Connections: Loose cables are like loose shoelaces; they can trip you up. Make sure all connections are secure and that cables are not frayed or damaged.
- Monitor Temperature: Check the temperature before heading out, just like you would the weather. Use temperature sensors to ensure it stays within safe limits.
- Software Updates: Update your software regularly. It's like staying up-to-date with the news; you need to know what's happening to stay safe and efficient.
- Hardware Inspections: Inspect your hardware periodically. It's like a health check-up; catching issues early can save you a lot of trouble later.
- Plan for Expansion: If you're adding new equipment, it's like planning a room addition to your house. Make sure your rack has enough space and power to accommodate growth.
- Upgrade Paths: Monitor technology trends. It's like following fashion: You want to stay current and stylish while also remaining timeless and functional.
- Documentation: Keep records of all maintenance and upgrades. It's like a diary; it helps you remember what you've done and plan for what's next.
Follow these steps to keep your server rack reliable and efficient. Regular maintenance and upgrades prevent downtime and ensure smooth network operation. A little care goes a long way!
FAQs About DIY Server Rack
Discover answers to common questions about DIY server racks, including materials, construction tips, cost, and setup for optimal performance.
A DIY server rack is a custom-built frame or enclosure designed to hold and organize computer servers and networking equipment. It's a cost-effective alternative to commercial server racks and can be tailored to fit specific space requirements and preferences.
Building your own server rack can save you money, provide flexibility for customization, and give you a better understanding of your home network setup. It also allows you to build a rack that perfectly fits your space and equipment needs.
When setting up your DIY server rack, consider the size of your equipment, ventilation and cooling needs, cable management, and ease of access for maintenance. Ensure the rack is sturdy and secure to protect your equipment.
Yes, safety is important when building and using a DIY server rack. Make sure the rack is stable and can support the weight of your equipment. Properly manage cables to prevent tripping hazards and ensure good airflow to avoid overheating of servers.
Proper cooling is crucial for maintaining the performance and longevity of your servers. To ensure adequate cooling in your DIY server rack, you should:
Maintain good airflow by leaving enough space between servers and using vented panels or doors.
Install fans to help circulate air and exhaust heat.
Consider the room temperature where the rack will be placed, and use air conditioning if necessary.
Regularly clean the rack and components to prevent dust buildup, which can insulate heat.
Final Thoughts
Building your own DIY server rack can be a fun and educational project. With a little patience and effort, you can build something truly useful. These instructions will help you get started and make the process smoother. Happy building!


