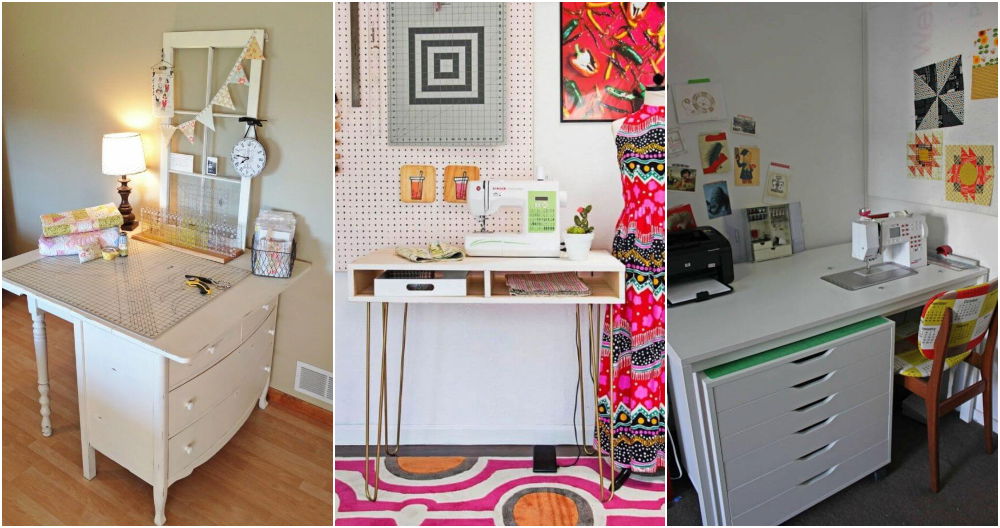
Building a homemade DIY sewing table was one of the most satisfying projects I've ever completed. I always wanted a space tailored to my sewing needs, with specific storage areas and a large working surface. First, I sketched my ideas and gathered all the tools and materials needed. Using affordable wood, screws, and some paint, I maked a basic but functional design.
Putting everything together was a mix of fun and learning. I sanded the wood to a smooth finish and painted it in colors I loved. As I assembled the table, I felt proud to witness my idea take shape.
Making a DIY sewing table yourself means you can customize it perfectly. Hope this inspires you to start your project; trust me, it's worth the effort!
Understanding the Need
The project was born out of necessity. The makeshift furniture my spouse had been using was no longer fitting her expanding crafting inventory, nor did it match the developed skill set I now possessed in woodworking. Hence, a new setup was in order: a combination of sewing table and storage cabinets tailored to the spatial and functional requirements of her crafting regimen.
Planning and Designing
Discover the importance of good design and essential materials like plywood and poplar for your next project. Boost your craftsmanship today!
Why Good Design Matters
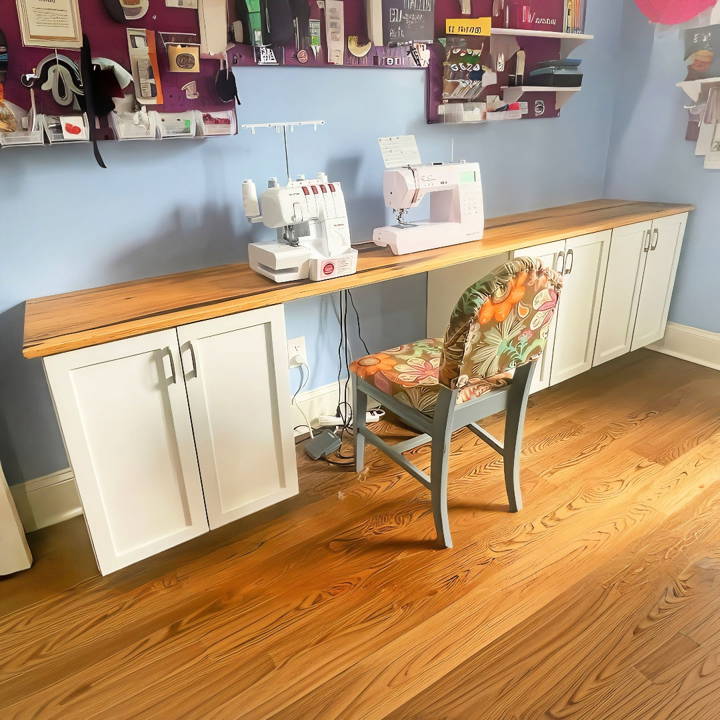
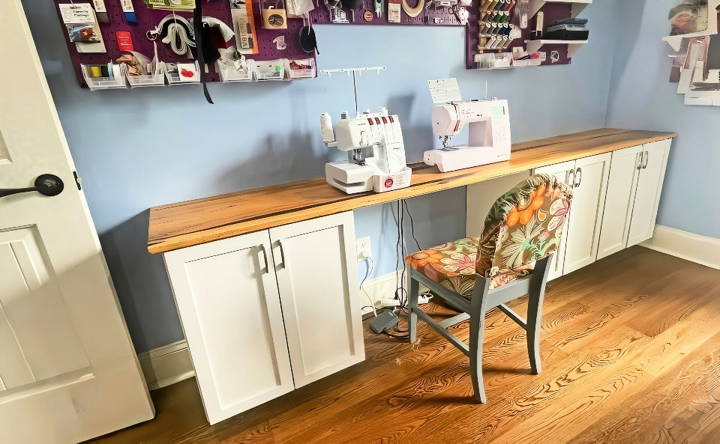
A thoughtful design ensures functionality, efficiency, and satisfaction in the final product. Using Fusion 360, I modeled a layout consisting of three cabinet sections with a bar on top for the sewing machine and serger, accompanied by a central table equipped with drawers. The layout was designed to optimize storage while providing ample space for sewing tasks.
Step by Step Instructions
Build your perfect DIY sewing table with step-by-step instructions. Learn about cutting, edge banding, pre-finishing, and overcoming challenges with doors.
Breaking Down Plywood
The first step was breaking down the plywood into manageable sizes with my track saw. Ensuring consistent dimensions by cutting slightly oversized pieces first, then trimming them on the table saw, was crucial for uniformity across the project.
Importance of Precise Cutting
Precise cuts contribute to the overall stability and appearance of the furniture. Paying attention to the direction of the blade and the finish side of the material minimizes tear-outs and ensures a clean look, especially when working with plywood.
Edge Banding for Aesthetic Finish
Edge banding was applied to conceal the plywood layers, giving the pieces a solid wood appearance. This step, although meticulous, significantly improves the visual quality of the finished product.
Pre-finishing: A Timesaver
Pre-finishing the pieces—with a natural finish inside and paint outside—prior to assembly saved time and ensured a neater final look without the hassle of masking and painting post-assembly.
Learning from Mistakes: The Doors
Discover challenges and solutions with doors, enhancing flexibility and problem-solving skills. Learn from mistakes: the doors experience awaits!
The Challenge with Doors
Building the doors involved meticulous milling and grooving, where I experienced a few setbacks, such as unintentionally making multiple pieces for one side and forgetting to paint edges. These errors were reminders of the importance of double-checking work and that perfection is a journey, not a destination.
Solution and Flexibility
Correcting the mistakes by sanding down and repainting, as well as filling unnecessary grooves with epoxy, taught me that flexibility and problem-solving are as much a part of woodworking as the actual building process.
Final Assembly and Finishing Touches
Assembling the cabinet sections, attaching the doors, and applying the final finishes were rewarding phases. They brought together the individual elements, revealing the cohesion and beauty of the designed piece. The project concluded with installing the solid Poplar top for the sewing table, providing a sturdy and expansive workspace for sewing projects.
Customization Tips for Your DIY Sewing Table
Building a sewing table that meets your specific needs can be a rewarding project. Here are some tips to help you customize your DIY sewing table:
- Adjustable Height: Consider installing adjustable legs to ensure your table works for you, whether you're sitting or standing. This can help prevent back pain and increase comfort.
- Foldable Parts: If space is an issue, foldable sections can be a lifesaver. You can have parts of the table that fold down when not in use, making your space more versatile.
- Built-in Storage: Plan for storage space within your table. Drawers or shelves for your sewing essentials can keep your workspace tidy and your tools within reach.
- Surface Material: Choose a surface material that's smooth enough to not snag fabrics but durable enough to withstand pin scratches and cutting.
- Lighting: Good lighting is crucial. Add a section on your table for a lamp or install under-cabinet lighting to brighten your work area.
- Power Outlets: Incorporate power strips or outlets into your table design for easy access to power for your sewing machine and other gadgets.
- Personal Touch: Paint or decorate your table in a way that inspires you. This could be with colors that calm you or patterns that spark your creativity.
The key to a great DIY project is making it your own. These tips are just a starting point to help you make a sewing table that not only looks great but also works perfectly for your sewing adventures.
Ergonomic Design Advice for Your DIY Sewing Table
When crafting a DIY sewing table, ergonomic design is key to ensuring comfort and preventing strain during long sewing sessions. Here's how you can incorporate ergonomics into your table:
- Proper Height: The table should be at a height that allows your elbows to rest comfortably at a 90-degree angle when sewing. This prevents shoulder strain.
- Chair Compatibility: Choose a chair that supports your lower back and allows your feet to rest flat on the floor or on a footrest.
- Wrist Position: Ensure that the table edge is rounded or padded to prevent pressure on your wrists.
- Eye Level: The top of your sewing machine should be at a level that doesn't require you to bend your neck down or up, which can cause neck pain.
- Leg Room: Provide ample space under the table for easy leg movement and to prevent knee contact with the table underside.
- Accessible Design: Arrange your sewing tools within easy reach to minimize stretching or straining.
- Non-Slip Surface: Use a non-slip mat or surface to keep your sewing machine in place without extra force.
- Break Reminder: Consider incorporating a small timer or reminder system to take regular breaks and stretch, which is crucial for good ergonomics.
By focusing on these ergonomic principles, you'll make a sewing table that not only looks great but also supports your body and enhances your sewing experience.
Troubleshooting Common Issues
When embarking on a DIY sewing table project, you might encounter a few hiccups along the way. Here's a helpful guide to troubleshoot common issues:
- Wobbly Table: If your table wobbles, check to ensure all legs are even. Adjust the length of the legs or add stabilizers to fix any imbalance.
- Sticky Drawers: For drawers that stick, apply a thin layer of wax along the runners. This can help them slide more smoothly.
- Surface Scratches: If your table surface gets scratched, gently sand the area and reapply the finish to protect the wood.
- Loose Screws: Tighten any loose screws immediately. If they continue to loosen, use a bit of wood glue in the screw hole for a firmer hold.
- Poor Lighting: Should your lighting be inadequate, consider adding more light sources or changing the position of your table to utilize natural light.
- Insufficient Storage: If you need more storage, add hanging organizers or portable storage units that can be tucked under the table when not in use.
- Noise Issues: To reduce noise from your sewing machine, place a rubber mat under it to absorb vibrations.
- Difficulty in Following Plans: If you're having trouble following DIY plans, look for video tutorials or seek advice from DIY forums for clarity.
Patience is key. Understand the problem and apply the solution carefully. Your DIY sewing table shows your dedication and creativity, so ask fellow DIY enthusiasts for advice.
FAQs About DIY Sewing Table
Discover answers to common questions about DIY sewing tables, including materials, design tips, and assembly instructions for your perfect workspace.
A DIY sewing table is a customized worktable built to suit your specific sewing needs. Building one allows you to make a space that's the perfect size for your room and has features tailored for your sewing projects. It can be a cost-effective solution and gives you the freedom to add personal touches like extra storage or unique design elements.
Absolutely! There are many plans available that cater to small spaces, including fold-down tables that can be stored away when not in use, or compact designs that fit into a closet. The key is to measure your available space and choose a plan that fits within those dimensions while still providing a functional work area.
The right height for a sewing table depends on your comfort level. A general guideline is to have the table at a height where you can sit with your arms at a 90-degree angle while sewing. This usually ranges between 28 to 30 inches tall. If you're building your own table, you can customize this to your preferred height.
When designing your sewing table, consider features like a drop-in space for your sewing machine to sit flush with the table surface, storage for your sewing supplies, and ample workspace for cutting and laying out patterns. Other useful features might include adjustable shelves, a fold-out ironing board, or a built-in measuring tape along the edge of the table.
Quilting requires a larger workspace to handle the bulk of the fabric. To customize your sewing table for quilting, consider adding an extension table or a drop-leaf section that you can fold out for more space. You can also incorporate a recessed area for your sewing machine to sit flush with the table surface, making fabric handling smoother. For storage, include drawers or shelves underneath to keep your quilting supplies and fabrics organized and within easy reach.
Conclusion
I found building a homemade DIY sewing table very rewarding. Building it myself gave me the chance to customize every detail to fit my needs. The experience boosted my confidence and added a personal touch to my sewing space. I encourage you to start your own project; it's a wonderful way to improve your sewing area and enjoy a sense of accomplishment. These tips will guide you well.


