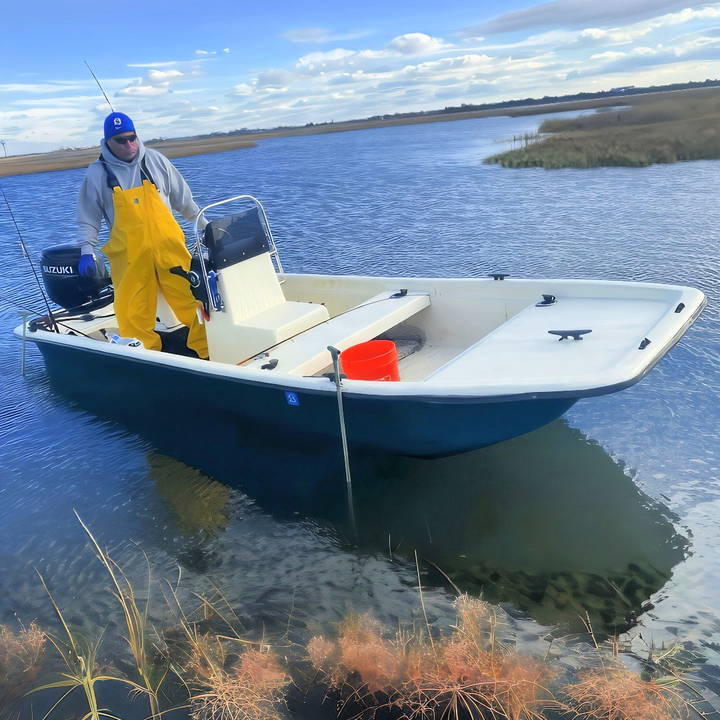
If you're into shallow-water fishing or enjoy duck hunting from a small boat or skiff, a shallow-water anchor is an essential tool to hold your position without the hassle of deploying a traditional anchor. In this comprehensive guide, we'll walk you through making your own DIY shallow water anchor. It's cost-effective, straightforward to assemble, and works like a charm for keeping your boat steady in skinny waters.
Why Build a DIY Shallow Water Anchor?
Purchasing shallow water anchors can be expensive, often running into hundreds of dollars. But by making your own push pole-style stick anchor, you can save a lot of money while ensuring you have a durable and effective tool for your boating adventures. Here are a few key benefits of this DIY approach:
- Cost-Effective: The entire project costs a fraction of what you'd pay for a commercial anchor.
- Customization: You can adjust the length, material, and design to suit your specific needs.
- Lightweight and Easy to Use: The stick anchor is portable and easy to deploy, especially in shallow, muddy, or sandy conditions.
- Multi-Functional: Whether you're fishing, bird watching, or duck hunting, this anchor will keep your boat in place.
Now that you're convinced, let's look at how to make your very own DIY push pole shallow water stick anchor.
Materials You Will Need
Here's a list of materials and tools to gather before starting the project. Most of these can be easily sourced online or from local hardware stores.
- 10-foot x 3/4" fiberglass pole: The backbone of your anchor, providing strength and flexibility.
- Aluminum tip: Found at specialty stores like Midnight Moon Outfitters, this point helps drive the pole into the lake or riverbed.
- 3/4-inch irrigation T-fitting: Acts as the handle for pushing and pulling the pole.
- Marine Tex epoxy: A two-part epoxy to bond the aluminum tip and the irrigation T to the fiberglass pole.
- Hockey tape: Reinforces the T-handle for extra durability.
- Fiberglass resin: To further strengthen the T-handle and protect it from wear and tear.
- Green camouflage paint: Optional, but helpful for blending your pole with the environment.
- D-ring and paracord: Used for attaching the anchor to your boat securely.
Step by Step Instructions
Learn how to make a DIY shallow water anchor with these easy step-by-step instructions. Save money and time with our detailed guide.
Step 1: Prepare the Fiberglass Pole
Start with the fiberglass pole. You'll need a pole that is 10 feet long with a diameter of 3/4 inch. This length is ideal for small boats or skiffs and allows you to anchor in waters up to 8-9 feet deep. Fiberglass is a strong, lightweight material that won't corrode in water, making it the perfect choice.
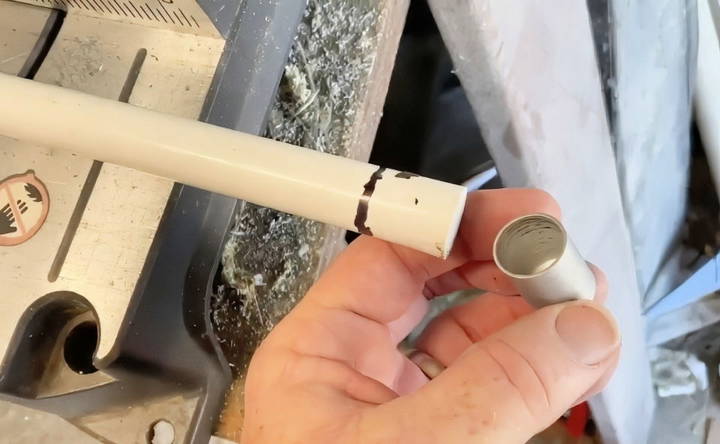
- Use a hand sander with 80-grit sandpaper to taper one end of the fiberglass pole. Tapering will ensure that the aluminum tip fits securely.
- Keep checking the fit by inserting the aluminum tip until it slides on snugly. You don't need to remove too much material – just enough for a tight fit.
Step 2: Attach the Aluminum Tip
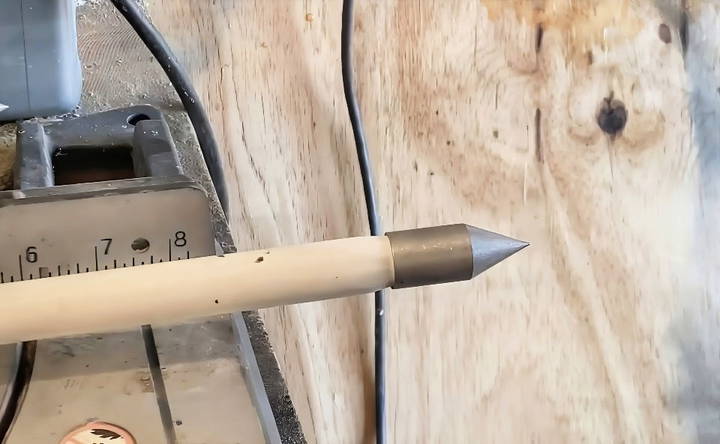
The aluminum tip is the piece that penetrates the bottom of the water body, so it needs to be both sharp and durable. After tapering the pole, it's time to attach the tip:
- Apply Marine Tex epoxy to the inside of the aluminum tip and the outside of the tapered fiberglass pole.
- Slide the tip onto the pole and let the epoxy cure. Marine Tex is known for its strong bond, so this attachment will be permanent and sturdy.
- Allow the epoxy to cure for the recommended time (typically 5 minutes for quick-cure versions or longer for standard epoxies).
Step 3: Make the T-Handle
The other end of the pole will need a T-handle to make it easier to push into the ground or pull it out.
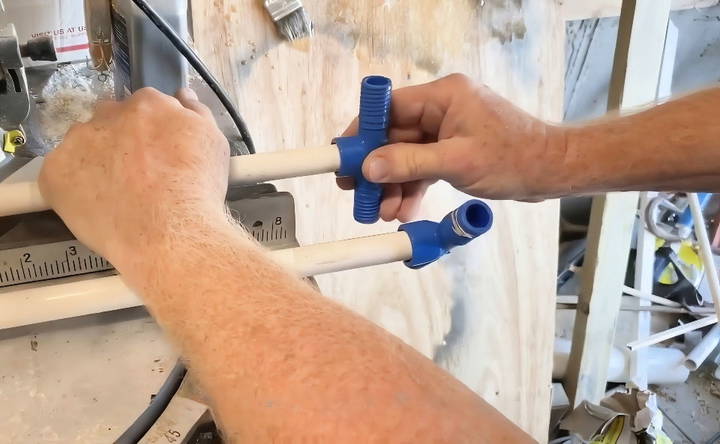
- Use a 3/4-inch irrigation T-fitting for this purpose. These fittings are affordable and available at most hardware stores.
- You will need to modify the T-fitting slightly. Ream out the female threads of the T-fitting with a 3/4-inch speed bore drill bit. This widens the fitting enough for the fiberglass pole to fit inside snugly.
- Once the fitting is modified, apply Marine Tex epoxy to the inside of the T-fitting and the outside of the fiberglass pole.
- Slide the T-fitting onto the pole and let the epoxy cure.
Step 4: Reinforce the T-Handle
Because the T-handle will experience a lot of wear and tear, especially in cold weather conditions, reinforcing it is a good idea.
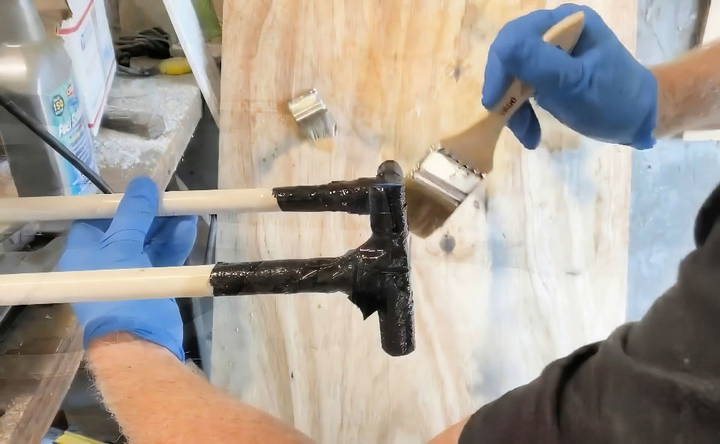
- Wrap the T-handle in hockey tape. This provides extra grip and makes it more durable.
- Coat the hockey tape with fiberglass resin to further reinforce the handle. This method ensures that the T-handle is strong enough to withstand extreme conditions like cold winters when you might use the anchor for duck hunting.
- Let the resin cure fully before proceeding to the next step.
Step 5: Camouflage Your Anchor
If you're using the anchor for duck hunting or want a less conspicuous anchor while fishing, consider spray-painting the fiberglass pole with a green camouflage color. This helps the pole blend into the surrounding environment and avoid scaring off wildlife.
Step 6: Attach the Anchor to Your Boat
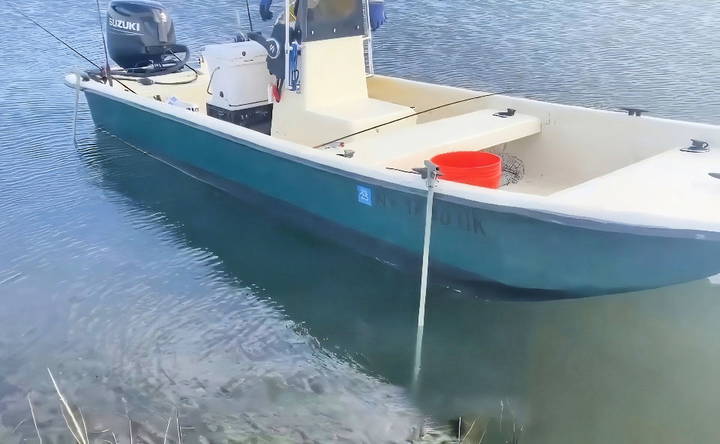
To make it easier to deploy the anchor, you'll want to attach it to your boat with a D-ring and paracord.
- Fasten a D-ring to a convenient spot on your boat using bolts or clamps.
- Tie a length of black paracord to the D-ring, and attach the other end to the T-handle of your anchor.
- Using a D-ring allows for quick and easy attachment and removal of the anchor when you're ready to use it. Simply insert the pole through the D-ring and push it down into the bottom.
Tips for Using Your DIY Shallow Water Anchor
- Choose the right location: This stick anchor works best in muddy, sandy, or clay bottoms where the pole can easily penetrate the surface.
- Ideal for calm conditions: While it's effective in most shallow water scenarios, this anchor is best used in low wind and current conditions. For rougher waters, consider using two anchors (one at the front and one at the back of your boat) to secure the vessel more firmly.
- Maintenance: After each use, rinse the anchor with fresh water to remove any salt or debris, especially if you've been using it in saltwater. This will extend its lifespan and keep it functioning optimally.
Costs and Time
Making your own push pole anchor is not only a fun project but also an economical one. Here's a breakdown of the approximate costs:
- Fiberglass pole: $50
- Aluminum tip: $9
- Irrigation T-fitting: $2–$3
- Marine Tex epoxy: $5–$10
In total, you'll spend around $60–$70, which is significantly less than commercial alternatives that can cost hundreds of dollars.
In terms of time, the project should take no more than a couple of hours, including the time for the epoxy and resin to cure.
Conclusion
With just a few readily available materials and a couple of hours of your time, you can build a durable and functional DIY push pole shallow water stick anchor for your small boat or skiff. This project is not only cost-effective but also customizable to your needs, whether you're fishing in skinny waters or setting up for a day of duck hunting.
By following these simple steps, you'll have a reliable and strong anchor that's easy to deploy and retrieve, keeping your boat secure in shallow water without the hassle of traditional anchors.
FAQs About DIY Shallow Water Anchor
Discover essential FAQs about DIY shallow water anchors, including tips, materials, and step-by-step guidance for your next boating project.
You can attach the anchor using a D-ring fastened to the boat's cleat with paracord. This method avoids drilling holes and allows for easy attachment and removal of the pole.
Yes, fiberglass poles sink quickly. To prevent losing your anchor, tie it securely using a D-ring or cleat. Alternatively, adding a foam float near the T-handle, like a pool noodle, could help keep it afloat.
This design is not ideal for larger boats. You would need a thicker and stronger pole to withstand the weight and pressure from heavy winds and currents.
Yes, PVC pipe with a wood dowel or bamboo core can work as a lightweight alternative. However, it may not be as strong as fiberglass, especially under heavy strain.
The total cost of materials is approximately $60-$70, depending on the source of your parts. Fiberglass poles, aluminum tips, and epoxy are the most significant costs.
This DIY anchor is best for small boats and skiffs, like the Carolina Skiff J16, which is lightweight and operates in shallow water.
Reinforce the T-handle with hockey tape and fiberglass resin to prevent damage in cold conditions. This technique strengthens the handle, ensuring durability even in freezing temperatures.


