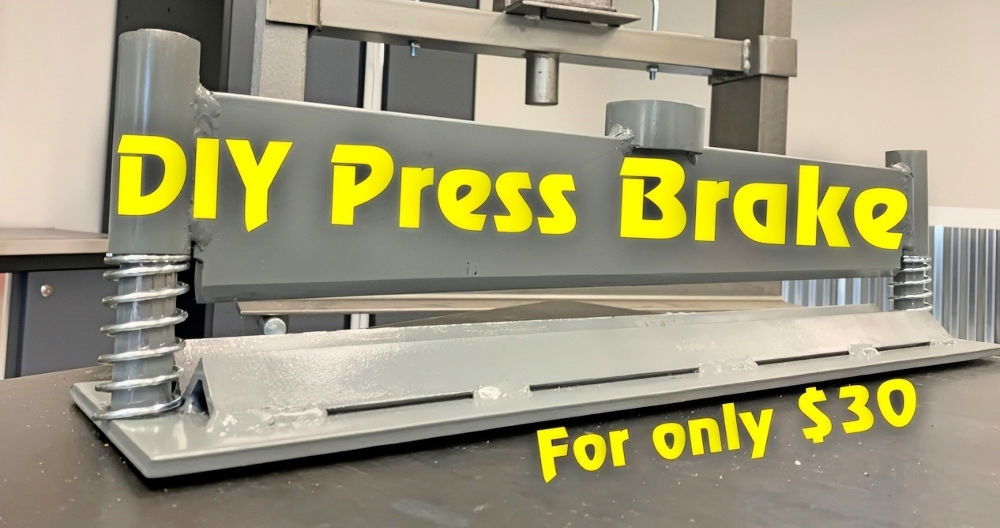
Building your own DIY sheet metal brake can be a rewarding project, allowing you to bend metal sheets precisely to your requirements. Not only does it save you money, but it also offers the satisfaction of crafting a tool that you can use repeatedly in your workshop. In this guide, we'll explore the process of building a 48-inch sheet metal brake, covering the materials, construction, and design tips to help you make a reliable, functional tool.
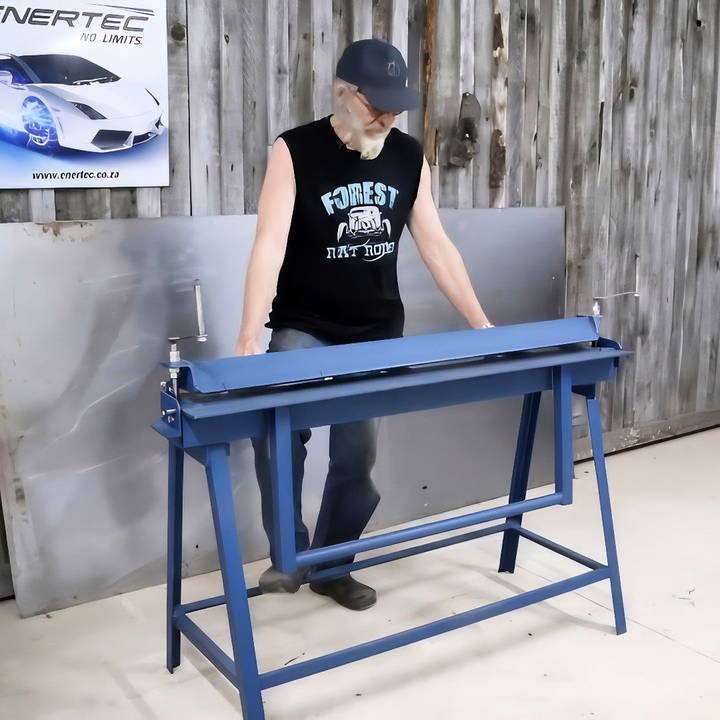
What Is a Metal Brake?
A metal brake is a machine used to bend sheet metal. Typically, it is composed of a stationary base, a clamping mechanism, and a movable component to build the bend. Commercial metal brakes can be expensive, but building one yourself from repurposed materials can be both cost-effective and efficient for smaller projects.
Materials and Tools Required
This DIY project is ideal for anyone who enjoys repurposing scrap materials. Most of the components can be sourced from junkyards or leftovers from previous projects. Here's what you'll need to build your own metal brake:
Materials:
- Angle Bar: Three lengths of angle bar are the primary materials for the brake. These bars measure approximately 90 mm wide with a thickness of 8 mm.
- Steel Frame: The main frame can be built from repurposed steel or tubing, depending on what you have available.
- 16 mm Round Bar: This acts as the pin around which the metal brake pivots.
- Threaded Bar (M16): Used to adjust and lock the clamp in place.
- Nuts and Bolts: Standard hardware like nuts and bolts will secure the components together.
- Scrap Pieces for Reinforcement: Small pieces of metal will be welded in place to strengthen the structure and ensure durability.
Tools:
- Welding Machine: To attach various metal components.
- Drill: For building holes in the angle bars and the frame.
- Wrenches and Pliers: To tighten and secure the nuts and bolts.
- Grinder: Useful for smoothing out edges or making custom cuts.
- Measuring Tools: Such as a tape measure or calipers to ensure precision.
Step by Step Instructions
Learn to build a DIY metal brake with our easy step-by-step instructions. Perfect your project with tips on design improvements and cost efficiency.
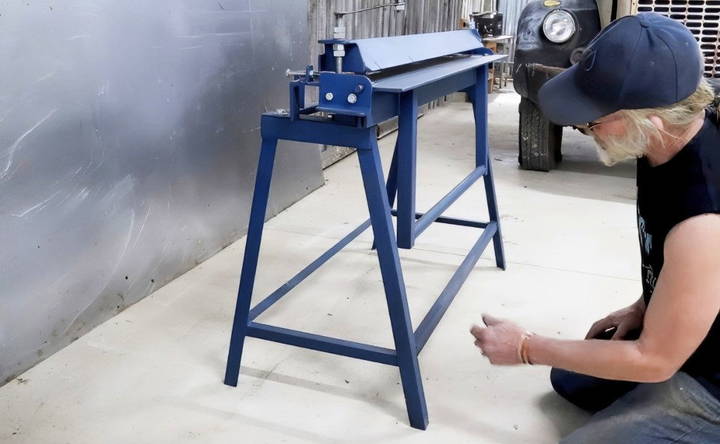
Step 1: Constructing the Base Frame
The base frame is the backbone of the metal brake, holding everything in place and providing stability for your bends. You can use scrap metal tubing or angle iron to build this frame. The one described in the project was made from repurposed steel sourced from a junkyard.
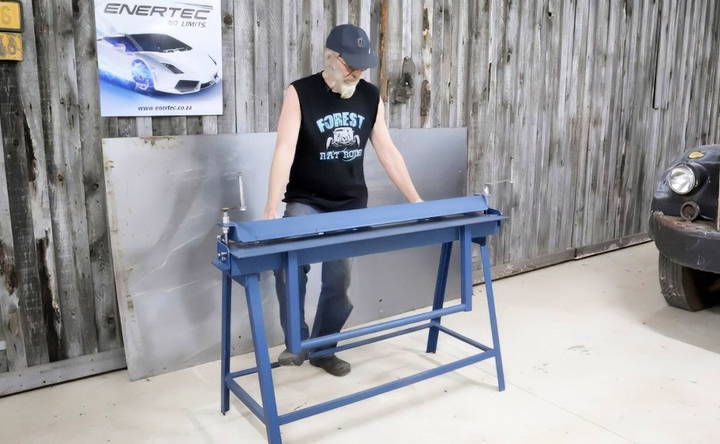
- Measurements: The angle bars used for the project were 1.35 meters long, making it possible to bend sheets up to four feet in width.
- Stability: Weld the base frame to a flat surface, or if you prefer portability, bolt it to a workbench so it can be removed when not in use.
Step 2: Building the Hinges
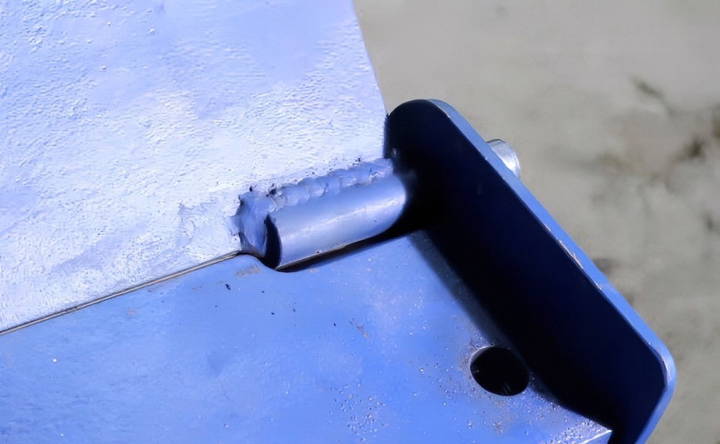
The hinge system is critical for ensuring smooth operation when bending sheet metal. In this design, the hinge consists of a 16 mm round bar welded to the angle bar.
- Positioning: It's crucial to align the center of the hinge with the edge of the angle bar. This ensures that the bending action follows a precise and consistent path. The key here is to carefully measure and cut the angle bar so that the pin is aligned with the center line of the metal being bent.
Step 3: Designing the Clamp
A metal brake requires a clamping mechanism to hold the sheet metal securely in place while bending. In this design, a third piece of angle bar is used to clamp down on the metal.
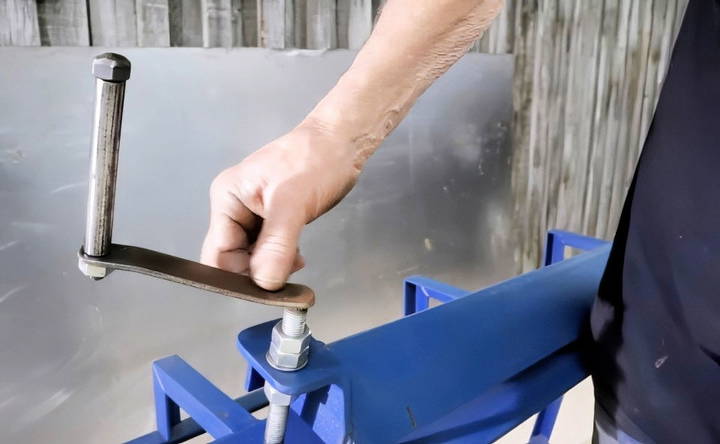
- Adjustability: By installing an M16 threaded bar on each side of the brake, you can raise or lower the clamp as needed. A double nut system ensures that the clamp stays in place once it's tightened.
- Fine-Tuning: It's important to be able to adjust the clamp according to the thickness of the metal. The back of the clamp is adjustable, allowing you to set a precise gap for the material, ensuring that you can accommodate different metal thicknesses.
Step 4: Adding Support for Larger Projects
For wider sheets of metal, you may experience flexing in the structure. To prevent this, it's recommended to brace the frame for additional support.
- Round Bar Tensioning System: One method of adding stiffness to the brake involves welding a round bar to the frame and installing a pipe section. A bolt is welded to the angle bar, and when tightened, it builds tension, pre-loading the structure to prevent any flex during operation.
Step 5: Building the Handle
A handle makes it easier to operate the brake and apply even pressure when bending. In this design, two pieces of square tubing were welded together to form a simple but effective handle.
- Lever Action: The handle should be long enough to provide leverage when bending thicker sheets of metal. Welding a sturdy piece of flat bar to the ends of the threaded rod ensures that you have ample strength to apply the necessary force.
Step 6: Cleaning and Finishing Touches
After assembly, it's a good idea to clean the brake and make any necessary adjustments.
- Cleaning: A damp cloth can be used to wipe down the structure, removing any debris or rust that might have accumulated during construction.
- Final Adjustments: Check that the hinge and clamping systems operate smoothly, and make sure there is no excessive play in the components.
Testing the Metal Brake
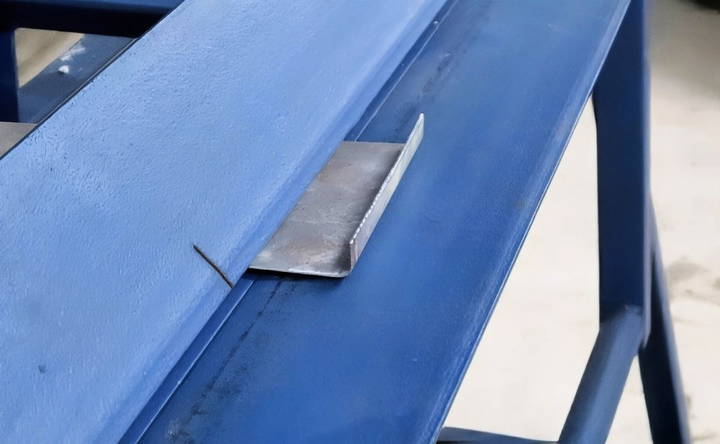
With your DIY metal brake complete, it's time to test it out. Start by clamping down a sheet of 18-gauge (1 mm thick) steel and bending it to 90 degrees. If everything is aligned properly, you should be able to achieve a clean, precise bend.
- Small Projects: The brake works well with smaller pieces of metal, especially 1-2 mm thick sheets.
- Larger Bends: If you need to bend larger pieces, the additional braces will come in handy to ensure the brake doesn't flex under pressure.
Tips for Improving the Design
Even though this homemade metal brake is fully functional, there are always ways to enhance the design:
- Reducing Bend Radius: The bend radius in this design is relatively large due to the rounded edge of the angle bar. To build tighter bends, you could mill the edge of the angle bar to build a smaller radius. However, this can be a time-consuming process.
- Flat Bar Addition: Another method to achieve a smaller radius is to attach a flat bar underneath the clamping mechanism. This will help build a tighter bend around a smaller surface area.
- Reinforcing the Structure: For heavier sheets of metal, consider adding additional bracing to the middle of the frame to prevent flexing.
Cost and Time Considerations
Building this metal brake from repurposed materials costs very little in terms of money, with most expenses going toward hardware like nuts and bolts. The project can be time-consuming, especially if you need to source materials from a junkyard, but for many DIY enthusiasts, the satisfaction of crafting your own tool makes it worthwhile.
- Time Investment: If you enjoy building your own tools, the time spent on this project will be rewarding. You'll not only have a functional metal brake, but you'll also have gained valuable experience in welding and metalworking.
- Budget: This project can be done on a tight budget, especially if you have access to scrap metal and spare parts. A commercial metal brake could cost hundreds or even thousands of dollars, but this DIY version can be made for a fraction of the cost.
Final Thoughts
A DIY metal brake is a practical tool for anyone working with sheet metal, and building one yourself is a fun and educational project. By using repurposed materials and following a few simple steps, you can build a sturdy and reliable tool that will serve you for years to come. Whether you're bending small pieces of metal for a hobby project or working with larger sheets for more substantial tasks, this homemade brake will get the job done. Plus, you'll have the satisfaction of knowing you built it yourself. Happy metalworking!
FAQs About DIY Metal Brake
Explore our FAQs about DIY metal brakes to learn essential tips, top techniques, and answers to common questions for your metalworking projects.
A metal brake allows you to bend sheet metal at specific angles. This homemade version can handle a variety of sheet metal thicknesses, offering flexibility for projects like fabricating automotive parts or constructing tools.
The clamp is adjusted using an M16 threaded bar on each side, allowing you to raise or lower it based on the metal thickness. A double nut system locks the clamp securely in place once adjusted.
Yes, but it requires modification. You can either grind down the radius of the angle bar or add a flat bar beneath the clamping angle. However, this might limit your ability to bend past 90 degrees.
Most of the materials can be sourced from scrap metal. The frame is made of repurposed angle bars and round bars, with bolts and nuts purchased separately. It's a cost-effective solution for DIY metalworkers.
To avoid flexing on wider bends, consider adding additional bracing. A round bar tensioning system welded to the frame can provide extra rigidity, especially for larger metal sheets.
The brake described in the project can bend sheets up to four feet wide. However, you can adjust the length of the brake based on your needs by altering the angle bar length.
Yes, but only for shorter sections. For wider sheets, more support and bracing are required to handle the additional stress without causing the brake to flex.
After each use, wipe the brake down with a damp cloth to remove debris and check the hinge and clamp for any signs of wear. Lubricating the moving parts regularly will also extend the brake's lifespan.
Yes, you can grind the edge of the angle bar to build a smaller bend radius. However, this requires precision and could be time-consuming. Another option is to add a smaller radius bar beneath the clamp.
The total cost is minimal if you can source most materials from a scrap yard. The largest expenses typically include purchasing bolts, nuts, and possibly round bars for the hinge. The frame and clamp can often be built from repurposed materials.
Yes, the design is scalable. For larger sheets or thicker materials, you can use thicker angle bars and add extra reinforcement, such as triangular braces, to handle the additional force.


