Making DIY shelf brackets can be both an economical and rewarding project. If you're looking to add extra storage to your garage or simply enjoy the process of making things by hand, crafting cheap DIY shelf brackets might be the perfect weekend project. Not only does it allow you to customize the design to fit your space and needs, but it also offers a sense of accomplishment once you see your creations put to use.
Embarking on a DIY shelf brackets project, like making garage shelf brackets from scratch, might seem daunting at first, but it's truly an accessible task for anyone willing to invest a little time and effort. In the sections that follow, we'll guide you through the essential steps of designing, constructing, and customizing your shelf brackets. We aim to make the process as clear and straightforward as possible, giving you the confidence to build something practical and stylish for your home.
Let's get started on this crafty endeavor and see where our creativity can take us.
Introduction to DIY Shelf Brackets
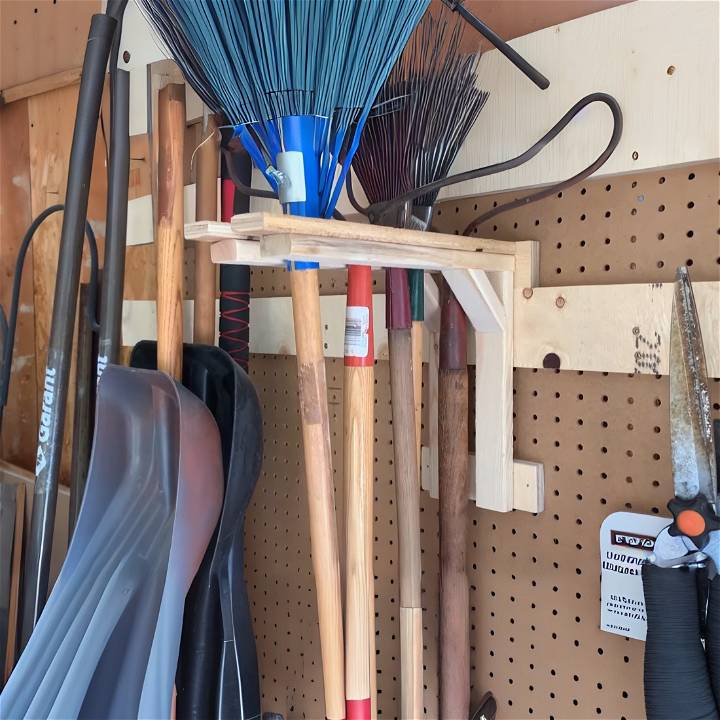
Making your own shelf brackets is not only a practical solution for home organization but also a rewarding DIY project. It allows you to tailor the size, style, and strength to your specific needs, ensuring that your shelves are both functional and a reflection of your personal taste.
Why Choose DIY?
Customization is at the heart of DIY shelf brackets. You can select materials that match your decor, build a design that fits your space perfectly, and build brackets that support the weight you need. Plus, the process of making something by hand brings a sense of accomplishment and can be a fun weekend project.
The Joy of Handcrafting
There's something special about using tools and materials to bring your vision to life. When you craft your own shelf brackets, you're not just making a piece of hardware; you're making a part of your home. This hands-on approach gives you a deeper connection to your living space.
Design Principles for Shelf Brackets
The design of your shelf brackets can be as simple or as intricate as you like. However, there are some key principles to keep in mind to ensure they are both attractive and sturdy.
Balancing Form and Function
Your brackets should be strong enough to hold your items securely, but that doesn't mean they can't be stylish. Consider the overall look of the room where the shelves will be placed and choose a design that complements it.
Variety of Styles
From industrial metal to rustic wood, the materials and design of your shelf brackets can vary widely. Research shows a range of DIY ideas, from minimalist invisible brackets to ornate, decorative supports. Think about the aesthetic you want to achieve and select a design that aligns with it.
Your unique shelf brackets will not only be a testament to your skills but also an original addition to your home decor.
How to Make Shelf Brackets - Step by Step Guide
Learn how to make shelf brackets with this easy step-by-step guide below:
Materials You'll Need
- 1x2 Finger Joint Pine boards
- Wood glue
- Brad nails (1 and a half inch)
- Trigger clamps
- Clamping square
- Miter saw (recommended for precise cuts)
- Safety glasses
- Wet paper towel (for glue cleanup)
Steps to Building Your Shelf Brackets
Learn how to build your own shelf brackets with these simple steps.
1. Measure and Cut Your Wood
- Checking Wood Quality: When choosing your Pine boards, ensure they are as straight as possible. Even if they have some bend, shorter segments (around 10-12 inches) minimize curvature issues.
- Cutting Dimensions: Decide on the dimensions based on your shelf's depth. For a 12-inch depth shelf, cut a 12-inch horizontal piece and a 10-inch vertical piece from the Pine boards, accommodating wall attachment points or your specific storage needs. The diagonal support piece should be about 3.5 inches long on the longer end. Adjust these measurements according to the size of the shelf you're planning.
- Use a Miter Saw (If Available): A miter saw is recommended for ensuring straight and accurate cuts. Safety first, wear your safety glasses during all cutting operations.
2. Assemble the Brackets
- Apply Wood Glue: Start by applying a thin layer of glue on the end of the vertical piece. Wait about a minute to let it slightly absorb into the wood.
- Clamping: Use the clamping square to ensure a perfect 90-degree angle between the horizontal and vertical pieces. The horizontal piece should sit on top of the vertical piece. Fix them together with trigger clamps.
- Brad Nailing: With the pieces clamped and aligned, use the brad nailer to secure them together with a couple of nails. Repeat this step for attaching the diagonal piece, ensuring it supports the structure and adds more strength to the bracket.
Tips for Success
- Glue Drying Time: Allow the wood glue to dry properly — usually 20-30 minutes, depending on the glue type. This ensures a strong bond.
- Mounting Options: Depending on where you plan to mount these, you might add a hanger cleat for French cleat walls or pre-drill holes for direct wall mounting.
- Waste Minimization: When cutting, try to utilize every part of the Pine board to reduce waste. Examine your leftovers to see if they can be repurposed for smaller pieces of the bracket.
Video Tutorial
For a step-by-step video tutorial, watch this YouTube video.
It pairs well with this written guide, enriching your understanding with visual references to complement the techniques detailed here in a straightforward and engaging manner.
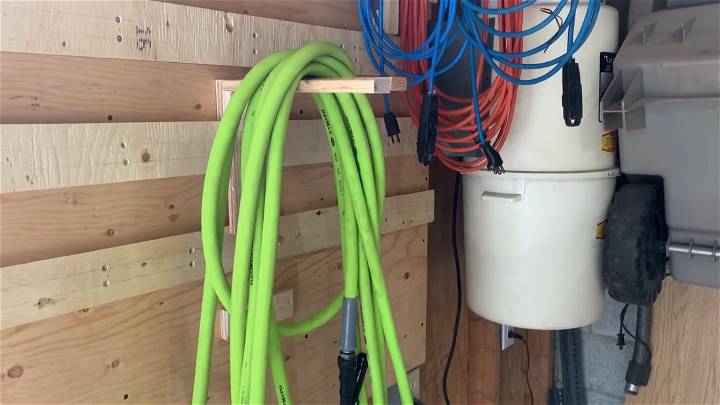
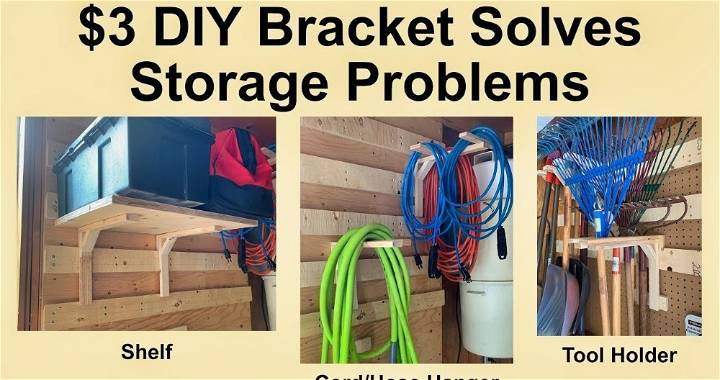
By following these steps, you can create sturdy, affordable shelf brackets to improve storage in your home or garage. Ideal for organizing tools, supporting shelves, or organizing hoses and cords.
Customization Ideas for DIY Shelf Brackets
When it comes to DIY shelf brackets, customization is key. It's not just about making storage; it's about adding a personal touch to your space. Here are some ideas to inspire you to make your shelf brackets uniquely yours.
Personalize with Paint
A simple way to customize your shelf brackets is with paint. Choose a color that complements your room, or go bold with a contrasting hue. For a more intricate design, consider patterns or stencils. The possibilities are endless, and a fresh coat of paint can transform the entire look of your shelves.
Decorative Cuts
If you're handy with tools, decorative cuts can add an elegant or playful touch to your brackets. From curves to geometric shapes, these cuts can be as simple or complex as you like. They not only enhance the aesthetics but also give your brackets a custom-made feel.
Mix Materials
Combining different materials can give your shelf brackets a unique look. Metal with wood, rope with steel, or even incorporating leather straps can build interesting textures and contrasts. This mix-and-match approach can elevate the overall design of your shelving.
Functional Add-Ons
Think about adding hooks or holders to your brackets for extra functionality. These can hold anything from kitchen utensils to plants, turning your shelf into a multipurpose space. It's a practical way to add more value to your brackets.
Finishing Touches
The finish on your shelf brackets can make a big difference. Whether you opt for a glossy varnish, a matte stain, or even a distressed look, the right finish can enhance the natural beauty of the materials and ensure your brackets stand out.
By incorporating these customization ideas, you can build shelf brackets that are not just supportive structures but also a reflection of your style and creativity. Remember, the goal is to make your space feel like home, and every little detail contributes to that.
Installation Tips and Tricks for DIY Shelf Brackets
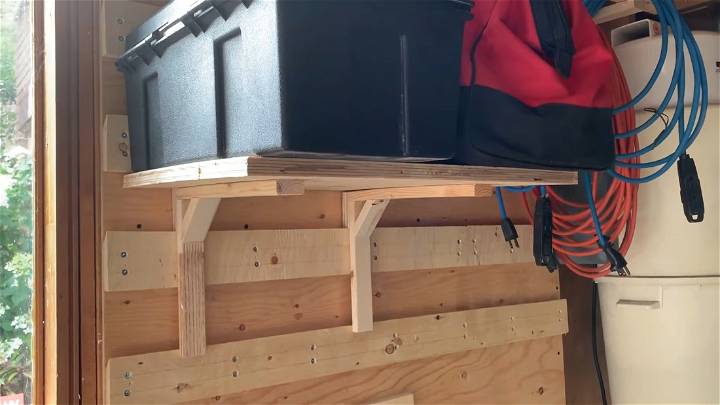
Installing DIY shelf brackets can be straightforward if you follow some simple guidelines. Here's how to ensure your shelves are not only stylish but also secure and level.
Finding the Right Spot
- Locate the studs in your wall using a stud finder. This is crucial for a secure installation.
- Plan the layout of your shelves before drilling any holes. Use a level to mark the exact spots where the brackets will go.
Securing the Brackets
- Drill pilot holes for the screws. This will help prevent the wood from splitting.
- Use appropriate anchors if you can't attach the brackets directly into studs. This will ensure that the shelves can support the intended weight.
Final Checks
- Double-check that everything is level before the final tightening of the screws.
- Test the strength of the brackets by applying a little pressure. If there's any movement, re-tighten the screws or consider using different anchors.
Maintenance and Care for DIY Shelf Brackets
To keep your DIY shelf brackets in top condition, a little maintenance goes a long way. Here are some tips to help you take care of them:
Regular Inspections
- Check for wear and tear periodically. Look for signs like cracks or rust.
- Tighten any loose screws and ensure the brackets remain firmly attached to the wall.
Cleaning and Upkeep
- Dust the brackets regularly to keep them looking fresh.
- Apply a fresh coat of paint or sealant as needed to protect the material from moisture and wear.
By following these installation and maintenance tips, your DIY shelf brackets will be both a reliable and attractive part of your home for years to come. Remember, the key to longevity is regular checks and prompt attention to any signs of wear.
Troubleshooting Common Issues
When embarking on a DIY shelf bracket project, you might encounter a few common issues. Here's how to address them effectively:
Ensuring Level Installation
- Use a level to ensure your brackets are perfectly horizontal before securing them.
- Measure twice, drill once to avoid misalignment of the brackets.
Dealing with Wall Irregularities
- If the wall is uneven, use shims to adjust the bracket position.
- Sand or plane the bracket backside to fit the wall contour if necessary.
Weight Support Concerns
- For heavy loads, reinforce the bracket with additional screws or a thicker backplate.
- Distribute weight evenly across multiple brackets to prevent sagging.
Updates and Improvements
Staying updated with the latest trends and improvements in DIY shelf brackets can lead to better designs and more efficient installations:
Embracing New Materials
- Explore eco-friendly materials like bamboo or recycled plastics.
- Innovative composites can offer strength and a modern aesthetic.
Incorporating Technology
- Use laser cutting for precise decorative patterns.
- Consider smart brackets with integrated lighting or sensors for a futuristic touch.
By addressing these common issues and staying informed about the latest updates, you can ensure your DIY shelf brackets are both functional and stylish. Remember, the key to a successful project is patience, precision, and the willingness to adapt and improve.
FAQs About DIY Shelf Brackets
When diving into the world of DIY shelf brackets, several questions often arise. Here are answers to some of the most common queries to help you on your DIY journey.
What materials do I need for DIY shelf brackets?
For basic shelf brackets, you'll need:
- Wood or metal for the bracket itself.
- Screws and wall anchors for installation.
- Tools: a saw, drill, screwdriver, level, and measuring tape.
How do I ensure my shelf brackets are strong enough?
To ensure strength:
- Choose thick, durable materials like hardwood or steel.
- Use heavy-duty screws and secure the brackets into wall studs.
- For wider shelves, add extra brackets for support.
Can I paint or stain my DIY shelf brackets?
Absolutely! Painting or staining your brackets can add a decorative touch. Just be sure to:
- Clean and sand the surface beforehand.
- Use paints and stains suitable for the material of your brackets.
- Apply a sealant for added durability.
How do I attach shelf brackets to a wall without studs?
If there are no studs where you want to install:
- Use wall anchors designed for the weight of your shelf.
- Consider toggle bolts for heavier loads.
- Always follow the manufacturer's instructions for the anchors.
What are some creative design ideas for shelf brackets?
Get creative with:
- Industrial pipes for a rustic look.
- Acrylic or glass for a modern vibe.
- Ornamental metalwork for a classic feel.
- Upcycled materials like old belts or branches for a unique twist.
By addressing these FAQs, you'll be better prepared to tackle your DIY shelf bracket project with confidence and creativity. Remember, the key is to plan, measure carefully, and choose the right materials for your needs. Happy DIY-ing!
Conclusion:
In conclusion, embarking on the journey to build cheap DIY shelf brackets for your garage is not just about saving money; it's about adding a personal touch to your space and enjoying the satisfaction of crafting something with your own hands. From picking the right materials to following our step-by-step guide, we've covered everything you need to get started.
This post aimed at guiding you through the design principles of shelf brackets and offering practical advice on customization ideas to make your garage shelf brackets uniquely yours. So, grab your tools and let your creativity take the lead as you transform your garage into a well-organized and stylistically cohesive space. Happy crafting!


