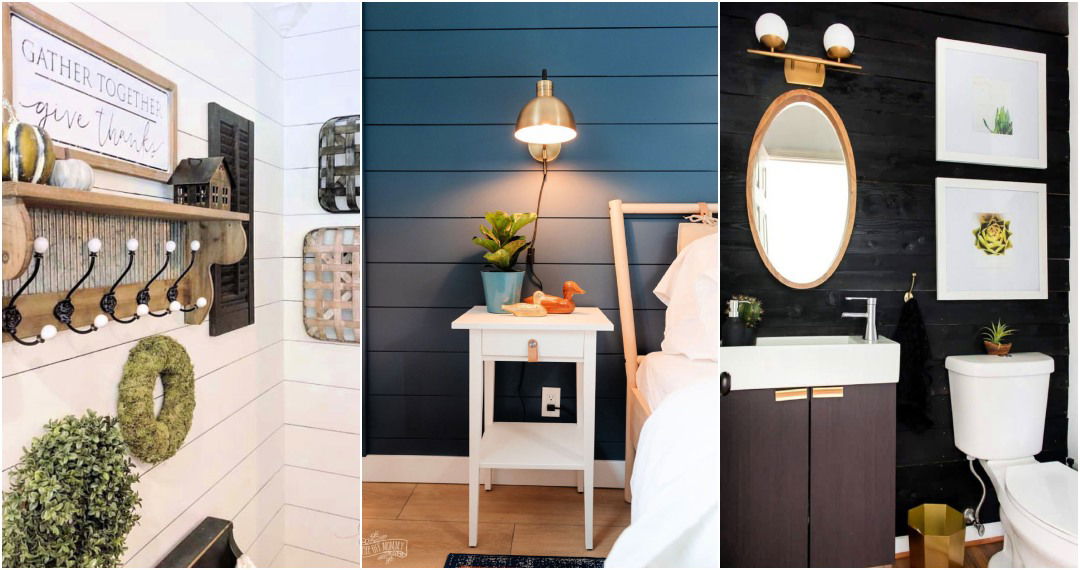
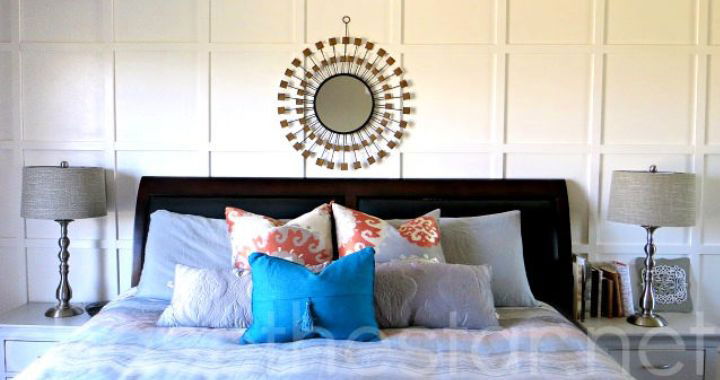
Wishing to transform my living room, I decided to build a DIY shiplap wall. I found that adding shiplap gave the room a cozy feel and added style. With some planning and effort, it can be done on a weekend.
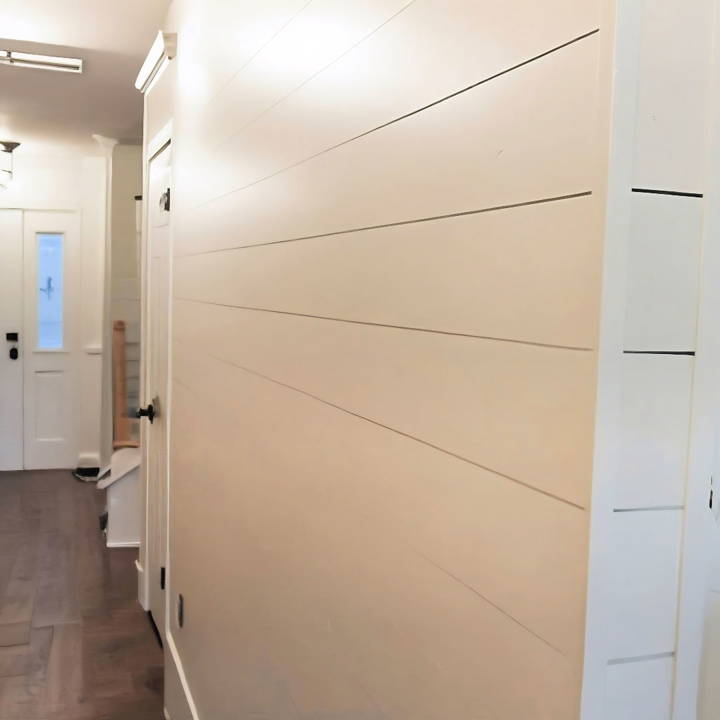
I started by gathering all tools and materials needed, like plywood, a saw, nails, and paint. Following simple steps, I measured and cut the boards, then nailed them to the wall. The painting was the final touch, enhancing the appearance. This guide will help you make your own shiplap wall.
Origin and Historical Significance
Shiplap originally served a practical purpose in shipbuilding. The overlapping boards buildd a tight seal on ships, making them watertight and suitable for sea voyages. This technique was later adopted in the construction of rural and coastal buildings for its durability and weather resistance.
Transition to Home Decor
Over time, shiplap found its way into homes, not just for its utility but also for its aesthetic appeal. It became a popular choice for interior walls, ceilings, and exterior siding. The horizontal lines of shiplap add texture and interest to a room, making a rustic, cozy atmosphere that's become synonymous with farmhouse style.
Modern-Day Use
Today, shiplap is celebrated for its versatility in design. It can complement a variety of decorating styles, from the aforementioned farmhouse to more contemporary and minimalist looks. It's also become a favorite among DIY enthusiasts because it's relatively easy to install and can dramatically transform the look of a space.
Why People Love Shiplap
- Aesthetic Appeal: Shiplap adds a charming and warm element to any room.
- Versatility: It fits a wide range of design preferences.
- DIY Friendly: Many homeowners enjoy the process of installing shiplap themselves.
Understanding shiplap's history shows its timeless appeal in design. From ships to homes worldwide, it adds character and history to any space, perfect for DIY enthusiasts.
Materials Needed and Why
- Sanded Plywood (about quarter inch thick): It's lightweight, cheap, and easy to handle. Opting for sanded plywood means a smoother finish with less prep work.
- Stud Finder: This little gadget is essential for locating studs in your wall, ensuring your shiplap stays securely mounted.
- Nail Gun and Nails: For actually attaching the plywood to the studs. It's way faster and more reliable than hammering by hand.
- Level: To ensure your shiplap lines are straight, even if your ceiling isn't.
- Saw: For cutting the plywood sheets to the correct size.
- Primer, Caulk, and Paint: For finishing touches. The primer helps the paint adhere better, the caulk fills any gaps, and the paint gives your wall that final look.
- A Dry, slightly damp rag: After sanding, this is to wipe down the wall, ensuring it's clean before you paint.
Step by Step Instructions
Learn how to install a DIY shiplap wall with easy, step-by-step instructions: clear and prime, mark studs, measure, cut, level, attach, fill, caulk, and paint!
Step 1: Clear and Prime the Wall
Clear the wall you're working on by removing any decorations, outlets, and nails. Give it a fresh coat of white paint if you're planning on white shiplap. This ensures that any gaps between the boards won't stand out against a darker wall.
Step 2: Mark the Studs
Using the stud finder, locate and mark the studs across the wall. This is crucial because attaching the shiplap to studs means a secure fit that won't easily come down.
Hanging the Shiplap
Learn how to hang shiplap like a pro: measure and cut boards, level and attach the first board, and stagger for a seamless finish.
Step 3: Measure and Cut Your Boards
Measure the length of your wall and cut your plywood sheets accordingly. Remember, it's always better to measure twice and cut once!
Step 4: Level and Attach the First Board
Ensure your ceiling is level (mine surprisingly was). If not, you'll want to use your level to place the first board so that all subsequent boards are level as well. Start from the top and work your way down. Secure the board with a nail gun into the studs.
Step 5: Stagger and Continue
Continue attaching boards, making sure to stagger the seams for a natural look. It's like laying bricks – you don't want your seams to line up vertically.
Finishing Touches
Complete your project with our step-by-step guide on Finishing Touches: Fill Nail Holes, Caulk the Edges, Prime, and Paint for a polished result.
Step 6: Fill Nail Holes
Once all the boards are up, fill in the nail holes with spackle or wood filler. This will give you a smooth finish.
Step 7: Caulk the Edges
Caulk along the edges where the shiplap meets the ceiling, floor, and any corners. This cleans up the look and hides any uneven edges.
Step 8: Prime and Paint
Wipe down your entire wall with the slightly damp rag to remove any dust. Then, apply a primer to prepare the surface for painting. Once the primer is dry, paint your shiplap in the color of your choice. I opted for a nice, bright white.
Customization Ideas for Shiplap Walls
When it comes to personalizing your shiplap walls, the possibilities are as broad as your imagination. Here are some creative ideas to make your shiplap stand out and reflect your unique style:
Paint and Color
- Go Beyond White: While white is a classic choice for shiplap, consider painting your shiplap in bold colors or soft pastels to match your room's decor.
- Accent Wall: Build an accent wall with shiplap in a contrasting color to add depth and focus to your space.
Textures and Patterns
- Mix Materials: Combine shiplap with other materials like brick or tile for a textured look.
- Horizontal vs. Vertical: Install shiplap horizontally for a traditional look or vertically to add height to your rooms.
Artistic Touches
- Stencil Designs: Use stencils to add patterns or motifs to your shiplap for an artistic flair.
- Gallery Wall: Turn your shiplap wall into a gallery by hanging artwork, photos, or decorative items.
Functional Flair
- Built-In Shelves: Integrate shelving within your shiplap walls for a functional and seamless design.
- Hooks and Hangers: Add hooks for a practical touch that's perfect for entryways or mudrooms.
Lighting
- Accent Lighting: Install LED strips or sconces to highlight your shiplap and build a warm ambiance.
- Natural Light: Position your shiplap to catch natural light and enhance the texture of the wood.
Seasonal Decor
- Holiday Themes: Decorate your shiplap with seasonal items to celebrate holidays and change the look throughout the year.
- Changeable Decor: Use removable hooks or shelves to switch out decor items easily without damaging the shiplap.
Transform your shiplap into a dynamic part of your home's design with these customization tips. Let your personality shine while keeping decor harmony.
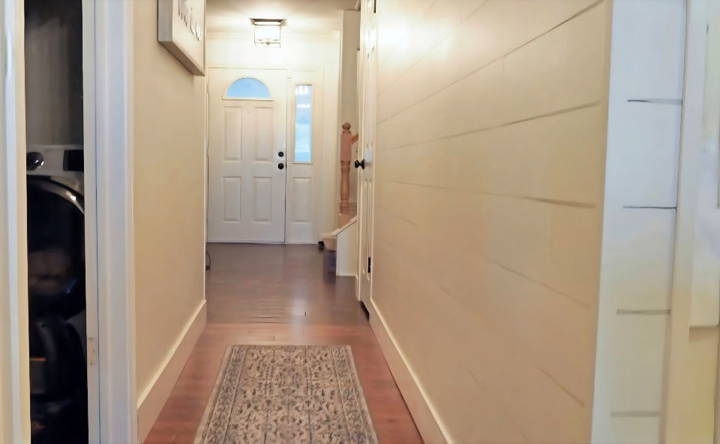
Troubleshooting Common Issues with Shiplap Walls
Shiplap walls can add a touch of rustic charm to any home, but like any DIY project, they can come with their own set of challenges. Here's a straightforward guide to solving some of the most common issues you might encounter when working with shiplap.
Gaps and Spacing
- Problem: Uneven gaps between the boards.
- Solution: Use a spacer or a set of coins to maintain consistent spacing as you install each board. This will ensure even gaps throughout.
Warped Boards
- Problem: Boards that don't lie flat against the wall.
- Solution: Before installation, stack the shiplap boards flat on the ground with spacers between them to allow air circulation. If a board is already warped, try screwing it into place from the center outwards to flatten it against the wall.
Cutting Errors
- Problem: Boards cut too short or at the wrong angle.
- Solution: Measure twice, cut once. Always double-check your measurements before cutting. If you do make a mistake, use the piece for a shorter part of the wall or as an end piece.
Nail Pops
- Problem: Nails that protrude from the wood over time.
- Solution: Use a nail set to drive the nails slightly below the surface of the wood, then fill the hole with wood filler. Paint over it for a seamless look.
Paint Problems
- Problem: Paint peeling or not adhering well.
- Solution: Ensure the wood is clean and dry before painting. Apply a primer designed for the type of wood you're using, followed by paint. If the paint peels, scrape off the loose paint, sand the area, prime, and repaint.
Board Alignment
- Problem: Boards not lining up correctly.
- Solution: Use a level to ensure each board is straight before securing it to the wall. Start from the bottom and work your way up, checking alignment as you go.
Moisture Damage
- Problem: Boards swelling or rotting due to moisture.
- Solution: If you're installing shiplap in a moisture-prone area, like a bathroom, choose a wood that's resistant to moisture or treat the wood with a water-resistant sealant.
Be ready for common issues to enjoy your shiplap walls stress-free. Patience and planning are key.
Safety Tips for DIY Shiplap Installation
When embarking on a DIY shiplap installation project, safety should be your top priority. Here are some essential safety tips to ensure that your project is not only successful but also conducted in a safe manner.
Personal Protective Equipment (PPE)
- Eye Protection: Always wear safety goggles to protect your eyes from dust and debris.
- Hearing Protection: Use earplugs or earmuffs when operating loud power tools.
- Gloves: Wear gloves to protect your hands from splinters and sharp edges.
Tool Safety
- Read Manuals: Before using any power tool, read the manual carefully to understand its operation and safety features.
- Inspect Tools: Check tools for damage before use and ensure they are in good working order.
- Proper Use: Use each tool for its intended purpose and follow the manufacturer's instructions.
Workspace Safety
- Keep It Clean: Maintain a clean and clutter-free workspace to prevent tripping and falling.
- Adequate Lighting: Ensure your work area is well-lit to avoid mistakes and injuries.
- Ventilation: Work in a well-ventilated area, especially if you're sanding wood or applying paint.
Ladder Safety
- Stable Base: Always place ladders on a firm and level surface.
- Correct Position: Position the ladder at the proper angle as recommended by safety guidelines.
- Three Points of Contact: Keep three points of contact with the ladder at all times—two hands and one foot or two feet and one hand.
Electrical Safety
- Check Cords: Inspect power cords for fraying or damage before plugging in any tool.
- Dry Hands: Never handle electrical tools with wet hands or in damp conditions.
- Grounded Outlets: Use grounded outlets and avoid overloading circuits with too many tools.
Material Handling
- Lifting Techniques: Lift heavy materials with your legs, not your back, to prevent strain.
- Sharp Edges: Be cautious of sharp edges when handling wood, and use sandpaper to smooth any rough areas.
First Aid
- Kit Accessible: Keep a first aid kit nearby in case of minor injuries.
- Emergency Plan: Know the location of your nearest hospital and have a phone accessible to call for help if necessary.
Follow these safety tips to reduce accidents and injuries during your DIY shiplap project.
FAQs About DIY Shiplap Wall
Find answers to common questions on DIY shiplap wall projects, from materials to installation tips, ensuring a successful home improvement project.
Shiplap is a type of wooden board traditionally used in the construction of barns, sheds, and other rustic buildings. It's known for its rabbet cut on the top and bottom, which allows the boards to fit together snugly, making a smooth, uniform look. Shiplap has gained popularity in home decor for its charming and timeless aesthetic.
You can install shiplap virtually anywhere in your home for a touch of rustic charm. It’s commonly used as an accent wall in living rooms, bedrooms, and bathrooms. Shiplap can also be used on ceilings and kitchen backsplashes and to add character to cabinetry or furniture.
Before installing the shiplap, measure the wall to determine how much material you’ll need. Consider the spacing between boards when calculating. Ensure you have all the necessary tools and materials ready. Decide whether you want to start from the top or bottom of the wall, but remember to keep each board level for a professional finish.
Yes, you can paint a shiplap to match your decor. For the best results:
Sand the surface lightly to ensure the paint adheres well.
Apply a primer, especially if you're using MDF or plywood, to prevent absorption and provide a smooth base.
Once the primer is dry, apply your chosen paint color with a brush or roller.
For a lasting finish, consider a second coat after the first one has dried completely.
Maintaining your shiplap wall is essential to keep it looking fresh and to extend its lifespan. Here are some tips:
Dust Regularly: Use a duster or a vacuum with a brush attachment to remove dust from the grooves and surface.
Clean Spills Immediately: If your shiplap gets dirty, wipe it down with a damp cloth. Avoid using harsh chemicals that can damage the finish.
Touch-Up Paint: Over time, you may notice some wear and tear. Touch up the paint as needed to keep your wall looking new.
Inspect for Damage: Periodically check for any signs of damage, such as warping or cracking, especially if the shiplap is in a moisture-prone area.
Avoid Humidity: If possible, control the humidity levels in your home to prevent the wood from expanding and contracting, which can lead to gaps.
Conclusion:
In conclusion, building a DIY shiplap wall in one weekend is both an achievable and rewarding home improvement project. With our step-by-step guide on how to shiplap a wall, you can transform any room in your house effortlessly.
Follow the instructions, gather your materials, and soon, you'll enjoy the rustic charm that a DIY shiplap wall brings. For more guides and home improvement tips, stay tuned to our blog.


