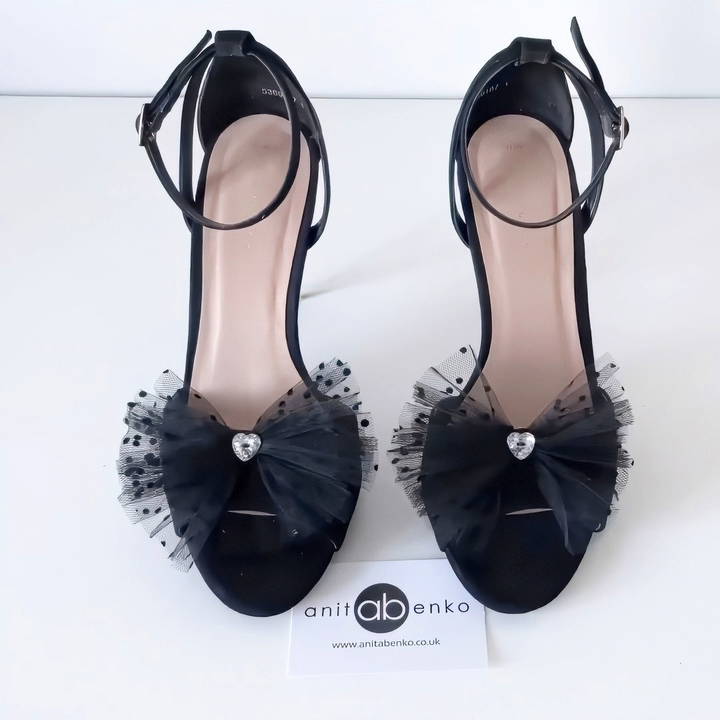
Transforming your shoes with custom-made clips is a fun and cost-effective way to refresh your wardrobe without needing new pairs. With a few materials and simple steps, you can make unique, detachable bow clips that attach effortlessly to your shoes, adding a touch of elegance or whimsy depending on your design. This guide will walk you through a straightforward method to make DIY shoe clips, focusing on a bow-style clip that's easy to attach and remove.
Materials Needed
To get started, gather these materials, most of which are accessible at local craft stores:
- Tulle Fabric: 70 cm by 10 cm (You can choose any color that complements your shoes)
- Felt Fabric: Used as a base to attach the clip securely
- Cotton Filling: For making structure and volume in the bow
- Metal Shoe Clips: Available in most craft stores; look for clips that are sturdy and won't damage your shoe material
- Decorative Button: This guide uses a silver heart-shaped button, but any small, decorative button that fits the theme will work
- Hot Glue Gun: For securing different elements together
- Black Glue Sticks: Used in the hot glue gun to attach the felt backing
- Needle and Thread: For sewing parts together, especially if gluing isn't sufficient for stability
Step by Step Instructions
Learn how to make DIY shoe clips with our step-by-step guide. Transform your shoes easily with tulle, buttons, and creativity.
Step 1: Prepare the Tulle Fabric
Start with the tulle fabric, measuring approximately 70 cm in length and 10 cm in width. This dimension provides a balanced look, making a bow that is neither too large nor too small.
- Cut the Fabric: Fold the tulle to find the midpoint, then cut along this line to make two equal halves.
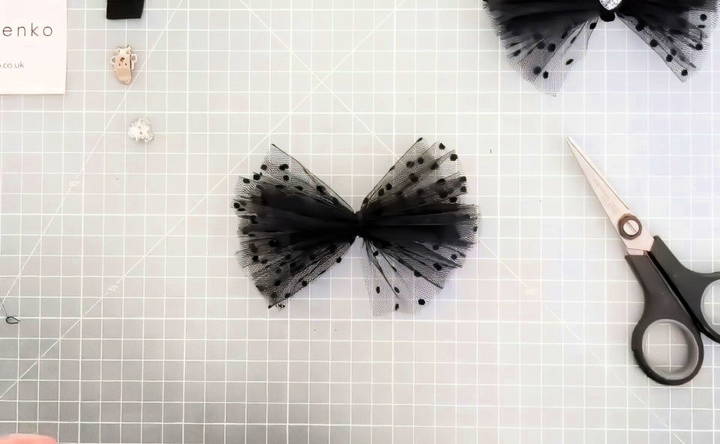
- Make the Bow Shape: Gather the fabric in the middle, scrunching it together to form the basic bow shape. This central pinch will give the bow structure and make it easier to attach the cotton filling.
Step 2: Add Cotton Filling for Volume
Adding a bit of cotton in the middle of the bow enhances its fullness and gives it a three-dimensional look. Here's how:
- Position the Cotton: Place a small amount of cotton in the center of the scrunched tulle.
- Adjust the Cotton: Distribute the cotton evenly so it doesn't clump in one spot. This ensures a smooth and symmetrical bow shape.
Step 3: Secure the Bow with a Decorative Button
This is where your chosen button comes in. In this guide, a silver heart-shaped button adds an extra decorative touch, but you can use any button that suits your style.
- Sew the Button: Using needle and thread, sew the button to the middle of the bow where you gathered the tulle and placed the cotton. Make sure it's secure, as the button helps keep the bow in shape.
- Double-Knot the Thread: For durability, double-knot the thread on the backside to prevent any loose threads from unraveling.
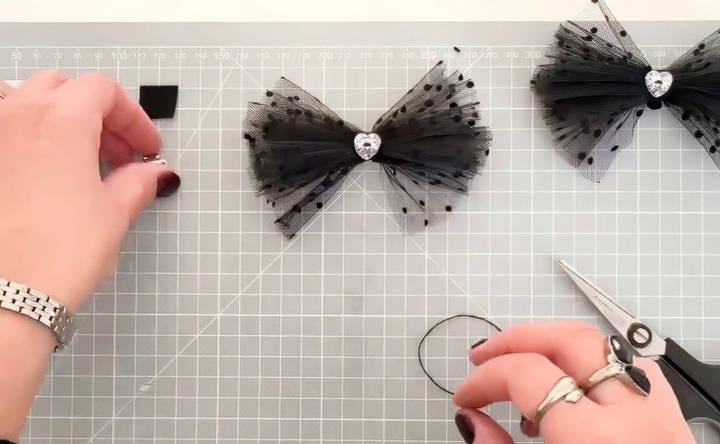
Step 4: Prepare the Felt Fabric Base
The felt base adds stability to the clip, making it sturdy and long-lasting. Here's how to prepare and attach it:
- Cut the Felt: Cut a small, rectangular piece of felt that's slightly smaller than the back of your bow.
- Sew the Shoe Clip: Sew the metal shoe clip to the felt piece. Make sure the clip's position aligns with the center of the felt to ensure balance when attached to the shoe.
- Secure the Clip Firmly: This step is crucial, as the clip holds the entire bow to the shoe. Sew through multiple layers if needed, ensuring the clip won't detach easily.
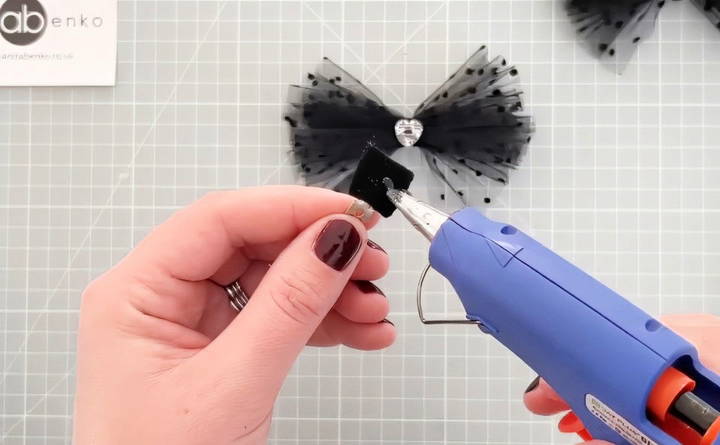
Step 5: Attach the Felt and Clip Assembly to the Bow
This step joins all the elements together, making your finished shoe clip.
- Apply Hot Glue: Use the hot glue gun with black glue sticks, applying a generous amount of glue to the felt backing.
- Press Firmly to the Bow: Attach the felt backing with the clip onto the center back of the bow. Press down firmly for a few seconds to allow the glue to set and hold the pieces together.
- Double-Check Stability: Once the glue has dried, gently tug on the felt and bow to make sure everything is securely attached.
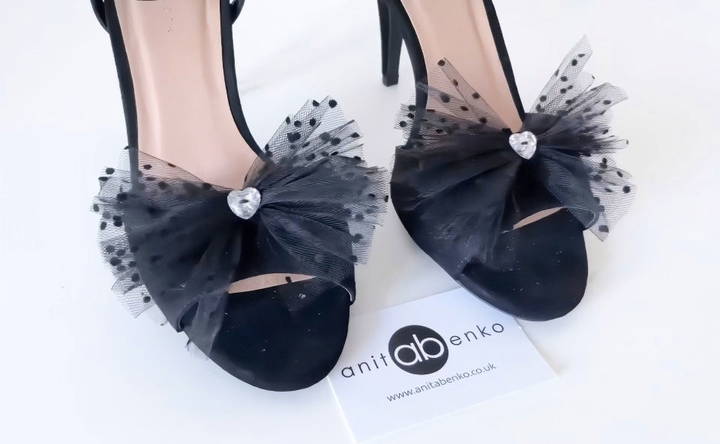
Step 6: Try It Out!
With your bow clip complete, it's time to see how it looks on your shoes.
- Attach the Clip: Open the shoe clip and place the bow in the desired position on your shoe. This could be at the front for a classic look, or to the side or back if you prefer something more unique.
- Secure the Clip: Once in position, clip the bow onto your shoe. The metal clip should hold it firmly in place without causing any damage.
- Adjust as Needed: Make minor adjustments to ensure the bow sits perfectly. The cotton filling should give it a slight lift, and the tulle will fan out evenly.
Tips and Tricks for Perfect DIY Shoe Clips
- Choose Durable Materials: For longevity, select materials that can withstand wear. Felt and sturdy tulle fabric are good choices, and a high-quality metal clip will prevent slippage.
- Experiment with Colors and Textures: Don't limit yourself to one style. Try lace, satin, or sequins for different looks. Metallic buttons or even small brooches can add personality.
- Use Fabric Glue for Extra Hold: If sewing isn't your thing, fabric glue can substitute for thread in some parts. However, sewing the clip to the felt base is generally more secure.
- Make Multiple Pairs: With different colors and designs, you can have a variety of shoe clips for different occasions.
Step-by-Step Video Tutorial
Final Thoughts
Making DIY shoe clips is a creative and satisfying way to customize your footwear. With a few materials and these simple steps, you can craft unique, detachable accessories that transform any pair of shoes into something new and exciting. Plus, they make excellent gifts for friends and family who love to personalize their style!
By following this guide, you'll be well on your way to mastering the art of DIY shoe clips, turning ordinary shoes into fashionable statements with minimal effort. Enjoy crafting your personalized accessories, and don't be afraid to experiment with different fabrics, buttons, and designs to make clips that are uniquely you!
FAQs About DIY Shoe Clips
Discover all you need to know about DIY shoe clips with our comprehensive FAQs. Tips and tricks for making customized shoe accessories.
No, the clips designed for this project won’t damage or leave marks on your shoes. Shoe clips are gentle and made specifically for attaching and removing without affecting the shoe material.
While some users have considered using earring clips, these may not be strong enough to hold securely, especially for larger or heavier bows. Shoe clips are recommended for durability, and they are readily available online.
The tulle used in this tutorial measures approximately 10 cm in width. This size helps create a balanced and elegant bow, but you can adjust it slightly depending on your preference.
Yes, if you want a permanent decoration, you can glue the bow directly onto the shoe. However, this approach makes the decoration non-removable, unlike a clip that offers versatility.
If metal shoe clips are unavailable, try checking online retailers like Amazon or eBay. These platforms offer a variety of shoe clip options to suit different styles and preferences.
Wedding-themed shoe clips can incorporate colors like gold and purple for a royal touch, or other personal favorites to match the theme. You might also add small gems or pearls for added elegance, especially for bridal accessories.
To prevent snags, consider adding extra felt around the clip base to make a buffer. This technique can help avoid any sharp edges that might catch on delicate clothing materials.


