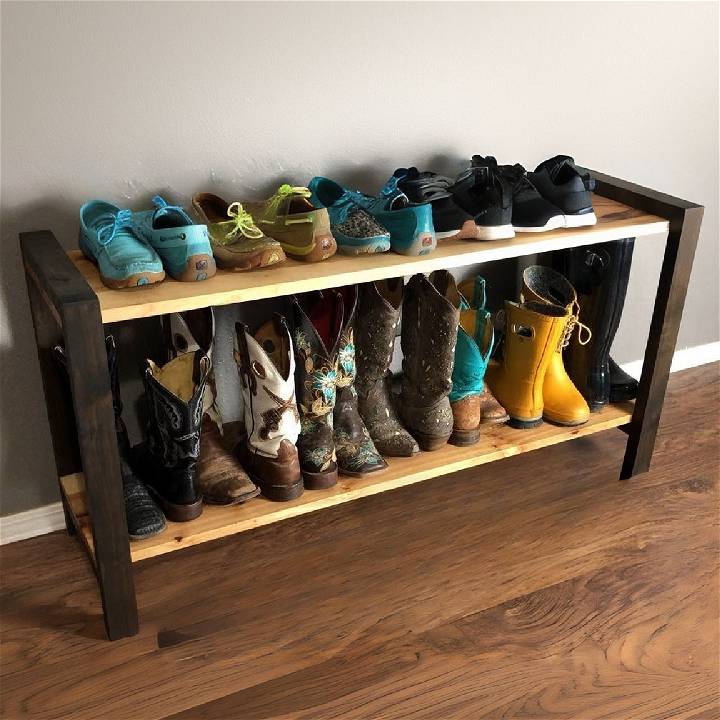
Recently, I embarked on a DIY journey to build a custom shoe rack. I needed a practical solution to organize my growing collection of shoes and boots, and I decided to share my process, hoping it might help someone with similar needs.
Planning and Materials Needed
The journey began with choosing the right wood. I had some hickory boards left over from a previous project, which were perfect for the shelves. However, you can use any wood, such as the common one-by-sixes, from your local home store. The choice of wood impacts the aesthetic and durability of your shoe rack, so choose based on your decor needs and budget
Materials Needed:
- Wood (I used hickory boards)
- Biscuits for joinery
- Glue
- Screws
- Stain and pre-stain conditioner
- Rubio Monocoat for finishing
Each material plays a crucial role. Wood forms the structure, biscuits ensure alignment and strength in joints, and glue secures the connections. Screws fasten the shelves to the legs invisibly from below. Stain, pre-stain conditioner, and Rubio Monocoat enhance durability and appearance.
Step by Step Instructions
Learn how to build a DIY shoe rack with our step-by-step instructions. From cutting the wood to finishing touches, make your own stylish storage solution today!
Step 1: Cutting the Wood
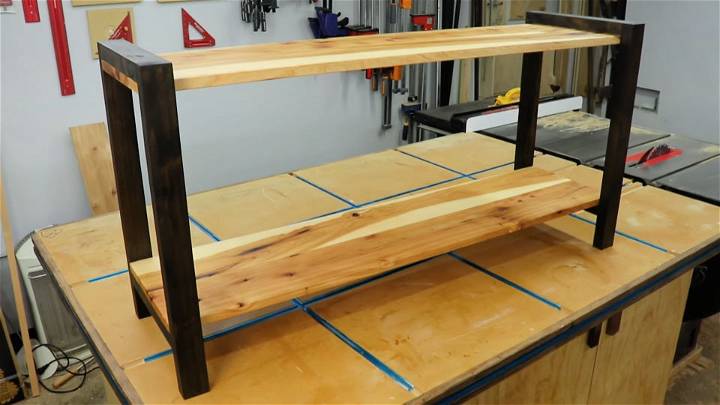
I started by cutting the shelves and legs to rough sizes, adding a couple of inches for refinement post-glue-up. For a customized length, I settled on four feet for the rack, but you can adjust it based on your space. The legs were cut from older cutoffs to about two inches wide for a modern, sleek look.
Step 2: Joining the Shelves
Using a biscuit joiner, I buildd slots for the biscuits in the edges of my boards. This not only aligns the boards but also strengthens the bond. It's essential to label the boards and slots to avoid confusion during assembly. Gluing and clamping the boards together, I ensured the biscuits were generously coated with glue for a firm hold.
Step 3: Assembling the Legs
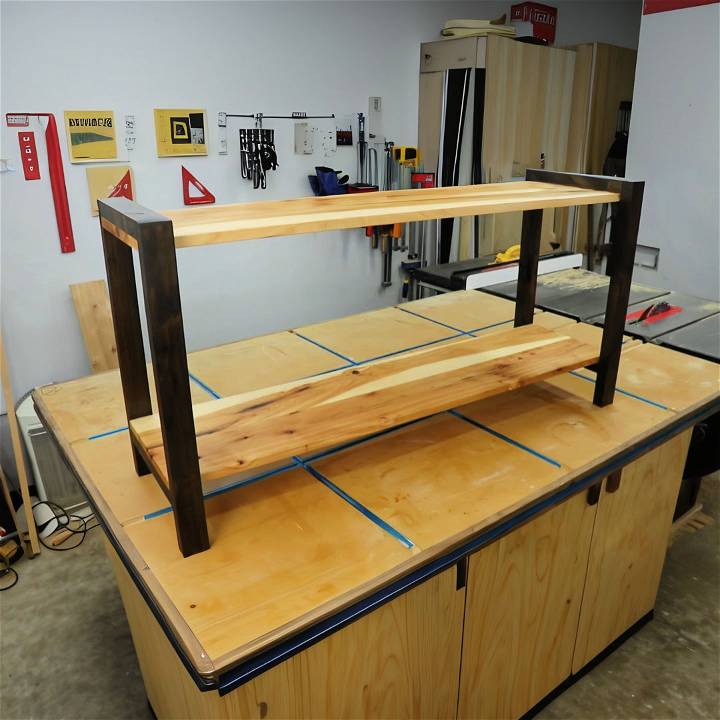
For a clean look, I opted for pocket screws to join the legs, ensuring the screw heads would be hidden. The design aimed for functionality and aesthetics, allowing ample space for boots and shoes. The bottom cross brace was set five inches from the bottom to accommodate various footwear sizes.
Step 4: Sanding and Staining
After the glue set, sanding smoothed out any irregularities. I started with 120 grit sandpaper and worked up to 180, the recommended grit for Rubio Monocoat. Applying a pre-stain conditioner minimized blotchiness, and an ebony stain provided a striking contrast to the hickory shelves.
Step 5: Finishing Touches
Rubio Monocoat was my choice for finishing because of its ease of use and the protection it offers without masking the wood's natural beauty. It requires a simple application and minimal maintenance over time. Attaching the shelves to the legs with screws from below ensured a clean, unseen fastening, completing the build.
Tips for Success
- Take Your Time: Don't rush the process, especially during measuring, cutting, and gluing.
- Quality Materials: Invest in good-quality wood and finishing products for durability.
- Customization: Feel free to adjust dimensions and finishes to match your space and needs.
- Safety First: Always prioritize safety when using tools and handling materials.
Building something functional and beautiful from scratch is an enriching experience. I hope my journey inspires you to tackle your DIY projects with confidence and creativity.
Advanced Customization for DIY Shoe Racks
When it comes to making a DIY shoe rack, the possibilities are endless. This section is dedicated to those who want to take their shoe rack to the next level with advanced customization options. Whether you're a seasoned DIY enthusiast or a creative newcomer, these ideas will help you design a shoe rack that's not only functional but also a reflection of your personal style.
Adjustable Shelves
Flexibility is key in any storage solution. With adjustable shelves, you can easily accommodate shoes of different sizes and styles, from flats to high boots.
- How to Implement: Use pre-drilled holes and shelf pegs to allow for height adjustment.
- Benefits: Maximizes space and adapts to your changing collection.
Hidden Compartments
A shoe rack with hidden compartments is perfect for keeping your valuable items safe or storing shoe care accessories.
- How to Implement: Add a false bottom or side panel that opens up to reveal extra storage space.
- Benefits: Keeps your space clutter-free and your items out of sight.
Built-in Seating
Adding a seating area to your shoe rack not only makes it more functional but also invites you to sit down and comfortably put on or take off your shoes.
- How to Implement: Reinforce the top of the shoe rack to support weight and add a cushion for comfort.
- Benefits: Provides convenience and adds a cozy touch to your entryway.
Personal Touches
Your shoe rack should reflect your personality. Personal touches can range from the choice of wood to the design details.
- How to Implement: Choose a wood stain that complements your home or add decorative carvings for a unique look.
- Benefits: Builds a piece that's uniquely yours and can become a conversation starter.
Lighting
Proper lighting can transform your shoe rack from a mere storage solution to a display piece.
- How to Implement: Install LED strips under each shelf to highlight your shoes.
- Benefits: Adds ambiance to the room and makes it easier to find the pair you're looking for.
Ergonomics
Consider the height and depth of your shoe rack to ensure it's comfortable for all users.
- How to Implement: Design the rack to be within easy reach without the need to bend or stretch.
- Benefits: Makes the shoe rack accessible to everyone, including children and those with limited mobility.
By using advanced customization options, you'll have a shoe rack that serves its purpose and enhances your home's aesthetics and personal style. Creativity and experimentation are key to a successful DIY project. So be creative; build a shoe rack to show off!
FAQs About DIY Shoe Racks
Building a DIY shoe rack can be a fun and rewarding project. To help you get started and ensure a smooth process, here are some of the most frequently asked questions and their answers.
What materials do I need for a basic shoe rack?
For a basic shoe rack, you'll need:
- Lumber or plywood for the frame and shelves.
- Screws or nails to assemble the pieces.
- Sandpaper to smooth the wood.
- Paint or stain if you want to finish the wood.
- Tools: a saw, drill, screwdriver, and measuring tape.
How do I determine the size of my shoe rack?
To determine the size:
- Measure the space where you plan to place the shoe rack.
- Consider the number and types of shoes you want to store.
- Ensure there's enough room between shelves for taller shoes.
Can I add doors to my shoe rack?
Yes, you can add doors:
- Use hinges to attach doors to the frame.
- Consider adding magnetic catches for easy closing.
- Doors can keep your shoes dust-free and out of sight.
How can I make my shoe rack more stable?
To make your shoe rack stable:
- Use thicker wood for a sturdier frame.
- Attach the rack to the wall with brackets for added support.
- Ensure all joints are tightly screwed or nailed together.
Is it possible to make a collapsible shoe rack?
Making a collapsible shoe rack is possible:
- Design the rack with interlocking pieces that can be easily assembled and disassembled.
- Use folding brackets to build shelves that can be folded down.
- This design is great for small spaces or temporary needs.
Conclusion:
Building this shoe rack was not just about making storage; it was about crafting something that fits perfectly into my home's aesthetic. The modern, sleek design complements my decor, and the satisfaction of DIY adds a personal touch to the space.
For anyone interested in replicating this project, remember to measure twice and cut once, choose materials that speak to your style and needs, and don't rush the finishing. A well-made shoe rack not only organizes your space but also showcases your craftsmanship and pride in your home.


