If you're a hunter, you know the value of a steady rest when aiming at a target. A good pair of shooting sticks can make all the difference, but store-bought models can cost anywhere from $10 to well over $100. The good news? You can make your own set of sturdy, silent, and long-lasting shooting sticks with just a few inexpensive supplies. Here's a step-by-step guide to making your own DIY shooting sticks without needing any nuts, bolts, or expensive equipment.
Why DIY Shooting Sticks?
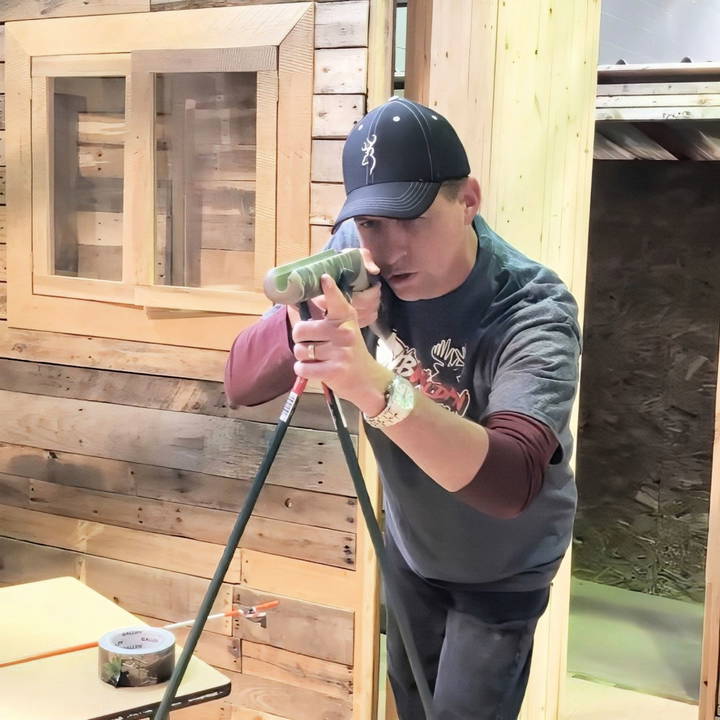
DIY shooting sticks are not only budget-friendly but also incredibly effective. They're lightweight, weatherproof, and can easily adjust to your preferred height. Plus, these DIY sticks eliminate the noise and fragility issues often found in store-bought models. Here's what you'll need and how to make them.
Materials and Tools Required
One of the best things about this project is the minimal list of materials. You only need three main items:
- Five-Foot Long Stakes: You can use driveway markers from the dollar store or, ideally, plastic-coated metal stakes from a home improvement store. The metal stakes are slightly pricier (around $1.99 each) but far sturdier and already camouflaged in green, so you won't need to wrap them in tape.
- Castration Rings: These are small, durable rubber bands that won't crack or weather over time, unlike typical elastic bands. Castration rings cost around $3.29 for a bag of 100, making them highly affordable for this project.
- Pliers: You'll need a pair of pliers, ideally welding pliers, to help stretch the castration rings over the stakes since they're quite strong and hard to stretch by hand.
With these three simple materials, you're ready to start making a solid and reliable pair of shooting sticks.
Step by Step Instructions
Learn how to make your own shooting sticks with this step-by-step guide. Easily customize and test for improved shooting stability.
Step 1: Choose Your Stakes
First, select stakes that are about five feet long. Here are two good options:
- Driveway Markers: These are inexpensive and available at most dollar stores. While affordable, they tend to be a bit flimsy and may bend under pressure. However, they work in a pinch.
- Plastic-Coated Metal Stakes: These are sold at stores like Canadian Tire. They're more durable, won't bend easily, and are already green, so they don't need additional camouflage.
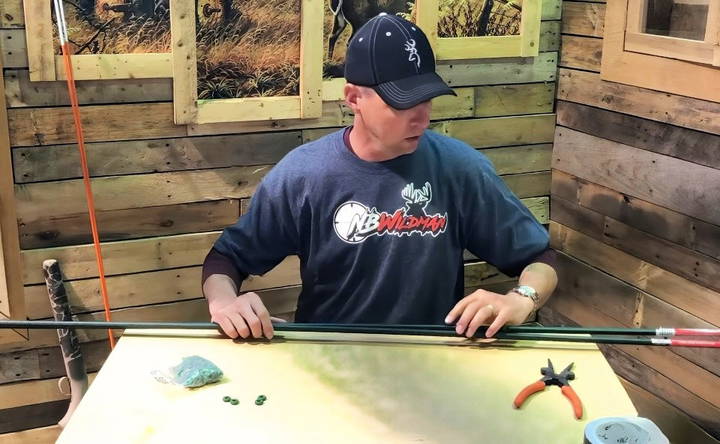
For this project, we'll assume you're using the plastic-coated metal stakes.
Step 2: Prepare the Stakes
If your stakes have bright stickers or any noticeable colors, remove these or wrap the stakes in camouflage duct tape to blend with your surroundings better. This step is optional but recommended for hunters who prioritize stealth.
Step 3: Slide on the Castration Rings
Now, you'll start attaching the castration rings to hold the stakes together. Here's how to do it:
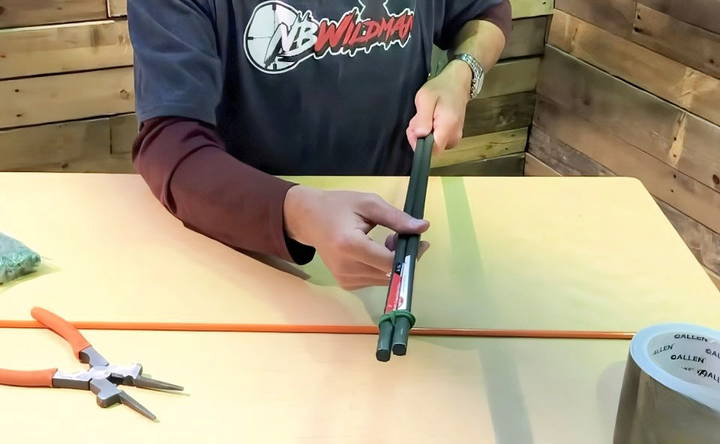
- First Ring (Single Stake): Start by sliding one castration ring over the top of one of the stakes and push it down a bit—about 4 inches from the top end.
- Next Three Rings (Both Stakes): Align the two stakes together, ensuring that their ends match up squarely. Use the pliers to stretch a castration ring over both stakes, positioning it about 4 inches below the first ring.
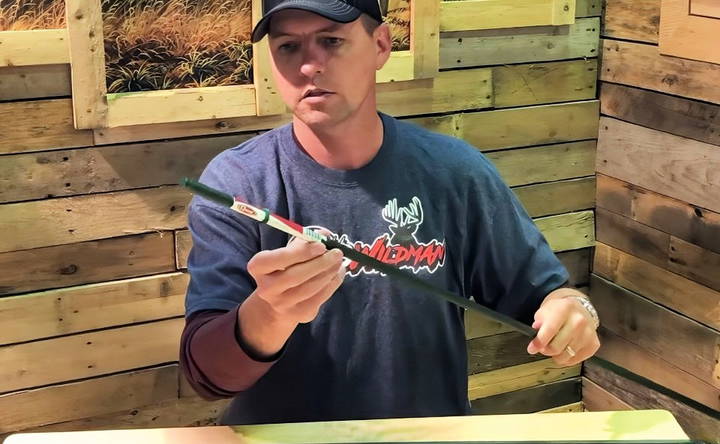
Repeat this process twice more, spacing each ring a few inches apart from the previous one. The goal is to have the two stakes firmly held together by three castration rings, making a hinge-like structure.
Step 4: Adjust the Position of the Rings
Now that all the rings are in place, you'll adjust the top ring to form a secure pivot point between the stakes:
- Using your pliers, slide the top ring (the one placed over both stakes) upward between the two stakes. This configuration helps the stakes stay together while providing enough flexibility to adjust them easily.
Testing and Using Your DIY Shooting Sticks
Once your shooting sticks are assembled, it's time to test them out.
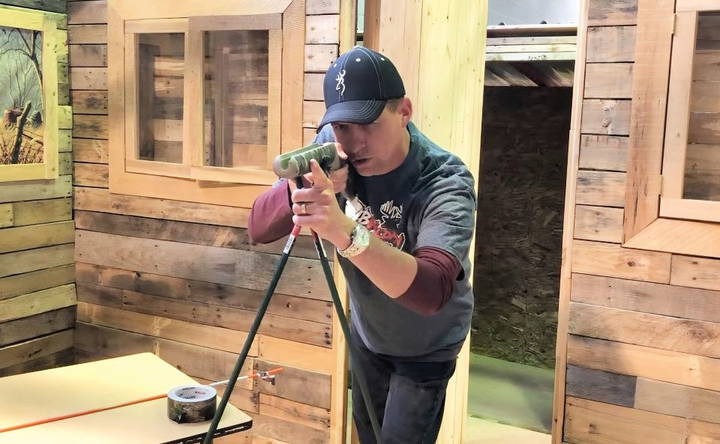
- Check the Stability: Hold the sticks in your hand and adjust the distance between the stakes by opening or closing them. The castration rings should be tight enough to hold the stakes in place while allowing them to pivot.
- Adjusting the Height: By adjusting the castration rings, you can change the height and positioning of the sticks depending on whether you're sitting, crouching, or standing. The flexibility of the rubber rings lets you alter the height by simply opening or closing the sticks, making them suitable for various shooting positions.
- Silent Operation: One of the main advantages of these DIY shooting sticks is their quiet operation. Unlike some store-bought models, these sticks won't make any clinking or creaking sounds, making them ideal for stealthy hunts.
Additional Tips for Customization
- Camouflage Wrap: If you're using bright-colored driveway markers or just want extra camo, wrap the stakes in camouflage duct tape. This not only helps with stealth but also adds an extra layer of durability.
- Long-Lasting Bands: Castration rings are excellent for outdoor use as they're weatherproof and durable. However, if you're concerned about longevity, keep a few spare rings in your kit.
- Portability: The DIY shooting sticks are lightweight and easy to carry. If you're setting up a more permanent hunting spot, you could even leave a set of these sticks at each location.
Why Castration Rings?
Using castration rings may seem unconventional, but they offer several unique advantages:
- Durability: Designed to endure outdoor conditions, castration rings are far more durable than regular elastic bands. They won't degrade in sunlight, moisture, or temperature changes.
- Elastic Strength: These rings provide just the right amount of tension to hold the stakes together without slipping or snapping.
- Cost-Effectiveness: A single bag contains 100 rings, more than enough for multiple pairs of shooting sticks or replacements. At only a few cents each, they're an inexpensive yet reliable option.
Pros and Cons of DIY Shooting Sticks
Like any DIY project, these shooting sticks have their advantages and disadvantages. Here's a quick look at both sides:
Pros
- Affordable: The entire project costs just a few dollars, making it much cheaper than buying commercial shooting sticks.
- Lightweight and Portable: Easy to carry around, especially if you're moving between hunting spots.
- Silent: Free from rattling or clicking sounds, ensuring you stay quiet in the field.
- Customizable: You can modify the sticks' length, height, or camouflage as desired.
Cons
- Potential for Wear: Although castration rings are durable, they may need replacing after several years of heavy use.
- Basic Adjustability: Unlike some high-end models, these sticks don't have intricate height adjustment features. However, they're still adaptable enough for most hunting scenarios.
- Assembly Requires Strength: Stretching the castration rings can be challenging, especially if you don't have strong pliers.
Final Thoughts
DIY shooting sticks are a fantastic solution for hunters who need a reliable, silent, and cost-effective rest. With just a few supplies, you can make a pair of shooting sticks that rival the performance of many high-end models. They're easy to assemble, lightweight, and adaptable to various shooting positions, making them perfect for any hunting scenario.
Whether you're a seasoned hunter or just starting, these DIY shooting sticks are a worthwhile addition to your gear. Give them a try, and you'll see how effective and affordable a DIY approach can be.
FAQs About DIY Shooting Sticks
Discover the essentials of DIY shooting sticks with our comprehensive faqs guide. Learn tips, materials, and techniques to elevate your shooting skills.
Castration rings are available at most farm supply stores and online. They’re affordable and come in packs that provide plenty for this project and future replacements.
It’s not recommended. Castration rings are much more durable and weather-resistant, while regular elastic bands may degrade over time, especially in outdoor conditions.
With castration rings, these shooting sticks can last for years, even when exposed to the elements. Some users have reported that their sticks remain in great condition after five or more years of use.
Yes, you can adjust the height by changing the distance between the two stakes. This flexibility makes them suitable for shooting from different positions, whether you’re standing, crouching, or sitting.
Adding extra castration bands or a larger band toward the bottom of each leg can keep the sticks from clanging together. This approach is ideal for hunters who want to minimize noise when walking in hunting areas.
Yes, you can add a third pole to create a tripod setup. Some users have used garden poles and reinforced the top area with paracord for extra stability. This makes the setup quieter and steadier, particularly for longer shooting sessions.
Yes, but castration rings are preferred due to their durability in various weather conditions. Some users have experimented with 550 paracord, though it doesn't offer the same flexibility. Snapring pliers can also make handling castration rings easier.
Many users have used cross-country ski poles, which are lightweight and sturdy, with a steel tip that provides grip on uneven terrain. Old hiking sticks with hand straps can also be used for added support.
Consider slightly bending the bottom of the stakes inward to make a "tripod-like" effect, which helps them hold better on uneven terrain. Another option is to place the flat end down for added stability, especially if hunting on flatter surfaces.
Castration rings are weather-resistant but may need occasional replacement after long-term exposure. Some users have noted they can last multiple years, even in harsh conditions. Keeping a few spares on hand is always a good idea.
Yes! Many users find the shooting sticks work as dual-purpose hiking poles, especially helpful for stability on rugged terrain. You can collapse them down for easy carrying, making them useful for both hunting and trekking.


