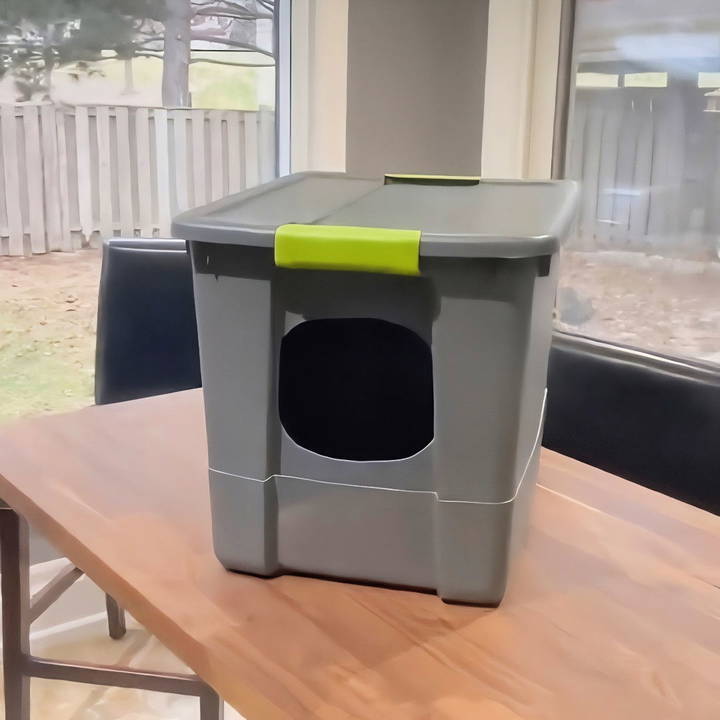
If you own a cat, you're likely familiar with the challenges of maintaining a clean and efficient litter box. Commercial options can be expensive, with prices often ranging from $60 to $80 for a plastic contraption. But what if I told you that you could build your own DIY sifting litter box for just $20? This guide provides a step-by-step approach to building a custom, budget-friendly solution that minimizes effort, time, and expense with basic tools and materials.
Why Build a DIY Sifting Litter Box?
Before we dive into the instructions, let's briefly discuss why a DIY sifting litter box is a great idea:
- Cost-effective: Store-bought litter boxes are costly. With a DIY version, you can spend less and still achieve excellent functionality.
- Customizable: You can design the box according to your cat's size and preferences.
- Sifting Mechanism: This type of box allows you to easily separate clean litter from waste, minimizing the need for frequent changes.
- Environmental Benefits: Using natural materials, like wood pellet litter, can reduce the environmental impact compared to traditional clay litters.
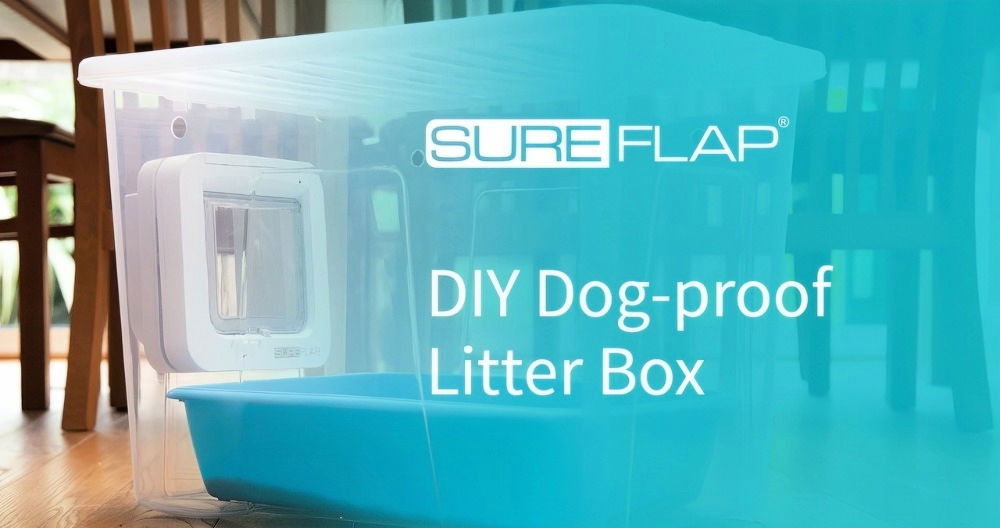
- Enclosed Design: Helps contain odors and prevents dogs (if you have them) from nosing around the litter box.
Materials Needed
To build your DIY stackable sifting litter box, you will need the following materials and tools, most of which are inexpensive and easy to find:
- 2 large plastic storage bins with lids: These will form the body of your litter box. Any brand or style of bin should work, but soft, malleable plastic is preferred as it's easier to cut.
- Drill and drill bits: You'll use these to make holes in the bottom of one bin to allow the sawdust to sift through.
- Utility knife (or X-Acto knife): To cut out the entry door and to trim plastic.
- Tape measure: For precise measurements.
- Marker: For marking where to cut or drill.
- Sandpaper (180-grit recommended): To smooth any rough edges where cuts are made.
- Spacers (optional): Golf balls or plastic lids work well as spacers to elevate the bins.
With these tools and materials ready, you're set to begin constructing your sifting litter box.
Step by Step Instructions
Learn how to make a DIY sifting litter box with step-by-step instructions, from cutting the entry door to final adjustments, plus tips for success.
Step 1: Cutting the Entry Door
The first thing to do is to make an entryway for your cat. This involves cutting a door in one of the storage bins. Follow these steps:
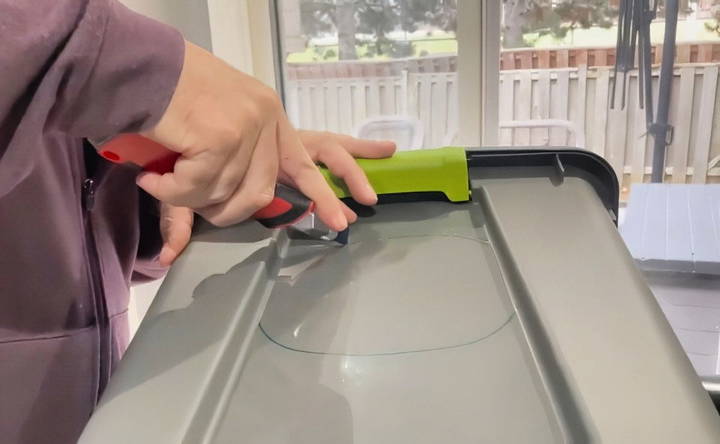
- Mark the Door: Use your marker to draw the outline of the door on one side of the bin. Make sure it's big enough for your cat to enter and exit comfortably. If you're unsure about sizing, a good starting point is a width of 8 inches and a height of 8 to 10 inches.
- Cut the Door: Use a utility knife or X-Acto knife to carefully cut along the marked lines. Begin by scoring the plastic lightly, and then gradually deepen the cut to avoid cracking the material.
- Smooth the Edges: After cutting the door, sand the edges using the 180-grit sandpaper. This step is crucial to prevent any sharp edges from hurting your cat.
At this stage, you've maked the basic structure that your cat will use to enter the litter box.
Step 2: Making the Sifting Tray
The next step involves converting the second bin into a sifting tray that will separate clean litter from waste.
- Measure and Mark the Tray's Height: Measure approximately 4.5 to 5 inches from the bottom of the second bin. This marks the height where the litter tray will sit, ensuring it's deep enough to hold litter but not too deep that it obstructs the door. Mark this height all around the bin using your marker.
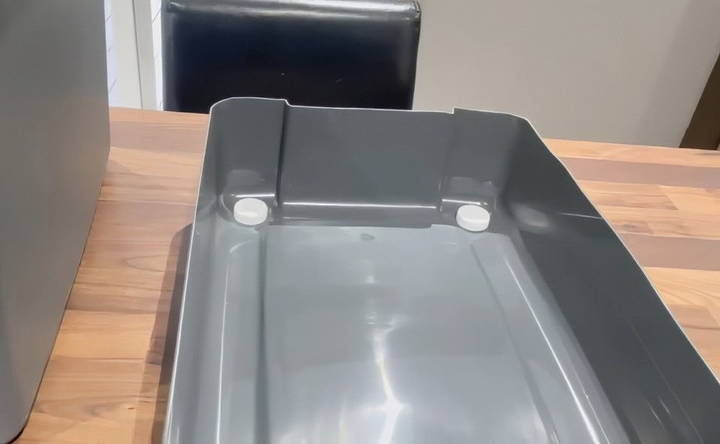
- Cut the Tray: Use the utility knife to cut along the line you marked earlier, essentially removing the upper portion of the second bin. What you'll be left with is a shallow tray that fits inside the main bin.
- Drill Holes for Sifting: Use your drill to make several small holes in the bottom of the tray. The holes should be about ¼ inch in diameter — small enough to allow sawdust to fall through, but not so large that whole pellets pass through. Make sure to evenly space the holes across the entire base to promote efficient sifting.
Step 3: Assembling the Litter Box
With the door and sifting tray ready, it's time to assemble your DIY stackable sifting litter box.
- Place the Sifting Tray: Insert the tray into the main bin, ensuring it sits flat and stable. You may use spacers (such as golf balls or plastic lids) at the corners to lift the tray slightly, making a gap between the tray and the bottom bin. This gap is where the sawdust will collect after sifting.
- Add Spacers (Optional): To prevent the tray from directly resting on the bottom of the bin, you can use plastic objects like golf balls or plastic lids as spacers. These items are ideal because they're easy to clean and won't absorb odors, unlike wood, which can retain moisture and bacteria.
- Add the Litter: Pour your chosen litter into the tray. In this design, wood pellets are recommended because they break down into sawdust when wet, allowing easy sifting.
- Secure the Lid: Since this is an enclosed litter box design, the lid of the bin should be placed on top to keep everything contained. The lid also helps prevent dogs or small children from accessing the litter area.
Step 4: Testing and Final Adjustments
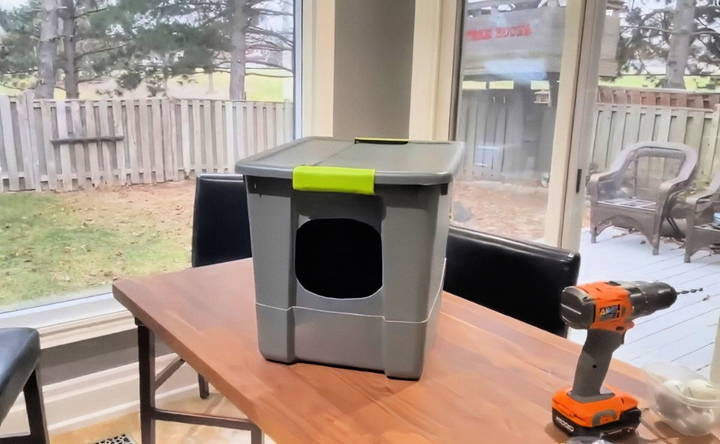
Now that your DIY stackable sifting litter box is complete, it's time to put it to the test.
- Introduce Your Cat: Allow your cat to explore the new litter box. Cats are curious by nature, and they'll likely investigate it immediately. Make sure the door is cut to a comfortable height for easy entry and exit.
- Sifting the Litter: Once the box is in use, simply lift the top tray and give it a shake. The sawdust from the wood pellets will fall through the holes, leaving the unused pellets in the tray for reuse. Scoop out solid waste manually.
- Adjust Spacers If Needed: If you find that the tray is moving around too much or the spacers aren't holding, you might consider securing them in place with a non-permanent solution like Velcro strips. This will keep the spacers from shifting while still allowing you to remove them for cleaning.
Why Wood Pellet Litter?
In this design, wood pellet litter is recommended for several reasons:
- Cost: A 40-pound bag of wood pellets can be purchased for as little as $7.50. This is much cheaper than traditional clay-based litters.
- Odor Control: Wood pellets naturally absorb moisture and odor, reducing the need for scented litters or deodorizers.
- Environmental Impact: Wood pellets are biodegradable and eco-friendly, unlike clay litter, which is not sustainable.
Additional Tips for Success
Here are some extra pointers to help you get the most out of your DIY litter box:
- Choose the Right Bins: When selecting bins, opt for soft, malleable plastic, as it's easier to cut and less prone to cracking. Clear plastic bins may look nice but tend to be more brittle and difficult to work with.
- Keep the Plastic Warm: If you live in a cold climate, make sure to bring the bins inside and let them warm up to room temperature before cutting. Cold plastic is more likely to crack.
- Regular Cleaning: The sifting tray makes cleaning easier, but you'll still need to empty the sawdust from the bottom bin regularly. Clean the tray and spacers occasionally to prevent odor buildup.
Conclusion
Building your own DIY stackable sifting litter box is an affordable, efficient solution that's easy to customize for your feline friend. With just two plastic bins and some basic tools, you can make a functional, enclosed litter box that provides both privacy for your cat and convenience for you.
By using wood pellets, you'll also save money and reduce your environmental footprint. So, if you're tired of overpriced store-bought litter boxes, give this DIY option a try—you and your cat will appreciate it!
FAQs About DIY Stackable Sifting Litter Box
Discover essential FAQs about DIY stackable sifting litter boxes. learn tips, benefits, and step-by-step guidance for effortless cleaning.
Using spacers such as golf balls, plastic lids, or even Duplo Lego bricks can keep the tray elevated and stable. Make sure these items are washable for easy cleaning. If they move too much, consider non-permanent solutions like Velcro to secure them in place.
A ¼-inch drill bit is recommended for making the sifting holes. This size is ideal because it allows sawdust to pass through while keeping most pellets intact.
Occasionally, some pellets may fall through, but it's rare. If it becomes an issue, you can consider using a liner in the bottom bin to catch the few that do slip through, making cleanup easier.
Wood pellets are highly recommended because they break down into sawdust, which can easily sift through the holes. Traditional clay or gravel litter will not work as effectively with this setup due to its different consistency.
After sifting, you can place the top bin on a clean surface or even on the unused lid to prevent mess. This keeps the area clean and avoids the hassle of cleaning multiple surfaces.
Yes, if you have a tall cat, you can modify the bin by attaching a portion of the cut-off top back onto the main bin to increase its height. This can provide more headroom for larger cats.
In most cases, the plastic is soft enough that it won't make sharp edges. However, if you notice any rough spots, a quick sanding with 180-grit sandpaper should smooth things out.
While enclosed boxes are convenient for containing odors and messes, some suggest that they can trap dust and lead to respiratory issues, even with pellet litter. Monitor your cat's behavior and health, and consider a more open design if needed.
You can use various items such as plastic lids, golf balls, or even Lego blocks. Avoid using wood as it can absorb moisture and cause odors. Washable plastic objects are ideal.
A simple solution is to add a second tray or liner. Some users suggest lining the bottom bin with a trash bag or pee pad for easy disposal and minimal mess.


