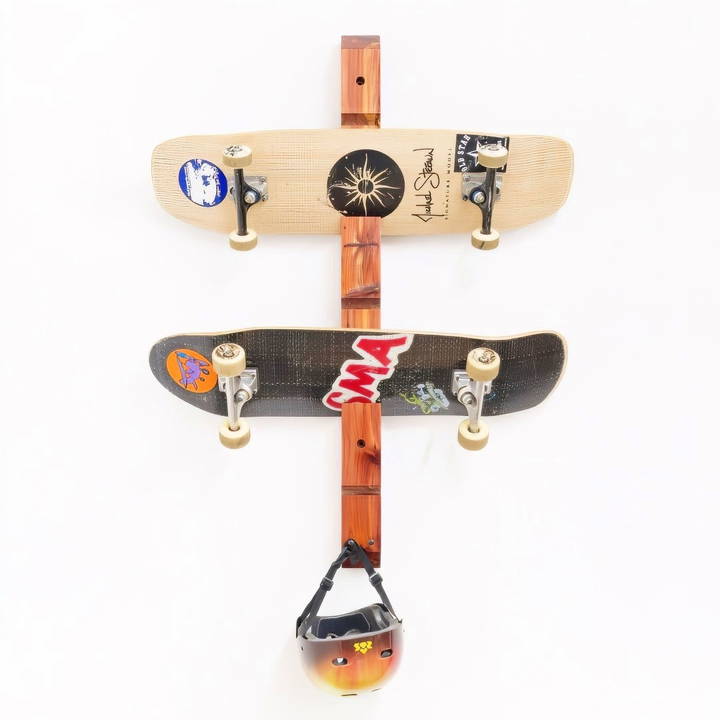
Building your own DIY skateboard rack is a fun and functional project that keeps your gear organized while adding a touch of DIY creativity to your home. This guide provides instructions for building a simple, customizable rack that accommodates up to five skateboards using a single 8-foot 2x4. This project is perfect for beginners and seasoned DIY enthusiasts alike. Let's get started!
Tools and Materials You'll Need
Discover essential tools and materials for building a skateboard rack. Organize your gear efficiently with our expert guidance.
Materials:
- 8' x 2" x 4" Cedar: Reclaimed cedar works well for a rustic aesthetic.
- 4.5" HeadLok Screws (2 or 4): These sturdy screws secure the rack to the wall.
- Cabinet Screws or Additional HeadLok Screws (2): Optional, but useful for additional strength.
- Wood Glue: For securing the joints.
- Homemade Wipe-On Polyurethane: Used for the finish.
- Linseed Oil: Optional, for a rich wood tone.
Tools:
- Miter Saw or Hand Saw: Essential for cutting the wood.
- Jointer and Planer: To smooth rough or damaged lumber (optional if your wood is pre-sanded).
- Clamps: To hold pieces together while gluing.
- Sandpaper: For smoothing surfaces and edges.
- Drill: To build counterbores and holes for screws.
- Card Scraper: For cleaning up joints.
- Measuring Tape and Pencil: For precise measurements and guidelines.
Step by Step Instructions
Learn to build a DIY skateboard rack with step-by-step instructions, from preparing lumber to finishing touches and customization ideas.
Step 1: Prepare the Lumber
If you're using reclaimed or rough lumber, it's essential to clean and prep it before cutting. Run the cedar through a jointer and planer to remove imperfections and ensure a smooth surface. If your wood is already clean and straight, you can skip this step.
Step 2: Cutting the Pieces
Discover the cutting the pieces main rack body and angled front pieces, designed for optimal support and style in your projects.
Main Rack Body:
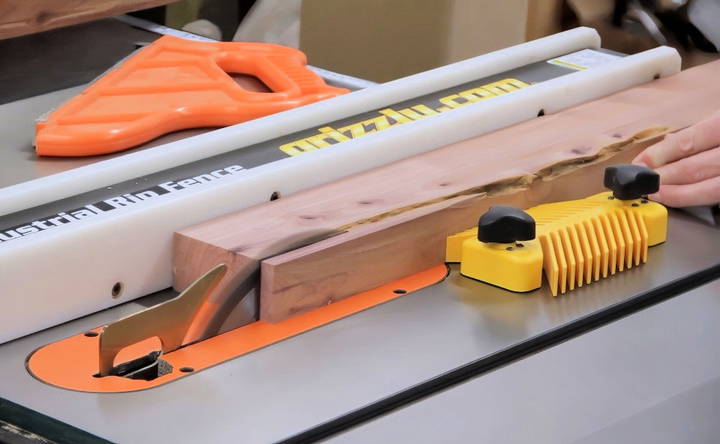
- Cut the 8-foot board in half: You'll now have two 4-foot sections.
- Reserve one section as the rack's backboard.
Angled Front Pieces:
- Cut the second 4-foot section into smaller pieces for the angled arms. These will hold the skateboards.
- Customize the rack: Depending on how many skateboards you want to store, cut the number of angled pieces accordingly (up to five for this design).
Step 3: Shaping the Pieces
Trim the top edge of each angled piece slightly to prevent chipping. This builds a smoother and more professional finish.
Step 4: Assembly
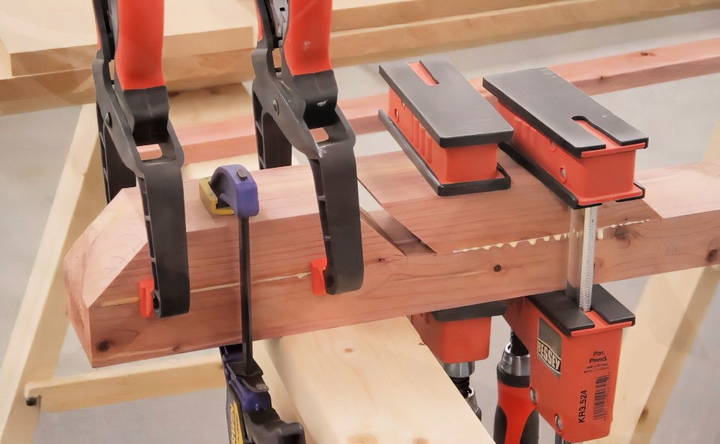
- Mark Guidelines: Measure and mark where each angled piece will attach to the backboard. Even spacing ensures a balanced look.
- Attach Front Pieces: Apply wood glue to the back of each angled piece.
- Align it with the guidelines and clamp it in place.
- Secure with Screws: Once the glue has dried, reinforce each joint with screws for extra durability.
Step 5: Sand and Smooth
- Use a card scraper and sandpaper to smooth the joints and remove excess glue.
- Sand all surfaces and edges for a polished finish.
Step 6: Drilling Counterbores
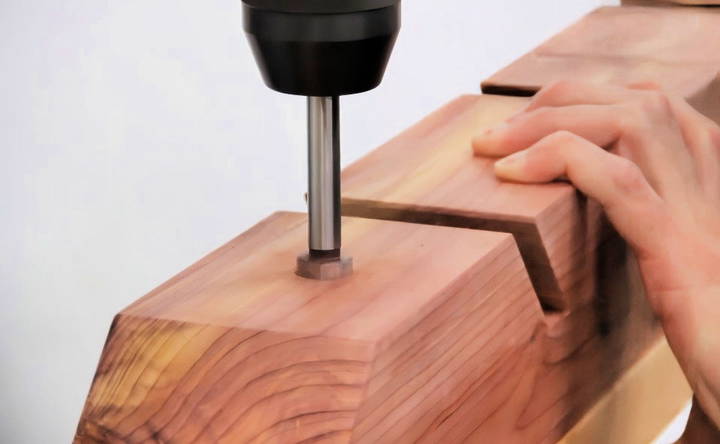
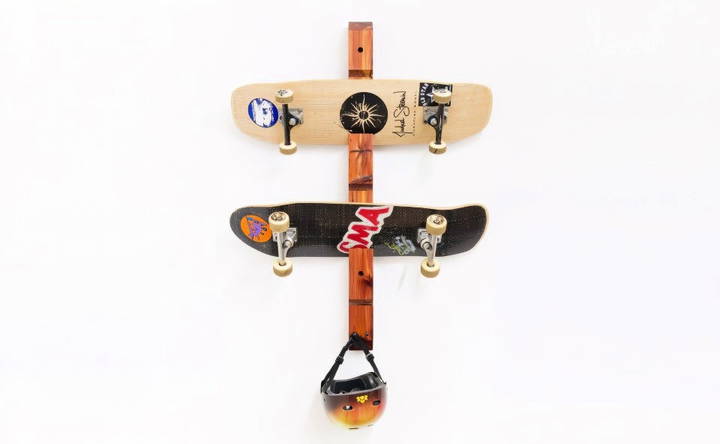
Drill counterbores at the top and bottom of the backboard. These recessed holes allow screws to sit flush with the wood, giving the rack a clean appearance. Use these holes to mount the rack securely to the wall.
Step 7: Finishing Touches
- Apply a Finish: Start with a coat of linseed oil to enhance the wood's natural grain. Follow this with several thin coats of homemade wipe-on polyurethane. Sand lightly between every other coat for a smooth, durable finish.
- Add Accessories: For extra functionality, attach cabinet screws to the bottom of the rack to hang helmets or other accessories.
Step 8: Mounting the Rack
Choose a sturdy wall location and mount the rack using 4.5" HeadLok screws. Make sure the rack is level and securely attached to wall studs for safety.
Customization Ideas
- Color Options: Paint or stain the rack to match your decor.
- Capacity Adjustment: Add more or fewer angled pieces based on your needs.
- Accessory Hooks: Install additional hooks for bags, pads, or other gear.
Maintenance and Longevity
To keep your skateboard rack in great condition:
- Regularly check and tighten screws.
- Reapply a finish if the wood shows signs of wear.
- Avoid exposing the rack to excessive moisture to prevent warping.
Why Build Your Own Skateboard Rack?
Building a DIY skateboard rack is not just a cost-effective storage solution; it's also an opportunity to showcase your craftsmanship. This project:
- Saves Money: DIY options are often cheaper than store-bought racks.
- Fits Your Style: Customize the design to suit your needs and space.
- Sustainable: Using reclaimed wood is eco-friendly.
Conclusion
Building a DIY skateboard rack is an enjoyable project that results in a practical and stylish addition to your home. With basic tools, a single piece of lumber, and some elbow grease, you'll have a rack that organizes your skateboards and frees up floor space. Follow this guide, and feel free to personalize the design for your unique needs.
Start building today and enjoy the satisfaction of completing your own functional work of art! If you have questions or need additional tips, feel free to ask in the comments below.
FAQs About DIY Skateboard Rack
Discover everything you need to know about DIY skateboard rack with our comprehensive FAQs, providing tips and solutions for your skateboard storage needs.
Cedar is a great choice for durability and aesthetics, but you can use pine or reclaimed wood. Note that pine may wear out faster over time if exposed to heavy use.
Apply a durable finish like wipe-on polyurethane to protect the wood. Sand lightly between coats for smooth results. Also, secure it to wall studs using long screws to support the weight of multiple skateboards.
Yes, but you may need to adjust the width and spacing of the slots. Wider slots and increased spacing will better accommodate larger boards.
Check the alignment of the jointer fence and ensure you’re applying consistent pressure on the outfeed side. If problems persist, use sandpaper or clamps to address gaps and reinforce with screws.
Yes, a 10-inch miter saw is sufficient for cutting the 45-degree angles needed for the rack.
The counterbores should leave about 1.5-2 inches of thickness in the wood under the screw heads. For mounting, aim to have 1-1.25 inches of the screw embedded into the wall stud.
Use 4.5-inch screws, ensuring at least 2 inches penetrate the wall stud. Pre-drill pilot holes to prevent splitting and ensure a secure fit.
Yes! If you don’t have a jointer, carefully sand the wood. For cutting, a hand saw or band saw can substitute a miter saw if used precisely.
This is a 1-to-1 mix of regular polyurethane and mineral spirits. It's applied with a cloth for a smooth finish, requiring multiple coats.
Yes, you can attach additional hooks or cabinet screws at the bottom of the rack for hanging helmets, pads, or bags.


