Making a DIY ski rack at home is an excellent way to organize and store your ski equipment efficiently. This guide provides step-by-step instructions to help you build a homemade ski rack that's both functional and aesthetically pleasing. By following these easy steps, you can save space and keep your skiing gear in top condition.
Ready to start your DIY ski rack project? Our guide covers everything you need to know, from gathering materials to final assembly. Let's dive in and transform your storage space with a personalized homemade ski rack.
Make your own DIY ski rack with this easy guide. Organize your skis efficiently with minimal tools and supplies. Perfect for ski enthusiasts!
Gathering the Materials
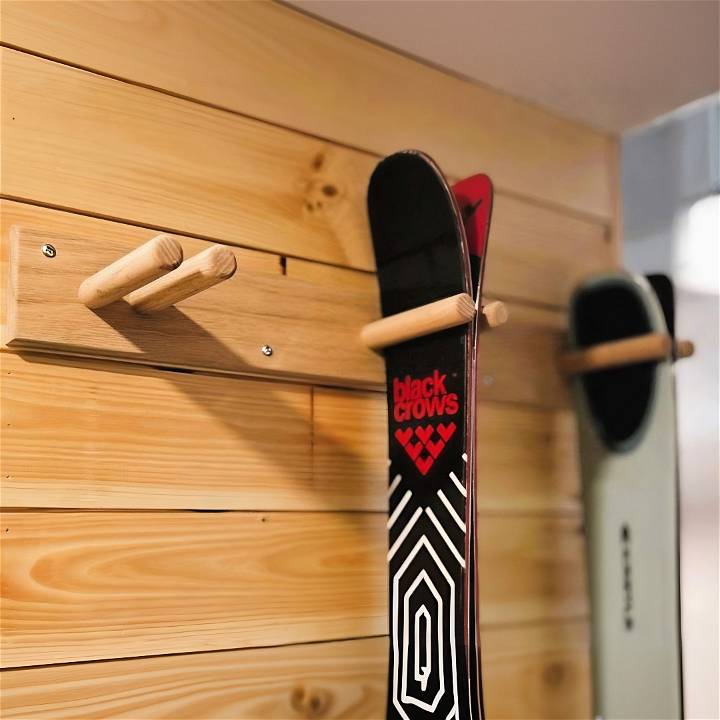
The beauty of this project lies in its simplicity and minimal material requirements. For my rack, I chose a 1x6 piece of Oak for its strength and aesthetic appeal and two one-inch diameter oak dowels. The dimensions of the oak board were specifically chosen to accommodate the space I had and to hold three pairs of skis, although you can adjust the length as per your needs.
Why Oak?
I initially wanted Maple, but because I couldn't find matching dowels, I opted for Oak. Besides its availability, Oak is durable, has a pleasant grain, and works beautifully for projects like this.
The Importance of Painters Tape:
The introduction of painter's tape might seem peculiar at first, but it serves two crucial purposes. Firstly, it protects the oak board during drilling, ensuring clean holes without splintering. Secondly, it guards against glue seepage, preserving the natural look of the wood or making it easier to stain later on.
Step by Step Instructions
Learn how to build a DIY rack with our step-by-step guide: prepping the board, marking and drilling, cutting dowels, assembling, finishing, and mounting.
Prepping the Board
With my materials ready, I trimmed the board to a width of three and three-quarter inches to better match the proportion of the one-inch dowels. This dimension felt right for the depth of the ski rack, ensuring enough clearance for the skis without protruding too much into the garage space.
Marking and Drilling
After marking the layout with measurements specific to my ski arrangement (which you can adjust based on your ski sizes and quantity), I drilled the holes for the dowels. Using a Forstner bit ensured clean, precise holes—an essential tip for anyone keen on a polished finish.
- Key Insight: I positioned the central pegs first, based on the configuration of my skis, and then measured outward for the end pegs. This approach may vary depending on the number and size of skis you're planning to rack.
Cutting and Rounding the Dowels
Cutting the dowels to six and a quarter inches allowed for a five and a half inch protrusion from the board—ample space for ski tips to rest securely. Routing the edges of these pegs not only added a smooth finish but also removed any sharp edges that could potentially damage the ski tips.
Assembling the Rack
The assembly involved a careful approach to glue application and dowel insertion. Given the tight fit, I used minimal glue and ensured each dowel was sealed and inserted with precision—a satisfying albeit slightly challenging part of the project.
Finishing Touches
For a natural look, I decided against staining and instead opted for a clear coat finish, emphasizing the natural grain and warmth of the oak. This step, though optional, added a layer of protection and a professional touch to the finished product.
Mounting and Usage
Mounting the rack was straightforward, involving four drilled holes (two at the top and two at the bottom) to secure the rack onto the garage wall. Once up, loading it with skis transformed an otherwise cluttered corner into a neat, organized space. Its capacity for ski poles was an additional, unplanned benefit.
Customization Options for Your DIY Ski Rack
When it comes to building a DIY ski rack, customization is key. You want your ski rack to not only be functional but also fit the aesthetics of your space and meet your specific needs. Here are some customization options that can help you tailor your ski rack to perfection:
Choose Your Material
Wood is a popular choice for its natural look and ease of handling. Consider cedar or redwood for their resistance to moisture and decay. For a more industrial look, metal pipes or aluminum can be used, offering durability and strength.
Size It Right
Measure the space where you plan to install the ski rack. Ensure there’s enough room for the length of your skis and consider future purchases. A modular design with adjustable slots can accommodate skis of various sizes and numbers.
Design for Your Skis
If you have a mix of alpine and cross-country skis, design slots to fit each type. Include padding in the slots to protect your ski edges from scratches.
Add a Touch of Personality
Paint or stain your ski rack in colors that match your home or garage. Add personalized decals or engravings to make it uniquely yours.
Incorporate Storage
Include a shelf or hooks for helmets, gloves, and goggles. This way, all your ski gear stays organized in one place.
Think Mobility
If you need to move your rack frequently, consider adding caster wheels. Ensure they’re lockable to keep the rack in place when in use.
Security Features
For those storing their rack in shared spaces, adding a lockable mechanism can provide peace of mind. Use sturdy locks and ensure the rack is securely anchored.
Consider these customization options to create a ski rack that reflects your style and ski lifestyle. Keep it simple and functional for a successful DIY ski rack.
Advanced Features for Your DIY Ski Rack
Enhancing your DIY ski rack with advanced features can make it more functional and secure. Here’s how you can add some sophisticated elements to your ski rack:
Weatherproofing
Apply a weather-resistant finish to protect your ski rack from the elements. Use sealants suitable for the rack’s material, whether wood or metal. This will help prevent rust and decay.
Locking System
For added security, especially if your rack is outside or in a shared space, install a locking system. Use a sturdy cable lock that can run through the skis or a built-in lock for the rack itself.
Adjustable Components
Create adjustable arms or slots so that your rack can hold different types of skis or snowboards. This feature allows you to customize the spacing according to the gear you’re storing.
Foldable Design
If space is at a premium, consider a foldable design. Hinges or retractable mounts can make your rack collapsible when not in use, saving valuable space.
Integrated Tools
Attach a small toolbox or pouch to your rack to keep ski maintenance tools handy. This could include edge sharpeners, wax, or screwdrivers for quick adjustments.
Lighting
For those late evenings returning from the slopes, install LED lights around your rack. This not only makes it easier to store your skis but also highlights your rack as a feature piece.
Smart Features
Incorporate smart technology like a Bluetooth tracker that alerts you if your skis are moved. Or, use sensors that monitor the rack’s condition and send notifications for maintenance.
Adding these features makes your DIY ski rack practical and a showcase of your creativity. Its user-friendly design will impress all winter sports enthusiasts.
Troubleshooting Common Issues with Your DIY Ski Rack
Building a DIY ski rack can be a rewarding project, but sometimes you might encounter a few hiccups along the way. Here’s a guide to troubleshooting some common issues you may face:
Stability Concerns
If your ski rack wobbles or feels unstable:
- Check the base: Ensure it’s even and rests flat on the ground.
- Secure connections: Tighten all screws and bolts.
- Add braces: Consider installing diagonal braces for extra stability.
Difficulty Fitting Skis
When skis don’t fit well:
- Adjust the spacing: Widen or narrow the slots to accommodate your skis.
- Use padding: Foam padding can protect skis and provide a snug fit.
- Re-evaluate design: If many skis don’t fit, you may need to redesign the rack with different dimensions.
Wood Splitting or Cracking
To prevent or fix wood damage:
- Pre-drill holes: This reduces stress on the wood when inserting screws.
- Choose quality materials: Select wood that’s known for durability.
- Apply sealant: Protect the wood from moisture which can cause splitting.
Difficulty Installing the Rack
If installation is challenging:
- Use a template: Mark drill holes using a paper template for accuracy.
- Seek help: Sometimes an extra pair of hands can make the process easier.
- Follow instructions: Double-check the installation guide for any missed steps.
Rust on Metal Parts
For metal racks or components:
- Use rust-resistant materials: Stainless steel or coated metals are best.
- Apply protective coatings: Regularly treat with rust inhibitors.
- Keep dry: Store the rack in a dry area to prevent rust.
Fixing common issues ensures your DIY ski rack’s durability and functionality. Patience and detail are crucial for success. Keep it simple and ask for help if necessary.
FAQs About DIY Ski Rack
Discover answers to common questions about DIY ski racks, from materials to installation tips, ensuring an organized and efficient ski storage solution.
When designing your ski rack, make sure to include slots or holders that are slightly wider than your skis to keep them secure. You can also add rubber or foam padding to the areas where the skis will rest to prevent slipping and protect the edges of your skis.
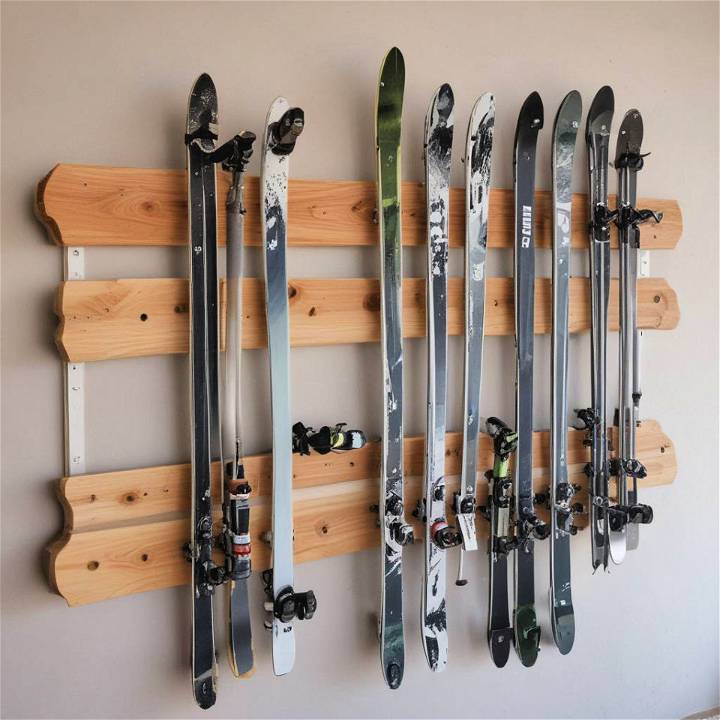
Yes, there are simple designs available that require minimal tools and experience. For example, a basic rack can be made by attaching two horizontal wood planks to the wall and adding vertical supports to hold the skis in place. Always prioritize safety and ask for help if you’re unsure about using any tools.
Building your own ski rack can be more cost-effective and allows for customization to fit the specific size and number of your skis. It also gives you the flexibility to choose materials that match your home’s decor and can be a fun DIY project.
Consider the space where you’ll place the rack, the number of skis you need to store, and whether you prefer a horizontal or vertical setup. Look for designs that accommodate your specific needs, such as adjustable widths for different ski sizes or additional storage for poles and boots.
To maintain your DIY ski rack, regularly check for any loose screws or damage and tighten or repair as needed. If you’ve used wood, consider treating it with a water-resistant sealant to protect against moisture damage. For metal parts, a coat of rust-preventative paint can help. Additionally, clean your rack occasionally to remove dirt and grime that could wear down the materials over time.
Final Thoughts
Wrapping up, making a DIY ski rack using these step-by-step instructions is a rewarding project. Not only does it keep your gear organized, but it also adds a personal touch to your home. Start building your homemade ski rack today and enjoy a clutter-free space.


