Building a DIY slant board turned out to be an incredibly rewarding project. It all began when I sought an easy way to boost my workout routine at home. Slant boards can be quite expensive in stores, so I decided to make one myself. The process was simple, and the final product really helped enhance my exercises.
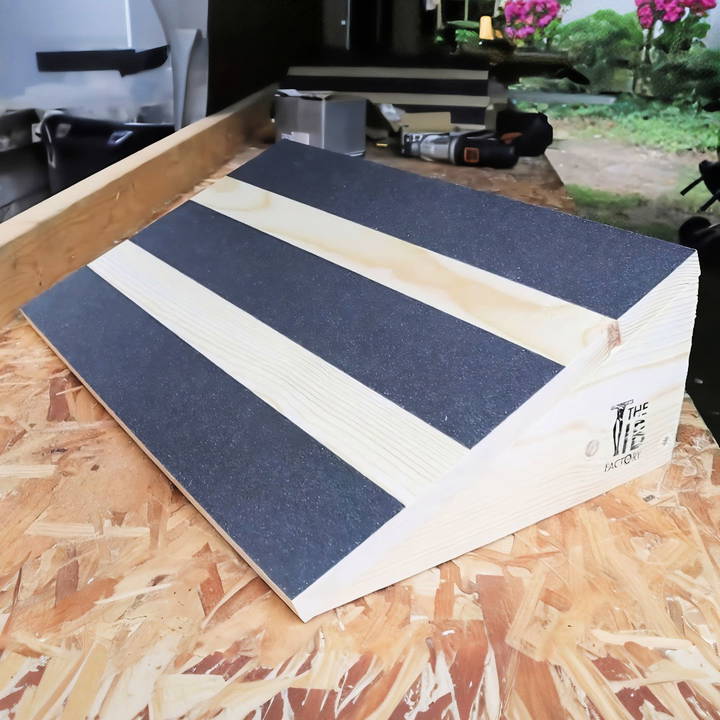
By building my own slant board, I saved money and gained a sense of accomplishment. Plus, making something with my hands gave me a new appreciation for my workouts. If you're thinking about improving your home gym and want to add a useful piece of equipment, try making a DIY slant board. I'm sharing my experience to help you get started and make your workouts better.
Why Build Your Own Slant Board?
Building your own slant board has a few advantages. First, it allows you to customize it to your liking. Second, making it yourself can be far more cost-effective than purchasing one. Lastly, the sense of accomplishment is always rewarding!
Materials You'll Need
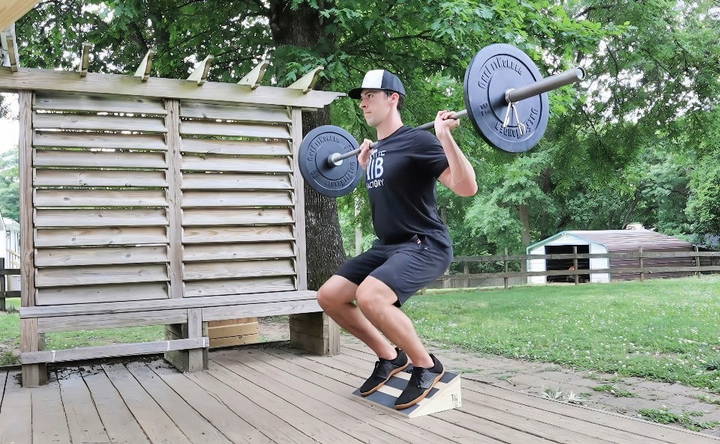
- Solid Pine Wood: I chose solid pine because it's lightweight and looks nice. It can handle heavy-weighted squats.
- Anti-slip Tape: To provide grip and prevent slipping during exercises.
- Various Wood Screws: Specific lengths are crucial to ensure proper assembly without damaging the wood.
- 1-5/8 inch #8 wood screws
- 1-1/4 inch #8 wood screws
- Wood Pieces: Cut to the required dimensions.
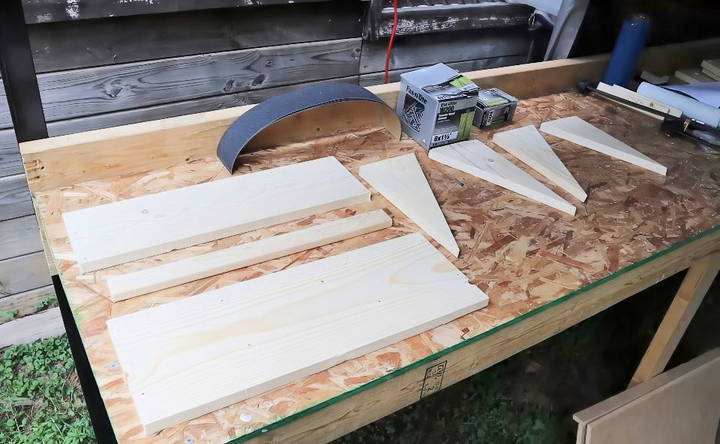
- 1x6 cut to 19-3/4 inches (Platform)
- 1x2 cut to 18-1/4 inches (Support)
- 1x8 cut to 19-3/4 inches (Brace)
- Inside wedge (24-degree angle, 10-3/4 inches long, 4-7/8 inches tall)
- Outside wedge (24-degree angle, 11-1/2 inches long, 5-1/4 inches tall)
Tools You'll Need
- Drill and Pre-Drill Bit: Essential for making accurate holes and avoiding wood splitting.
- Drill Press: Ensures precision during drilling.
- Works Drill: It allows convenient switching between drilling and pre-drilling.
- Sanding Table: To smooth out uneven surfaces.
Step by Step Instructions
Learn how to make a DIY slant board with our step-by-step guide. Follow detailed instructions from measuring to adding anti-slip tape.
Step 1: Measuring and Cutting
- Measure All Pieces: Precision is key. Ensure your pieces are cut to the specified dimensions. This means your slant board will be stable and reliable.
- Mark Drill Points: Before drilling, mark the points on the wood where you'll be drilling. This preparation will save you from potential assembly errors.
Step 2: Preparing the Wood
- Pre-drill Holes: Use a tapered countersink bit to pre-drill holes. This prevents the wood from splitting when inserting screws.
Step 3: Assembly
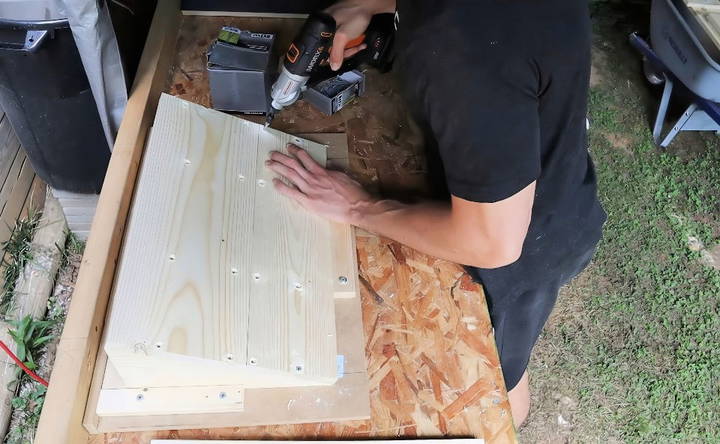
- Attach Outer Bracing: Start by connecting your outside bracing. For the bottom row of holes and the top two middle holes, use 1-1/4 inch screws. For all other holes, use 1-5/8 inch screws.
- The border holes should be 3/8 inch in to hit the center of your bracing.
- The middle screws should be 6 inches in to hit the center of your middle bracing.
Step 4: Attaching Wedges
- Secure Wedge Pieces: Use the previously drilled holes to secure the inner and outer wedge pieces.
- The holes on the 1x8 should be 2-1/2 inches from the top and 1 inch up from the bottom.
- The holes on the 1x6 should be 3/8 inch from the top and 2-3/8 inches from the bottom.
Step 5: Adding the Handle
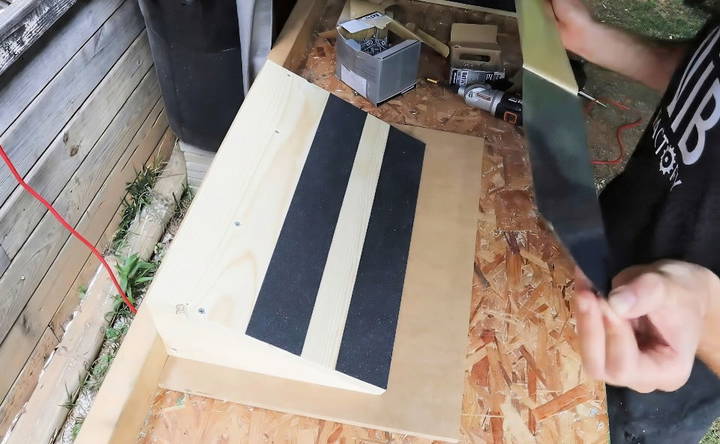
- Attach the Handle: From the back, attach the handle to the two middle support pieces. Then, attach it from the sides to lock everything together.
Step 6: Final Adjustments
- Fix Any Rocking: If your slant board wobbles, use a sanding table to smooth out the bottom and eliminate any extra wobble.
Step 7: Applying Anti-Slip Tape
- Apply the Tape: Apply anti-slip tape to the bottom row, the middle, and the top to hide all connecting hardware and ensure a seamless look.
Customization Tips for Your DIY Slant Board
Building a DIY slant board gives you the flexibility to tailor it to your specific needs and preferences. Here are some tips to help you customize your slant board in a way that's both functional and personal:
Choose the Right Material
- Plywood is a popular choice due to its strength and affordability. Consider the thickness; 3/4 inch is typically sturdy enough.
- For a more eco-friendly option, bamboo or recycled wood can be great alternatives.
Select the Surface Texture
- A non-slip surface is crucial for safety. You can use sandpaper or a non-slip mat cut to size.
- If you prefer a smooth surface, ensure it's finished with a non-slip varnish.
Adjust the Size
- Standard slant boards are around 12 inches wide and 18 inches long. If you have larger feet or need more room, adjust these dimensions accordingly.
- The height should build an angle between 20 to 40 degrees. Use a simple formula to calculate the height: \text{Height} = \text{Length} \times \tan(\text{Angle})Height=Length×tan(Angle)
Personalize the Angle
- Fixed angle: Choose an angle that feels comfortable for your exercises or stretching.
- Adjustable angle: Install hinges and a prop stick with notches to change the angle as needed.
Add Visual Appeal
- Paint your slant board in a color that matches your workout area or inspires you.
- Decals or stickers can add a personal touch without compromising the board's functionality.
Enhance Comfort
- Attach a soft foam pad on the top where your heels rest to prevent discomfort during prolonged use.
- Ensure the edges are rounded and smooth to avoid scrapes.
Make It Portable
- Add a handle or folding mechanism if you plan to store the slant board or travel with it.
- Keep the design lightweight yet durable for easy transportation.
Make a custom slant board that's both functional and stylish with our expert tips. Discover how to balance utility and personal flair in your DIY project.
Advanced Modifications for Your DIY Slant Board
Enhancing your DIY slant board with advanced modifications can significantly improve its functionality and versatility. Here's how you can take your slant board to the next level:
Adjustable Incline Mechanism
- Install a metal bracket system with multiple slots to allow for angle adjustments. This will enable you to change the incline easily according to your workout or therapy needs.
- Use wing nuts and bolts for quick adjustments without the need for tools.
Folding Design for Easy Storage
- Add a hinge at the midpoint of the board so it can be folded in half. This makes it convenient to store or carry.
- Ensure the folding mechanism is secure when the board is in use to maintain stability.
Integrated Resistance Bands
- Attach hooks or loops at the lower end of the slant board to connect resistance bands. This allows for a variety of strength exercises.
- Choose adjustable bands to cater to different resistance levels and exercise types.
Electronic Angle Indicator
- For precision, install a digital protractor that displays the exact angle of the slant board. This is particularly useful for physical therapy exercises where specific angles are required.
- Ensure the display is clear and easy to read, even in bright light.
Non-Skid Adjustable Foot Bar
- A movable foot bar with a non-skid surface can be added to accommodate different foot sizes and positions.
- It should be easy to adjust and lock into place to ensure safety during use.
Cushioned Surface for Comfort
- Upgrade the surface with a high-density foam pad for added comfort during prolonged stretching or exercising.
- Choose a water-resistant cover for the foam pad to make it easy to clean and maintain.
Implement these upgrades for a versatile DIY slant board that boosts workouts or rehab. Ensure safety and stability for reliable use.
Troubleshooting Common Issues with DIY Slant Boards
When crafting a DIY slant board, you might encounter a few hiccups along the way. Here's a guide to help you troubleshoot some of the most common issues:
The Board is Too Slippery
- Solution: Apply a non-slip tape or a rubber mat to the surface. Make sure it's evenly applied to prevent any tripping hazards.
The Angle Isn't Right
- Solution: Double-check your measurements. Use the formula \text{Height} = \text{Length} \times \tan(\text{Angle})Height=Length×tan(Angle) to adjust the height for the desired angle.
The Board Wobbles
- Solution: Ensure all joints are securely fastened. Add rubber feet or a base frame to increase stability.
The Surface is Rough
- Solution: Sand the board down with fine-grit sandpaper until smooth. Finish with a sealant for a polished look.
Difficulty Adjusting the Angle
- Solution: Lubricate the hinges or adjustment mechanism. If you're using a prop stick, make sure the notches are clean and well-defined.
The Board is Too Heavy
- Solution: Consider using lighter materials like cedar or pine. If portability is a concern, design a foldable board.
The Board Makes Noise
- Solution: Tighten any loose screws and add felt pads where the board contacts the floor to muffle sound.
Difficulty Following Instructions
- Solution: Break down the steps into smaller, manageable parts. Use visual aids like diagrams or videos to clarify complex sections.
Address these issues to ensure your DIY slant board is safe and functional. Patience and detail are crucial for troubleshooting.
FAQs About DIY Slant Board
Get quick answers to the FAQs about DIY slant boards. Learn how to build, use, and benefit from your own homemade slant board.
A DIY slant board is a homemade inclined platform designed to stretch and strengthen the muscles in your legs. It’s particularly useful for people with conditions like plantar fasciitis or for those looking to enhance their leg workouts. By using a slant board, you can help prevent back pain, heal leg injuries, and protect your Achilles tendons.
The dimensions can vary, but a common size for a slant board is about 12 to 15 inches wide and 18 to 24 inches long. The height at the higher end (the incline) should be around 6 to 12 inches to build the necessary angle for stretching. Ensure the board is wide enough to comfortably fit both feet side by side.
Yes, some DIY designs allow for adjustable angles. This can be achieved by making a series of holes or slots in the supporting legs where a pin or bolt can be inserted to hold the top part of the board at various angles. This feature is useful if multiple people with different flexibility levels will be using the board.
Place the slant board on a flat, non-slip surface. Step onto the board with one foot at a time, gradually increasing the pressure until you feel a stretch in your calves and hamstrings. Hold onto a stable object for balance if needed. Start with short durations and gradually increase as your flexibility improves.
Maintaining your DIY slant board is simple. Keep it clean by wiping it down with a damp cloth after use to remove any sweat or dirt. Check the screws and bolts periodically to ensure they are tight and the board is secure. If you've added an anti-slip surface, replace it once it shows signs of wear to prevent accidents. Store your slant board in a dry area to prevent warping of the wood.
Final Tips and Observations
- Building with Pine Wood ensures your slant board is lightweight yet durable.
- Pre-drilling with a Tapered Countersink Bit is crucial to prevent splitting.
- Using a Drill Press helps maintain precision, ensuring all screws go in straight.
- Anti-Slip Tape is an essential finishing touch that provides grip for safe exercises.
Enjoy Your New Slant Board!
Completing this DIY slant board project was incredibly rewarding. It's robust and just the right weight, thanks to solid pine and precise assembly. Whether you're using it for weighted squats or other knees over toes exercises, this DIY slant board is a perfect addition to your workout gear.


