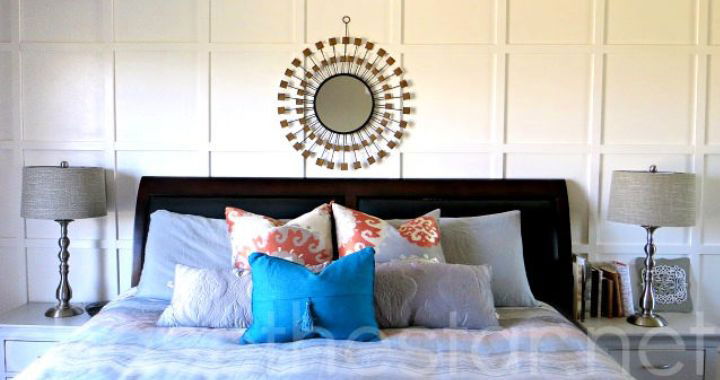
A slat wall, also known as a slot wall or slatwall, is a building material used in shopfitting for wall coverings or display fixtures. It consists of panels, usually 4 ft. by 8 ft., made with horizontal grooves that are configured to accept a variety of merchandising accessories.
The slat wall system was originally used in retail stores, but it’s now being adopted by many homeowners due to its versatility and functionality. It’s a great way to maximize space, especially in small areas, as it allows you to hang, display, or store items on the wall.
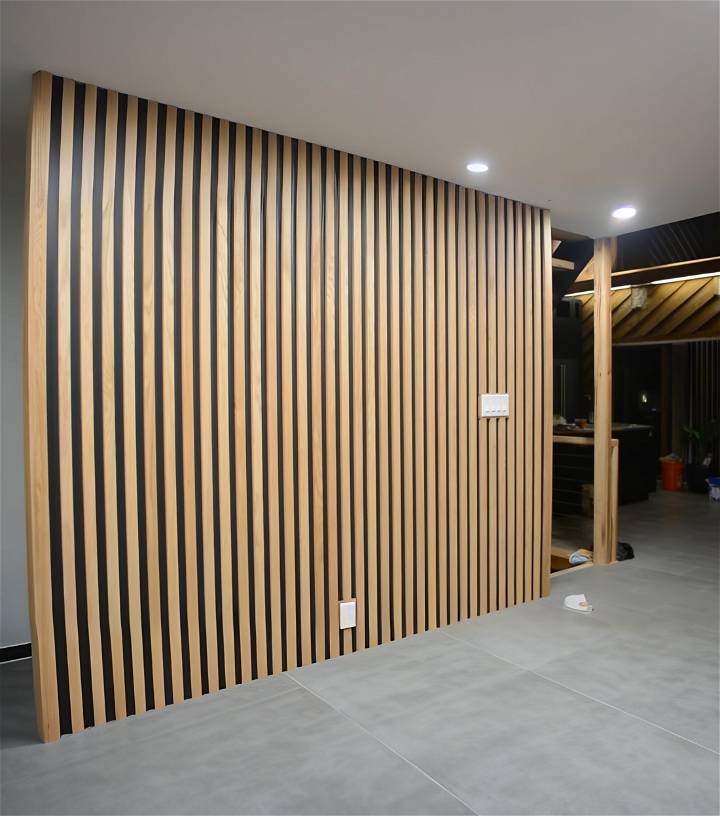
One of the main advantages of a slat wall is its flexibility. The grooves or slats make it easy to move shelves, hooks, and other accessories around, allowing you to customize your wall storage as your needs change.
In the following sections, we’ll go over everything you need to know to build your own slat wall, including the materials needed, a step-by-step guide, cost estimation, and more. So, let’s get started!
How to Build a Slat Wall - Step by Step Guide
Learn how to build a slat wall with our step-by-step guide. Make a functional and stylish storage solution for your home or garage effortlessly.
Materials and Tools Needed
- MDF panels
- Stud finder
- Tape measure
- Circular saw or jigsaw
- Drill and screws
- Liquid nails or wood glue
- Caulk and wood filler
- Sandpaper (220 grit)
- Primer and paint (gray for priming, black for topcoat)
- Oak boards (for slats)
- Pin nails and pin nailer
- Danish oil
- Painters tape
- Router with a flush trim bit
- Hand clamps
Step by Step Instructions
Learn how to build a wood slat wall step by step with our easy-to-follow guide below:
Preparing the Wall
- Measuring and Marking: Using a stud finder, locate and mark all stud locations on the wall. Measure the height and width of your intended wall area to calculate how much MDF and wood you need. Don't forget to account for outlets or switches by precisely measuring and marking their locations on your MDF panels.
- Cutting and Attaching MDF: Cut the MDF panels to your measured sizes, including cuts for any outlets or switches. Secure the panels to the wall at the marked stud locations with screws. Ensure the MDF lies flat against the wall; this might require scribing and trimming the panels for a perfect fit, especially in older homes where walls may not be level.
Slat Preparation
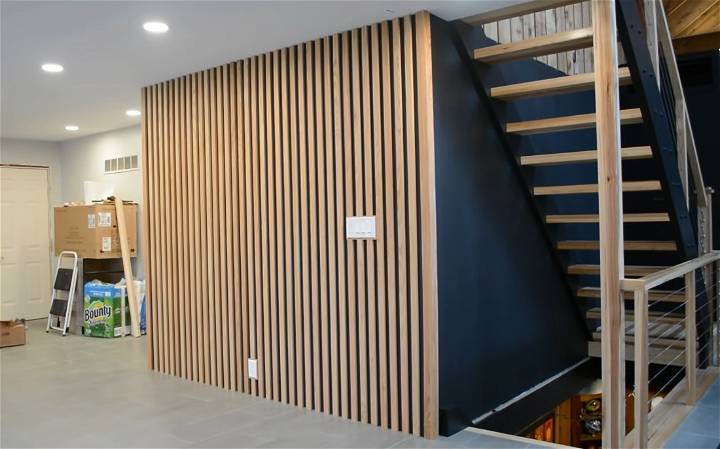
- Purchasing Materials: Select your wood slats. Oak is recommended for its quality, though it might be pricier. Acquire boards that can be ripped down to your desired slat size, which in this project are 1.5 inches in width.
- Cutting Slats: Using a table saw, rip your boards down to the 1.5-inch width. Make sure to choose the smoothest side of each slat as the visible side.
- Sanding and Sealing: Sand each slat with 220 grit sandpaper for a smooth finish. Apply Danish oil to each slat to protect the wood and enhance its natural beauty.
Painting the Wall
Before attaching the wood slats, paint the wall and MDF panels. Prime the wall first with gray primer if you plan on using a dark topcoat color. Utilizing a gray primer will reduce the number of topcoat layers needed. Once the primer is dry, apply your black (or chosen color) paint. Let it dry completely.
Installing the Slats
- Starting Corner: It’s essential to begin with a perfectly square corner. Use this as the reference point to ensure all slats are aligned correctly as you progress across the wall.
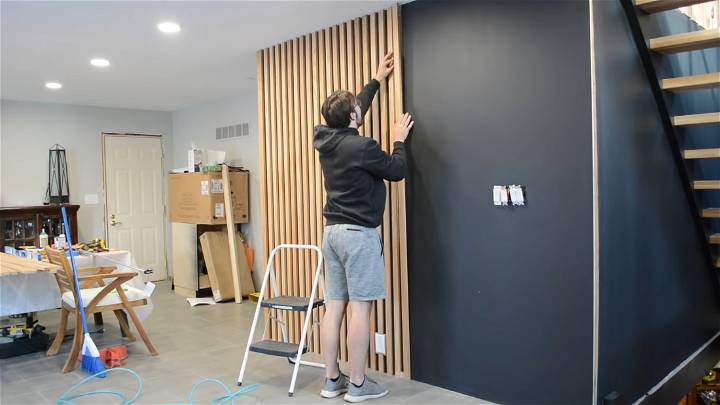
- Applying Slats to the Wall: Apply a thin bead of liquid nails or wood glue to a slat, position it against the wall, and use spacers to ensure even gaps between slats. Secure the slat with pin nails. Repeat the process, making sure each slat is level.
Attention to Detail
- Outlets and Switches: Extrude these out to match the depth of the wood slats, making a seamless look.
- Filling and Sanding: If any nails protrude or there are gaps, use wood filler to smooth these out, then sand down for a seamless finish.
Final Touches
Once all slats are installed and any glue or filler is dried, give your wall a final inspection. Make any necessary adjustments or touch-ups to the paint or Danish oil finish. Remove any painter's tape used during the oil application.
Video Tutorial
For a step-by-step video tutorial on building a wood slat wall, watch The Lake House Project Ep 20.
It pairs well with this written guide, offering a visual approach to the described techniques, making it easier to follow and understand.
Building a wood slat wall requires patience and precision, but the result is a stunning addition to any room that adds texture and interest. Whether for a home project or a professional renovation, this guide provides a reliable roadmap to achieving a beautiful wooden accent wall.
Estimating the Cost of Your DIY Slat Wall
When planning your DIY slat wall project, it’s important to consider the costs involved. This will help you budget appropriately and avoid any unexpected expenses. Here’s a breakdown of the potential costs:
Materials
The cost of materials can vary greatly depending on the type and quality of wood you choose, the size of your wall, and where you purchase your materials. On average, you can expect to spend between $50 and $200 on materials. This includes the cost of the wood, screws, and any other hardware you might need.
Tools
If you don’t already own the necessary tools, you’ll need to factor this into your budget. Essential tools for this project include a saw, drill, level, and measuring tape. The cost of these tools can range from $20 to $100 each, depending on their quality and brand.
Finishing
If you decide to paint or stain your slat wall, you’ll need to budget for paint, stain, or sealant. A gallon of paint or stain typically costs between $15 and $50.
Miscellaneous
Don’t forget to factor in any additional costs, such as protective gear (gloves, safety glasses, etc.), sandpaper, and brackets or hooks for hanging items on your slat wall. These costs can add an additional $10 to $50 to your budget.
These are just estimates, and the actual cost may vary based on your specific project and location. It’s always a good idea to do some research and shop around for the best prices before starting your project.
Time Required for Your DIY Slat Wall Project
When planning a DIY project, it’s important to have a realistic understanding of the time commitment involved. This helps you schedule your work and ensures that the project doesn’t become a source of stress.
Planning and Preparation
Before you start building your slat wall, you’ll need to spend some time planning and preparing. This includes measuring your space, deciding on the design and layout of your slat wall, sourcing materials, and gathering your tools. This stage can take anywhere from a few hours to a couple of days, depending on the complexity of your project and how readily available your materials are.
Building the Slat Wall
The time it takes to actually build your slat wall will depend on your skill level and the size of the wall. If you’re a beginner, it might take a bit longer as you get the hang of using the tools and techniques required. On average, you can expect to spend one to two days building your slat wall.
Finishing Touches
Once your slat wall is built, you’ll need to spend some additional time on the finishing touches. This includes sanding the wood, applying paint or stain, and adding any hooks or brackets. This stage can take anywhere from a few hours to a full day, depending on the finish you choose and how many coats are required.
In total, you can expect your DIY slat wall project to take anywhere from two to four days. Remember, these are just estimates and the actual time may vary based on your specific project. It’s always a good idea to allow some extra time in case unexpected challenges arise.
Safety Measures for Your DIY Slat Wall Project
Safety should always be your top priority when working on any DIY project, including building a slat wall. Here are some safety measures to keep in mind:
Personal Protective Equipment (PPE)
Always wear the appropriate Personal Protective Equipment (PPE). This includes safety glasses to protect your eyes from dust and debris, durable gloves to protect your hands from splinters and cuts, and a dust mask or respirator if you’re sanding or painting.
Tool Safety
Ensure you’re using all tools correctly and safely. If you’re not sure how to use a tool, take the time to learn and practice before starting your project. Always unplug power tools when not in use or when changing attachments.
Workspace Safety
Keep your workspace clean and organized to prevent accidents. Make sure your work area is well-lit and ventilated, especially if you’re painting or staining.
Lifting Safely
When lifting heavy materials, always lift with your legs, not your back, to prevent injury. If something is too heavy, ask for help or use a dolly.
Fire Safety
If you’re using a saw or other tools that generate heat, have a fire extinguisher nearby. Never leave a running power tool unattended.
No project is worth risking your health or safety. Always take the necessary precautions and don’t rush. If you’re ever unsure about something, it’s best to seek professional advice.
Maintenance and Care for Your DIY Slat Wall
Once your slat wall is installed, it’s important to know how to maintain and care for it to ensure its longevity. Here are some tips:
Regular Cleaning
Dust and dirt can accumulate on your slat wall over time. Regular cleaning is essential to keep your slat wall looking its best. Use a soft, dry cloth to gently wipe down the slats. Avoid using harsh chemicals or abrasive cleaners as they can damage the wood.
Checking for Damage
Over time, the slats may become loose or damaged due to wear and tear. Regularly check your slat wall for any signs of damage. If you notice a loose or damaged slat, it’s important to repair or replace it as soon as possible to prevent further damage.
Protecting the Wood
If your slat wall is made of wood, consider applying a protective finish to help protect it from damage. This could be a clear wood sealant, varnish, or paint, depending on your preference. A protective finish can help to prevent scratches, stains, and water damage.
Rearranging with Care
One of the benefits of a slat wall is the ability to easily rearrange your storage. However, when moving items around, be careful not to scratch or damage the slats. Always lift items off the hooks or shelves rather than dragging them.
Regular maintenance and care can help to extend the life of your DIY slat wall and keep it looking its best.
FAQs About DIY Slat Wall
Get all your questions about DIY slat walls answered! Discover tips, tricks, and ideas for making your own stylish and functional space.
What is a Slat Wall?
A slat wall is a wall covering that consists of panels with horizontal grooves. These grooves can hold hooks, shelves, and other accessories, making it a versatile storage solution.
What Materials Do I Need for a DIY Slat Wall?
You’ll need panels for the slat wall, which can be made of wood or other materials, screws for installation, and hooks or shelves for storage. The exact materials may vary depending on your specific project.
How Much Does a DIY Slat Wall Cost?
The cost can vary greatly depending on the materials you choose and the size of your wall. On average, you can expect to spend between $50 and $200 on materials.
How Long Does It Take to Build a Slat Wall?
The time required can vary depending on your skill level and the size of the wall. On average, you can expect to spend one to two days building your slat wall.
Can I Paint or Stain My Slat Wall?
Yes, you can paint or stain your slat wall to match your decor. Just be sure to use a paint or stain that is suitable for the material of your slat wall.
How Do I Maintain My Slat Wall?
Regular cleaning with a soft, dry cloth can help keep your slat wall looking its best. Also, check regularly for any loose or damaged slats and repair or replace them as needed.
Is a Slat Wall a Good DIY Project for Beginners?
Yes, building a slat wall is a great DIY project for beginners. It requires basic tools and materials, and there are plenty of step-by-step guides available to help you through the process.
Can I Use a Slat Wall in Any Room?
Yes, a slat wall can be used in any room where you need extra storage. They’re commonly used in garages, workshops, retail stores, and even in bedrooms or kitchens.
What Can I Store on My Slat Wall?
You can store just about anything on your slat wall, as long as it’s not too heavy. This includes tools, craft supplies, kitchen utensils, and more.
Where Can I Buy Materials for My Slat Wall?
Materials for your slat wall can be purchased at most home improvement stores or online. Be sure to shop around for the best prices.
These are general answers. Do your own research and seek professional advice if needed.
Conclusion:
In conclusion, incorporating a DIY slat wall into your home can enhance organization, aesthetics, and functionality. Transform your space with this versatile and customizable solution to declutter and beautify any room.


