Building a real wood snow sled can be a rewarding project that results in a beautiful and functional creation. This guide will help you craft a sled from scratch, focusing on clarity, reliability, and ease of understanding. Let's dive right into how you can make your own wood sled.
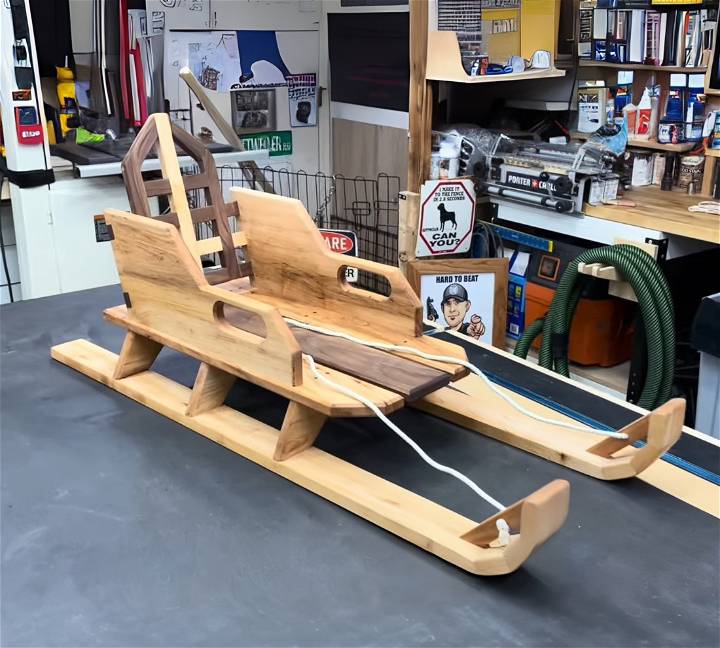
What You Will Need
- Hard Maple Wood (or any wood of your choice)
- Table Saw for cutting angles (optionally, a Miter Saw or Band Saw can also be used)
- Sandpaper for smoothing edges
- Wood Glue for joining pieces
- Dowels for reinforcement
- Drill for making dowel holes
- Mineral Oil for finishing (optional)
Step-by-Step Instructions
Learn how to build a DIY real wood snow sled step by step below:
1. Preparing the Skis
- Cut the wood to four feet in length for skis. You will trim them down to about 38 inches, leaving extra material for making the curve at the front.
- Mark the skis at 38 inches, as this will be their final length.
- Using a table saw set at a 75-degree angle or a miter saw set at 15 degrees, make angled cuts for making a curve at the front of the skis.
2. Assembling the Skis
- Cut three pieces for each ski with 15-degree cuts at both ends. When you align these cuts, they form a nice curve, mimicking the front of traditional sleds.
- For a functional sled, reinforce these pieces. Glue them together and add additional reinforcing elements like dowels or a cross member.
3. Sanding and Finishing the Skis
- Once assembled, sand down the skis until smooth. Round the edges by sanding to give a nice finished look.
- For any cracks, push glue into them and then sand over to fill any gaps.
4. Preparing the Cross Members
- Cut cross members to 14 inches each. These will be spaced evenly along the length of the sled's body.
- Mark where the cross members will go on the skis and cut them at an angle to ensure proper fit and clearance.
5. Attaching Cross Members
- Using a band saw or another cutting tool, shape your cross members if desired.
- Sand and clean up any saw marks on the members.
- Attach the cross members to the skis using glue. For additional strength, secure them with dowels.
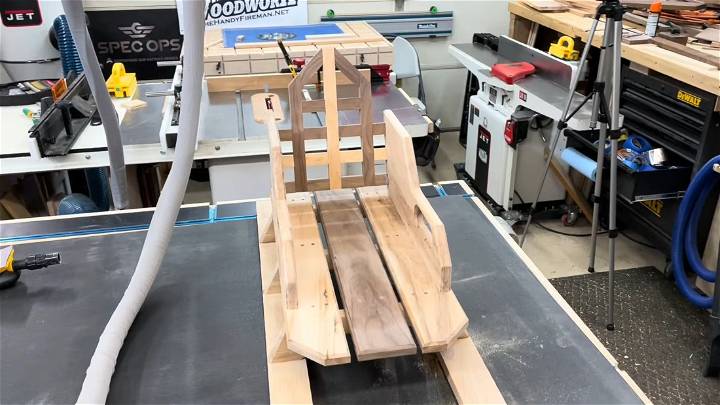
6. Constructing the Seat
- Measure and mark the placement for the seat on the cross members.
- Cut and shape the seat pieces, sanding them smooth.
- Attach the seat pieces to the cross members using glue and dowels for a clean finish.
7. Final Assembly and Finishing Touches
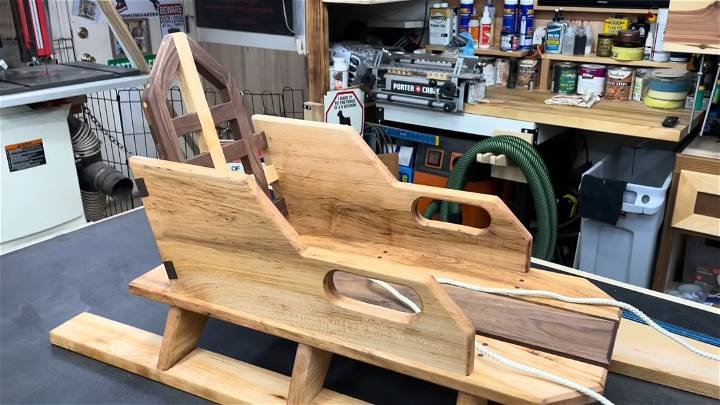
- Attach side pieces to the sled, adding dowels for handles.
- Construct a unique backrest using wood strips if desired. Use half-lap joints for assembling the backrest.
- Once fully assembled, thoroughly sand the sled.
- Finish your sled with mineral oil to enhance the wood's natural beauty and protect it from the elements.
Video Tutorial
For a detailed visual guide on making this wood sled, watch the step-by-step video tutorial here.
It pairs wonderfully with this written guide, offering visual clarity on techniques that might seem complex in text alone.
Building your own real wood snow sled can be a fulfilling project that not only provides fun but also leaves you with a beautiful, handmade item that can be passed down through generations. Enjoy the process, and stay warm on the slopes!
Safety Precautions
When building and using your DIY sled, safety should be your top priority. Here are some safety measures to consider:
During Construction
- Use the Right Tools: Always use the correct tools for the job. This not only ensures a better build but also reduces the risk of injury.
- Wear Protective Gear: Safety glasses, gloves, and sturdy footwear can protect you from splinters, sharp tools, and heavy materials.
- Work in a Well-Ventilated Area: If you're using any kind of adhesive or paint, make sure your workspace is well-ventilated to avoid inhaling fumes.
While Sledding
- Check the Sled Before Use: Before each use, check your sled for any damage. Look for cracks in the wood, loose screws, or worn out parts.
- Choose the Right Environment: Only sled on designated sledding hills that are free of obstacles such as trees, rocks, and fences. Avoid sledding on streets and driveways.
- Dress Appropriately: Wear warm clothing that covers your skin to protect against frostbite and hypothermia. Don't forget your helmet!
- Sled Safely: Always sit face-forward on your sled. Sled one at a time, and keep arms and legs within the sled at all times.
Safety first! Enjoy the thrill of sledding while staying safe.
Customization Ideas
Making your DIY sled unique and personalized can add an extra layer of fun to the project. Here are some ideas to customize your sled:
Paint Designs
- Add a Splash of Color: Painting your sled can not only make it stand out but also add a layer of protection to the wood. Use outdoor paint that can withstand the cold and wet conditions.
- Build a Design: Consider adding stripes, polka dots, or even a cool geometric pattern. If you're feeling artistic, you could paint a winter scene or your favorite cartoon character.
Comfort Additions
- Add a Cushion: For a more comfortable ride, consider adding a cushion to the seat of your sled. You can either buy a waterproof cushion or make your own using waterproof fabric and foam.
- Install Handles: Adding handles to the sides of your sled can make it easier to hold on during a fast downhill ride. Make sure they're securely attached and smooth to prevent splinters.
Functional Upgrades
- Attach a Pull Rope: A pull rope can make it easier to haul your sled back up the hill. Attach a sturdy rope to the front of your sled, making sure it's secure.
- Add Runners: For a faster ride, consider adding metal runners to the bottom of your sled. They can help reduce friction and increase speed.
These are just ideas. Feel free to get creative and add your own personal touches to your DIY sled.
Troubleshooting Guide
Building a DIY sled can be a fun but challenging project. Here are some common issues you might encounter and how to address them:
Problem: Wood Splitting
Solution: If you find the wood splitting when you're screwing pieces together, try pre-drilling the holes. This builds a path for the screw and can help prevent the wood from splitting.
Problem: Sled Slides Poorly
Solution: If your sled isn't sliding well, it could be due to rough spots on the bottom. Try sanding the bottom of the sled until it's smooth. You can also add wax to reduce friction and increase speed.
Problem: Sled is Unstable
Solution: If your sled is unstable or tips over easily, check the balance. The weight should be evenly distributed across the sled. You might need to adjust the position of the seat or add weight to the front or back.
Problem: Screws are Loose
Solution: If screws keep coming loose, try using wood glue in the screw holes before screwing them in. This can help keep the screws in place.
Patience and problem-solving are part of the DIY process. Don't get discouraged if things don't go perfectly the first time. With a little troubleshooting, you'll have a functioning DIY sled in no time.
Maintenance Tips
Taking care of your DIY sled will ensure it lasts for many winters to come. Here are some maintenance tips to keep your sled in top shape:
After Each Use
- Clean Your Sled: After each use, wipe down your sled to remove any snow or moisture. This can prevent the wood from warping or rotting.
- Check for Damage: Look for any signs of damage such as cracks in the wood or loose screws. Address these issues promptly to prevent them from worsening.
Seasonal Maintenance
- Apply a Fresh Coat of Paint or Sealant: Before the start of each winter season, consider applying a fresh coat of paint or sealant to your sled. This can protect the wood from moisture and extend the life of your sled.
- Tighten Screws: Over time, the screws on your sled may become loose. Check and tighten them at the start of each season.
Storage Tips
- Store in a Dry Place: When not in use, store your sled in a dry place. This can prevent the wood from absorbing moisture and rotting.
- Avoid Extreme Temperatures: Extreme cold or heat can damage your sled. Try to store it in a place with a consistent, moderate temperature.
A well-maintained sled not only lasts longer but also provides a safer and more enjoyable sledding experience.
FAQs About DIY Sled
Learn everything you need to know about DIY sleds with our comprehensive FAQ guide. Find answers to all your questions here.
What type of wood should I use for my sled?
Hardwoods like maple, oak, or birch are great choices for a DIY sled. They're durable and can withstand the wear and tear of sledding.
Can I use any type of paint for my sled?
It's best to use outdoor paint that can withstand cold and wet conditions. This will help protect the wood and keep your sled looking great.
How can I prevent the wood from splitting when I screw pieces together?
Try pre-drilling the holes before screwing the pieces together. This builds a path for the screw and can help prevent the wood from splitting.
My sled isn't sliding well. What can I do?
If your sled isn't sliding well, try sanding the bottom until it's smooth. You can also add wax to reduce friction and increase speed.
How can I make my sled more comfortable?
Consider adding a cushion to the seat of your sled. You can buy a waterproof cushion or make your own using waterproof fabric and foam.
How often should I check my sled for damage?
It's a good idea to check your sled for damage before each use. Look for cracks in the wood, loose screws, or worn out parts.
How should I store my sled when it's not in use?
Store your sled in a dry place when not in use. This can prevent the wood from absorbing moisture and rotting.
Conclusion:
In conclusion, when it comes to making your own DIY sled, the possibilities are endless. From traditional wooden designs to innovative materials, you can unleash your creativity and enjoy the thrill of sledding in style. Start crafting your unique sled today!


