Starting something interesting this weekend? Let's dive into making a DIY smart mirror with Raspberry Pi! Sounds fun, right? I remember the first time I tried—my excitement was through the roof. Don't worry; it isn't as hard as it may seem. With some guidance and the correct tools, even a newcomer can make something amazing.
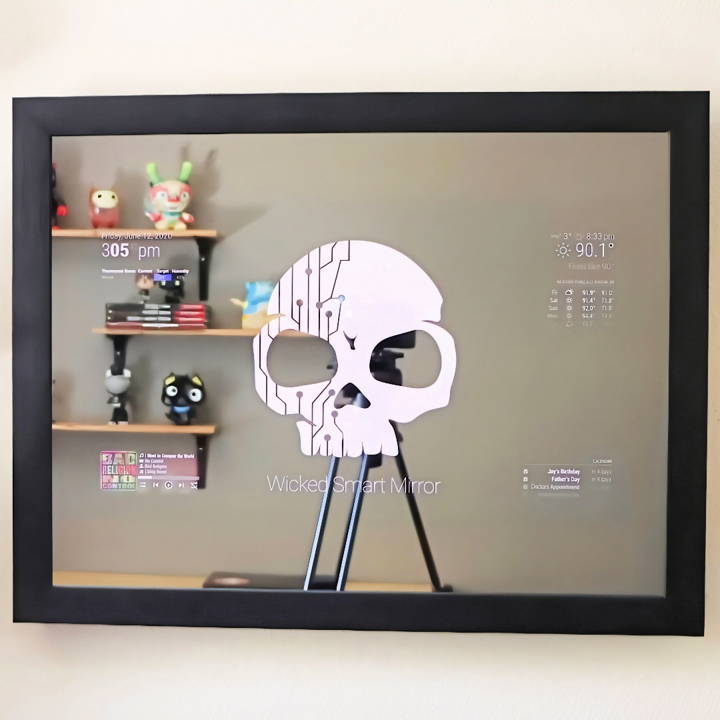
I'm sharing this to help you get started on your own smart mirror project. Follow the steps, and soon you'll have a handy and stylish gadget. This guide covers DIY smart mirror, also known as a magic mirror, and breaks it down into easy steps.
You'll find everything you need to know about how to make a smart mirror with your own hands. Let's get started!
What is a Smart Mirror?
A smart mirror is a two-way mirror with an electronic display behind the glass. The display's content shines through the reflective surface, providing a seamless way to check updates while you go about your morning routine.
How Does it Work?
The magic happens when a monitor or TV screen displays information and a specially designed two-way mirror is placed on top. This allows the display to be visible only when the electronic components are active. When turned off, it looks like a regular mirror.
What Can It Show?
Smart mirrors can show a wide range of information, such as:
- Time and Date: Always stay on track with the current time and date.
- Weather Updates: Dress appropriately with live weather forecasts.
- News Briefs: Catch up on the latest headlines as you get ready.
- Personal Calendars: Keep up with your schedule and never miss an appointment.
- Traffic Information: Plan your commute with real-time traffic updates.
Customization is Key
One of the best features of smart mirrors is their customizability. You can tailor the displayed information to your preferences, often using simple software applications. Whether you want to see your latest emails or control smart home devices, a smart mirror can be programmed to meet your needs.
DIY or Buy?
While you can purchase pre-made smart mirrors, many tech enthusiasts opt to make their own. This DIY approach allows for greater personalization and often a deeper understanding of the technology involved.
Smart mirrors add a futuristic touch and convenience to daily routines. They exemplify how technology improves everyday objects. Whether you're tech-savvy or love innovation, a smart mirror could be your next project.
Why Build a Smart Mirror?
The appeal of a Smart Mirror for me was the fusion of daily utility with technology. Being able to view the time, weather, and motivational messages while getting ready in the morning seemed like a perfect start to a productive day. Plus, the idea of adding a piece of custom, tech-savvy furniture to my living space was incredibly enticing.
Materials Needed
- Two-Way Mirror: The magic starts here. It allows the display to show through while still functioning as a mirror.
- Monitor: Displays the smart features. I chose one easily disassembled with accessible ports.
- Raspberry Pi: Acts as the brain, running the software that powers the mirror's smart features.
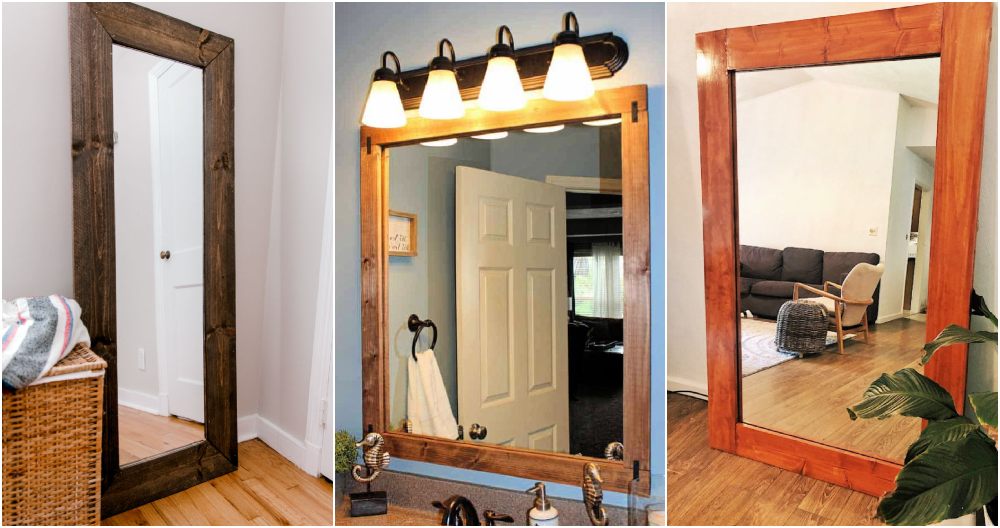
- Frame: Encases the whole setup. I opted for a simple black frame for a sleek look.
- Plywood & Paint: For extending the frame to house the electronics.
- Tools: Screwdriver, saw, and hot glue gun for cutting and assembling.
Why these materials? The two-way mirror is crucial for the smart capabilities, while the Raspberry Pi offers a cost-effective and flexible solution to run the smart mirror interface. The frame and plywood ensure that the final product is not only functional but also aesthetically pleasing.
Step by Step Instructions
Learn to build a DIY smart mirror with our step-by-step guide. From preparing the frame to programming the Raspberry Pi, make your own smart mirror today!
Step 1: Preparing the Frame
I needed a frame that was both stylish and practical. Finding a basic black frame allowed me to match it to my interior decor easily. Since there wasn't enough space in the original frame to house the monitor and Raspberry Pi, I extended it using plywood.
Extending the Frame
- Cutting Plywood: Measured and cut the plywood to make a box that attaches to the back of the picture frame.
- Assembly with Pocket Screws: Ensured a sturdy construction that would safely hold the monitor and electronics in place.
- Painting: I matched the paint to the frame for a seamless look, discovering that black acrylic paint provided the best finish.
Step 2: Installing the Two-Way Mirror
The two-way mirror needed careful handling. Ensuring the darker side faced the back, I positioned it within the frame securely, flattening the metal tabs to keep it in place. This step required patience and precision to avoid any scratches or damage.
Step 3: Preparing the Monitor
Before dissembling the monitor, I tested it with the Raspberry Pi and adjusted the brightness to maximum to ensure optimal visibility through the two-way mirror. Taking apart the monitor was straightforward but required gentle handling to avoid any damage to the display or components.
Step 4: Assembling the Smart Mirror
With the two-way mirror set in the frame and the monitor prepared, I:
- Mounted the Monitor: Used the cardboard backer from the frame as a template to accurately position the monitor, securing it with hot glue.
- Attached the Raspberry Pi: Found an optimal spot at the back of the monitor, ensuring all connections were accessible.
- Routed and Secured Cables: Used hot glue and cable ties to neatly arrange the cables, preventing any loose ends from interfering with the mirror's appearance.
Step 5: Programming the Raspberry Pi
I opted for the Magic Mirror² open-source software for its vast community and plethora of customizable modules. The installation process involved:
- Downloading the OS: Installed Raspberry Pi OS and ensured it was updated.
- Installing Magic Mirror* ²: Followed the online documentation to install the software, taking it step by step to avoid any errors.
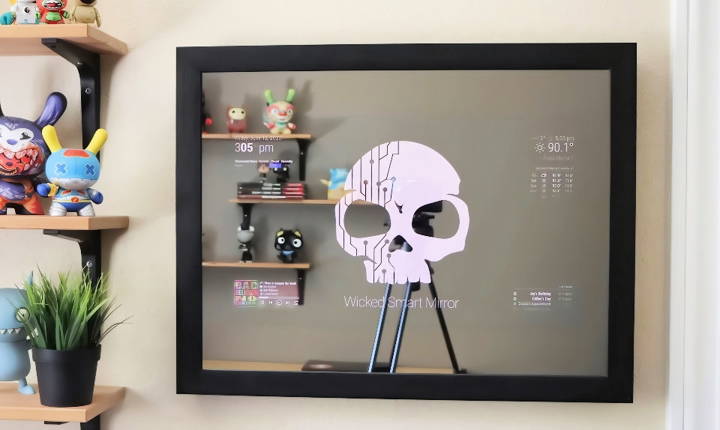
- Customizing the Interface: Started with basic modules like time, weather, and a motivational quote to get a feel for customization options.
Challenges and Solutions
Throughout this project, I encountered a few challenges, particularly with disassembling the monitor and programming the Raspberry Pi. However, by taking a methodical approach and carefully following instructions, I was able to navigate these hurdles. Patience and precision were key to assembling the smart mirror without damaging any components.
Software Configuration and Customization
Setting up the software for your smart mirror is a crucial step in making a personalized experience. It's where you can tailor the mirror to display the information that matters most to you. Let's walk through the process in a straightforward manner.
- Choosing the Right Software There are several software options available for smart mirrors, but two popular choices stand out due to their ease of use and customization capabilities: Senses - Smart Mirror Software and MagicMirror². Both are open-source and offer a variety of widgets and modules to display information like weather, news, calendars, and more.
- Installation and Basic Setup Installing the software typically involves downloading it onto a Raspberry Pi or similar device. Once installed, you'll be greeted with a default set of widgets that you can keep or change according to your preferences.
- Customizing Widgets and Modules Widgets are the building blocks of your smart mirror's display. You can add, remove, or rearrange them to suit your needs. For example, Senses offers over 35 different widgets, including ones for controlling smart home devices like Hue Lights or displaying reminders. MagicMirror² also has a strong community that has developed a wide range of modules.
- Personalizing with Profiles and Voice Commands Profiles allows you to set up different configurations for various times of the day or specific scenarios. For instance, you might have a morning profile that shows traffic and weather and an evening profile that displays relaxing content. Some software, like Senses, even supports voice commands to switch profiles or control widgets.
- Ensuring Accessibility and Ease of Use The goal is to make your smart mirror as user-friendly as possible. This means configuring the software in a way that feels intuitive to you. Both Senses and MagicMirror² provide mobile apps or web applications that simplify the configuration process, allowing you to adjust settings from your smartphone.
- Keeping Your Software Up-to-Date Lastly, it's important to keep your software updated to benefit from the latest features and security improvements. Most smart mirror software has an auto-update feature, making this process seamless.
By following these steps, you can configure and customize your smart mirror software to make a truly unique personal assistant that reflects your lifestyle and needs.
Integration with Home Automation Systems
In the realm of smart homes, integration is the key to making a seamless and efficient living environment. Integrating your smart mirror with home automation systems allows you to control various aspects of your home from one central point. Let's explore how you can connect your smart mirror to your home's automation systems for a truly connected experience.
Understanding Home Automation Integration
Home automation integration is the process of linking various smart devices to work together as a cohesive system. This can include lighting, heating, security, and entertainment devices, all controlled from a central hub or application.
The Role of a Smart Mirror
A smart mirror can serve as an interactive control panel for your home automation system. With a simple voice command or touch, you can adjust lighting, set the temperature, or monitor security cameras. It acts as a visual and control interface, reflecting not just your image but also the status of your connected home devices.
Setting Up Integration
To integrate your smart mirror with your home automation system, you'll need to:
- Choose a Compatible Hub: Select a hub like Home Assistant, which supports a wide range of devices and services.
- Connect Your Devices: Ensure all your smart devices are connected to the same network and are discoverable by the hub.
- Configure the Smart Mirror: Install the necessary software on your smart mirror that allows it to communicate with the hub.
- Build Automation: Set up routines and automation that enable your smart mirror to control connected devices based on your preferences or triggers.
Examples of Integration
- Morning Routine: Your smart mirror can display the day's weather forecast while warming up your bathroom and starting your coffee maker.
- Security Alerts: Receive notifications on your smart mirror if a security camera detects unexpected movement or if a door is unlocked.
- Energy Management: Monitor and control your home's energy consumption directly from your smart mirror, making adjustments to save on utility bills.
Benefits of Integration
- Convenience: Manage your home's devices from one central location.
- Energy Efficiency: Automate tasks to optimize energy use.
- Enhanced Security: Keep an eye on your home's security features through your smart mirror.
- Personalization: Tailor your smart home experience to fit your daily life.
Integrating your smart mirror with home automation makes a convenient control hub, making routines efficient and your home responsive, advancing toward a smarter lifestyle.
Troubleshooting Common Issues
When it comes to smart mirrors, encountering a hiccup or two is not uncommon. But don't worry; most issues have straightforward fixes. Here's a guide to troubleshooting some of the most common problems you might face with your smart mirror.
Mirror Not Responding
If your smart mirror isn't responding, first check the power supply. Ensure it's plugged in and the outlet is functioning. If it's battery-operated, check if the batteries need replacing.
Display Issues
- Flickering or Dimming: This could be due to power fluctuations. Check your power source, or consider using a stabilizer.
- Black Screen: Ensure the display device behind the mirror is turned on. If it is, try rebooting the system.
Touch Interface Problems
If the touch interface is unresponsive, recalibrate the touch settings. Refer to your smart mirror's manual for specific instructions on how to do this.
Software Glitches
- Frozen Screen: A simple reboot can often resolve this. Disconnect the power, wait a few seconds, then reconnect.
- App Crashes: Update your apps and the mirror's operating system to the latest version to fix bugs that may be causing crashes.
Connectivity Issues
- Wi-Fi Not Connecting: Check your router and ensure your smart mirror is within range. Restarting both devices can also help.
- Bluetooth Devices Not Pairing: Make sure both devices are in pairing mode and close to each other. If they still won't pair, reset the Bluetooth settings on your smart mirror.
Voice Command Not Working
Ensure your smart mirror's microphone is not obstructed and that it's enabled in the settings. Speak clearly and at a moderate volume.
Maintenance Tips
- Cleaning: Use a microfiber cloth to clean the mirror surface gently. Avoid harsh chemicals that could damage the display.
- Software Updates: Regularly updating your smart mirror's software can prevent many issues before they start.
If the issue persists, contact the manufacturer's support. Smart mirrors are advanced, but a bit of troubleshooting ensures they keep enhancing your daily routine.
FAQs About DIY Smart Mirror
Discover faqs about DIY smart mirror, covering setup tips, component choices, software options, and troubleshooting for your personalized smart mirror project.
A DIY Smart Mirror is a customizable mirror that displays information from the internet, such as the time, weather, news, and personal data. It’s made by placing a two-way mirror over a screen like a monitor or TV, connected to a computer or a Raspberry Pi.
No, you don’t need to be a programmer. There are pre-made software options available that you can use to set up your smart mirror. However, if you want to customize it further or add unique features, some basic programming might be required.
Yes, you can add touch functionality using an IR Touch Overlay or Touch Foil. However, this may require additional components and a bit of woodworking to frame it properly. For simplicity and cost-effectiveness, many people opt for non-touch smart mirrors controlled by voice or remote apps.
The mirror should be a two-way mirror, also known as a smart mirror, which is reflective on one side and transparent on the other. The display should be an LCD or LED screen that fits the size of the mirror. Ensure the resolution and brightness are sufficient for clear visibility through the mirror.
Absolutely! You can enhance your DIY Smart Mirror with voice control features. This allows you to interact with your mirror hands-free, making it even more convenient. For instance, you can use Amazon Alexa or Google Assistant for voice commands. To do this, you'll need a microphone and speakers connected to your Raspberry Pi or computer. Some people have successfully added Alexa and voice controls to their Raspberry Pi-driven smart mirrors. If you're using a smartphone with Google Assistant installed, it should work right out of the box. This feature is particularly useful for tasks like checking the weather, playing music, or updating your shopping list while you get ready in the morning.
Final Thoughts
Making a DIY smart mirror is super exciting. It combines tech and creativity. Follow the steps, and you'll have your very own magic mirror in no time. You'll find the instructions helpful and straightforward. Happy building!


