In survival situations or outdoor excursions, knowing how to make a simple DIY snare trap can be a game-changer. Whether you're camping, hunting, or in a survival scenario, understanding how to catch small game such as rabbits or squirrels using minimal materials is invaluable. The spring snare trap is one of the simplest and most effective methods for this. It requires just a few natural materials you can find in the wilderness and some basic tools. This guide will walk you through the process step-by-step.
What Is a Spring Snare Trap?
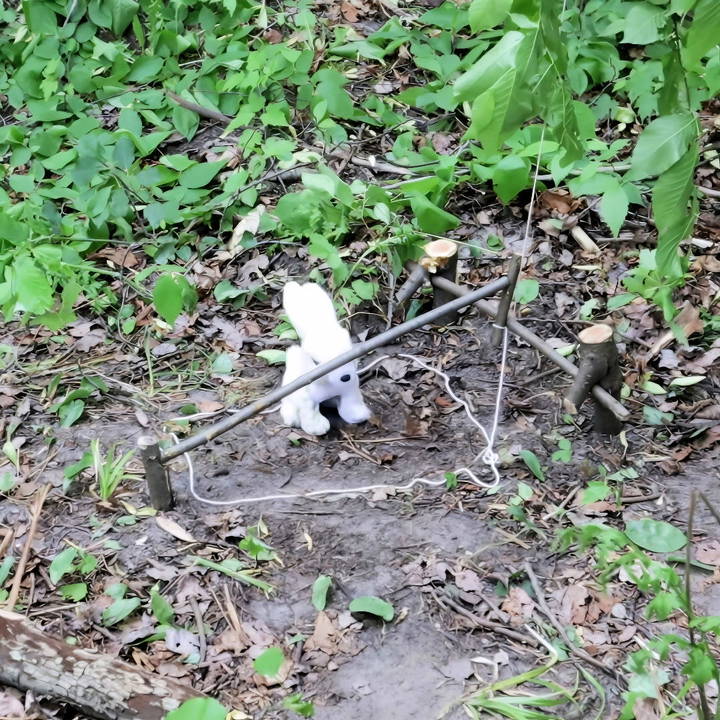
A spring snare trap is a primitive but effective device used to catch small animals. It works by using tension (from a bent tree or sapling) to tighten a noose around the prey and lift it off the ground when the trap is triggered. The trap is set up with a few key pieces: a trigger mechanism, a noose, and a bent sapling or branch providing the spring action.
In this guide, we'll specifically focus on a spring snare trap designed for catching small game like rabbits and squirrels, but this method can be scaled up for larger game if needed.
Materials Needed for The Spring Snare Trap
To build a spring snare trap, you will need a few basic materials, which can mostly be gathered from your surroundings:
- String or Cordage: This can be snare wire, paracord, or any durable string. The string is used to build the noose and secure the trap to the spring mechanism (a sapling or branch).
- A Strong, Flexible Sapling or Branch: This acts as the "spring" that will pull the animal off the ground once caught. Look for a young, bendable tree or a sturdy branch that can be bent and secured to the ground.
- A Sharp Knife or Cutting Tool: You will need this to cut the sticks and sharpen them for placing in the ground.
- Two Forked Sticks (Support Sticks): These will hold the trigger mechanism and are driven into the ground to support the trap.
- Trigger Stick: A stick that holds the snare in place until the animal triggers it.
- Bait: Although not necessary, bait can be used to lure animals into the trap. Think of food items that small animals in the area might be attracted to.
Step by Step Instructions
Learn how to build a snare trap with our step-by-step instructions. From gathering materials to setting the trap, we cover all you need to know for success.
Step 1: Gather Your Materials
Before you start building the trap, gather the necessary materials listed above. Choose a location where small game is likely to pass through, such as animal trails, near water sources, or areas where you have seen animals foraging.
The spring part of the trap will be provided by a young tree or sapling. The more flexible and strong this tree or branch is, the more effective the trap will be. Once you have your sapling, strip away any leaves or small branches to reduce resistance when it snaps back.
Step 2: Make the Support Sticks
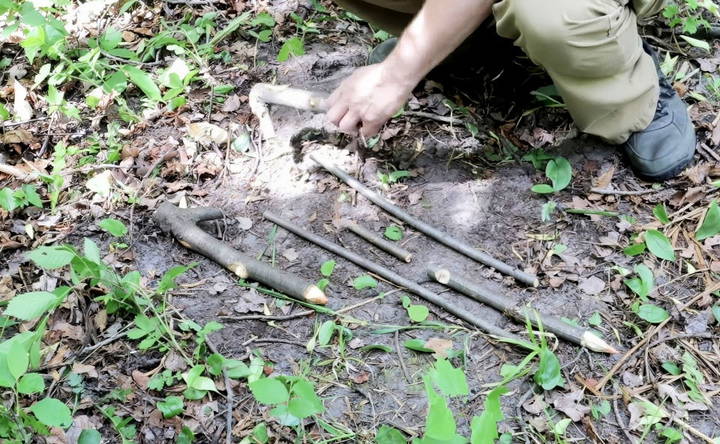
The support sticks act as the base of the snare trap. Find two sturdy branches with natural forks at the top. These forks will hold the trigger mechanism in place. Trim each stick down to about 8–12 inches in length and sharpen one end of each so they can be driven into the ground.
When choosing your location, make sure the sapling or branch can be bent over without breaking, and that there's enough clearance for it to snap upward when the trap is triggered. Place your sharpened sticks a few feet apart, depending on the size of the noose you're planning to use.
Step 3: Set Up the Trigger Mechanism
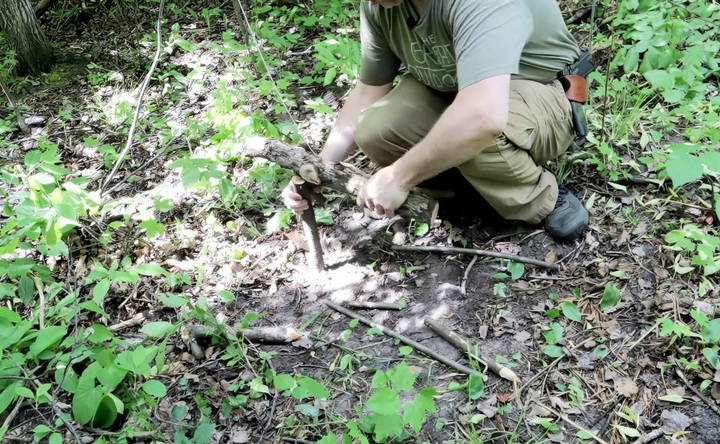
The trigger mechanism is the key part of the trap. This includes a horizontal trigger stick that holds the noose in place and is connected to the spring (the sapling or branch).
- First, sharpen the end of the trigger stick so that it fits into the notch of one of the support sticks. The trigger stick should rest horizontally between the two support sticks.
- Next, build a small notch in the second support stick to hold the trigger stick securely in place. This notch will keep the stick from slipping until enough pressure (from the animal) is applied to release it.
The trigger stick will be under tension from the sapling, so ensure it is secure enough to hold the tension but will release with minimal disturbance.
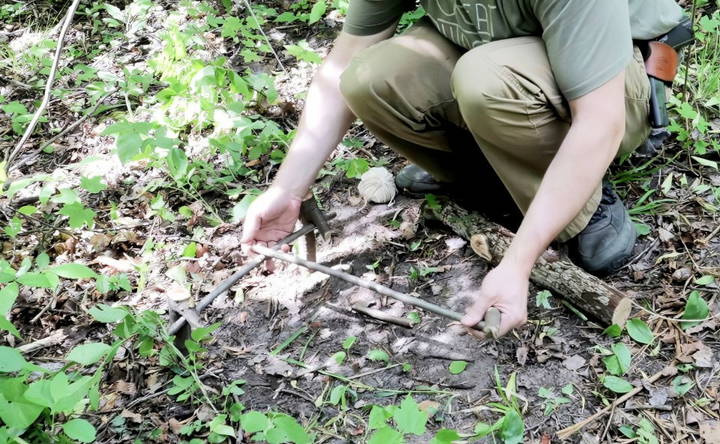
Step 4: Attach the Snare Noose
Now it's time to attach the string or cordage to the trigger stick to build the snare noose. Here's how:
- Tie one end of the string to the sapling or branch.
- The other end of the string should form a noose that will catch the animal. Use a slip knot to make the noose, as this type of knot will tighten around the animal as it struggles.
- Position the noose over the area where you expect the animal to step. The size of the noose should correspond to the size of the animal you're targeting. For rabbits, for example, a noose about 6–8 inches in diameter is appropriate.
Ensure that the string is taut enough to keep the noose open, but not so tight that it triggers the trap prematurely.
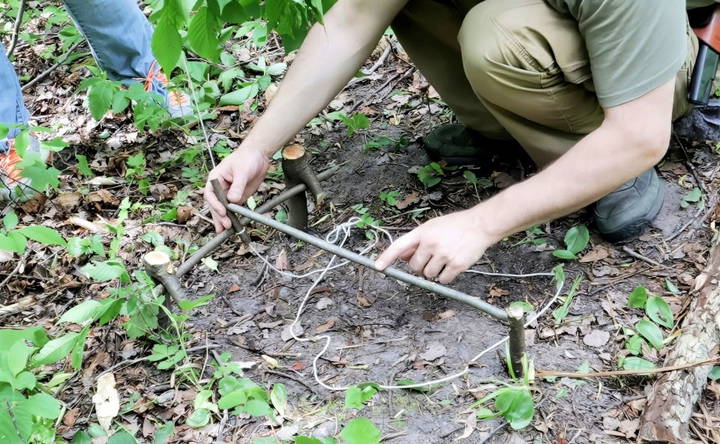
Step 5: Position the Trigger and Set the Trap
After you've attached the noose, it's time to set the trigger mechanism. Here's how it works:
- Bend the sapling or branch over and secure the free end of the string to the trigger stick.
- Make sure the noose is in position and the trigger stick is resting securely in the notch you cut in one of the support sticks.
- Test the balance of the trap by gently pulling on the string. It should remain in place until enough force is applied to release it.
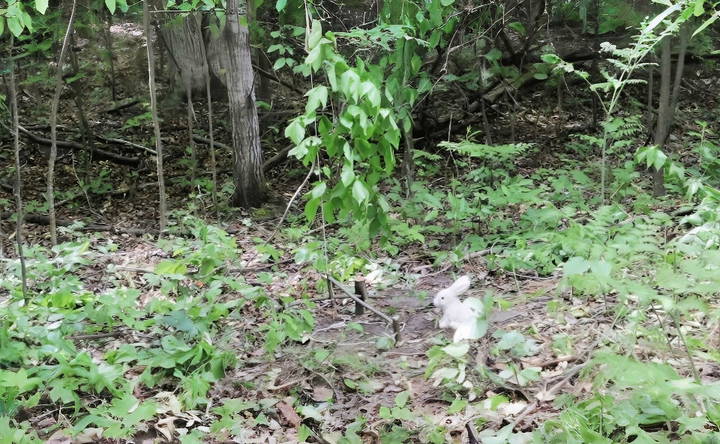
When the animal steps on or disturbs the trigger stick, the sapling will snap back, tightening the noose and lifting the animal into the air.
Using the Trap: Tips for Success
- Baiting the Trap: While it's possible to catch small game without bait, adding bait can significantly increase your chances. Use food items like apples, carrots, or whatever vegetation the local animals seem to prefer.
- Camouflage the Trap: Animals are wary of new objects in their environment, so be sure to camouflage the trap by covering the noose and trigger mechanism with leaves, grass, or other natural materials. This will make the trap look like part of the natural surroundings.
- Placement is Key: Place your trap along animal paths or near feeding areas. Observing animal behavior will help you determine the best locations for your snare.
Safety and Ethical Considerations
It's essential to remember that snare traps are intended for survival situations. They are indiscriminate, meaning they will catch any animal that triggers them, so they should be used responsibly. Here are a few things to keep in mind:
- Check Your Trap Frequently: If you're relying on the trap for food, check it regularly to ensure that any animals caught do not suffer unnecessarily.
- Follow Local Laws: In many areas, trapping animals is regulated by law. Make sure you are aware of the laws governing hunting and trapping in your region before setting any traps.
- Trap Responsibly: Only set traps when necessary for survival or when you plan to consume the animals. Using snare traps carelessly can harm wildlife populations.
Testing and Fine-Tuning the Trap
Once your trap is set, test it out. A quick way to test the sensitivity is by using a stick or other object to gently press down on the trigger stick. Watch how the trap functions and make adjustments if needed:
- Too Loose: If the trap doesn't trigger easily, you may need to adjust the positioning of the trigger stick or tighten the string.
- Too Tight: If the trap triggers too quickly, consider loosening the tension or increasing the size of the noose to prevent accidental triggering.
Testing your trap will help ensure that it works correctly when it matters most.
Final Thoughts: Mastering the Spring Snare Trap
The spring snare trap is a powerful tool in the hands of anyone with bushcraft skills, and it's a valuable asset in survival situations. With just a few natural materials, you can build a reliable trap that will catch small game and help provide food in the wilderness. By following the steps outlined in this guide, you'll be well on your way to mastering this fundamental skill.
Remember, practice makes perfect, and the more you practice building and setting these traps, the more successful you'll become. Whether you're a seasoned outdoorsman or someone new to bushcraft, learning how to build a spring snare trap is a practical and rewarding skill. Happy trapping!
FAQs About DIY Spring Snare Traps
Discover essential FAQs about DIY spring snare traps. Learn to build effective, safe snare traps for small game with these expert tips and tricks.
The best materials for a snare line are snare wire, paracord, or durable string. Snare wire is highly effective due to its strength and thin profile, which allows it to tighten quickly around small game. Paracord is also a good choice, especially for larger game, while string works well for smaller animals.
Yes, the spring snare trap can function without bait. The trigger mechanism is designed to be sensitive enough that an animal stepping through the noose will activate it. However, baiting the trap with food like vegetables or fruit can increase the likelihood of attracting animals.
The size of the noose should be adjusted depending on the size of the animal you are trying to catch. For small game like rabbits, a noose with a diameter of about 6-8 inches works well. For larger animals, you can increase the size of the loop.
To prevent the snare from being dragged under the support stick, ensure that the string is tied in the correct direction. Wrapping the cord in the right direction will ensure that the spring action lifts the animal rather than causing the snare to get stuck on the ground or support stick.
Yes, you can pre-make the components of a snare trap at home using stronger materials like metal or synthetic rods. This can save time if you need to set up the trap quickly in the wild. However, knowing how to make one from natural materials in the field is essential for survival situations.
Wind can accidentally trigger the trap, especially if it's too sensitive. One way to mitigate this is by slightly increasing the tension on the trigger stick, or by using a sturdier sapling that won’t sway easily in the wind.
Over time, a sapling or branch can lose its springiness due to the constant pressure of being bent. After a few days, this will reduce the speed at which the snare is triggered. To keep the trap functional, replace the sapling or tighten the string regularly.
To increase the sensitivity, ensure the trigger stick is balanced just right so that it releases with minimal pressure. You can also reduce the tension on the snare by adjusting the height or positioning of the trigger mechanism.
If your trap isn't triggering properly, it may be due to incorrect tension on the string or poor placement of the trigger stick. Try adjusting the angle of the support sticks, tightening the string, or repositioning the trigger stick until the trap works as expected.
You should check your trap frequently—ideally every few hours—to ensure that no animals suffer unnecessarily and that the trap remains functional. This also helps you reset the trap quickly if it has been triggered.


